
Related Manuals for THOMSON MID1002


Summary of Contents for THOMSON MID1002
-
Page 1: User Manual
16GB 25.65cm (10.1”) Touch Screen Tablet PC Model No.: MID1002 User Manual Please read this instruction manual carefully before connecting or operating the product. Save it for future reference. -
Page 2: Table Of Contents
Contents Important Safety Precautions....................1 Attention: ..........................2 Important Notice ........................2 Caution ..........................3 Charge the Built-in Battery ....................3 Installing a Micro SD Memory Card(not included) ............4 Connecting to the Earphone ....................5 1. Brief introduction for Tablet....................6 1.1 Diagram of Tablet ....................6 1.2 PACKAGE CONTENTS ..................7 1.3 Tablet state and notice ...................8 2. - Page 3 8.5 Language and Input Method ................41 8.6 About Tablet PC ....................41 9. Installation and Management of Programs ..............42 9.1 Installation ......................42 9.2 Management and Uninstall................42 10. Other applications ....................... 43 10.1 Clock ........................43 10.2 Getjar ......................... 44 10.3 Google Settings ....................
-
Page 4: Important Safety Precautions
Important Safety Precautions - The product shall not be exposed to dripping or splashing and no objects filled with liquids, such as vases, shall be placed over the product. Dry location used only. - No naked flames sources, such as candles, should be placed over or near the product. - Never use the device while driving or when operating any vehicle as this could cause accidents. -
Page 5: Attention
- Do not allow your device to be submerged in water. Do not expose headphone socket or the device to water, as water entering the set may cause major damage. - Active mobile phones in the vicinity may cause interference. - We will not be responsible for any memory loss caused by product damage, repairs or other reasons. -
Page 6: Caution
Caution - Only use the approved power adaptor with the output power (DC5V 2A) that is provided with the device. Using a different power adaptor may cause damage to the device. - The device is equipped with a high performance processor. It may produce heat in the cabinet if used for long periods. -
Page 7: Installing A Micro Sd Memory Card(Not Included
- The device may heat up while charging. This is normal and should not affect your device’s lifespan or performance. - When the battery is fully charged, first turn off the power at the electrical socket, unplug the power adaptor from the device and then unplug the power adapter from the electrical socket. -
Page 8: Connecting To The Earphone
Connecting to the Earphone Insert your earphone (not included) into the device 3.5mm earphone jack on the side of the unit. Power ON the device, select your favorite music or video and adjust the volume to a comfortable listening level. Note: 1. -
Page 9: Brief Introduction For Tablet
Brief introduction for Tablet 1.1 Diagram of Tablet Front view: Front camera Side view:... -
Page 10: Package Contents
M1002 underside view Rear camera Speaker 1.2 PACKAGE CONTENTS Check your product box and make sure the below items are included, the supplied items are designed only for your device and may not be compatible with other devices, other accessories may not be compatible with your device. Tablet PC AC Adaptor USB cable... -
Page 11: Tablet State And Notice
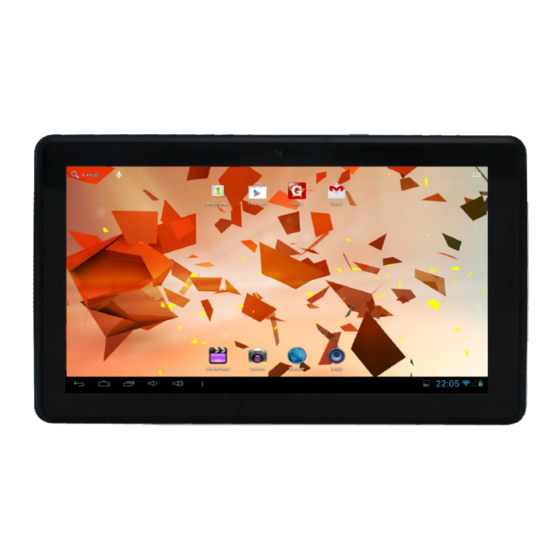
1.3 Tablet state and notice Icon Descriptions The following are icons in the status bar: Mail notice Mute Gmail notice Without SD card Computer and Tablet are Uploading/Downloading connected through USB line Events waiting to be done Downloading finished General notice (for example: Alarm clock opening synchronous error) 3G Dongle SIM card... -
Page 12: Quick Start
Quick start 2.1 Button function Descriptions for button function: Press this key for a long time to start up the Tablet During normal operation, press this key for a long time to pop up the shutdown option Power key During normal operation, press this key to turn off the screen During normal operation or when breakdown appears, press the power key for 7 seconds to make your device enter into shutdown state... -
Page 13: Unlocking And Closing Of The Screen
2.3 Unlocking and closing of the screen The machine will close automatically when the screen is left unused 1.After the screen has been left unused for a period of time, the machine will turn the screen off automatically, so as to save battery power. 2 .... - Page 14 1. Access to Google search engine 7. Vol- 2. Voice search 8. Vol+ 3. Access to applications 9. Menu 4. Go back last page 10.Time display 5. Access to Home page 11. Battery Indicator 6. Recent applications menu 12. Main screen applications Note: In any application programs, you can press Home Page key to return to the homepage interface.
- Page 15 Custom homepage interface Change desktop wallpaper Tap the icon in the homepage interface to pop up the submenu Wallpaper, Mange Apps and System settings. You can also select the wallpaper setting in system setting. When the menu pops up, choose the source of the wallpaper you want to change.
-
Page 16: Access To Application Program
Select the desktop widget you want and hold to drag the widget into the homepage screen., The system will return back to the main interface. Widgets 2.5 Access to application program How to visit an aplication program on the Tablet: Please click the application program menu. -
Page 17: Usb Connection
2.6 USB connection Storage setting of the Tablet Before transferring documents, you must set the storage mode on your Tablet firstly: Connect the Tablet with a computer by using a USB lead. The Notice bar will show the USB prompt. A screen will pop up automatically. -
Page 18: Memory Card
2.7 Memory card Copy the document to storage card You can transmit documents between your Tablet and a computer, such as music and pictures, etc. If you want to see the documents in the Tablet, click the file browser to look through the content in the SD card. Delete documents on the storage card of Tablet Find the document you want to delete using file browser Press the document name you need to delete, press the button... -
Page 19: Character Input
2.8 Character input Use screen keyboard When you start a program or select the text edit box which needs to input characters or numbers, a screen keyboard will show. The following input methods are provided for the keyboard to select. Android keyboard Input method of a third party (user can install them by themself) Select the input method you need to use... -
Page 20: Application Technique
Switch input capital and small letters Switch to input option Click to insert space Click to execute carriage return Click and press on to delete characters on the left of the cursor 2.9 Application Technique Open the application procedure recently in use. Click the third button under the lower left side of the screen at any time to pop up the procedure windows on the screen, the application procedures that were used recently will appear on the screen. - Page 21 Application procedure used recently Add a widget to the desktop On the application menu, click “WIDGETS”button and enter into the interface. The icon and name for added WIDGETS can appear on this interface, such as: music, photo frame, clock and searching. Press and hold the selected widget and drag to the desktop.
- Page 22 Please backup your files before operating this function. Alternatively you can press the reset button on the side of your tablet, please refer to Side View Diagram on page 6. Rapid Screenshot When you are located on such any interface such as Games or Movies and want to save the picture in memory, the desired pictures can be saved only by pressing the Volume Down key and Power key simultaneously.
-
Page 23: Connection Establishment
icon to switch off the pop up window or tap the screen to exit. Tap the Connection Establishment 3.1 Wi-Fi Connection Your Tablet can be connected onto a Wi-Fi network to connect to the internet: On the homepage interface, click and select the meun key and pop up the menu setting;... -
Page 24: Dongle Connection
Click here and select Wi-Fi network Advanced Wi-Fi setting option 3.2 3G Dongle Connection Under the shutdown status, insert corresponding 3G Dongle Start the machine and enter into the main interface to click and select Menu Key; Click and select Setting; Click and select 3G dongle option, open 3G switch, within 45 seconds, observe that the SIM signal icon on the notice board is on. -
Page 25: Communication
Please enable the “Airplane mode” if need to disable the WiFi and 3G Dongle Data. Communication 4.1 E-mail Setting for E-mail The E-mail application procedure is attached with the setting guide for E-mail, the external POP3 or IMAP E-mail account for common Web E-mail service provider ( such as: Yahoo, Gmail, Hotmail etc., ) can be added. - Page 26 Setting guide for E-mail After clicking and selecting the E-mail icon in the applicationmenu, the produced E-mail setting guide will help you perfom the setting; Click and select Next button; Input E-mail address and password of your E-mail account; If you enter an invalid email address it will not allow you to proceed to the next step.
- Page 27 10. Click “ Send”, send out the E-mail. Notice: If you have more than one account and hope to send out a E-mail in a certain account, prior to clicking the main menu and composing the E-mail, click that account name in advance. Learn to send or view email messages via the Google Mail™...
- Page 28 If you are offline or outside your service area, the message will be held in the message thread until you are online and inside your service area. View an email message 1. In the application list, select Gmail. 2. Select to update the message list.
-
Page 29: Multi-Media
Multi-media 5.1 Supported File Format Your Tablet can play the following formats by the Movie Player Multimedia File Support: Ÿ AVI(H.264,DIVX,DIVX,XVID), Ÿ RM, RMVB Ÿ MKV(H.264,DIVX,DIVX,XVID), WMV, Ÿ MOV, Ÿ MP4(H.264,MPEG,DIVX,XVID), Ÿ MPG, Ÿ FLV(H.263,H.264) Picture File Supported: Ÿ JPG, JPEG, Ÿ... - Page 30 The cycle has been opened Replay all songs Check current play list Cover of special edition Artist Special edition Music Remaining time Played time Play progress bar Visit and play the music Click and select the music; Click and select the songs, click and select the Artist, Special Edition and Song List.
-
Page 31: Camera
5.3 Camera Camera functions Click and select the camera icon in main menu. The system enters into the camera interface; Click and select the Photo button and easily take the photos; Click the to set the White Balance and Exposure . -
Page 32: Hdmi Connection ( Hdmi Cable Is Not Supplied )
Click and select the video recording button, end the video recording, and observe the previewed video which located at the right top corner. Click the to set the White Balance and Exposure Click the to set the wether to Store Location information onto the file. Click the to go back to Photo / Video taking mode. -
Page 33: Internet
You can also click the from Apps to set the HDMI switch when connected to Internet Note: Before using the internet, you must first establish a stable WIFI connection. Please refer to section 3.1 6.1 Browser Enter Homepage The browser always opens the last web page that the user has visited, and the home page will appear after clicking the browser. - Page 34 Click Settings. Click Set Home page. Enter URL at the Address bar and Click OK. Browser menu options Address bar Visit web page Click Browser. Enter your URL in the address bar. Click Start or Go on the soft keyboard. Click here to add a web page as bookmark Input the contents...
- Page 35 Manage bookmarks Set web page bookmark Go to a certain web page in the browser interface. Click the icon ‘Click here to add a web page as bookmark’, and a Bookmark this page window pops up, click OK to set the page you want as the bookmark.
-
Page 36: Other Applications
Other Applications 7.1 Alarm clock Click the clock icon in the apps menu. Click set alarms. Click the time periods or settings to set up the alarm.. After setup, click Done on the corresponding clock. Set the right date & time in system setting before using the Alarm clock. 7.2 Calculator Click Calculator from the apps menu. -
Page 37: File Management
7.3 File Management Browse files Click the ES File Explorer from the apps menu. You can use the file browser to view, manage, edit and delete the files and folders. Cut and copy files In the file browser, press and select the file you want to operate. Pop up operating menus, including Cut, Copy, Delete, Rename, Move to, Copy to, Play music, Select all, Set home directory and Attributes, etc. -
Page 38: Basic Settings
Pop up the search panel and enter the keywords you need to find. Click OK and the search progress bar will appear in the notification bar. When the search is completed, pop up the dialog box to confirm whether to show the results. - Page 39 Click Sound. Click the Screen key tone and screen lock alert tone. Display settings Adjust screen brightness Click the application icon to enter the settings application on the Homepage. Click Display. Click Brightness. Pop up the brightness setup panel, and drag the brightness bar to left or to right to adjust the brightness.
- Page 40 As p er the instruction on the top of the display. ---- Result for test, you can find the result of “Calibration success, kType=1” Quit it when it test ok...
- Page 41 Set Wallpaper 1. Click the Wallpaper under the Display setting, 2. Select the Wallpaper souce, It will shows the available wallpaper 3. Click the desired wallpaper, it will preview the related wallpaper 4. Click the Set Wallpaper to confirm to use the selected wallpaper Gravity Calibration Utility Select this utility if reset or calibrate the Gravity is needed.
-
Page 42: Security And Location
a) Security and Location 1. Set unlock pattern You can set your own unlock pattern (equivalent to the password) to protect the privacy of your Tablet Click the application icon to enter the settings application on the Homepage. Click Security. Click Set screen lock. -
Page 43: Storage
2. Other settings In the security settings, functions such as encryption setup, equipment management and credential storage can be added to the tablet PC. b) Storage View storage settings Click the application icon to enter the settings application on the Homepage. Click Storage. -
Page 44: Language And Input Method
Click Set date, then click the up button or the down button to adjust the date, month and year, and click Done when finished. Click Set time, then click the up button or the down button to adjust hours and minutes, click AM or PM to change between morning and afternoon. -
Page 45: Installation And Management Of Programs
7. Installation and Management of Programs a) Installation Install third-party applications Additional third-party Android applications are available from the Internet. Download and copy 3 party applications to the Micro SD card and insert into the Tablet. Method 1: Download the .apk folder from the internet onto your computer. Connect the tablet to your computer and transfer the .apk file to the tablet. -
Page 46: Other Applications
8. Other applications 10.1 Clock Set and control alarms for important events. Set an alarm: 1. In the application list, select Clock. 2. Select . To set the alarm. 3. Select to set and add alarm. 4. Set the details of the alarm. 5. -
Page 47: Getjar
10.2 Getjar Your device’s functionality can be extended by installing additional applications. Getjar provides a quick and easy way to shop for mobile applications. - This feature may be unavailable depending on your region or service provider. - Your device will save user files from downloaded applications to the internal memory. -
Page 48: Peoples
10.4 Peoples Manage your Google account contact by click the Peoples 10.5 Play Store Your device’s functionality can be extended by installing additional applications. Play Store provides a quick and easy way to shop for mobile applications. - This feature may be unavailable depending on your region or service provider. - Your device will save user files from downloaded applications to the internal memory. -
Page 49: Reboot Manger
10.6 Reboot Manger Click and select the from the Apps, you can select Reboot, Recovery or Power off the unit ( Recovery mode is not suggested to use for end user in normal situation ) 10.7 Voice Search Search for information by voice This feature may be unavailable depending on your region or service provider. -
Page 50: Youtube
2. Click the to start recording. 3. Click the to stop recording. 4. Select to listen to the recording message. 5. Click Done to save the recording message in the File Manager, click Discard.to discard the recording message and exit the recording mode automatically. 10.9 YouTube Learn to view and upload videos via the YouTube™... - Page 51 Pause or resume playback. Scan forwards or backwards in the file by dragging the bar. Play the video on the full screen. Upload a video 1. In the application list, select YouTube. 2. Select your Google account if it is linked to YouTube. Alternatively, you can select Sign in and set up an account to sign in to YouTube.
-
Page 52: Troubleshooting
Important : If you are experiencing any problems with this device you must veiw the troubleshooting list below first and then visit our web site on www.thomson-electronics.com more detailed information. If you have tried the troubleshooting and visited the web site and still have a question then for further assistance please contact the help line. -
Page 53: Specification
. Technical Specification Type Details Descriptions Model MID1002 CPU type Amlogic AML8726-MX, Dual Cortex-A9 CPU speed 1.5GHz NAND 16GB (the stated flash memory capacity includeds the FLASH operating software.) Operating system Andriod 4.1.1 version Network WIFI802.11b/g/n Basical connections parameter Micro USB...