Table of Contents
Advertisement
Advertisement
Table of Contents

Related Manuals for HP 1825


Summary of Contents for HP 1825
- Page 1 User’s Guide 1825 Flat Panel Monitor Document Part Number: 305223-001 August 2002...
- Page 2 The warranties for HP products are set forth in the express limited warranty statements accompanying such products. Nothing herein should be construed as constituting an additional warranty.
-
Page 3: Product Features
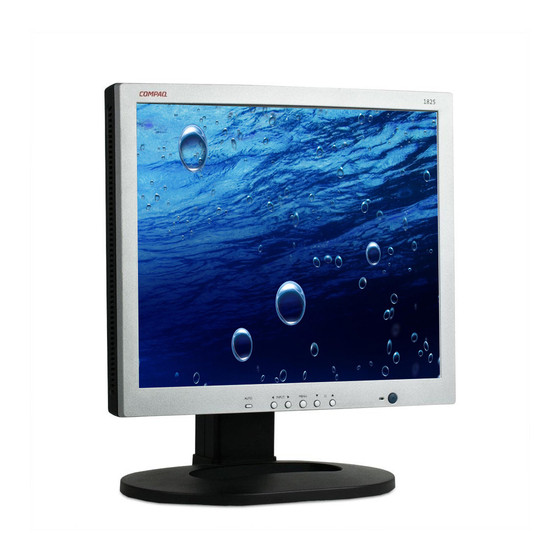
Product Features The 1825 Flat Panel Display has an active matrix, thin-film transistor (TFT), liquid crystal display (LCD). The monitor features include: Large 18.1-inch (45.9 cm) viewable area display. 1280 × 1024 native resolution, plus full-screen support for lower resolutions. -
Page 4: Installing The Information Files
1. Place the monitor in a convenient, well-ventilated location near your computer. 2. Connect the monitor signal cable to the video connector on the rear panel of the computer. www.hp.com/go/support and selecting the desired User’s Guide... - Page 5 The DVI-D cable supplied with this monitor is for digital- to-digital connection only. Your computer must have a DVI-compatible graphics card installed for use with this cable. When connecting the DVI-D signal cable to the DVI connector on the monitor, you must connect the other end of the DVI-D cable to the DVI connector on the computer.
- Page 6 6. Adjust the monitor as needed for your comfort using the monitor’s tilt, swivel, and height adjustment capabilities. You can change your monitor’s viewing position to portrait. To rotate your display to the portrait position, you will need to install the Pivot software, which is contained on the CD included with your monitor.
- Page 7 User’s Guide...
-
Page 8: Selecting The Signal Connectors And Cables
Å WARNING: To reduce the risk of electric shock or damage to your equipment: Do not disable the power cord grounding plug. The grounding plug is an important safety feature. Plug the power cord into a grounded (earthed) electrical outlet that is easily accessible at all times. -
Page 9: Removing The Monitor Base
Removing the Monitor Base You can remove the monitor base to mount the monitor on a wall, a swing arm or other mounting fixture. To remove the monitor from the base, read the caution and warning below before beginning the procedure. Ä... -
Page 10: Mounting The Monitor
2. Remove the four screws as shown in the following illustration. Ä CAUTION: Ensure that the bottom of the monitor base is positioned over a table or desktop before removing the base from the monitor. 3. Remove the monitor base from the monitor. Mounting the Monitor 1. -
Page 11: Operating The Monitor
2. Mount the monitor to a swing arm or other mounting fixture by following the instructions included with the mounting fixture to be used. Operating the Monitor Auto button Input button Menu User’s Guide Front Panel Controls Control Automatically adjusts the displayed image Allows you to switch to and from the VGA and DVI-I video signal... - Page 12 Brightness Power LED Power Switch Front Panel Controls Control • Adjust brightness up and down (when the OSD is off). • Use the up and down buttons to navigate through the OSD menus when the OSD is on. Illuminates green when the monitor is on and turns amber when the monitor is in a power saver mode.
-
Page 13: On-Screen Display Settings
On-Screen Display Settings The adjustments for screen settings are located in the on-screen display (OSD). Press the menu button on the monitor's front panel to view the OSD menu in one of seven available languages. The following table shows the menus and their functions at each level: Menu Level Adjust Position Brightness &... -
Page 14: Adjusting Monitor Settings
Menu Level Reset to Factory Setting Input Selection Exit Main Controls The Video Noise OSD selection is not available when the monitor is operating in the DVI-D (digital) mode. Adjusting Monitor Settings On the front panel controls of your monitor, once you press the menu button, the On Screen Display (OSD) Main Controls window will pop up and you can now start making adjustments to your monitor’s various features. -
Page 15: Adjusting Screen Quality
Adjusting Screen Quality Allow the monitor to warm up for 20 minutes before performing the following procedures. The Auto Adjustment feature automatically fine-tunes the image quality each time a new video mode is utilized. If additional improvement is desired, select the Auto Adjust control on the front bezel. -
Page 16: Optimizing Digital Conversion
Optimizing Digital Conversion This monitor contains advanced circuitry that allows the flat panel screen to function like a standard monitor. Two controls in the on-screen display can be adjusted to improve image performance: Clock and Clock Phase. Use these controls only when the auto adjust function does not provide a satisfactory image. -
Page 17: Entering User Modes
Factory Preset Display Modes Preset Pixel Format 640 x 350 720 x 400 640 x 480 640 x 480 640 x 480 800 x 600 800 x 600 800 x 600 832 x 624 1024 x 768 1024 x 768 1152 x 870 1280 x 1024 1280 x 1024... -
Page 18: Energy Saver Feature
new mode just as it does a preset mode. In addition to the 15 factory preset modes, there are four user modes that can be entered and stored. Energy Saver Feature When the monitor is in its normal operating mode, the monitor uses less than 60 watts of power and the Power light is green. -
Page 19: Protecting The Monitor
Protecting the Monitor To protect your monitor from overheating and other types of damage: Use only a power source and connection appropriate for this monitor, as indicated on the marking label/back plate and the AC adapter. If an extension cord or power strip is used, make sure that the cord or strip is rated for the product and that the total ampere ratings of all products plugged into the extension cord or power strip do not exceed 80% of the extension cord or strip... -
Page 20: Cleaning The Monitor
Keep the monitor in a well-ventilated area, away from excessive light, heat, and moisture. Keep the monitor away from high capacity transformers, electric motors, and other strong magnetic fields. Do not open the monitor cabinet or attempt to service this product yourself. -
Page 21: Specifications
Specifications 1825 Flat Panel Monitor Display Type Viewable Image Size Tilt Swivel Face Treatment Maximum Weight (Unpacked) Dimensions (includes pedestal) Height Depth Width Graphics Resolutions Text Mode Dot Pitch Horizontal Frequency (analog mode) Vertical Refresh Rate (analog mode) User’s Guide 18.1 inches... -
Page 22: Color Display Values
1825 Flat Panel Monitor Environmental Requirements Temperature Operating Temperature Non-operating Temperature Relative Humidity Power Source Power Consumption Input Terminals Color Display Values Blue Green White Chromaticity (6500 K) (9300 K) Gamma: 2.2 * Commission International d’Eclairage, 1931 Standard. 32to 95... -
Page 23: Agency Regulatory Notices
Agency Regulatory Notices Federal Communications Commission Notice This equipment has been tested and found to comply with the limits for a Class B digital device, pursuant to Part 15 of the FCC Rules. These limits are designed to provide reasonable protection against harmful interference in a residential installation. -
Page 24: Declaration Of Conformity For Products Marked With Fcc Logo, United States Only
Agency Regulatory Notices Modifications The FCC requires the user to be notified that any changes or modifications made to this device that are not expressly approved by Compaq Computer Corporation may void the user's authority to operate the equipment. Cables Connections to this device must be made with shielded cables with metallic RFI/EMI connector hoods to maintain compliance with FCC Rules and Regulations. -
Page 25: Canadian Notice
To identify this product, refer to the Part, Series, or Model number found on the product. Canadian Notice This Class B digital apparatus meets all requirements of the Canadian Interference-Causing Equipment Regulations. Avis Canadien Cet appareil numérique de la classe B respecte toutes les exigences du Règlement sur le matériel brouilleur du Canada. -
Page 26: Japanese Notice
Agency Regulatory Notices Japanese Notice EPA Energy Star Compliance Monitors that are marked with the Energy Star Logo meet the requirements of the EPA Energy Star program. As an Energy Star Partner, Compaq Computer Corporation has determined that this product meets the Energy Star guidelines for energy efficiency. Specific details on using the Energy Saving features can be found in the energy saver or power management section of the computer manual. -
Page 27: Why Do We Have Environmentally Labelled Computers
TCO ‘99 Congratulations! You have just purchased a TCO'99 approved and labelled product! Your choice has provided you with a product developed for professional use. Your purchase has also contributed to reducing the burden on the environment and also to the further development of environmentally adapted electronics products. -
Page 28: What Does Labelling Involve
Agency Regulatory Notices Since all methods of electricity generation have a negative effect on the environment (e.g. acidic and climate-influencing emissions, radioactive waste), it is vital to save energy. Electronics equipment in offices is often left running continuously and thereby consumes a lot of energy. What does labelling involve? This product meets the requirements for the TCO'99 scheme which provides for international and environmental labelling of... -
Page 29: Environmental Requirements
Labelled products must meet strict environmental demands, for example, in respect of the reduction of electric and magnetic fields, physical and visual ergonomics and good usability. Below you will find a brief summary of the environmental requirements met by this product. The complete environmental criteria document may be ordered from: TCO Development SE-114 94 Stockholm, Sweden... - Page 30 Agency Regulatory Notices The relevant TCO'99 demand requires that plastic components weighing more than 25 grams must not contain flame retardants with organically bound bromine or chlorine. Flame retardants are allowed in the printed circuit boards since no substitutes are available.
-
Page 31: Power Cord Set Requirements
Lead** Lead can be found in picture tubes, display screens, solders and capacitors. Lead damages the nervous system and in higher doses, causes lead poisoning. The relevant TCO´99 requirement permits the inclusion of lead since no replacement has yet been developed. - Page 32 Agency Regulatory Notices A power cord should be routed so that it is not likely to be walked on or pinched by items placed upon it or against it. Particular attention should be paid to the plug, electrical outlet, and the point where the cord exits from the product.