Table of Contents
Advertisement
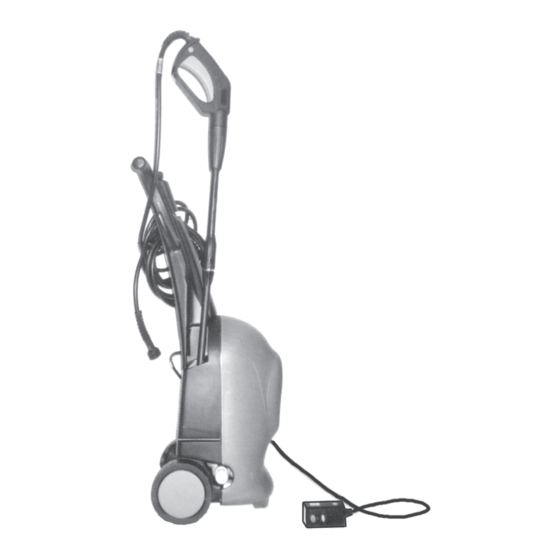
PRESSURE WASHER
1800 PSI
Model 02433
ASSEMBLY AND OPERATING INSTRUCTIONS
®
3491 Mission Oaks Blvd., Camarillo, CA 93011
Visit our Web site at: http://www.harborfreight.com
TO PREVENT SERIOUS INJURY,
READ AND UNDERSTAND ALL WARNINGS
AND INSTRUCTIONS BEFORE USE.
©
®
Copyright
2004 by Harbor Freight Tools
. All rights reserved. No portion of this
manual or any artwork contained herein may be reproduced in any shape or form
without the express written consent of Harbor Freight Tools.
For technical questions or replacement parts, please call 1-800-444-3353.
Manual revised 02/05; 06/05; 08/05
Advertisement
Table of Contents

Related Manuals for Chicago Electric 2433


Summary of Contents for Chicago Electric 2433
-
Page 1: Pressure Washer
. All rights reserved. No portion of this manual or any artwork contained herein may be reproduced in any shape or form without the express written consent of Harbor Freight Tools. For technical questions or replacement parts, please call 1-800-444-3353. -
Page 2: Table Of Contents
Unpacking ...2 Specifications ...3 Safety ... 3-9 General Safety Rules... 3 Specific Safety Rules ... 6 Grounding... 8 Assembly ...10 Controls And Setup ...12 Operation ...15 Operating Tips ...16 Inspection, Maintenance, And Cleaning...18 Parts Lists And Diagrams ... 19-21 Parts List A / Assembly Diagram A ... 19 Parts List B / Assembly Diagram B ... -
Page 3: Specifications
You will need this manual for the safety warnings and precautions, assembly, oper- ating, inspection, maintenance and cleaning procedures, parts list and assembly diagram. Keep your invoice with this manual. Write the invoice number on the inside of the front cover. -
Page 4: Electrical Safety
ELECTRICAL SAFETY Grounded tools must be plugged into an outlet properly installed and grounded in accordance with all codes and ordinances. Never remove the grounding prong or modify the plug in any way. Do not use any adapter plugs. Check with a qualified electrician if you are in doubt as to whether the outlet is properly grounded. -
Page 5: Tool Use And Care
Use safety equipment. Always wear eye protection. Nonskid safety shoes, hard hat, or hearing protection must be used for appropriate conditions. Always wear ANSI approved safety impact goggles and thick rubber boots during use and maintenance. TOOL USE AND CARE Use clamps (not included) or other practical ways to secure and support a smaller workpiece to a stable platform. -
Page 6: Specific Safety Rules
Maintain labels and nameplates on the Pressure Washer. These carry important information. If unreadable or missing, contact Harbor Freight Tools for a replacement. WARNING! Risk of injection or severe injury. Keep clear of Nozzle. Do not direct discharge stream at people or animals. - Page 7 Prior to starting the Pressure Washer in cold weather, check all of the parts of the unit to make sure ice has not formed. Do not store the unit anywhere that the temperature will fall below 32°...
-
Page 8: Grounding
Improperly connecting the grounding wire can result in the risk of electric shock. Check with a qualified electrician if you are in doubt as to whether the outlet is properly grounded. Do not modify the power cord plug provided with the tool. -
Page 9: Extension Cords
Grounded tools require a three wire extension cord. As the distance from the supply outlet increases, you must use a heavier gauge extension cord. Using extension cords with inadequately sized wire causes a serious drop in voltage, resulting in loss of power and possible tool damage. (See Table A.) The smaller the gauge number of the wire, the greater the capacity of the cord. -
Page 10: Assembly
Insert the Valve located at the bottom of the Handle into the Suction Tube located at the top of the Pressure Washer body. Make sure that the Suction tube does not bend or get pinched during assembly. Lower the Handle fully onto the Pressure Washer Body. - Page 11 Attach the female part of the Quick Connector Set (36C) to the right/ lower side of the Pressure Washer. Screw the male part of the Quick Connector Set onto a heavy duty garden hose (not included). Then, attach the male part of the Quick Connector Set to the female part of the Quick Connector Set.
-
Page 12: Controls And Setup
CONTROLS AND FEATURES The Pressure Washer features an automatic On/Off Micro Switch (42B). The Motor (3A) of the Pressure Washer does not run continuously, but only when the Trigger (21C) is squeezed. When spraying water through the unit stops, the Motor will automatically shut off. - Page 13 Detergent is dispensed in a 6% solution. Do not add water to the Detergent Dispenser. CAUTION! NEVER use any products not designed for pressure washer use, nor any products with bleach, chlorine, or any other corrosive materials, including liquids containing solvents, trisodium phosphate products, ammonia, or acid-based cleaners.
- Page 14 CHECK THE WATER SUPPLY. Prior to using the Pressure Washer for the first time, it is ESSENTIAL to verify that the water supply is adequate. The Pressure Washer needs TWICE the water supply (or volume) than the stated water output (2.1 GPM).
-
Page 15: Operation
Make sure the Power Switch is in the “OFF” position. (See Figure M.) Attach the heavy duty hose to the Pressure Washer, using the Quick Connector Set (36C). (See Figure G.) Attach the Spray Wand (9C), Turbo Wand (33C), or Brush Wand and Adapter (34C, 35C) into the Spray Wand Extension (8C), and press and twist the Wand into the Extension until the Wand locks in place. -
Page 16: Operating Tips
(5A) in a safe direction and discharge all remaining pressure. The high-pressure hose and water inlet hose can be disconnected after the pressure is released. Store the pressure washer and all accessories in accord with the directions under Storage on page 18. -
Page 17: Cleaning Recommendations
If detergent is to be applied: Only use pressure washing detergent; other detergents will clog or damage the pressure washer. Apply the detergent at low pressure, by either using the Brush Wand (34C) or the low pressure setting of the Spray Wand (9C). -
Page 18: Inspection, Maintenance, And Cleaning
WARNING! Make sure that (1) the Trigger is locked in its off position, (2) the Power Switch of the Pressure Washer is in its “OFF” position, (3) the plug is unplugged from its electrical outlet, (4) that the water supply is shut off, and (5) all residual water pressure is safely expelled before performing any inspection, maintenance, or cleaning procedures. -
Page 19: Parts Lists And Diagrams
PARTS LIST A / ASSEMBLY DIAGRAM A Part # Description Handle Clip Box Motor Top Shell Wash Gun Pump PLEASE READ THE FOLLOWING CAREFULLY THE MANUFACTURER AND/OR DISTRIBUTOR HAS PROVIDED THE PARTS DIAGRAM IN THIS MANUAL AS A REFERENCE TOOL ONLY. NEITHER THE MANUFACTURER NOR DISTRIBUTOR MAKES ANY REPRESENTA- TION OR WARRANTY OF ANY KIND TO THE BUYER THAT HE OR SHE IS QUALIFIED TO MAKE ANY REPAIRS TO THE PRODUCT OR THAT HE OR SHE IS QUALIFIED TO REPLACE ANY PARTS OF THE PRODUCT. -
Page 20: Parts List B / Assembly Diagram B
PARTS LIST B / ASSEMBLY DIAGRAM B Part # Description Washer, Bearing Thrust Needle Bearing Bearing Washer Ring Piston Piston Return Spring Piston Return Spring Pump Seat O-Ring Bolt O-Ring O-Ring Cover Board O-Ring Pump Body Cap, Retainer O-Ring O-Ring Block Large Spring Small Spring... -
Page 21: Parts List C / Assembly Diagram C
PARTS LIST C / ASSEMBLY DIAGRAM C a l l NOTE: Some parts are listed and shown for illustration purposes only, and are not available individually as replacement parts. For technical questions, please call 1-800-444-3353; SKU 02433 Troubleshooting section at end of manual. n i l n i l PAGE 21... -
Page 22: Troubleshooting
Be CERTAIN to shut off the Pressure Washer, release all pressure in a safe manner, and disconnect it from power and water before adjusting, cleaning, or repairing the unit. PRESSURE WASHER STOPS SUDDENLY Check whether the power switch is on and lit. - Page 23 TROUBLESHOOTING Be CERTAIN to shut off the Pressure Washer, release all pressure in a safe manner, and disconnect it from power and water before adjusting, cleaning, or repairing the unit. PRESSURE WASHER WILL NOT START Dry self thoroughly and check the voltage...
- Page 24 TROUBLESHOOTING Be CERTAIN to shut off the Pressure Washer, release all pressure in a safe manner, and disconnect it from power and water before adjusting, cleaning, or repairing the unit. PRESSURE CHANGES DURING USE Air may be getting in the water supply hose, check all connections.