Accu-Chek Aviva Nano User Manual
Hide thumbs
Also See for Aviva Nano:
- User manual (86 pages) ,
- Reference manual (104 pages) ,
- User manual (100 pages)
Table of Contents
Advertisement
Quick Links
- 1 Coding the Meter
- 2 Using the Accu-Chek Aviva Nano System
- 3 Unusual Blood Glucose Results
- 4 Meter Setup
- 5 Setting the Time and Date
- 6 Transferring Data Directly to a Computer or Pda Using Specialized Software and an Infrared Cable
- 7 Changing the Batteries
- 8 Screen Messages and Troubleshooting
- Download this manual
Advertisement
Table of Contents
Troubleshooting

Related Manuals for Accu-Chek Aviva Nano


Summary of Contents for Accu-Chek Aviva Nano
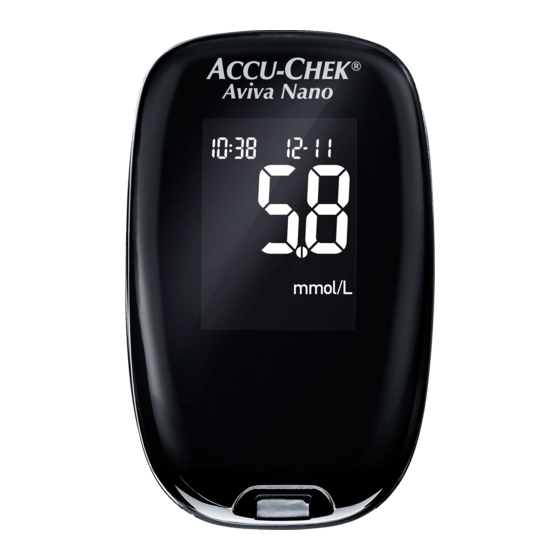
- Page 1 CCU- ® Aviva Nano BLOOD GLUCOSE METER / GLYCOMÈTRE User’s Manual Manuel de l’utilisateur...
- Page 2 Whether the Accu-Chek Aviva Nano Meter is your first blood glucose meter or you ® have used a meter for some time, please take the time to read this manual carefully before you use your new meter. To use it correctly and dependably, you need to understand its operation, screen displays and all individual features.
- Page 3 Your new Accu-Chek Aviva Nano Meter is for quantitative blood glucose testing using Accu-Chek Aviva Test Strips. Suitable for self-testing. The Accu-Chek Aviva Nano Meter may be used by patients who test their own blood glucose as well as by healthcare professionals for monitoring patients’ blood glucose values.
- Page 4 It should not be used to diagnose diabetes. • Only use Accu-Chek Aviva Test Strips. Other test strips will give inaccurate results. • The meter comes with a preset time and date. You may need to change the time to your time zone.
-
Page 6: Table Of Contents
Chapter 1: Understanding Your New System The Accu-Chek Aviva Nano Meter .................. 7 Coding the Meter ......................9 Using the Accu-Chek Aviva Nano System ..............11 ............13 Chapter 2: Testing Your Blood Glucose Performing a Blood Glucose Test ................. 13 Marking Test Results and Setting the Post-Meal Reminder........... - Page 7 ................. 51 Chapter 4: Control Testing Why Perform Control Tests ..................51 About the Control Solutions ..................52 Performing a Control Test .................... 53 Understanding Out-of-Range Control Test Results ............57 ..........59 Chapter 5: Maintenance and Troubleshooting Changing the Batteries ....................59 Cleaning the Meter.......................
-
Page 8: Chapter 1: Understanding Your New System
Chapter 1: Understanding Your New System The Accu-Chek Aviva Nano Meter Infrared (IR) Window – Used to transfer data Right and Left from the meter to a Arrow Buttons – computer or PDA. Press to enter memory, adjust On/Off/Set Button –... - Page 9 Golden End – Insert this end of the test strip into the meter. Yellow Window – Touch blood drop or control solution here. Test Strip Control Solution Bottle Test Strip Container On/Off/Set Button Side View Infrared (IR) Window Code Chip Batteries –...
-
Page 10: Coding The Meter
Coding the Meter 1. Make sure the meter 2. Turn the meter over. 3. Remove the old code is off. chip (if there is one in the meter) and discard it. Change the code chip every time you open a new box of test strips! - Page 11 4. Turn the code chip over so the 5. Leave the code chip in the meter code number faces away from until you open a new box of test you. Push it into the code chip strips. slot until it stops. Notes: •...
-
Page 12: Using The Accu-Chek Aviva Nano System
Using the Accu-Chek Aviva Nano System • Only use Accu-Chek Aviva Test Strips. • Store the test strip container and meter in a cool dry place, such as a • Change the code chip every time you bedroom. open a new box of test strips. -
Page 14: Chapter 2: Testing Your Blood Glucose
Chapter 2: Testing Your Blood Glucose Performing a Blood Glucose Test Before you perform your first blood glucose test, set up the meter correctly. You need the meter, a test strip, and a lancing device with a lancet loaded. 1. Wash and dry your hands. 4. - Page 15 Yellow Release Button 5. A test strip and 6. Lance your fingertip with the lancing device. Blood samples flashing blood drop taken from the palm are equivalent to blood taken from the symbol appear on fingertip. For detailed information on how to obtain blood the display.
- Page 16 7. Gently squeeze your finger to assist 8. Touch the blood drop to the front edge the flow of blood. This helps you get a of the yellow window of the test strip. blood drop. Do not put blood on top of the test strip.
- Page 17 9. The result appears on the display. If you want to mark the test result as a pre-meal or post-meal test, or with a general marker, leave the test strip in the meter (see the next section). Otherwise, remove and discard the used test strip. Note: After a successful test, the meter turns off five seconds after the test strip is removed.
-
Page 18: Marking Test Results And Setting The Post-Meal Reminder
Marking Test Results and Setting the Post-Meal Reminder If you wish, you can mark your test result with: Pre-Meal Marker Pre-Meal Marker with Post-Meal Reminder Post-Meal Marker General Marker • Marking results with a pre-meal or post-meal marker provides more information about your blood glucose results to help you and your healthcare professional in the management of your diabetes. - Page 19 Here is how to mark a test result and initiate a post-meal reminder: Perform a blood glucose test. Do not remove the test strip. 1. Press and release to toggle through the test result markers and post-meal reminder. Pre-Meal Marker Pre-Meal Marker with Post-Meal Reminder Post-Meal Marker General Marker...
-
Page 20: Alternate Site Testing (Ast)
Alternate Site Testing (AST) You have the option of testing other places on your body besides the fingertip. Blood obtained from a fingertip or palm can be used at any time to measure blood glucose. The two palm testing sites are the fleshy areas under the thumb (thenar) and under the little finger (hypothenar). - Page 21 IMPORTANT Alternate site testing may be done: • Immediately before a meal • Talk to your healthcare professional about Alternate Site Testing. • Fasting DO NOT test from an alternate site: Do not change your treatment because of just one result. •...
- Page 22 To perform a blood glucose test from an alternate site, you need the meter, a test strip, and a lancing device with the clear AST cap. 1. Prepare the lancing device. 3. Make sure the code number on the display matches the code number on 2.
- Page 23 4. A test strip and flashing 5. Press the lancing device 6. Trigger the lancing blood drop symbol firmly against a fleshy device while keeping appear on the display. area on the alternate steady pressure on the site. Press the lancing site.
- Page 24 7. Touch the blood drop to the front 8. The result appears on the display. edge of the yellow window of the test Mark the result, or remove and discard strip. When you see flash, you have the used test strip. enough blood in the test strip.
-
Page 25: Unusual Blood Glucose Results
Unusual Blood Glucose Results If your blood glucose result does not match how you feel, follow these steps: Troubleshooting Checks Action Discard the test strips if they are past the 1. Check if the test strips are expired. expiry date. 2. -
Page 26: Troubleshooting Checks
5. Check if you followed the testing steps. Read Chapter 2, “Testing Your Blood Glucose” and test again. If you still have problems, call Accu-Chek Customer Care at 1-800-363-7949. 6. Check if the code number on the meter If they do not match, insert the correct display matches the code number on code chip into the meter and test again. -
Page 27: Symptoms Of High Or Low Blood Glucose
Symptoms of High or Low Blood Glucose Being aware of the symptoms of high or low blood glucose can help you understand your test results and decide what to do if they seem unusual. Here are the most common symptoms: High blood glucose (hyperglycemia): fatigue, increased appetite or thirst, frequent urination, blurred vision, headache, or general aching. -
Page 28: Chapter 3: Meter Memory, Setup, And Downloading
Chapter 3: Meter Memory, Setup, and Downloading Memory Storing Test Results The meter automatically stores up to 500 blood glucose test results with the time and date of the test and any test markers. You can review them at any time. Test results are stored from the newest to the oldest. -
Page 29: Viewing Test Results
7, 14, 30, and 90 day averages. To view stored control results, first download them to a compatible software application. For product availability, please contact Accu-Chek Customer Care at 1-800-363-7949. Viewing Test Results With the meter on or off, press and release to enter memory. - Page 30 Note: Only test results that have been assigned a pre-meal ( ) or post-meal ( ) marker are included in pre-meal and post-meal averages. All blood glucose results are included in the general 7, 14, 30, and 90 day averages. General Average Past Results Press...
-
Page 31: Meter Setup
Meter Setup Using the Set-Up Mode By using the set-up mode, you can personalize the meter to suit your lifestyle. Here are the features you can customize in the order in which they appear in the set-up mode: Time and date – set the time and date Beeper –... -
Page 32: Setting The Time And Date
You are here TIME / DATE BEEPER POST-MEAL ALARM HYPO INDICATOR (hrs, min, am/pm, REMINDER CLOCK (off, on, level) (on/off) month, day, year) TIME (A-1, A-2, A-3, A-4) (1hr or 2hr) Setting the Time and Date decrease increase 1. Press and release 2. - Page 33 decrease increase 4. Press and release to confirm the 5. Press and release to adjust hour. The minutes flash. the minutes. Press and release confirm the minutes.
- Page 34 6. Repeat step 5 to set am/pm, month, 7. If you want to set up more options, day and year. press and release . If you want to exit, press and hold until you see the flashing test strip symbol.
-
Page 35: Setting The Beeper On/Off
You are here TIME / DATE BEEPER POST-MEAL ALARM HYPO INDICATOR (hrs, min, am/pm, REMINDER CLOCK (off, on, level) (on/off) month, day, year) TIME (A-1, A-2, A-3, A-4) (1hr or 2hr) Setting the Beeper ( ) On/Off Your new meter has the beeper preset to “On.” You can set the beeper to “OFF,” if you prefer. - Page 36 2. Press and hold 1. Press and release until 3. Press and release to turn the meter on. “set-up” appears on the repeatedly until you The flashing test strip display. reach the display with symbol appears. the flashing beeper symbol and “On” or “OFF.”...
- Page 37 4. Press and release 5. If you want to set up more options, switch between “On” and “OFF.” press and release . If you want to exit, press and hold until you see the flashing test strip symbol.
-
Page 38: Setting The Post-Meal Reminder Time
You are here TIME / DATE BEEPER POST-MEAL ALARM HYPO INDICATOR (hrs, min, am/pm, REMINDER CLOCK (off, on, level) (on/off) month, day, year) TIME (A-1, A-2, A-3, A-4) (1hr or 2hr) Setting the Post-Meal Reminder Time ( The post-meal reminder: •... - Page 39 1. Press and release 2. Press and hold until 3. Press and release to turn the meter on. “set-up” appears on the repeatedly until you The flashing test strip display. reach the display with symbol appears. “set-up,” and the flashing “1Hr” or “2Hr.”...
- Page 40 4. Press and release to select When a post-meal reminder is “1Hr” or “2Hr.” Press and release activated this screen appears. to confirm your choice.
-
Page 41: Setting The Alarm Clock Function
You are here TIME / DATE BEEPER POST-MEAL ALARM HYPO INDICATOR (hrs, min, am/pm, REMINDER CLOCK (off, on, level) (on/off) month, day, year) TIME (A-1, A-2, A-3, A-4) (1hr or 2hr) Setting the Alarm Clock Function ( ) The alarm clock: •... - Page 42 Notes: • If you tested within 15 minutes of an alarm, the alarm does not occur. • If the meter is on at the alarm time, the alarm does not occur. • Exposure to cold conditions may disable alarms until the meter is turned on.
- Page 43 When you are setting the time for the alarm clock function, the bell symbol and “set-up” remain on the display. 2. Press and hold 1. Press and release until 3. Press and release to turn the meter on. “set-up” appears on the repeatedly until you The flashing test strip display.
- Page 44 4. Press and release 5. If you select “On,” the 6. Press and release to switch hour flashes. “A-1” and to select the between “On” and the bell symbol remain hour. Press and release “OFF.” Press and on the display. to confirm the hour.
- Page 45 7. The minutes flash. Press 8. Press and release 9. “Set-up,” "OFF,” and the and release to confirm the minutes. bell symbol appear on to select 00, 15, 30, or “Am” or “pm” flashes the display with the next 45. These are the only on the display.
-
Page 46: Setting The Hypo Indicator Function
You are here TIME / DATE BEEPER POST-MEAL ALARM HYPO INDICATOR (hrs, min, am/pm, REMINDER CLOCK (off, on, level) (on/off) month, day, year) TIME (A-1, A-2, A-3, A-4) (1hr or 2hr) Setting the Hypo Indicator ( ) Function The hypo indicator: •... - Page 47 2. Press and hold until 3. Press and release 4. Press and release “set-up” appears on the repeatedly until you to switch display. reach the display with between “On” and “set-up” and “OFF,” and “OFF.” Press and the flashing release to confirm your choice.
- Page 48 5. If you choose to set the hypo indicator to “On,” “set-up” appears and flashes. The display shows 3.9 mmol/L. 6. Press and release to select the level you want. Press and release confirm it. 7. Press and hold until you see the flashing test strip symbol to exit the set-up mode.
-
Page 49: Transferring Data Directly To A Computer Or Pda Using Specialized Software And An Infrared Cable
Transferring Data Directly to a Computer or PDA Using Specialized Software and an Infrared Cable You can transfer your stored results to a computer to track, identify patterns, and print. Infrared (IR) 1. Install the software according to the instructions. Window To transfer the results to a computer, connect the infrared cable according to the instructions. - Page 50 Notes: • If the data did not transfer successfully, try again. If you still have problems, contact Accu-Chek Customer Care at 1-800-363-7949. • To make the most of the download feature, you must set the time and date in the...
- Page 51 50 50...
-
Page 52: Why Perform Control Tests
Chapter 4: Control Testing Why Perform Control Tests Performing a control test lets you know that the meter and test strips are working properly to give reliable results. You should perform a control test when: • You open a new box of test strips •... -
Page 53: About The Control Solutions
About the Control Solutions • Only use Accu-Chek Aviva Control Solutions. • The meter automatically recognizes the Accu-Chek Aviva Control Solution. • The control results are not displayed in memory. • Write the date you opened the control solution bottle on the bottle label. The solution is good for three months from that date or until the expiry date on the bottle label, whichever comes first. -
Page 54: Performing A Control Test
Performing a Control Test You need the meter, a test strip, and control solution Level 1 and/or Level 2. The control level is printed on the bottle label. 1. Insert the test strip into the meter in 2. Make sure the code number on the the direction of the arrows. - Page 55 3. Select the control 4. Put the meter on a flat 5. Remove the control solution you want to surface, like a table. bottle cap. Wipe the test. You will enter the tip of the bottle with a level later in the test. tissue.
- Page 56 6. Squeeze the bottle until a tiny drop 7. The result appears on the display, forms at the tip. Touch the drop to the along with the control bottle symbol front edge of the yellow window of the and flashing “L.” Do not remove the test strip.
- Page 57 8. Press and release to confirm the is inside the range on the test strip control level in the meter. container, the test strips and meter are working properly. “Err” and the 9. “OK” and the control result alternate control result alternate on the display if on the display if the result is in range.
-
Page 58: Understanding Out-Of-Range Control Test Results
Understanding Out-of-Range Control Test Results If the control result is not inside the acceptable range, here are some things you can do to solve the problem: Troubleshooting Checks Action 1. Check if the test strips or control Discard the test strips or control solutions solutions are expired. - Page 59 Read Chapter 4, “Control Testing” and test 6. Check if you followed the testing steps. again. If you still have problems, call Accu-Chek Customer Care at 1-800-363-7949. 7. Check if you chose the correct control If you chose the wrong control solution...
-
Page 60: Chapter 5: Maintenance And Troubleshooting
Chapter 5: Maintenance and Troubleshooting Changing the Batteries (+) side facing down 1. Use your thumb to slide 2. Remove the old batteries 3. Slide the battery drawer the battery drawer out of and place the new ones back into position until it the meter. - Page 61 Notes: • The meter uses two 3-volt lithium batteries, type 2032. This type of battery can be found in many stores. It is a good idea to have spare batteries available. (+) side facing down or facing away from you. •...
-
Page 62: Cleaning The Meter
Cleaning the Meter Caring for the Accu-Chek Aviva Nano Meter is easy. Just keep it free of dust. If you need to clean it, follow these guidelines carefully to help you get the best performance possible: Do Not • Make sure the meter is off •... -
Page 63: Maintenance And Troubleshooting
The meter needs little or no maintenance with normal use. It automatically tests its own systems every time you turn it on and lets you know if something is wrong. If you drop the meter or think it is not giving accurate results, call Accu-Chek Customer Care at 1-800-363-7949. -
Page 64: Screen Messages And Troubleshooting
Screen Messages and Troubleshooting Never make treatment decisions based on an error message. If you have any concerns, call Accu-Chek Customer Care at 1-800-363-7949. The meter will not turn on or the display is blank. • Batteries are dead –... - Page 65 Battery power is low. The meter is ready for Change the batteries you to insert a test strip. soon. The meter is in set-up The meter is ready for a mode, waiting for you drop of blood or control to change or confirm solution.
- Page 66 Blood glucose may A pre-meal marker was be higher than the assigned to this test measuring range of result. the system. A post-meal marker Blood glucose may was assigned to this be lower than the test result. measuring range of the system.
- Page 67 A pre-meal marker Blood glucose is was assigned to below the defined this test result hypoglycemia and the post-meal (low blood reminder has been glucose) level. activated. A general marker The meter is not was assigned to coded or the this test result.
- Page 68 Verify that the code number printed on the test strip container matches the code number printed on the code chip currently inserted in the meter. If the message reappears, call Accu-Chek Customer Care at 1-800-363-7949.
- Page 69 If this does test strip error has occurred. not fix the problem, If this confirms how you feel, call Accu-Chek Customer contact your healthcare Care at 1-800-363-7949. professional immediately. If it does not confirm how you feel, repeat the test and refer to Chapter 2, “Unusual Blood Glucose Results.”...
- Page 70 20 seconds enter the set-up mode to and reinsert them. Perform a ensure the time and date in blood glucose or control test. the meter are correct. If the problem persists, call Accu-Chek Customer Care at 1-800-363-7949.
- Page 71 The temperature is above or The batteries are almost below the proper range for out of power. Change the the system. Move to an area batteries now. within the temperature range indicated for test strip use in the test strip package insert, wait five minutes, and repeat the test.
- Page 72 The time and date settings may be incorrect. Make sure the time and date are correct and adjust, if necessary. Note: If you see any other error screen, please call Accu-Chek Customer Care at 1-800-363-7949.
-
Page 74: Chapter 6: Technical Information
Chapter 6: Technical Information Product Limitations Please read the literature packaged with your test strips to find the latest information on product specifications and limitations. Specifications Blood volume 0.6 µL Sample type Fresh whole blood Measuring time Refer to your test strip package insert for more information Measuring range 0.6 to 33.3 mmol/L Test strip storage conditions... -
Page 75: Electromagnetic Compatibility
Approx. 40 g (with batteries) Construction Hand-held Protection class Meter type The Accu-Chek Aviva Nano Meter is suitable for continuous operation Control solution storage conditions 2 °C to 32 °C Electromagnetic Compatibility This meter meets the electromagnetic immunity requirements as per ISO 15197 Annex A. - Page 76 Performance Analysis The performance data for the Accu-Chek Aviva Nano System (Accu-Chek Aviva Nano Meter with Accu-Chek Aviva Test Strips) were obtained using capillary blood from diabetic patients (method comparison, accuracy), venous blood (repeatability), and control solution (reproducibility). The system is calibrated with venous blood containing various levels of glucose.
-
Page 77: Product Safety Information
Product Safety Information Strong electromagnetic fields may interfere with the proper operation of the meter. Do not use this meter close to sources of strong electromagnetic radiation. To avoid electrostatic discharge, do not use the meter in a very dry environment, especially one in which synthetic materials are present. -
Page 78: Explanation Of Symbols
Explanation of Symbols You may encounter the following symbols on packaging, on the type plate, and in the User’s Manual for your Accu-Chek Aviva Nano Meter, shown here with their meaning. Consult the instructions for use Caution (refer to accompanying documents). Please refer to safety- related notes in the manual accompanying this instrument. -
Page 79: Guarantee
The statutory provisions on rights in consumer goods sales in the country of purchase shall apply. Additional Supplies The following supplies and accessories are available from your authorized Roche Diabetes Healthcare Center, pharmacies or your medical/surgical supply dealer: Test Strips Accu-Chek Aviva Test Strips Control Solutions Accu-Chek Aviva Control Solutions... -
Page 80: Information For Healthcare Professionals
Information for Healthcare Professionals WARNING: Patients receiving peritoneal dialysis using solutions containing icodextrin (e.g. Extraneal, Icodial) should not use the Accu-Chek Aviva Test Strip. It could cause an overestimation of blood glucose results. Healthcare Professionals: Follow the infection control procedures appropriate for your facility. - Page 81 test results. The difference in capillary bed concentration and blood perfusion throughout the body can lead to sample site-to-site differences in blood glucose results. These physiological effects vary between individuals and can vary within a single individual based upon his or her behavior and relative physical condition. Our studies involving alternate site testing of adults with diabetes show that most persons will find their glucose level changes more quickly in the fingers’/palms’...
-
Page 82: Index
Index alarm clock function, setting, computer, connecting your fatigue, 26 meter to, 48 frequent urination, 26 alternate site testing, 19, 79 control solution, 52 general marker, 17–18 appetite, increased, 26 control test results, guarantee, 78 understanding, 57 batteries, changing, 59 healthcare professionals, 79 control test, acceptable range, batteries, installing, 59... - Page 83 26 test strips, Accu-Chek Aviva, 8, 11 post-meal marker, 17–18, 28–30 thirst, increased, 26 post-meal reminder, 17–18, time and date, setting, 31 28–30, 37–39 tingling, 26 pre-meal marker, 17–18, trembling, 26 28–30 troubleshooting, 62–71 product limitations, 73 product specifications, 73...
- Page 84 ©2008 Roche Diagnostics. All rights reserved. ©2008 Roche Diagnostics. Tous droits réservés. The ACCU-CHEK Aviva Nano system, including the meter, code chip, and test strips, is covered by the ® following patents: Canadian Patent Nos. 2,068,214; 2,153,877; 2,153,883; 2,153,884; 2,175,501.
- Page 85 All other product names and trademarks are the property of their respective owners. ACCU-CHEK, ACCU-CHEK AVIVA et ACCU-CHEK AVIVA NANO sont des marques de Roche. Tous les autres noms de produits et de marques sont la propriété de leurs détenteurs respectifs.