Table of Contents
Advertisement
Advertisement
Table of Contents

Related Manuals for GE Gas Ranges


Summary of Contents for GE Gas Ranges
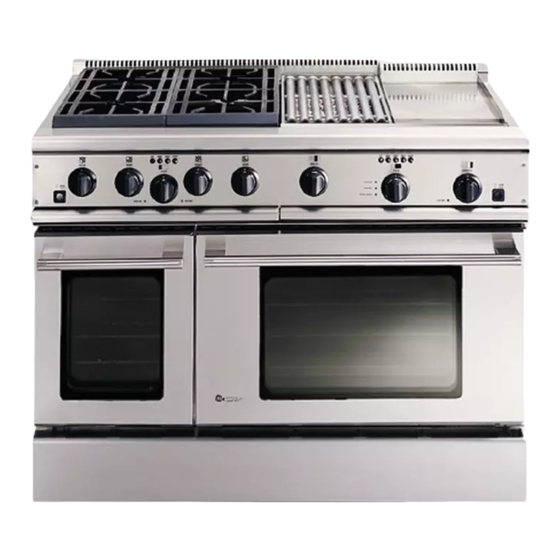
- Page 1 Owner’s Manual Stainless Steel Professional 36″ and 48″ Gas Ranges...
-
Page 2: Table Of Contents
This includes temperature calibration of each oven and cooktop element. This is Monogram’s way of ensuring correct installation and precise operation of your new professional range. Our Preferred Service Specialists are always at your service. If any Monogram appliance should ever require service, please call the Monogram Preferred Service number shown above. - Page 3 Before Read this manual carefully. It is intended to using help you operate and maintain your new range properly. your Keep it handy for answers to your questions. range Write You’ll find them on a label in the rear of down the the burner box below the burner grates.
-
Page 4: Important Safety Instructions
If it is not, there is a possible risk of the range tipping over and causing injury if you or a child stand, sit or lean on an open door. - Page 5 • Do not attempt to repair or replace any part of your range unless it is specifically recommended in this manual. All other servicing should be referred to a qualified technician.
-
Page 6: Surface Cooking
Do not use a towel or other bulky cloth in place of a pot holder. flammable materials and spillage, turn cookware handles toward the side or back of the range without extending over adjacent burners. range. They provide the air inlet and outlet that are necessary for the range to operate properly with correct combustion. - Page 7 • DO NOT use cookware on the grille. • If range is located near a window, do not hang long curtains that could blow over the surface burners and create a fire hazard.
- Page 8 OVEN • Stand away from the range when opening the oven door. Hot air or steam which escapes can cause burns to hands, face and/or eyes. • Never “open door broil” with children nearby. They could quickly come into contact with a hot oven interior surface, causing severe burns.
-
Page 9: Features
REAR FRONT REAR GRILL BAKE OVEN OVEN OVEN ON HEATING OVEN ON HEATING DOOR LOCKED Features of Your Range Stainless Steel Range 12″ Oven Shelf GRIDDLE 27″ Oven Shelf ZDP36N4D ZDP36L4D ZDP36N4R Page ZDP36L4R – – 17, 18, 22, 26... - Page 10 When using the simmer burner, always ensure that it lights from the main burner. Burners Your new professional gas range is equipped with burners typical of those used in restaurants. These burners are designed in two pieces for easy cleaning and control.
- Page 11 This “extinction pop” is normal for propane gas. Simmering Your new professional gas range has exceptionally low simmering capabilities. The center simmer cap serves as a heat diffuser to spread out the heat to avoid having a center hot spot.
- Page 12 After the flame is burning all the way around the burner, adjust the flame. Surface Cooking Stainless Steel Range Incorrect Correct Note: The flame size on a gas burner should match the cookware you are using.
- Page 13 Wok: A large, professional-sized wok and wok ring, specially designed for use on this range, is available from your dealer. Ask for model ZXWK22Y.
- Page 14 Surface Cooking Stainless Steel Range To prevent flare-ups from happening, trim the fat from around the edges of steaks and chops, use hamburger that is lean, remove the fat from poultry, etc.
- Page 15 Grilling • When turning the meat over, always use a hints spatula as it will not puncture the meat allowing the juices to run out. This will help to keep the meat juicy. Turn the meat only once, as juices are lost when the meat is repeatedly turned.
- Page 16 Surface Cooking Stainless Steel Range 4 Turn the control knob to a medium setting (350°F.). Turn the heat off when the oil begins to smoke. Allow the griddle to cool.
-
Page 17: Using The Ovens
(The broiler pan with grid is a good pan for this.) 12″ oven control (48″ ranges only) Using the Ovens Stainless Steel Range The oven has 3 shelf positions. 27″ oven control When roasting, use the A or B shelf position. -
Page 18: Proofing
NOTE: Do not use the proofing mode for warming food or keeping food hot. The proofing oven temperature is not hot enough to hold foods at safe temperatures (above 140°F.). Using the Ovens Stainless Steel Range 12″ oven control... - Page 19 Baking Use the proper baking pan. The type of finish pans/sheets on the pan determines the amount of browning that will occur. • Dark, rough or dull pans absorb heat resulting in a browner, crisper crust. Use this type for pies. For even cooking and proper browning, there must be enough room for air circulation in the placement...
- Page 20 • Some package instructions for frozen casseroles or main dishes have been developed using commercial convection ovens. For best results in this oven, preheat the oven and use the temperature on the package. Using the Ovens Stainless Steel Range...
- Page 21 How to set 1 Push in the CONV. BAKE selector button on the 27 ″ the right hand side of the control panel above the thermostat dial (close to the oven for center on 36″ ranges). convection 2 Using the thermostat dial, set the desired baking temperature.
- Page 22 12″ oven control (48″ ranges only) Using the Ovens Stainless Steel Range 27″ oven control Leave the door open to the broil stop position. The broiler does not need to be preheated for most broiling.
- Page 23 Suggested shelf positions and cooking times are intended as general guidelines only. Experiment Broiling with these settings for specific foods and your personal preference. guide Food Bacon Ground Beef Well Done Beef Steaks Rare Medium Well Done Rare Medium Well Done Chicken Bakery Products Bread (Toast)
- Page 24 The 12″ oven, the griddle and/or the grille cannot be used. The range must be completely cool in order to set the self-clean cycle. We recommend venting with an open window or using a ventilation fan or hood during the first self-clean cycle.
-
Page 25: Clean Cycle
How to set The clean cycle takes about 5 hours plus about the 27 ″ 30 minutes to cool down. oven for 1 Push in the CLEAN selector button on the right hand side of the control panel above self-cleaning the thermostat dial. -
Page 26: Ceramic Briquettes
® or Cameo ® Care and Cleaning Stainless Steel Range The bake elements can be lifted gently to clean the oven floor. If spillovers, residue or ash accumulate around the bake elements, gently wipe around the element with warm water. -
Page 27: Broiler Pan And Grid
The light bulb is located on the back of the oven. Before replacing the bulb, disconnect electrical power to the range at the main fuse or circuit breaker panel. Let the bulb cool completely before removing it. For your safety, do not touch a hot bulb with a damp cloth. -
Page 28: Care And Cleaning
When lifting the burner grates, be careful as they are heavy. Place them on a protected surface, so they won’t scratch the surface of the cooktop. Care and Cleaning Stainless Steel Range Ignitor Simmer Outer cap/ burner ports... -
Page 29: Griddle
Drip trays, Located beneath the cooktop are one or two drip tray drip trays. If you have a griddle or a grille there will also be a tray liner. The drip trays and liners liners and are made of stainless steel. The drip trays are drain tubes on rollers so they are easy to remove and replace. -
Page 30: Grille
(48 ″ ranges only) Let the range cool before cleaning. We recommend that you wear rubber gloves when cleaning the range. Soap and water will normally do the job. Heavy spattering or spillovers may require cleaning with a mild abrasive cleaner. -
Page 31: Burner Assembly
• Food is being cooked in a hot pan. • Cookware is not suited for broiling. Use the broiling pan and grid that came with your range. • Aluminum foil used on the broiling pan and grid has not been fitted properly and slit as recommended. - Page 32 The Problem Solver POSSIBLE CAUSE • Plug on the range is not completely inserted in the electrical outlet. • A fuse in your home may be blown or the circuit breaker tripped. • The oven controls are not properly set.
-
Page 33: Consumer Services
800.626.2000 Service Contracts You can have the secure feeling that GE Consumer Service will still be there after your warranty expires. Purchase a GE contract while your warranty is still in effect and you’ll receive a substantial discount. With a multiple-year contract, you’re assured of future 800.626.2224... -
Page 34: Warranty
To know what your legal rights are in your state, consult your local or state consumer affairs office or your state’s Attorney General. Warrantor: General Electric Company. If further help is needed concerning this warranty, write: Manager—Customer Relations, GE Appliances, Louisville, KY 40225 WARRANTY This warranty is extended to the original... - Page 35 Today Registration Product General Electric Company Warranty Registration Department P.O. Box 32150 Louisville, KY 40232-2150 Important Mail Ownership Consumer Appliances Place 1st Class Letter Stamp Here...
-
Page 36: Product Registration 3
To ensure that your product is registered, mail the separate product registration card. If the separate product registration card is missing, fold and mail the form below. No envelope is needed. Consumer Product Ownership Registration Product Range Mrs. Miss First...