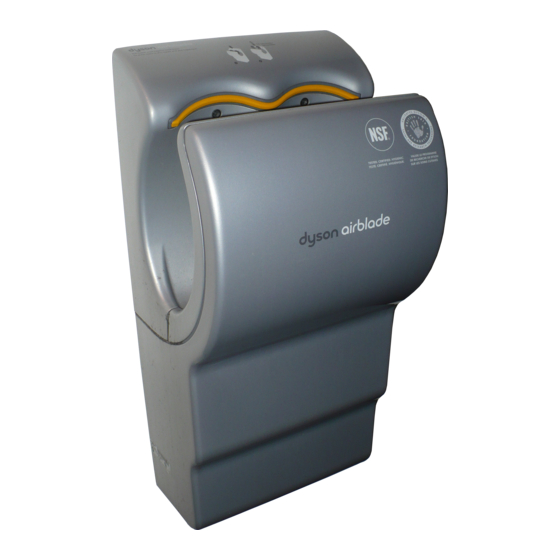
Dyson Airblade Owner's Manual
Hand dryer
Hide thumbs
Also See for Airblade:
- Owner's manual (105 pages) ,
- Features (11 pages) ,
- Care & cleaning (3 pages)
Table of Contents
Advertisement
Available languages
Available languages
Quick Links
Download this manual
See also:
Owner's Manual
Advertisement
Table of Contents

Related Manuals for Dyson Airblade


Summary of Contents for Dyson Airblade
- Page 4 • Connecting to Electrical Supply damage to property and/or personal injury. • Refitting Front Fascia & Access Panel Dyson will not be held liable for any damage to property or personal injury as a result of failure to comply with the instructions contained herein.
- Page 5 Appropriate electrical fittings (6) screws, toggle or masonry bolts and appropriate fittings. (Recommended minimum size of 0.25") Dyson recommends the use of protective clothing, eyewear and materials as necessary. Dyson Digital Motor HEPAfilter Rating plate Access ganel Air inlet...
-
Page 6: Electrical Requirements
Dyson Helpline toll Airblade _"hand dryer may result. codes and standards, including free at 1-888-DYSON-AB fire-rated construction. -
Page 7: Mounting Bracket
Positioning Mounting Bracket /t,, WARNING: Before There are two electrical entrance Ensure that marks are level and Select a location that will allow Recommended heights are shown locations available to ease with in the correct location as illustrated beginning any installation accessibility to the Airblade in Fig1, but may need to be... - Page 8 Removing Fascia Cover WARNING: Use caution Remove the (5) tamper proof Place the Airblade hand dryer screws from the unit in the when removing casing. face up on a dry and clean work The casing may have sharp surface to protect the product sequence illustrated in Figs 3-5 edges/corners which may...
-
Page 9: Connecting To The Electrical Supply
Fig9 length to reach the terminal block. locations as illustrated in Fig9 the Dyson Airblade If mounting in knock-out 1: cause harm or become Lay the unit flat on its back. permanently damaged. - Page 10 Connecting to the Hanging unit Refitting Fascia & Access Panels Electrical Supply cont. Step 3. Hang the unit on the secured Attach the front fascia panel back Install the (2) tamper proof screws Terminal block connections: back into the inner section of the mounting bracket as illustrated on by latching...
-
Page 11: Cleaning Advice
Withdraw hands slowly upwards • Call our Dyson Helpline toll cloth or vacuum Fig12 free at 1-888-DYSON-AB through the air a couple times to thoroughly dry hands in • Visit us on the web at 12 seconds. - Page 12 Important: Turn off power before troubleshooting/servicing. Note: Please try and have model & serial number available before calling the Dyson Helpline. The model/serial plate is located on the left, lower side corner of the unit. Problem Action If Problem Persists...
- Page 13 • 5 year parts limited warranty • Additional 1st year labor limited warranty • Dedicated Dyson helpline The full terms and conditions of the Dyson limited warranties are described on the following pages. Thank you for choosing to buy the Dyson Airblade...
- Page 14 Please register your product with us. 5 Year Parts Limited Warranty There are 3 ways to do this: All factory parts of your Dyson Airblade hand dryer are warranted against original defects, material and workmanship • You may fill out and send in the completed...
-
Page 15: Warranty Service
• Please fill out and return the Product Registration Form, or register • In no event shall Dyson B2B, Inc. be liable for any darnages arising directly or online at www.dysonairblade.com or call the Dyson Helpline... - Page 16 You can register your warranty online at www.dysonairblade.com or by calling 1-888-DYSON-AB For further information about what is included in the Dyson 5 year parts limited warranty and additional 1st year labor limited warranty, please visit www.dysonairblade.co...
-
Page 20: Contenido De La Caja
Si quita la carcasa • Herramientas necesarias o Io manipula de manera inapropiada, los componentes internos del secador Dyson Airblade podrian causar lesiones o daEarse de forma permanente. Procedimientos de instalaci6n • Requisitos el6ctricos... - Page 21 (TamaF_o minimo recomendado: 0.25 pulgada) Dyson recomienda ufilizar ropa, galas y materiales de protecci6n segOn sea necesa rio. Motor digital Dyson Filtro HEPA Placa de especificaciones Entrada del aire Panel de acceso...
- Page 22 Ilame gratis a la especificaciones, la unidad podrci c6digos vigentes, tanto federales linea de ayuda de Dyson al daBarse en forma permanenfe como estatales y locales, incluida 1-888-DYSON-AB o sere1 utilizada de manera la cons_rucci6n resistente al fuego.
-
Page 23: Soporte De Montaje
iiii I:_' iii '__ ,O,_;;;i @ _iiii._!i! i _ii_'__'_ i@ ii;"_ _ ii _ ,_0_, _!!_i;. _.iiiiii e Colocaci6n Soporte de montaje /_ ADVERTENCIA: Antes En la Fig1 se indican las alturas Elija un lugar que permita acceder Hay dos entradas disponibles para Aseg6rese... - Page 24 C6mo quitar la tapa frontal ADVERTENCIA: Tenga Coloque el secador de manos Quite los cinco tornillos a prueba precauci6n al quitar la Airblade orientaclo hacia arriba, de manipulaci6n imprudente carcasa; puede tenet _ngulos en una superficie de trabajo limpia la herramienta provista, como se y bordes filosos que podrian...
-
Page 25: Vista Posterior
Pase los cables de componentes internos del por el bloque de terminales la Iongitud suficiente para la electricidad en el orificio ciego. secador Dyson Airblade alimentaci6n por el bloque con@ctelos apropiadamente como conectarlos a la placa posterior podrian causar lesiones Si prefiere... - Page 26 iiii ::_' iii '__,0,_:::: @_iiii:!i! i _ii _'_'_ i@ iii _ ii _ ,_8_, S _ii:iii @ Conexi6n al suministro C6mo colgar C6mo volver a colocar la tapa la unidad de electricidad (cont.) frontal y los paneles de acceso Paso 3. Coloque el secador en el soporte Para insfalar nuevamente...
-
Page 27: Consejos De Limpieza
• Llame gratis a la linea de ayuda un patio seco o una aspiradora un par de veces para secarlas de Dyson al 1-888-DYSON-AB (Fig. 12). totalmente en doce segundos. • Visite nuestro sitio en Internet en www.dysonairblade.com... - Page 28 Importante: Desconecte la unidad antes de tratar de solucionar un problema o de repararla. Nota: Antes de Ilamar a la IJnea de ayuda de Dyson, tenga a mano el modelo y nOmero de serie de la unidad. Encontrarc_ esta informaci6n en la placa de especificaciones adherida en el lado inferior izquierdo del secador.
- Page 29 5 afios para las piezas • Garantia limitada adicional de un afio para la mano de obra • Linea de ayuda de Dyson Los t@rminosy condiciones completos de las garantias limitadas de Dyson estan descritos a continuaci6n. Gracias pot haber...
- Page 30 Io expresado en el manual del propietario. • Llame gratis a la linea de ayuda de Dyson al 1-888-DYSON-AB La garantia limitada de 5 ahos para las piezas comienza en la fecha de • Visite nuestro sitio en tnternet en www.dysonairblade.com...
- Page 31 Dyson al 1-888-DYSON-AB. La mayoria unidad que no est6n en conformidad con Io expresado en el manual de los problemas pueden ser solucionados...
- Page 32 ¢7¸ Comuniquese con la Iinea de ayuda de Dyson al "1-888-DYSON-AB Cuando flame a la lineade ayuda de Dyson, aseg0rese de fenera mano el n0mero de serie y Ja fecha de compra del secador AirbJade Enconfrar6 nOmero de serie en la informaci6n...