
Related Manuals for Ricoh FAX 3320L


Summary of Contents for Ricoh FAX 3320L
-
Page 1: Operating Instructions
Operating Instructions Basic Features Getting Started Faxing Registering Troubleshooting For safe and correct use of this machine, please be sure to read the Safety Information before you use it. - Page 2 Please be sure to connect the power cord to a power source as above. For details about power source, see Chapter 10, “Connecting the Power and Switching On” in the Advanced Features manual. Declaration of Conformity Product Name: Facsimile Model Number: 3730/F630/LF312/FAX3320L Responsible party: Ricoh Corporation Address: 5 Dedrick Place, West Caldwell, NJ 07006 Telephone number: 973-882-2000 This device complies with part 15 of FCC Rules.
-
Page 3: Table Of Contents
TABLE OF CONTENTS NOTICE ........................1 Safety Information ......................3 Safety During Operation ..................3 Important Safety Instructions ................7 Important Safety Instructions ..................7 Caution ........................7 Position of theRCAUTION Label ................. 8 ENERGY STAR Program ..................9 Energy Saving Modes ....................10 How to Read this Manual ..................12 Manuals for This Machine ................... - Page 4 Scan Settings .......................34 Resolution ........................34 Original Type......................35 Dialing ........................36 Entering Numbers Directly ..................36 Pause ........................37 Tone ........................37 Using Quick Dials.....................37 Using Speed Dials....................38 Using Groups ......................39 When Specifying a Group with a Quick Dial............40 When Specifying a Group with the Group key............40 Reception Modes ....................41 Selecting the Reception Mode .................41 3.
- Page 5 4. Troubleshooting Loading Paper in the Main Paper Tray.............. 71 Adjusting Volume ....................72 Clearing Original Jams..................74 Clearing a Copy, Fax, or Print Jam ..............75 Inside the Machine ....................75 Error Messages ....................77 When the Receive File Indicator is Lit ...............79 Solving Problems....................80 INDEX......................
-
Page 7: Notice
NOTICE R CAUTION: Use of controls, adjustments or performance of procedures other than those specified herein may result in hazardous radiation exposure. Shielded interconnect cables must be employed with this equipment to ensure compliance with the pertinent RF emission limits governing this device. Direct (or indirect reflected) eye contact with the laser beam may cause serious eye damage. - Page 8 -Notice about the Telephone Consumer Protection Act (Valid in USA only) The Telephone Consumer Protection Act of 1991 makes it unlawful for any per- son to use a computer or other electronic device, including FAX machines, to send any message unless such message clearly contains in a margin at the top or bottom of each transmitted page or on the first page of the transmission, the date and time it is sent and an identification of the business or other entity, or other individual sending the message and the telephone number of the sending ma-...
-
Page 9: Safety Information
Safety Information When using this machine, the following safety precautions should always be fol- lowed. Safety During Operation In this manual, the following important symbols are used: R WARNING: Indicates a potentially hazardous situation which, if instructions are not followed, could result in death or serious injury. R CAUTION: Indicates a potentially hazardous situation which, if instructions are not followed, may result in minor or moderate injury or damage to property. - Page 10 R WARNING: • Connect the power cord directly into a wall outlet and never use an extension cord. • Disconnect the power plug (by pulling the plug, not the cable) if the power cable or plug becomes frayed or otherwise damaged. •...
- Page 11 R CAUTION: • Protect the machine from dampness or wet weather, such as rain and snow. • Unplug the power cord from the wall outlet before you move the machine. While moving the machine, you should take care that the power cord will not be damaged under the machine.
- Page 12 • If toner or used toner is inhaled, gargle with plenty of water and move into a fresh air environment. Consult a doctor if necessary. • If toner or used toner gets into your eyes, flush thoroughly with eyswash or water. Consult a doctor if necessary. •...
-
Page 13: Important Safety Instructions
Important Safety Instructions Important Safety Instructions Caution When using your telephone equipment, basic safety precautions should always be followed to reduce the risk of fire, electric shock and injury to persons, includ- ing the following: • Do not use this product near water, for example, near a bath tub, wash bowl, kitchen sink or laundry tub, in a wet basement or near a swimming pool. -
Page 14: Position Of Thercaution Label
Position of theRCAUTION Label This machine has a RCAUTION label at the position shown below. For safety, please follow the instructions and handle the machine as indicated. The inside of the machine becomes very hot. Do not touch the inside. Doing so could result in a burn. -
Page 15: Energy Star Program
ENERGY STAR Program ® ENERGY STAR Program ® The ENERGY STAR Program encourages energy conservation by promoting energy efficient computers and other office equipment. The program backs the development and dissemination of products that feature energy saving functions. It is an open program in which manufacturers participate voluntarily. Targeted products are computers, monitors, printers, facsimiles, copiers, scanners, and multi- function devices. -
Page 16: Energy Saving Modes
Energy Saving Modes Energy Saving mode enables you to avoid using unnecessary power and econo- mize on electricity. Although we recommend you use this mode from the view- point of environmental consciousness, you can also turn it off. When you install this machines for the first time, Energy Saving mode is turned on by default. - Page 17 Note ❒ When you load paper in Energy Saving mode, an error message will not be displayed even if the cassette is not pushed in correctly. ❒ After loading paper, press the Energy Saver key and check that "READY” is shown on the display.
-
Page 18: How To Read This Manual
How to Read this Manual Symbols The following set of symbols is used in this manual. R WARNING: This symbol indicates a potentially hazardous situation that might result in death or serious injury when you misuse the machine without following the in- structions under this symbol. -
Page 19: Manuals For This Machine
Manuals for This Machine Two Facsimile Reference manuals are provided, the Basic Features manual and the Advanced Features manual. Please refer to the manual that suits your needs. Basic Features (this manual) The Basic Features manual explains the most frequently used fax functions and operations. - Page 20 ❖ Chapter 10 Installation Explains about installation considerations, connecting to a telephone line, and connecting the power. ❖ Chapter 11 Appendix You can check the specifications for this machine.
-
Page 21: Getting Started
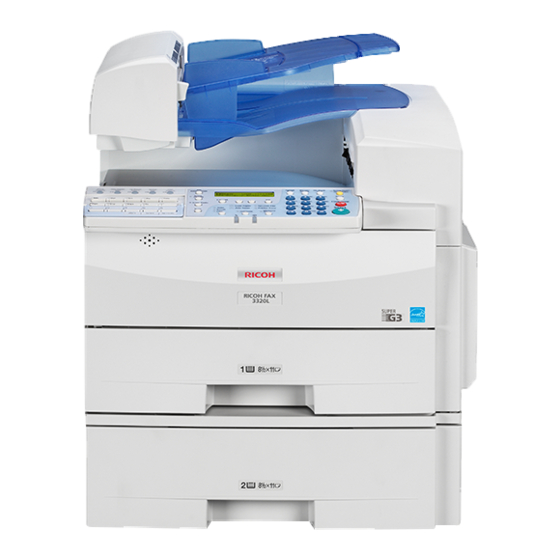
1. Getting Started Guide to Components Front View AZW004 ADF Cover Main Paper Tray Cover for the document feeder (ADF). Load paper here. Release Button Paper Tray Unit (Option) Push this button to open the document You can load more paper here. feeder. -
Page 22: Side View
Getting Started Original Tray Original guide Place originals here for sending a fax and Adjust the original guide to match the copying. size of the originals. Side View Output tray guide G3 Line Connector Pull out and raise the end fence to sup- External Telephone Connector port large papers. -
Page 23: Control Panel
Control Panel Control Panel User Function keys Add Toner indicator Each of these can be programmed for Blinks when toner is about to runout and rapid access to frequently used functions. lights continuously when toner has run out. ❖ Functions Programmed by Default Load Paper indicator Function Lights when a paper tray is empty or the... - Page 24 Getting Started {On Hook Dial} key Status Indicators Use to dial a number from the numeric These indicators keep you informed keypad without having to lift the hand- about the current status of the unit. set. • hAlarm When the alarm indicator flashes, {Energy Saver/Clear Modes} key check the display and read the mes- Energy Saver: Hold down 2 seconds to...
-
Page 25: Starting The Machine
Starting the Machine Starting the Machine To start the machine, turn on the Turning Off the Power power switch. Note Important ❒ This machine automatically enters ❒ Make sure that 100% is shown on Energy Saver mode if you do not the Fax standby display before you use the machine for a while. -
Page 26: Reading The Display
Getting Started Reading the Display The machine status and instructions are shown on the display. Important ❒ Do not apply a strong shock or force of about 30N (about 6.8 lbf ) or more to the panel display. Otherwise, the display might be damaged. N = Newton lbf = weight pound Note... -
Page 27: Standby Display
Reading the Display Standby Display Communication Display While the machine is in standby dis- While the machine is communicating, play (immediately after it is turned on the status is displayed. or after the {Cancel} key is pressed), ❖ Display during Memory Transmission the following display is shown. -
Page 28: Display Prompts
Getting Started Display Prompts Depending on the situation, the ma- chine will show various prompts on the display. ❖ Instructions and Requests ❖ Questions ❖ Selections ❖ Status... -
Page 29: Faxing
2. Faxing Transmission Modes ❖ Immediate Transmission There are two types of transmission. The machine dials immediately, ❖ Memory Transmission and transmits the fax while scan- When a fax document is stored in ning. memory, then transmission starts It is convenient when you would automatically. -
Page 30: Switching Between Memory Transmission And Immediate Transmission
Faxing Switching between Memory Transmission and Immediate Transmission Press the {Memory Trans.} key to switch between Memory Transmis- sion and Immediate Transmission. When the indicator of the {Memory Trans.} key is not lit, Immediate Transmission is selected. When the indicator of the {Memory Trans.} key is lit, Memory Transmission is selected. -
Page 31: Setting Originals
Setting Originals Setting Originals You can set your originals in the Doc- Note ument Feeder. ❒ When sending a fax, the image output at the other end depends on ❖ How to set A4, B5 JIS (Japanese the size and direction of paper Industrial Standard), A5, 5 "×8 ",... -
Page 32: Loading Originals In The Document Feeder
Faxing Note Loading Originals in the ❒ Set the originals gently. Document Feeder Reference Use the Document Feeder to scan in a For details about unsuitable stack of originals in one operation. originals, see p.123 “Originals The Document Feeder can handle sin- unsuitable for the Document gle-sided originals. -
Page 33: Memory Transmission
Memory Transmission Memory Transmission ❒ The theoretical maximum number Memory Transmission is convenient because: of destinations you can enter with the number keys is 69, but this will • Fax documents can be scanned depend on the amount of memory much more quickly. - Page 34 Faxing Reference Select any scan settings you re- quire. See p.34 “Scan Settings”. p.43 “Own Name/Fax Head- er/Own Fax Number” Dial. If you wish to send the same message to more than one desti- nation, press the {OK} key, and then dial another destination.
-
Page 35: Canceling A Memory Transmission
Canceling a Memory Transmission Canceling a Memory Transmission Before the Start Key is Pressed During Transmission Use this procedure to cancel a trans- Press the {Energy Saver / Clear mission after the original has been Modes} key. scanned. Note ❒ If transmission finishes while you are carrying out this procedure, it will not be canceled. -
Page 36: While The Original Is Awaiting Transmission
Faxing Press the {Job Information} key, Display the file you want to de- lete. and confirm that "1. Cancel TX / RX" is displayed. Enter the file number with the number keys, or search using 0 or Press the {OK} key. Press 0 or 1 to select "... -
Page 37: Immediate Transmission
Immediate Transmission Immediate Transmission Immediate Transmission is conve- Set your original. nient when: Reference • You wish to send a document im- mediately as it is scanning. p.25 “Setting Originals” • You wish to quickly check whether Select any scan settings you re- you have successfully connected quire. - Page 38 Faxing Reference p.43 “Own Name/Fax Head- er/Own Fax Number” After transmission the machine will return to standby display.
-
Page 39: Canceling An Immediate Transmission
Canceling an Immediate Transmission Canceling an Immediate Transmission Before the Start key is Pressed Press the {Energy Saver / Clear Modes} key. Note ❒ When you have already set the original, you can also cancel the transmission by removing the original from the machine. -
Page 40: Scan Settings
Faxing Scan Settings ❖ Fine (8×15.4 lines/mm, 200×400dpi) You may wish to send many different types of fax messages. Some of these Select for originals with very fine may be difficult to reproduce at the details or when you require the other end. -
Page 41: Original Type
Scan Settings ❒ Usually, transmission takes short- Original Type er when Auto resolution is select- e d t ha n D e t a i l r e s o lu t i o n i s If your original contains photographs selected. -
Page 42: Dialing
Faxing Dialing There are four main ways to dial a Enter the fax number with the number: number keys. ❖ Entering Numbers Directly The digits appear on the display as you enter them. See p.36 “Entering Numbers Di- rectly” ❖ Using Quick Dials: See p.37 “Using Quick Dials”... -
Page 43: Pause
Dialing Note Tone ❒ If a memory file is awaiting trans- mission and the This function allows a machine con- "Exceeded the nected to a pulse dialing line to send message is dis- Max.Cannot Add" tone signals (for example if you want played when dialing with the to use a special service on a tone dial- number keys, you cannot dial any... -
Page 44: Using Speed Dials
Faxing Set your original and select any Using Speed Dials scan settings you require. You can specify destinations simply by pressing the {Speed Dial} key and a Speed Dial code (00 to 99). You must store the destination's fax Press the Quick Dial key in which number in a Speed Dial beforehand. -
Page 45: Using Groups
Dialing Press the {Speed Dial} key. Using Groups You can store multiple destinations as a single Group and simply specify a particular Group. You must store the destinations' fax number in a Group beforehand. Additionally, you can store destina- tion names and a Group name in Groups. -
Page 46: When Specifying A Group With A Quick Dial
Faxing When Specifying a Group with a Quick When Specifying a Group with the Group Dial Make sure that the Memory Trans- Make sure that the Memory Trans- mission indicator is lit, if not, press mission indicator is lit, if not, press the {Memory Trans.} key to light it. -
Page 47: Reception Modes
Reception Modes Reception Modes ❒ Set a smaller number of rings The machine can treat incoming fax messages and telephone calls in three for the telephone answering ways. machine than for the fax ma- chine. ❖ Manual Receive ❒ It could not be work correctly Use this mode if your line is shared depends on a telephone an- by a fax machine and a telephone... - Page 48 Faxing Press 0 or 1 until " 3. Setup " is displayed. Press the {OK} key. Press 0 or 1 until “ 5. Reception Mode “ is displayed. Press the {OK} key. Press 0 or 1 to select the recep- tion mode.
-
Page 49: Own Name/Fax Header/Own Fax Number
3. Registering Own Name/Fax Header/Own Fax Number Make sure that all necessary settings Note are made before connecting your ma- ❒ In the USA, law requires that chine to the telephone line. your fax number be included in the fax Header. Register the fax ❖... -
Page 50: Registering
Registering Press 0 or 1 until "6. Fax Infor- Registering mation" is displayed. The following procedure describes how to make initial settings. Press the {User Tools} key. Press the {OK} key. Confirm that " 1. Own Name " is displayed. Press the {OK} key. - Page 51 Own Name/Fax Header/Own Fax Number Press the {OK} key. Enter your Own Fax Number. The programmed Own Name is displayed. Note ❒ The format of the number is normally as follows: Interna- Press 0 or 1 to move the cursor, tional Dial Prefix, Your Country and then enter your fax number Code, Your Area Code (do not...
-
Page 52: Editing
Registering Press 0 or 1 until "6. Fax Infor- Editing mation" is displayed. The following procedure describes how to edit initial settings. Press the {User Tools} key. Press the {OK} key. Press 0 or 1 to select the item that you want to edit. Press the {OK} key. - Page 53 Own Name/Fax Header/Own Fax Number Press 0 or 1 until " 2. Fax Fea- tures " is displayed. Press the {OK} key. Press 0 or 1 until " 3. Setup " is displayed. Press the {OK} key. Press 0 or 1 until "6. Fax Infor- mation"...
-
Page 54: Quick Dial
Registering Quick Dial To save time, you can program a fax Press the {User Tools} key. number that you use often into a Quick Dial key. Then, whenever you are sending a message to that loca- tion, just press that Quick Dial key to dial. - Page 55 Quick Dial Press the {OK} key. Display the number of the Quick Dial key you want to register. The fax number is programmed. Press a Quick Dial key, or search using 0 or 1. Enter the destination name. Note ❒ If a Quick Dial has already been registered, the contents are dis- played.
-
Page 56: Editing
Registering Press the {OK} key. Press the {OK} key. If you want to store another Quick Confirm that " 1. Prog. Quick Dial " Dial, go to step E. is displayed. Press the {User Tools} key to re- Press the {OK} key. turn to standby display. -
Page 57: Deleting
Quick Dial Press the {Clear/Stop} key, and then Deleting reenter the destination name. The following procedure describes Note how to delete fax numbers registered ❒ Under rare circumstances, gar- in Quick Dial keys. bled characters may appear during name registration if you Limitation use the {Pause/Redial} key to ❒... -
Page 58: Quick Dial Key Label (Dial Label)
Registering Press 0 or 1 until " 2. Del. Quick Quick Dial Key Label (Dial Dial " is displayed. label) You can print a template that can be used to make labels for Quick Dial keys. The template will have destina- Press the {OK} key. -
Page 59: Label Paper
Quick Dial Label paper AUG. 21. 2002 11:22AM... -
Page 60: Speed Dial
Registering Speed Dial Press the {User Tools} key. Registering If you register numbers in Speed Di- als, you can specify the fax number simply by pressing the {Speed Dial} key, and entering a two-digit Speed Dial number. The following procedure describes how to register fax numbers in Speed Dials. - Page 61 Speed Dial Display the number of the Speed Enter the Destination name. Dial you want to register (00 to 99). Enter the Speed Dial number with the number keys, or search using 0 or 1. Note ❒ If a destination name is already registered in the Speed Dial, the name is shown on the display.
-
Page 62: Editing
Registering Press the {OK} key. Editing The following procedure describes how to edit registered Speed Dial numbers. Display the number of the Speed Press the {User Tools} key. Dial you want to edit (00 to 99). Enter the Speed Dial number with the number keys, or search using 0 or 1. -
Page 63: Deleting
Speed Dial Press 0 or 1 to select "On" or Deleting "Off". The following procedure describes how to delete fax numbers in Speed Dials. Limitation Note ❒ If a registered Speed Dial is being ❒ Label insertion allows the desti- used for a standby Memory Trans- n a t i o n n a m e t h a t i s p r o - mission, the message "... - Page 64 Registering Press 0 or 1 until " 4. Del. Speed Dial " is displayed. Press the {OK} key. Display the Speed Dial number you want to delete (00 to 99). Enter the Speed Dial number with the number keys or search using 0 or 1.
-
Page 65: Groups
Groups Groups If you regularly broadcast documents Registering to the same set of destinations, you can combine these numbers into a You can register the following items group. Then just select the group and in a Group: each number will be dialed in se- quence automatically. - Page 66 Registering ❒ It is recommended that you print Press the {User Tools} key. the Group Dial list and keep it when you register or change desti- nations. See p.54 “Printing Re- ports/Lists”, Advanced Features. ❒ If you register the same destination in different Groups, it is only counted as one item.
- Page 67 Groups Press the 0 or 1 to select " Add " Display the number of the Group you want to register (1 to 5). or " Exit ". Enter the group number with the number keys, or search using 0 or Press the {OK} key.
-
Page 68: Editing
Registering Press the {OK} key. Press the {OK} key. Confirm that " 1. Program / Delete Press the {User Tools} key to re- " is displayed. turn to standby display. Press the {OK} key. Editing Press 0 or 1 until " 5. Prog. Group Dial "... -
Page 69: Adding A Fax Number To A Group
Groups Press the {Clear/Stop} key, and then Adding a Fax Number to a Group enter the new name. Press the {User Tools} key. Note ❒ If you want to delete a character of the name, press the {Clear/Stop} key. ❒ If you press the {Cancel} key, the display will return to that shown for step E. - Page 70 Registering Display the number of the group Specify the destination using one to which you want to add a num- of the following three methods: ber (1 to 5). Enter the fax number with the Enter the group number with the number keys.
-
Page 71: Deleting
Groups Press the {OK} key. Deleting The following procedure describes how to delete a destination from a group. Press 0 or 1 to select "Yes" if the • When you delete a destination group was programmed in a from a group programmed in a Quick Dial, or select "No"... - Page 72 Registering Press the {OK} key. Press 0 or 1 until " 5. Prog. Group Dial " is displayed. Press 0 or 1 to display the desti- Press the {OK} key. nation you want to delete. Press the {OK} key. Display the group number for the destination you want to delete (1 to 5).
-
Page 73: To Delete An Entire Group
Groups Press the {OK} key. Press the {OK} key. If you selected "No", go to step U. Confirm that " 1. Program / Delete " is displayed. Note ❒ If you want to edit a programmed Press the {OK} key. Quick Dial key, press the Quick Press 0 or 1 until "... - Page 74 Registering -To change and delete Quick Dials programmed as groups: To store an entire group under a dif- ferent Quick Dial key, or to delete the group from the Quick Dial key alto- gether, perform the following proce- dure: Press the {User Tools} key. Press 0 or 1 until "...
-
Page 75: Entering Characters
Entering Characters Entering Characters This section describes how to enter characters. Available Characters • Letters: ABCDEFGHIJKLMNOPQRSTUVWXYZabcdefghijklmnopqrstuvwxyz • Symbols: – _ (space) . , ( ) / @ & $ ! ' # p % + : ; < = > ? ^ [ ] ` { | } ∼ •... -
Page 76: How To Enter Characters
Registering {Clear/Stop} key Deletes the character at the cursor posi- -Wild Cards tion. If the cursor is placed to the right of the last character at the right end of a line, When you register other parties' Own that character will be deleted. Name or Own Fax Numbers for mul- tiple destinations, you can register a sequence of characters common to... -
Page 77: Troubleshooting
4. Troubleshooting Loading Paper in the Main Paper Tray If there is no paper in the main paper Important tray, the B indicator on the control ❒ Do not stack paper over the lim- panel lights. it mark. Use the following procedure to load the paper. -
Page 78: Adjusting Volume
Troubleshooting Adjusting Volume You can change the volume of the fol- Press 0 or 1 until " 2. Fax Fea- lowing sounds the machine makes. tures " is displayed. ❖ On Hook Sounds when you press the {On Hook Dial} key. ❖... - Page 79 Adjusting Volume Press the {OK} key. The volume is adjusted. If you want to adjust another item, repeat steps G to I. Press the {User Tools} key to re- turn to standby display.
-
Page 80: Clearing Original Jams
Troubleshooting Clearing Original Jams If an original is jammed, the hindica- Close the ADF unit and ADF cov- tor on the Control Panel blinks and “ er making sure it clicks firmly Clear Misfed Original (S) “ is dis- into place. played. -
Page 81: Clearing A Copy, Fax, Or Print Jam
Clearing a Copy, Fax, or Print Jam Clearing a Copy, Fax, or Print Jam R CAUTION: Inside the Machine • The fusing section of this ma- chine might be very hot. Caution should be taken when removing Open the right cover. misfed paper. - Page 82 Troubleshooting Pull out the jammed paper. When paper is caught in the lower unit A Pull out the jammed paper. Close the right cover making sure it clicks firmly into place.
-
Page 83: Error Messages
Error Messages Error Messages The following messages may appear while you are operating or programming the machine. Message Problem/Solution No Files Exist No polling reception operations have been programmed. There are no documents in memory waiting for transmis- sion. Incorrect file number. Check the file number and try again. Cannot Combine : (currently se- Appears when you attempt to select a function that cannot lected function) - Page 84 Troubleshooting Message Problem/Solution Some Page(s) are Blank An almost entirely blank document was scanned. Check your document. Reset Toner Correctly The toner cassette is not set correctly. Toner is Almost Empty The toner cassette is nearly empty. Copy Mode Locked Copy mode is disabled.
-
Page 85: When The Receive File Indicator Is Lit
When the Receive File Indicator is Lit When the Receive File Indicator is Lit If the Receive File indicator is lit, a message has been received but could not be printed for some reason. The message was stored in memory (Substitute Recep- tion). -
Page 86: Solving Problems
Troubleshooting Solving Problems This table lists some common problems and their solutions. Problem Required Action Printed or sent image contains spots. The Document Feeder (ADF) or scanner is dirty. Clean them. Make sure that ink or correction fluid is dry before set- ting the original. -
Page 87: Index
INDEX Add Toner indicator , 17 Editing Fax Header , 46 ADF Cover , 15 Groups , 62 Adjusting Volume Alarm , 72 Own Fax Number , 46 Dialing , 72 Own Name , 46 Key Tone , 72 Quick Dial , 50 On Hook , 72 Speed Dial , 56 Reception , 72... - Page 88 LCD display , 17 Quick Dial , 48 Loading Paper , 71 Deleting , 51 Load Paper Indicator , 17 Dialing , 37 Lower Right Cover , 15 Dial label , 52 Low-power Mode , 9 Editing , 50 Registering , 48 Quick Dial keys , 18 Main Paper Tray , 71 Manual Receive , 41...
- Page 89 Tone , 37 Transmission Modes , 23 Trans. Option key , 17 Troubleshooting , 71 Error Messages , 77 TTI→Fax Header , 43 User Function keys , 17 User Tools key , 18 Ventilation hole , 16 Volume , 72 Wild Cards , 70...
- Page 90 MEMO H555-8200A...
-
Page 91: Fcc Requirements
7. If trouble is experienced with this equipment, for repair or warranty information, please contact RICOH CORP. CUSTOMER SUPPORT DEPT. at 1-800-FASTFIX. If the equipment is causing harm to the telephone network, the telephone company may request that you disconnect the equipment until the problem is resolved.