Table of Contents
Advertisement
Read this manual carefully before you use this machine and keep it handy for future reference. For safe and correct use, be sure to read the Safety
Information in this manual before using the machine.
Image Scanner
What You Can Do With This Machine
Setting Up the Scanner
Configuring the Scanner Settings
Setting Originals
Sending Scan File by E-mail
Sending Scan File by Scan to Folder
Sending Scan File by Scan to FTP
Printing Scanned Image Files
Sending Scan Files Using Delivery Server
Using the TWAIN Scanner Function
Appendix
Operating Instructions
Advertisement
Table of Contents

Related Manuals for Ricoh IS200E


Summary of Contents for Ricoh IS200E
-
Page 1: Operating Instructions
Image Scanner Operating Instructions What You Can Do With This Machine Setting Up the Scanner Configuring the Scanner Settings Setting Originals Sending Scan File by E-mail Sending Scan File by Scan to Folder Sending Scan File by Scan to FTP Printing Scanned Image Files Sending Scan Files Using Delivery Server Using the TWAIN Scanner Function... - Page 2 Introduction This manual contains detailed instructions and notes on the operation and use of this machine. For your safety and benefit, read this manual carefully before using the machine. Keep this manual in a handy place for quick reference. Power Source Color Scanner: 120V, 60 Hz, 10A or more Please be sure to connect the Power Cord to a power source as above.
-
Page 3: Table Of Contents
TABLE OF CONTENTS Safety Information ....................1 Safety During Operation..................... 1 Lithium Batteries (Memory Back-up)................2 Manuals for This Scanner ..................3 How to Read This Manual ..................4 1. What You Can Do With This Machine Outline........................5 Scan to E-mail......................5 Scan to Folder...................... - Page 4 3. Configuring the Scanner Settings Outline to Use Scan to E-mail................33 Outline to Use Scan to Folder................34 Outline to Use Scan to FTP.................36 Outline to Use Scan to Print ................37 Outline to Use the Network Delivery ..............38 Outline to Use As a TWAIN Scanner ..............40 To Use as a Network TWAIN Scanner..............
- Page 5 Recalling the Settings .................... 108 To recall the settings ...................108 Creating a Backup File of All the Settings..............108 Setup items to be backed-up and restored............108 To create a backup file ..................108 To restore settings from a backup file ..............109 Installing Software .....................
- Page 6 6. Sending Scan File by Scan to Folder Sending a Scanned File to a Registered Shared Folder ........ 144 Procedure Breakdown.................... 144 Selecting a Shared Folder..................145 Selecting a File Name .................... 146 Using [Enter Custom Send File] to Send a Scanned File to an Unregistered Shared Folder....................
- Page 7 11.Appendix Troubleshooting....................181 When An Original Is Jammed In ADF ..............181 When Scanning is Not Performed as Expected .............182 When an Error Message Appears................183 Scanner unit error messages ................183 Scan settings error messages ................184 Send Scan (E-mail, Send File (SMB/FTP) or Delivery Server) operation error messages...185 Print Scan operation error messages ..............187 Error messages displayed on the Web Status Monitor ........
-
Page 9: Safety Information
Safety Information When using this machine, the following safety precautions should always be fol- lowed. Safety During Operation In this manual, the following important symbols are used: R WARNING: Indicates a potentially hazardous situation which, if instructions are not followed, could result in death or serious injury. R CAUTION: Indicates a potentially hazardous situation which, if instructions are not followed, may result in minor or moderate injury or damage to property. -
Page 10: Lithium Batteries (Memory Back-Up)
R CAUTION: • Protect the equipment from dampness or wet weather, such as rain, snow, and so on. • Unplug the Power Cord from the wall outlet before you move the equip- ment.While moving the equipment, you should take care that the Power Cord will not be damaged under the equipment. -
Page 11: Manuals For This Scanner
Manuals for This Scanner The following manuals describe the operational and maintenance procedures of this machine. To enhance safe and efficient operation of this scanner, all users should read and follow the instructions carefully. ❖ ❖ ❖ ❖ Quick Installation Guide Describes how to install the scanner. -
Page 12: How To Read This Manual
How to Read This Manual Symbols The following set of symbols is used in this manual. R WARNING: This symbol indicates a potentially hazardous situation that might result in death or serious injury when you misuse the machine without following the in- structions under this symbol. -
Page 13: What You Can Do With This Machine
1. What You Can Do With This Machine This section introduces various functions of this machine, and provides most ba- sic information such as control locations and standby screens, etc. Outline Scan to E-mail You can directly send a scanned data as an attached file from this machine. The e-mail destinations can be pre-registered, or entered directly using the bundled USB-keyboard. -
Page 14: Scan To Folder
What You Can Do With This Machine Process Flow A A A A Specify an e-mail destination, subject, and make necessary settings for scanning using the control panel of “1. This machine.” The e-mail destina- tions can be searched or entered using the bundled USB-keyboard. B B B B Originals are scanned by “1.This machine.”... -
Page 15: Scan To Ftp
Outline Client computer You can use a client computer on the net- work to perform a scan to folder opera- tion remotely (which requires a Web browser). You can also browse scanned files saved to a shared folder from a client computer. -
Page 16: Scan To Print
What You Can Do With This Machine Client computer You can browse scanned files saved to an FTP server from a client computer. You need to have an FTP client program on the computer to connect to an FTP server. Process Flow A A A A Specify an FTP server, file name, and make necessary settings for scanning... -
Page 17: Delivery Server
Outline Process Flow A A A A Perform a Print Scan operation using the control panel of “1. This ma- chine.” B B B B Originals are scanned by “1.This machine.” C C C C The scan data is interpreted to a printer language and sent to either “2.Local printer”... -
Page 18: Twain Scanner
What You Can Do With This Machine Process Flow A A A A Specify destinations, and make necessary settings for scanning using the control panel of “1.This machine.” B B B B Originals are scanned by “1.This machine.” C C C C The scan data is sent to and saved on “2.Delivery server”. - Page 19 Outline Process Flow A A A A Use a TWAIN-compliant application on a “2. Client computer” or “3. Off- line computer” to send a command for scanning via the TWAIN driver. B B B B Originals are scanned by “1. This machine.” C C C C The scanned data can be edited and stored using the TWAIN-compliant ap- plication on the “2.
-
Page 20: Guide To This Scanner
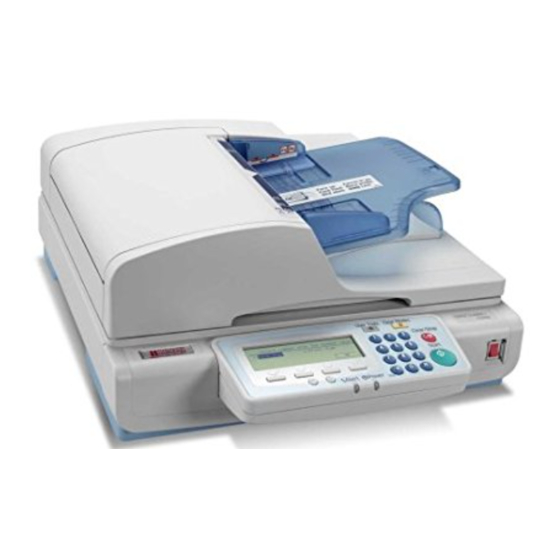
What You Can Do With This Machine Guide to this Scanner AFJ002S ADF (Automatic Document Feeder) (User Tools) key Allows you to automatically load multi- Press this key to configure various settings ple originals into this machine. The ADF such as send scan, print scan, network, etc. also provides duplex scanning. -
Page 21: Function Key
Guide to this Scanner { { { { 0 0 0 0 } } } } / { { { { 1 1 1 1 } } } } (Cursor) keys Function key Used to move highlight on the screen for Used to select functions that appear on selecting an option. -
Page 22: Using Keys Displayed On The Screen
What You Can Do With This Machine Using Keys Displayed on the Screen You can use the function keys, located under the display panel, to operate keys that appear on the display panel. Example: AFJ005S To execute a key operation on the display panel, press the relevant function key. •... -
Page 23: How To Interpret The Indicators
Guide to this Scanner How to Interpret the Indicators Front indicators This section explains how to interpret the indicators of this machine. AFJ063S Description For a short while after turning the power on. Power is on. Restart the machine. If the error occurs again, contact your service repre- sentative. -
Page 24: Scanner Features Menu
What You Can Do With This Machine Scanner Features Menu Pressing the { { { { User Tools} } } } key displays the Scanner Features menu. You can con- figure settings for network, Send Scan, Print Scan, and Scan/Print conditions to meet your requirements. -
Page 25: Function Priority
Guide to this Scanner Function Priority You can select the initial screen displayed each time you turn the machine's power on. It is good idea to select the initial screen in accordance with how fre- quently you use Print Scan. The following three options are available. •... -
Page 26: Select Method
What You Can Do With This Machine Select Method • With the options in [6.Select Method], you can select a combination of the func- tions that suits for the method how you use this machine. The following three options are available. •... - Page 27 Guide to this Scanner • Delivery Server standby screen While this screen is displayed, pressing [Dest.] enables you to deliver scan data using the address book in ScanRouter V2/Professional. You can also configure various settings using the control panel of this machine, or using a Web browser on a client computer.
-
Page 28: When Using [Send Function Permission]
What You Can Do With This Machine While Select Method screen, Delivery Server standby screen, E-mail/Send File standby screen, or Print Scan standby screen is displayed, starting the TWAIN driver from a TWAIN-compliant application on a client computer will display the TWAIN standby screen. Press [Exit] to return to the previous screen. -
Page 29: Login And Logout Screens
Guide to this Scanner Login and Logout screens If you have specified and configured your user ID and password at [Password] menu of the Web Status Monitor, the Login menu will be displayed. Depending on the system settings, the [Login] screen may be shown after you select [Send Scan] or [Print Scan] on the Select Method screen. - Page 30 What You Can Do With This Machine...
-
Page 31: Setting Up The Scanner
2. Setting Up the Scanner This section explains how to setup the scanner to get it ready for use, and how to make necessary connections. Checking the Scanner Location Before setting up the scanner, take a few minutes to check the location where you are going to install the scanner. - Page 32 Setting Up the Scanner 140 mm (5.5”) or more 50 mm (1.96”) or more 190 mm (7.48”) or more 378 mm (14.88”) or more ❖ ❖ ❖ ❖ Installation environment Important ❒ Do not set up the scanner in any of the following types of locations. Doing so creates the risk of malfunction of the scanner.
-
Page 33: Connecting The Keyboard
Connecting the Keyboard Connecting the Keyboard C C C C Use the bundled USB keyboard to en- Connect the USB keyboard cable ter configuration of User Authenti- to one of the USB ports. c a t e , t o m a k e s e a r c h f o r t h e destinations of E-mails at Send Scan, and to enter directly the E-mail ad- dresses and subjects. -
Page 34: Connecting To A Local Printer
Setting Up the Scanner Connecting to a Local Printer When you wish to use a local printer Important at Print Scan, USB connect this ma- ❒ Only one printer is available for chine with the printer. This section printing at Print Scan. If you explains how to connect a local print- have USB connected with multi- er with this machine. -
Page 35: Connecting To A Computer Via Usb Cable
Connecting to a Computer via USB Cable Connecting to a Computer via USB Cable This section explains how to connect an off-line computer to this machine. Important ❒ Prepare a marketed USB2.0 com- pliant cable before connection pro- cedures. ❒ Before connection, install a TWAIN driver on the computer. -
Page 36: Connecting To A Network
Setting Up the Scanner Connecting to a Network This section explains how to connect this machine to a network. Important ❒ Use a 100BASE-TX (category 5) or 10BASE-T network cable when you connect this machine to a net- work. A A A A Insert the network cable’s end to the network interface connector of this machine. -
Page 37: Attaching The Card Slot Cover
Attaching the Card Slot Cover Attaching the Card Slot Cover A A A A C C C C Reeve the USB and network ca- Insert the prongs to the prong bles through the slits of the card holes, and then push both sides of slot cover. -
Page 38: Connecting To A Power Source
Setting Up the Scanner Connecting to a Power Source B B B B This section explains how to connect Confirm that the lock switch lo- this machine to a power source, using cated at the right side of the ma- the bundled AC power cord. -
Page 39: Turning On The Power
Turning On the Power Turning On the Power A A A A Make sure the power cord is firm- ly plugged into the wall outlet. B B B B Open the switch cover and turn on the power switch. AFJ057S - Before turning off the power Before you turn off the power of this machine, make sure that a standby... - Page 40 Setting Up the Scanner...
-
Page 41: Outline To Use Scan To E-Mail
3. Configuring the Scanner Settings Outline to Use Scan to E-mail The following overview diagram shows the preparation steps for sending scan files as e-mail attachments. Note that the underlined steps are essential. Reference There are three types of setup items: 1) items that you can configure settings using the control panel of this machine, 2) items that you can configure set- tings using a Web browser on a client computer, 3) items that you can config- ure settings using both of the above. -
Page 42: Outline To Use Scan To Folder
Configuring the Scanner Settings Outline to Use Scan to Folder The following overview diagram shows the preparation steps for sending scan files to shared folders of Windows using SMB protocol. Note that the underlined steps are essential. Reference There are three types of setup items: 1) items that you can configure settings using the control panel of this machine, 2) items that you can configure set- tings using a Web browser on a client computer, 3) items that you can config- ure settings using both of the above. - Page 43 Outline to Use Scan to Folder Reference For configuration items, see p.41 “Initial Scanner Setup” and for operation of configuration, see p.143 “Sending Scan File by Scan to Folder”.
-
Page 44: Outline To Use Scan To Ftp
Configuring the Scanner Settings Outline to Use Scan to FTP The following overview diagram shows the preparation steps for sending scan files to folders on an FTP server. Note that the underlined steps are essential. Reference There are three types of setup items: 1) items that you can configure settings using the control panel of this machine, 2) items that you can configure set- tings using a Web browser on a client computer, 3) items that you can config- ure settings using both of the above. -
Page 45: Outline To Use Scan To Print
Outline to Use Scan to Print Outline to Use Scan to Print The following overview diagram shows the preparation steps for printing scan data by Print Scan. Note that the underlined steps are essential. Reference There are three types of setup items: 1) items that you can configure settings using the control panel of this machine, 2) items that you can configure set- tings using a Web browser on a client computer, 3) items that you can config- ure settings using both of the above. -
Page 46: Outline To Use The Network Delivery
Configuring the Scanner Settings Outline to Use the Network Delivery The following overview diagram shows the preparation steps to use this ma- chine as a network delivery scanner, which function is enabled using ScanRout- er V2/Professional. Note that the underlined steps are essential. Reference There are three types of setup items: 1) items that you can configure settings using the control panel of this machine, 2) items that you can configure set-... - Page 47 Outline to Use the Network Delivery See the manuals for ScanRouter Register this machine using ScanRouter V2/Professional or ScanRouter V2/Professional V2/Professional Help. Enter the IP address directly using [Set I/O Device]. Reference For configuration items, see p.41 “Initial Scanner Setup” and for operation of configuration, see p.171 “Sending Scan Files Using Delivery Server”.
-
Page 48: Outline To Use As A Twain Scanner
Configuring the Scanner Settings Outline to Use As a TWAIN Scanner To Use as a Network TWAIN Scanner The following overview diagram shows the preparation steps for using this ma- chine as a network TWAIN scanner. Configure [1.System Settings] on this machine See p.51 “System Settings”... -
Page 49: Initial Scanner Setup
Initial Scanner Setup Initial Scanner Setup The table on the next page shows all the setup items and their factory default val- ues. The table also includes information about for which of the functions each of the setup items is used (see the columns under “Purpose”), and the available method for configuration (see the columns under “Method”). - Page 50 Configuring the Scanner Settings ❖ ❖ ❖ ❖ The Method Row Under “Method” in the table on the next page, there is a column for each of the setup method listed below. Column name: Means if: Scanner Each of the setup items to the left can be configured using the control panel of this machine.
-
Page 51: Function Table
Initial Scanner Setup Function Table Basic Settings Purpose Method Setup Item Default b b b b b × Device Name RNP****** × Comment (null) × URL Name × /cgibin/url.cgi/ × Help URL /cgibin/help.cgi b b b b b b b ×... - Page 52 Configuring the Scanner Settings Purpose Method Setup Item Default b × Community Name 1 to public b × Access Type 1 to 10 read-only b × Protocol 1 to 10 TCP/IP × Manager IP Address 0.0.0.0 × Current Password (null) ×...
- Page 53 Initial Scanner Setup Purpose Method Setup Item Default b b b b b b b Function Priority Send b b b b b b b TWAIN Standby Time b b b b b Auto Reset Timer b b b b Compression(Binary) b b b b Compression...
- Page 54 Configuring the Scanner Settings Purpose Method Setup Item Default b b b b × Authentication at Sending File × Authentication at Printing b b b b b × Authentication Method LDAP Authentication b b b b b × Domain Name (Null) b b b b b ×...
-
Page 55: Send File Settings
Initial Scanner Setup Send File Settings Purpose Method Setup Item Default × Interval Time for Resending × No. of Times to Resend × Job Delivery Data Max. Setting × File Name + Time × Create Device Name Folder × Program No. (Automatically as- signed) ×... -
Page 56: E-Mail Settings
Configuring the Scanner Settings Purpose Method Setup Item Default × No.1 to 30 (null) Available up to 1000 registrations. Available up to 30 registrations. E-mail Settings Purpose Method Setup Item Factory Default Value × POP Server Address (null) × POP Server Port No. ×... - Page 57 Initial Scanner Setup Purpose Method Setup Item Factory Default Value × Program No. (Automatically assigned) × Name (null) × Key Display (null) × Assign Title ABC/1/On × E-mail Address (null) × Register as Sender × Sender's Password × Protected Password (null) ×...
-
Page 58: Delivery Settings
Configuring the Scanner Settings Delivery Settings Purpose Method Setup Item Default Delivery Server IP 0.0.0.0 Address × Interval Time for Redelivery × No. of Times to Redeliver Off Job Delivery Data Max. Setting Automatically configured when you register this machine on ScanRouter V2/Profes- sional. -
Page 59: System Settings
System Settings System Settings This section describes the setup items contained in the System Settings menu. They include an item used to select the initial screen of the machine, and basic setup items for operating this machine on a network, such as an IP address set- ting. - Page 60 Configuring the Scanner Settings • Print Scan When you select this option, the Print Scan Ready screen is displayed as the initial screen. ❖ ❖ ❖ ❖ IP Address When a fixed IP address is assigned to this machine on the network you use, enter the IP address to this item in the form of xxx.xxx.xxx.xxx (xxx:0 through 255).
- Page 61 System Settings Note ❒ When you want to set no limitation of access to this machine, leave these settings as their default values. ❒ When an IP address of a client computer falls within the logical products of the access control entry and the access mask entry, the client computer is granted its access to this machine.
- Page 62 Configuring the Scanner Settings ❖ ❖ ❖ ❖ DNS Server 2 IP Address (WSM) When a secondary DNS server runs on the network you use this machine, specify the IP address of the secondary DNS server in the form of xxx.xxx.xxx.xxx (xxx:0 through 255).
-
Page 63: Configuring [System Settings]
System Settings ❖ ❖ ❖ ❖ Date/Time(Yr/Month/Day/Hr/Min/Sec) This item lets you adjust the machine's date and time. The current date and time affects all the related operations of this machine, such as a time stamp inserted in each of e-mail messages sent from this machine. Also, you can as- sign a poling interval of the time server. - Page 64 Configuring the Scanner Settings D D D D C Specify the IP address of this Select the option you want among machine. “Select: Send/Print”, “Send Scan” and “Print Scan”. • Input the IP address using the number keys. • The option that is currently se- •...
- Page 65 System Settings Note To configure network boot ❒ When you want to set no lim- settings when you use this itation of access to this ma- machine on a DHCP environment chine, it is not necessary to A Press [↓ ↓ ↓ ↓ Next] three times at 2. IP specify “5.
- Page 66 Configuring the Scanner Settings C Press [Settings]. Note ❒ This item is automatically con- figured when you register this machine to a delivery server op- erated by ScanRouter V2/Pro- fessional. Press [OK] to confirm The setting screen for “7. Net- this setting after you have regis- work Boot”...
- Page 67 System Settings K K K K Press [↓ ↓ ↓ ↓ Next]. To specify the LDAP Advanced Search Conditions “13. Destination Search Priority” appears. A Press [Settings]. To specify the LDAP Search Object A Press [Settings]. B Press [↓ ↓ ↓ ↓ Next]. C Press [Settings] while “2.
- Page 68 Configuring the Scanner Settings L L L L Press [↓ ↓ ↓ ↓ Next]. To specify the Address Book Search Object “14. Send Function Permission” appears. A Press [Settings]. To specify the Send Function Permission A Press [Settings]. B Press [↓ ↓ ↓ ↓ Next] twice. C Press [Settings] while “3.
- Page 69 System Settings M M M M Press [↓ ↓ ↓ ↓ Next]. Note ❒ Press [Cancel] twice if you do “15. Date/Time (Yr/Month/Day/ not wish to change. You will Hr/Min/Sec)” appears. return to the “15. Date/Time (Yr/Month/Day/Hr/Min/S To set the date and time ec)”.
- Page 70 Configuring the Scanner Settings R R R R Press [Exit]. This returns to the System Settings menu. S S S S Press [Exit]. This exits the Scanner Features menu, and returns to the standby screen that is displayed when you turn the power on.
-
Page 71: Sendscan Settings
SendScan Settings SendScan Settings This section describes the setup items contained in the SendScan Settings, and shows you how to configure the settings in the SendScan Settings menu (which includes main setup items in the SendScan Settings) using the control panel of this machine. - Page 72 Configuring the Scanner Settings ❖ ❖ ❖ ❖ TWAIN Standby Time This item lets you specify the time after which this machine stands by for a network TWAIN command (or a [Enter Custom Send File] command), from the last operation of the control panel of this machine. When you set this item to “Off”, this machine always stands by for these commands.
- Page 73 SendScan Settings ❖ ❖ ❖ ❖ Compression (Gray Scale/Full Color) This item determines whether to compress scan data, created under the fol- lowing conditions. • Scan is performed for sending the scan data using Delivery Server function or Send Mail/Send File function. •...
- Page 74 Configuring the Scanner Settings ❖ ❖ ❖ ❖ Auto Update Destination List • When “Delivery Server/TWAIN” is selected under [6.Select Method] Select whether to update the contents of the Address Book automatically with the latest data from the delivery server. When “On” is selected, the Address Book is updated each time you press [Dest.] or [Sender] on this ma- chine.
- Page 75 SendScan Settings • Show Options after Each Scan Job The screen for selecting the next operation appears on the display panel of this machine. When scanning is performed from the ADF The following screen appears when all the originals in the ADF are scanned.
- Page 76 Configuring the Scanner Settings • Clear Settings after Each Scan Job The initial screen displayed immediately after power-on appears on the display panel of this machine, and files are sent. Note ❒ When you perform the [Enter Custom Send File] operation from the Web Status Monitor, the [Enter Custom Send File] settings are retained after files are sent.
-
Page 77: Configuring [Send Scan Settings]
SendScan Settings ❖ ❖ ❖ ❖ Registration This item allows you to register the “Vertical” and/or “Horizontal” positions of the original at values you have specified; among “1. Exposure Glass”, “2. ADF Front Side” and “3. ADF Back Side”. ❖ ❖ ❖ ❖ Select Title (WSM) This item lets you select the titles that are displayed when you press the { { { { ./*} } } } (Title) key. - Page 78 Configuring the Scanner Settings C C C C H H H H Press [Settings] Select the option you want for “2. TWAIN Standby Time”. If you select “On”, specify the time after which this machine stands by for a network TWAIN command (or a [Enter Custom Send File] com- The setting screen for “1.
- Page 79 SendScan Settings L L L L Important By pressing [Next] to display “4. ❒ Never turn off the power of this Compression (Black and White)” through “12. ADF Thin Paper” as machine before the standby the setup item, select options for screen is displayed.
-
Page 80: Print Scan Settings
Configuring the Scanner Settings Print Scan Settings This section describes all the setup items included in Print Scan Settings menu, and shows you how to configure these settings using the control panel of this machine. Reference The System Settings menus are available by pressing the { { { { User Tools} } } } key. For configuration using the System Settings menus, see p.55 “Configuring [System Settings]”. -
Page 81: Configuring [Print Scan Settings]
Print Scan Settings C C C C Press [Settings]. Configuring [Print Scan Settings] Follow the steps below to configure Print Scan Settings using the control The setting screen for “1. Max. panel of this machine. Number of Copies” appears. Note ❒... - Page 82 Configuring the Scanner Settings H H H H Important Display the option you wish to se- ❒ Never turn off the power of this lect. machine before the standby screen is displayed. Doing so can discard all the settings you have configured, and return this machine to its factory default •...
-
Page 83: Scan Settings
Scan Settings Scan Settings You can configure and register up to four sets of settings for scanning, when per- forming a Send Scan (e-mail, Send File (SMB/FTP) or Delivery Server) opera- tion. Memory areas named “Default”, “User 1”, “User 2”, and “User 3” are available for registering Scan Settings. - Page 84 Configuring the Scanner Settings ❖ ❖ ❖ ❖ Resolution This item lets you select the scan resolution. You can select from 100dpi, 200dpi, 300dpi, 400dpi, 600dpi and Custom Resolution. Note ❒ The higher the resolution, the smaller the number of original pages that can be scanned at a time.
- Page 85 Scan Settings The following illustrates the reference point and actual scanning area in ac- cordance with the place where you set the originals. When the original is set on the Exposure glass ADG012S When you place an original on the Exposure glass, the available area for scanning is 215mm (8.5”) (vertical) and 297mm (11.7”) (horizontal) from the reference point, regardless of the setting in [Scan Type].
- Page 86 Configuring the Scanner Settings Note ❒ The inside line of the original table’s guide on the side of the control panel exactly passes the vertical reference point for the ADF scanning, when the guide is fully expanded. ❖ ❖ ❖ ❖ Image Density This item lets you select the scan density in one of the seven steps.
- Page 87 Scan Settings Note ❒ When a send file operation is performed using the delivery server func- tion, the file type is determined in accordance with the delivery server set- ting. • Single Page Each page is saved as a single, separate file. When an original of two or more pages is scanned, the same number of files as the number of original pages is created.
-
Page 88: Registering [Scan Settings]
Configuring the Scanner Settings C C C C Press the { { { { 1} } } } key. Registering [Scan Settings] Follow the steps below to configure and register Scan Settings using the control panel of this machine. The Default Scan Settings menu is Note displayed, and “1. - Page 89 Scan Settings F F F F Note While the option you want to se- ❒ Pressing [Cancel] discards the lect is displayed, press [OK]. selected option, and returns This saves the setting you have se- to the Default Scan Settings lected, and returns to the Default menu.
- Page 90 Configuring the Scanner Settings K K K K Press [Settings]. To set a custom area A While the option “Custom Area Setting” is displayed, press [Settings]. The setting screen for “3. Scan Size” appears. L L L L Select the Scan size. The setting screen for “Custom Area Setting”...
- Page 91 Scan Settings N N N N S S S S Press [Settings]. While the Scan Settings menu is displayed, press the { { { { 2} } } } , { { { { 3} } } } or { { { { 4} } } } key to display a correspond- ing User Scan Settings menu.
-
Page 92: Print Settings
Configuring the Scanner Settings Print Settings You can configure and register up to four sets of settings for printing scan data. Memory areas named “Default”, “User 1”, “User 2”, and “User 3” are available for registering Print Settings. You can easily recall the settings you have regis- tered to “User 1”, “User 2”, or “User 3”, which means you don't have to config- ure detailed settings each time you print scan data. - Page 93 Print Settings ❖ ❖ ❖ ❖ Reduce/Enlarge This item lets you print scan data with the image reduced or enlarged using a preset ratio, or even changing the reproduction ratio in 1% increments. • 25% • 50% • 65% • 73% x14 →...
-
Page 94: Registering [Print Settings]
Configuring the Scanner Settings C C C C Press the { { { { 1} } } } key. Registering [Print Settings] Follow the steps below to configure and register Print Settings using the control panel of this machine. The Default Print Settings menu is Note displayed, and “1. - Page 95 Print Settings H H H H Press [Settings]. To set a custom size A While the option “Custom Size” is displayed, press [Set- ting]. The setting screen for “2. Original Size” appears. I I I I Select the original size. The setting screen for “Custom Size”...
- Page 96 Configuring the Scanner Settings K K K K P P P P Press [↓ ↓ ↓ ↓ Next], and then select an When you are finished, press [Ex- option for “4. Reduce/Enlarge” in it]. the same way that you have done This returns to the Scanner Fea- H H H H I I I I...
-
Page 97: Configuring Settings Using A Web Browser
Configuring Settings Using a Web Browser Configuring Settings Using a Web Browser This section describes the procedure to make various settings using a web browser on a client computer. Important ❒ Before making any settings, connect this machine to the network and specify its IP address. -
Page 98: To Access This Machine From A Web Browser
Configuring the Scanner Settings To access this machine from a Web browser A A A A Start up a web browser on a client computer. B B B B Input “http://xxx.xxx.xxx.xxx/” (“xxx.xxx.xxx.xxx” is the IP address for this machine) in the web browser’s address bar, and then press the { { { { Enter} } } } key. The top page of the “Web Status Monitor”... - Page 99 Configuring Settings Using a Web Browser AFJ060S Header Area Scroll bar for the Sub-Menu Area Contains links to the top page and the on- Use this scroll bar to scroll through the line help of the Web Status Monitor. sub-menu area, when the lower or upper part of its content is out of sight.
-
Page 100: Example Procedures Using [Configuration] Main Menu
Configuring the Scanner Settings Important ❒ It may not be possible to return to the previous page using the browser’s [Back] button. In such a case, click the [Update] button on the browser. If a main menu or a sub-menu is clicked again, the information you have entered will be cleared. -
Page 101: Configuring [E-Mail Address]
Configuring Settings Using a Web Browser Note Configuring [E-mail Address] ❒ Be sure to click [OK] to save A A A A the settings you have made Click [Configuration] on the main on the currently displayed menu. screen. Once you move to an- The password input dialog box ap- other page without clicking pears. - Page 102 Configuring the Scanner Settings Note To export the address data to a ❒ Be sure to click [OK] to save CSV file the settings you have made A Click [Export]. on the currently displayed screen. Once you move to an- The [Export Data] page appears.
- Page 103 Configuring Settings Using a Web Browser Note Note ❒ When the [Close this dialog ❒ It is good idea to start with the when download completes] CSV file that is exported using check box is not selected on the Web Status Monitor. You the dialog box that appears can use the file exported using when you click [Save], the di-...
-
Page 104: Information To Register From Web Status Monitor
Configuring the Scanner Settings Note Note ❒ To return to the E-mail Ad- ❒ If “On” is selected for [Auto Up- dress screen, click [Back] date Destination List], the destina- again, or click [E-mail Address] t i o n l i s t i s a u t o m a t i c a l l y in the sub-menu area. -
Page 105: Information To Register In [User Authentication Management]
Configuring Settings Using a Web Browser ❖ ❖ ❖ ❖ FTP Only (File Name Unchangeable) you can send in FTP protocol with the file name fixed setting Note ❒ You can view all the information displayed, regardless of the screen size, but the character line may be returned. -
Page 106: Information To Register In [Time Server]
Configuring the Scanner Settings ❖ ❖ ❖ ❖ Search Base This item is to configure the search base at time of [LDAP Authentication]. You can enter the LDAP Directory for the LDAP authentication. Note ❒ Be sure to reboot the system after this configuration. Information to Register in [Time Server] It can assign a poling interval of the time server, by using: [Configuration]→[Basic Settings]→[Time Server]... - Page 107 Configuring Settings Using a Web Browser ❖ ❖ ❖ ❖ Key Display Enter the name to appear on the control panel of this machine, using up to 16 characters. The first 16 characters of the send file path name are automatically used if you skip registering a key display name.
- Page 108 Configuring the Scanner Settings • Login Password and Confirm Login Password Enter the password for the user name displayed in the [Login User Name] box. Each password character appears as “*”. Note ❒ When accessing a shared folder that is password protected under Win- dows 95/98/98 SE/Me, enter the password.
-
Page 109: Information To Register In [Ftp Server]
Configuring Settings Using a Web Browser Information to register in [FTP Server] You can register an FTP server address for sending scanned data to a shared folder on the FTP server. Up to 1000 FTP server addresses can be registered. Reference See the Web Status Monitor Help for information about how to register an FTP Server address. - Page 110 Configuring the Scanner Settings ❖ ❖ ❖ ❖ FTP Server • Server Name/Path Name Enter the path to the FTP server shared folder, in the format of “server name\folder name” or “IP address\folder name”. Note ❒ Be sure to specify folders that are on the root directory of an FTP server. You cannot specify any sub-directories for “folder name”...
-
Page 111: Information To Register In [E-Mail Address]
Configuring Settings Using a Web Browser Information to register in [E-mail Address] You can register destination addresses to which you use for sending scanned data as an e-mail attachment. Up to 2000 e-mail addresses can be registered. ❖ ❖ ❖ ❖ Program No. Enter a number for the e-mail address between 00001 and 50000. -
Page 112: Information To Register In [Search Destinations]
Configuring the Scanner Settings ❖ ❖ ❖ ❖ E-mail • E-mail Address Enter the e-mail address used as the destination. • Register as Sender Select whether to use the e-mail address not only as the destination but as the sender also. •... -
Page 113: Information To Register In [Printer]
Configuring Settings Using a Web Browser ❖ ❖ ❖ ❖ Search Object It configures the search target at time of LDAP search. You can select one by pulldown among “E-mail Address”, “Name” or “Company Name”. ❖ ❖ ❖ ❖ Advanced Search Conditions It configures the search conditions at time of LDAP search. - Page 114 Configuring the Scanner Settings ❖ ❖ ❖ ❖ Assign Title You can assign a printer under the following three types of titles for recalling the printer's key display name quickly on the control panel of this machine. • Alphabet [ABC], [DEF], [GHI], [JKL], [MNO], [PQRS], [TUV], [WXYZ] •...
- Page 115 Configuring Settings Using a Web Browser ❖ ❖ ❖ ❖ Default Printer Click [Yes] to set the printer as the default printer. Only one printer can be set as the default printer at a time. Note ❒ When only one printer is registered, that printer is set as the default auto- matically.
-
Page 116: Recalling The Settings
Configuring the Scanner Settings Note Recalling the Settings ❒ You cannot specify the items to be backed up or restored separately. You can recall the current settings of ❒ When you use a backup file to this machine for confirmation, by us- copy the settings to another unit, it ing the Web Status Monitor. -
Page 117: To Restore Settings From A Backup File
Configuring Settings Using a Web Browser F F F F ❖ ❖ ❖ ❖ Send File Path When everything is the way you Enter the shared folder path for want, click [Backup]. storing the backup file. Enter t h e p a t h i n t h e f o r m a t o f Note “\\host name\folder name”... - Page 118 Configuring the Scanner Settings E E E E ❖ ❖ ❖ ❖ Backup File Name Enter each of the items on the Enter the backup file name from screen. which you want to restore the ❖ ❖ ❖ ❖ Send File Path settings.
-
Page 119: Installing Software
Installing Software Installing Software To use this machine as a TWAIN scanner, it is necessary that the TWAIN driver is installed on the computer from which you use this machine. To use the machine as a network delivery scanner, it is essential to install option- al ScanRouter V2/Professional on the delivery server. -
Page 120: Software For Using A Twain Scanner
Configuring the Scanner Settings Software for Using a TWAIN Scanner To use the machine as a TWAIN scanner, it is essential to install the TWAIN driver. If you do not have applications that work with TWAIN, it is necessary to also install DeskTopBinder Lite. -
Page 121: Installing Twain Driver
In this case, restart the client computer. ❒ After the installation is com- plete, the “IS200e (Network) TWAIN Driver Ver. 4” and “IS200e (USB) TWAIN Driver Ver. 4” folders are in the “Pro- gram”... -
Page 122: Desktopbinder Lite
Configuring the Scanner Settings DeskTopBinder Lite Use Auto Run for installation. System requirements Limitation ❒ When installing the software in Windows NT Server or Windows 2000 Serv- er, a stand-alone server must be used. Do not use the primary domain con- troller or backup domain controller. -
Page 123: Installing Desktopbinder Lite
Installing Software C C C C Click [DeskTopBinder Lite]. The In- Installing DeskTopBinder Lite staller of the DeskTopBinder Lite A A A A starts. Follow the instructions on Start Windows, and then insert the screen. the supplied CD-ROM labeled “Scanner Driver(s), Utilities and Reference Operating Instructions”... -
Page 124: Installing Smartdevicemonitor
Configuring the Scanner Settings Installing SmartDeviceMonitor Use Auto Run for installation. A A A A Start Windows, and then insert the supplied CD-ROM labeled “Scanner Driver(s), Utilities and Operating Instructions” into the CD-ROM drive of the computer. The CD-ROM Launcher screen ap- pears. -
Page 125: Setting Originals
4. Setting Originals This chapter describes how to set an original to be scanned with this machine. It is possible to set an original on the exposure glass or the ADF. To scan both sides of a page and several pages successively, the ADF is convenient. Sizes and Weights of recommended Originals Where orig-... - Page 126 Setting Originals ❖ ❖ ❖ ❖ Originals that cannot be set in the ADF Placing the following types of originals in the ADF can cause paper misfeeds or result in damage to the originals. Place these originals on the exposure glass instead.
-
Page 127: Original Orientation
Original Orientation Original Orientation The original can be set either in sideway or lengthway orientation, but to assure- that the top/bottom orientation of the original comes out correctly when thes- canned file is displayed on a computer, the correct placement must be selected. Note ❒... -
Page 128: When Using As Twain Scanner
Setting Originals ❖ ❖ ❖ ❖ Duplex Originals Select “2 Sided:TtoT”or “2 Sided:TtoB” of the in the [Settings]→Set- tings for each Users→[Original Settings] for the send scan function in with one sided originals. Settings 2 Sided T to T 2 Sided T to B When Using as TWAIN Scanner Make the settings with [Orientation:] and [Orig.Orientn.:] of the TWAIN Driver. - Page 129 Original Orientation ❖ ❖ ❖ ❖ Simplex originals in A5, 8 ” × × × × 5 ” (the originals with 215mm (8 ”) or less length) Exposure Glass Settings Settings ❖ ❖ ❖ ❖ Duplex originals Set with [Scan Settings:] in the TWAIN Driver. Settings 2 Sided(Top to Top) 2 Sided(Top to Bottom)
-
Page 130: Placing The Original On The Exposure Glass
Setting Originals When the original layout is por- Placing the Original on the trait: Exposure Glass Important ❒ Be careful not to pinch your fingers when closing the ADF. ❒ To activate the auto detection of an original, place the original after this machine starts up. -
Page 131: Placing The Originals In The Adf
Original Orientation B B B B Adjust the side guides to the size Placing the Originals in the of your originals. The ADF allows you to place multiple originals at one time. Originals placed in the ADF can be scanned on one side or both sides. - Page 132 Setting Originals...
-
Page 133: Sending Scan File By E-Mail
5. Sending Scan File by E-mail This chapter explains how to send a scan file as an e-mail attachment. Procedure Breakdown The following overview diagram shows the flow of the steps for sending scan files as E-mail attachments. Note that the underlined steps are essential. ⇒... -
Page 134: E-Mail Content
Sending Scan File by E-mail E-mail Content Sender • If you specify a sender of an e-mail using the [Sender] list on this machine, the user you have specified becomes the sender. Note ❒ It is necessary to set [Register as Sender] to “On” to have a registered user displayed on this machine’s [Sender] list. -
Page 135: Related Information
Procedure Breakdown Related information The following information is automatically generated and used as body text of your E-mail message. Note ❒ You cannot change the auto-generated body text. ❖ ❖ ❖ ❖ First line The following sentence is inserted to the first line of an E-mail body. “This E-mail was sent from <device name>... -
Page 136: Before Sending Scan Data
Sending Scan File by E-mail Before Sending Scan Data Reference See p.117 “Setting Originals” for information about how to place the originals in the ADF (Auto Document Feeder) or on the exposure glass, and about available paper size and weight. Original Location When you perform a Send Scan (E-mail, Send File (SMB/FTP) or Delivery Serv- er) operation, it is not necessary to select the location (ADF or exposure glass) for... - Page 137 Before Sending Scan Data • When the message “ ” is displayed on the display Connecting with PC... panel, the machine is used from a client computer, and scanning is in progress. Wait until the job now in progress ends. •...
-
Page 138: Setting Destinations And A Subject
Sending Scan File by E-mail Setting Destinations and a Subject C C C C You can specify up to 100 destina- Press [Search Dest.], [Input], [List] or tions at a time, by selecting from the the { { { { ./*} } } } (Title) key according to registered destinations on this ma- your operation while [To:] is high- chine. - Page 139 Setting Destinations and a Subject Note Note ❒ To select another destination, ❒ Press [DestList] to confirm the highlight the destination you destinations which are al- want to select with the { { { { 1 1 1 1 } } } } ready selected.
- Page 140 Sending Scan File by E-mail Note Note ❒ To select another destination, ❒ Press [DestList] to confirm the highlight the destination you destinations which are al- want to select with the { { { { 1 1 1 1 } } } } ready selected.
- Page 141 Setting Destinations and a Subject H Press [OK]. Note To search for another destina- ❒ If any inaccurate character is tion, repeat from step B. contained in an E-mail ad- I Press [Exit]. d r e s s y ou h a v e e n t e r e d , “Contains characters that cannot be used.”...
-
Page 142: Setting Cc Destinations
Sending Scan File by E-mail D D D D Note When you are finished, press [Ex- ❒ You can select the title under it]. which each of the registered This returns to the screen that was destinations is assigned in displayed in step [Configuration] →... -
Page 143: Setting A Subject
Setting Destinations and a Subject Note Note ❒ When no subject is necessary, ❒ Selecting another subject au- p r e s s [ E x i t ] h e r e . T h e E - tomatically deselects the sub- mail/Send File standby screen ject currently selected (so the is displayed. -
Page 144: Making Scan Settings
Sending Scan File by E-mail Making Scan Settings Follow the steps below to configure Note scan settings before you perform a ❒ Press [Exit] if you want to use Send Scan operation. If you skip the the settings you have registered following steps, scan is performed us- to [Default]. -
Page 145: Confirming The Scan Settings
Making Scan Settings B Use [↓ ↓ ↓ ↓ Next] or [↑ ↑ ↑ ↑ Prev.] to scroll F Press [OK]. through the pages, use the { { { { 1 1 1 1 } } } } This returns to the E-mail/Send or { { { { 0 0 0 0 } } } } key to highlight the set- File standby screen, and the cur- up item you want to change,... - Page 146 Sending Scan File by E-mail D D D D When you are finished, press [Ex- it]. E E E E Press [Cancel] or [OK]. Note ❒ If you want to apply the scan settings you selected in step press [OK]. If you want to exit the status screen without chang- ing anything, press [Cancel].
-
Page 147: Selecting A Sender
Selecting a Sender Selecting a Sender ❒ When you select a user whose You can select a sender of an e-mail using the [Sender] list on this machine. [Sender's Password] setting (in- cluded under [Configuration] → The [Sender] list displays the regis- [E-mail Settings] →... -
Page 148: Performing Scan Operation
Sending Scan File by E-mail Performing Scan Operation • Press [Add] to continue scan- Starting a Scan Operation ning to add scanned data to the current image file. • Press [New Job] to finish the To start with originals in the ADF current scanning job and send the scanned data. -
Page 149: To Start With An Original On The Exposure Glass
Performing Scan Operation D D D D C C C C Repeat step as necessary. To start with an original on the exposure E E E E glass Press [Finish] when all the origi- nals are scanned. A A A A Confirm that the E-mail Ready Note screen is displayed. -
Page 150: Checking Transmission Results
Sending Scan File by E-mail ❒ If an e-mail or a file could not be Checking Transmission sent for any reason, [Not Sent] appears in the [Status] column. Results ❒ The [Send Type] column indi- Follow the steps below to check trans- cates the type of transmission: mission results using the WebStatus- [E-mail], [SMB], [FTP], [Delivery]... -
Page 151: Sending Scan File By Scan To Folder
6. Sending Scan File by Scan to Folder This chapter explains how to send a scan file to a Windows shared folder. In this chapter, the following two types of Scan to Folder procedures are explained sep- arately: • Procedures to send a scanned file to a registered shared folder. •... -
Page 152: Sending A Scanned File To A Registered Shared Folder
Sending Scan File by Scan to Folder Sending a Scanned File to a Registered Shared Folder By using the control panel of this machine, you can send a scanned file to a Win- dows shared folder that is registered to this machine. Procedure Breakdown The following overview diagram shows the flow of the steps for sending a scanned file to a Windows shared folder that is registered to this machine. -
Page 153: Selecting A Shared Folder
Sending a Scanned File to a Registered Shared Folder D D D D Use [↓ ↓ ↓ ↓ Next] and [↑ ↑ ↑ ↑ Prev.] to scroll Selecting a Shared Folder through the pages, and display the shared folder name you want You can select a single shared folder to select. -
Page 154: Selecting A File Name
Sending Scan File by Scan to Folder Note Note ❒ You can select the title under ❒ Enter the four- through eight- which each of the registered digit number that is specified in [Configuration] → [File Send Set- destinations is assigned in [Configuration] →... - Page 155 Sending a Scanned File to a Registered Shared Folder B B B B Use the { { { { 1 1 1 1 } } } } and { { { { 0 0 0 0 } } } } keys to highlight [File Name], and then press [List].
-
Page 156: Using [Enter Custom Send File] To Send A Scanned File To An Unregistered Shared Folder
Sending Scan File by Scan to Folder Using [Enter Custom Send File] to Send a Scanned File to an Unregistered Shared Folder By using the [Enter Custom Send File] function on the Web Status Monitor, you can send a scanned file to any of Windows shared folders that you have an access right. -
Page 157: Using [Enter Custom Send File] Function
Using [Enter Custom Send File] to Send a Scanned File to an Unregistered Shared Folder ❖ ❖ ❖ ❖ Send File Path Using [Enter Custom Send Enter the path to the shared folder where you are sending File] Function the file, in the format of “\\host name\folder name”... - Page 158 Sending Scan File by Scan to Folder ❖ ❖ ❖ ❖ [Test] Reference Click to check whether connec- When you place the original on tion to the specified shared fold- the exposure glass, see p.141 er is enabled wh en data is “To start with an original on the entered in the [Send File Path], exposure glass”.
-
Page 159: Scanned Image Files Sent To Shared Folders
Scanned Image Files Sent to Shared Folders Scanned Image Files Sent to Shared Folders This section describes how the file name and the file location of a scanned file are determined when you perform a Scan to Folder operation. File Locations A scanned file created by a Scan to Folder operation is sent to a shared folder that you have specified in [Send File Path] of [Configuration], and is saved in a sub-fold- er inside of the specified folder. -
Page 160: File Names
Sending Scan File by Scan to Folder File Names Files created by a Scan to Folder operation are named as described below in ac- cordance with the file name you specified. In case you did not specify a file name, the default file name “DOC” applies. Note ❒... - Page 161 Scanned Image Files Sent to Shared Folders ❖ ❖ ❖ ❖ File names without time When [File Name + Time] (included under [Configuration] → [File Send Settings] → [Send File] on the Web Status Monitor) is set to “Off”, file names are gener- ated in the following manner.
- Page 162 Sending Scan File by Scan to Folder...
-
Page 163: Procedure Breakdown
7. Sending Scan File by Scan to FTP This chapter explains procedures to send a scanned file to an FTP server. Procedure Breakdown The following overview diagram shows the flow of the steps for sending a scanned file to an FTP server that is registered to this machine. Note that the un- derlined steps are essential. -
Page 164: Sending Scan File By Scan To Ftp
Sending Scan File by Scan to FTP Selecting an FTP Server D D D D You can select a single FTP server as a Use [↓ ↓ ↓ ↓ Next] and [↑ ↑ ↑ ↑ Prev.] to scroll destination to which you send a through the pages, and display scanned file. - Page 165 Selecting an FTP Server Note To recall all available ❒ Enter the four- through eight- destinations digit number that is specified in [Configuration] → [File Send Set- A Press the { { { { ./*} } } } (Title) key. tings] →...
-
Page 166: Scanned Image Files Sent To Ftp Servers
Sending Scan File by Scan to FTP Scanned Image Files Sent to FTP Servers This section describes how the file name and the file location of a scanned file are determined when you perform a Scan to FTP operation. File Locations A scanned file created by a Scan to FTP operation is sent to a folder on the FTP server that you specified, and is saved in a sub-folder inside of the specified fold- er. - Page 167 Scanned Image Files Sent to FTP Servers • Example 3: Specified file name: (none) File format: multi-page TIFF Original type: color, full color Pages: 2, two-sided Time when scanned: 2003/9/16/13:07:21 The following file is generated: DOC030916130721(0001).PDF ❖ ❖ ❖ ❖ File names without time When [File Name + Time] (included under [Configuration] →...
- Page 168 Sending Scan File by Scan to FTP...
-
Page 169: Printing Scanned Image Files
8. Printing Scanned Image Files This chapter explains how to use “Print Scan” function, which enables you to print scan data directly by a printer. Procedure Breakdown The following overview diagram shows the flow of the steps for printing scan data using a registered printer. -
Page 170: Before Printing Scan Data
Printing Scanned Image Files Before Printing Scan Data Important ❒ You need to register the printer with WebStatusMonitor before using Print Scan function. See p.37 “Outline to Use Scan to Print” for the outline of pro- cedures to use the function. Reference See p.117 “Setting Originals”... - Page 171 Before Printing Scan Data • When the message “Connecting with PC...” is displayed on the display panel, the machine is used from a client computer, and scanning is in progress. Wait until the job now in progress ends. • When the message “Connecting with PC... Set original(s) and select the set- tings from the PC.”...
-
Page 172: Printing Scan Data
Printing Scanned Image Files Printing Scan Data Follow the steps below to print scan • Color/Black and White data using Print Scan. The default setting selected us- ing [Color:Full Color] (in [3.Print A A A A Press the { { { { 2} } } } key. Scan Settings] under the Scanner Features menu) is displayed at the left end of the third line of... -
Page 173: Specifying The Number Of Copies
Printing Scan Data The “Ready” message changes to Configuring Print Settings “Printing...”. When you perform a Print Scan oper- ation, you can change the settings ini- tially displayed on the screen (which settings are those that you have con- figured and registered to [Default] in Note [5.Print Settings] under the Scanner ❒... - Page 174 Printing Scanned Image Files Note Reference ❒ Press [Cancel] if you want to use See p.84 “Information to Reg- the settings you have registered ister in [Print Settings]” for to [Default]. details about each of the set- up items. ❒ You cannot edit and save the C Highlight the option you want settings that you have regis- to select by using the { { { { 1 1 1 1 } } } } or...
-
Page 175: Confirming The Print Settings
Printing Scan Data K Press [OK]. Note ❒ If you change the settings in [Enlarge], [Reduce] and [Create Margin], only the latest setting that you have selected within all of these setup items ap- This returns to the Print Scan plies. -
Page 176: Selecting A Printer
Printing Scanned Image Files C C C C B B B B Use [↓ ↓ ↓ ↓ Next] and [↑ ↑ ↑ ↑ Prev.] to display Display the printer you want to select by using [↓ ↓ ↓ ↓ Next] or [↑ ↑ ↑ ↑ Prev.]. the setting of the setup item you want to confirm. -
Page 177: Selecting Color/Black And White
Printing Scan Data To recall all available printers Selecting Color/Black and White A Press the { { { { ./*} } } } (Title) key. List of titles appears on the When you perform a Print Scan oper- screen. ation, you can select between “color” B Use the { { { { 1 1 1 1 } } } } or { { { { 0 0 0 0 } } } } key to scanning and “black and white”... - Page 178 Printing Scanned Image Files...
-
Page 179: Sending Scan Files Using Delivery Server
9. Sending Scan Files Using Delivery Server This chapter explains procedures to deliver a scanned file to multiple destina- tions by using a delivery server with ScanRouter V2/Professional installed. Procedure Breakdown The following overview diagram shows the flow of the steps for sending a scanned file using an address book on a delivery server. -
Page 180: Selecting Delivery Destinations
Sending Scan Files Using Delivery Server Selecting Delivery Destinations C C C C You can specify up to 100 destina- Use [Next] and [Prev.] to scroll tions at a time, by selecting from the through the pages, and display registered destinations in the address the destination you want to select. - Page 181 Selecting Delivery Destinations F F F F B Use the { { { { 1 1 1 1 } } } } or { { { { 0 0 0 0 } } } } key to When you are finished, press highlight the title you want to [OK].
- Page 182 Sending Scan Files Using Delivery Server...
-
Page 183: Using The Twain Scanner Function
10. Using the TWAIN Scanner Function This chapter describes the operations of DeskTopBinder Lite for scanning origi- nals by using this machine as a TWAIN scanner. In addition, some functions of the TWAIN driver are introduced. You can select either “USB” or “Network” on your PC, using the TWAIN driver configuration. -
Page 184: Procedure Breakdown
Using the TWAIN Scanner Function Procedure Breakdown The following overview diagram shows the flow of the steps for scanning orig- inals from a client computer using the TWAIN driver. Menu may be different depending on the application Start a TWAIN-compliant appli- you use. -
Page 185: Scanning Originals
Scanning Originals Scanning Originals This section explains how to scan Note originals using the network TWAIN ❒ The name of the scanner cur- scanner function. rently being used is shown A A A A on the title bar of the dialog Start DeskTopBinder Lite, and bo x. -
Page 186: Editing And Printing Scan Files
Using the TWAIN Scanner Function Note Note ❒ For advanced settings, click ❒ Depending on the scanning [Detail] to display the Detail resolution, the area to be window. For information scanned may be subject to re- about the Detail window, see strictions. -
Page 187: What You Can Do With The Twain Driver
What You Can Do with the TWAIN Driver What You Can Do with the TWAIN Driver The following is an introduction to the various functions of the TWAIN driver: Reference For more information about these functions or other functions, see TWAIN driver Help. - Page 188 Using the TWAIN Scanner Function...
-
Page 189: 11. Appendix
11. Appendix Troubleshooting Note When An Original Is Jammed ❒ The jammed original will move In ADF toward the direction against the direction of the knob rotation. When an original is jammed In the Rotate the knob in either direc- ADF, remove the original by the fol- tion until the original finishes its lowing procedures. -
Page 190: When Scanning Is Not Performed As Expected
Appendix When Scanning is Not Performed as Expected Condition Possible Cause and Required Action The scanned image is dirty. • Exposure glass, the ADF exposure glass, white sheet or original roller is dirty. • Clean the exposure glass, the ADF expo- sure glass, white sheet, or original roller ⇒... -
Page 191: When An Error Message Appears
Troubleshooting When an Error Message Appears When an error message appears, see the following lists of error messages to find possible causes of the error, and take the steps necessary to eliminate the cause of the error. The lists are classified into several categories such as “Scanner Unit Error Mes- sages”, “Scan Settings Error Messages”... -
Page 192: Scan Settings Error Messages
Appendix Scan settings error messages Message Possible Cause and Required Action The original is not on the exposure glass, or it Cannot detect the scan size. is placed but the scan size cannot be automati- Check whether the original is cally detected. -
Page 193: Send Scan (E-Mail, Send File (Smb/Ftp) Or Delivery Server) Operation Error Messages
Troubleshooting Message Possible Cause and Required Action Scanning of the second or subsequent original Exceeded Job Delivery Data Max. has failed. Send the current scanned data or delete to cancel this job. • To send the data up to the previous page scanned, press [Send]. - Page 194 Appendix Message Possible Cause and Required Action • If you specified to perform a Scan to Folder Cannot communicate with the (SMB) operation, check if the power of the server. Check the server status computer on which the Windows shared and connection.
-
Page 195: Print Scan Operation Error Messages
Troubleshooting Print Scan operation error messages Message Possible Cause and Required Action • The printer you have selected for printing is currently Printer is offline. offline. Press the { { { { Online} } } } key on the printer to make it Check the printer. -
Page 196: Error Messages Displayed On The Web Status Monitor
Appendix Error messages displayed on the Web Status Monitor Message Possible Cause and Required Action • The format for entering [Login User Name] is incorrect. Wrong parameter for Lo- Confirm that [Login User Name] is specified in the for- gin User Name. mat of “work group name\user name”... -
Page 197: Other Problems
Troubleshooting Other Problems Problem Possible Cause and Required Action Two or more units of this machine • You can change the device name of this machine from [Configuration] → [Basic Settings] → [General Settings] → with the same (or similar) device name exist on the same network. - Page 198 Appendix Problem Possible Cause and Required Action This machine does not work in ac- • After configuring the scan settings (specifically, after cordance with the scan settings clicking [OK] on the [Scan Settings] screen) on the Web Status Monitor, press the { { { { Clear Modes} } } } key. By press- configured on the Web Status ing the { { { { Clear Modes} } } } key, the settings under [Scan Set- Monitor.
-
Page 199: Adjusting The Position To Start Reading The Originals
Troubleshooting ❖ ❖ ❖ ❖ Originals on the ADF Front Side Adjusting the position to start reading the originals Note ❒ Configure the positions of an orig- inal at: { { { { User Tools} } } } -> [2. Send Scan Settings] ->... - Page 200 Appendix D D D D I I I I F F F F Press [Settings]. Repeat from step to change the value for the other direction. J J J J Press [Exit]. E E E E Select the place you want to ad- just with [↑...
-
Page 201: Cleaning
Cleaning Cleaning ❒ Wipe off the Automatic Document R WARNING: Feeder (ADF) with a dry, clean • Never remove any covers or cloth when there is dust or soiling screws other than those spec- present inside. ified in this manual. The inside of the scanner contains high- voltage components that can Cleaning ADF Lifting Up... -
Page 202: Cleaning The Interior Of Adf
Appendix C C C C C C C C Wipe off the Roller with a tightly Wipe off the Pick Roller of the squeezed wet cloth. Pick Roller Unit, Feed Roller and Roller with a tightly squeezed wet cloth. AFJ013S Roller AFJ015S Pick Roller... -
Page 203: Part Names And Replacing Intervals Of The Consumable Parts
Cleaning Part Names and Replacing Replacing the Consumable Intervals of the Consumable Parts Parts A A A A Turn off the power of the scanner The Pick Roller Unit and ADF Pad are and unplug the power cable from disposable parts. Be sure to replace the outlet. - Page 204 Appendix D D D D G G G G Open the cover A A A A . Detaching the left side of the Pick Roller Unit A A A A , then detach the right side as well sliding it to the leftward, and remove the Unit.
-
Page 205: Displaying And Resetting The Counter Of Consumable Parts
Cleaning J J J J B B B B Press the { { { { 1} } } } key. Insert a new ADF Pad. “1. Function Priority” of the Send Scan Settings is displayed. C C C C Select the “17. Supply Counter”, using [↓... - Page 206 Appendix G G G G Press [Cancel]. The screen returns to “17. Supply Counter” menu. H H H H Press [Exit] twice. This returns to the standby screen.
-
Page 207: Moving And Transporting The Scanner
Moving and Transporting the Scanner Moving and Transporting the Scanner • Safety laws and regulations (in- Transporting the Scanner cluding those stipulating radio wave regulations and material reg- A A A A ulations) differ in each country. Turn on the Power Switch. Use of this product and its con- B B B B Press the { { { { User Tools} } } } key. - Page 208 Appendix F F F F Important Press [Yes]. ❒ This scanner is a precision de- vice. Be careful so that it is not damaged during transport. ❒ Use the cushioning materials provided with the scanner at “Preparation complete. Turn Lock the time of purchase.
-
Page 209: Disposing Of The Scanner
Disposing of the Scanner Disposing of the Scanner When you want to dispose of your scanner, contact your dealer or a service rep- resentative. Important ❒ Never dispose of the lithium batteries by incineration. This can cause them to rupture resulting in injury. Note ❒... -
Page 210: E-Mail Address Book Data Format And Device Tag Information
Appendix E-mail Address Book Data Format and Device Tag Information This section describes the data format of CSV files that are exported by selecting [Entered Program Information] and [Device Tag Information] using the Web Status Monitor. Read this section when you create or edit a CSV file for updating the address book of this machine. -
Page 211: About The E-Mail Address Information
E-mail Address Book Data Format and Device Tag Information About the e-mail address information The following example shows a set of values that constitute an e-mail address record. When you edit a CSV file for updating the address book data of this ma- chine, insert a line that is formatted in the following way per an e-mail address record into the file. -
Page 212: Device Tag Information
Appendix ❖ ❖ ❖ ❖ [1] : Register as Sender Determines whether the e-mail address is used not only as the destination but as the sender also. [0] : Not used as sender [1] : Used as sender ❖ ❖ ❖ ❖ [TExMTA==] : Protected Password When an e-mail address record in the exported CSV file from this machine is password protected, the encrypted password appears like the one shown above. -
Page 213: How File Size Changes Depending On Scan Area And Resolution
How File Size Changes Depending on Scan Area and Resolution How File Size Changes Depending on Scan Area and Resolution Scan area and resolution determine the file size of a scanned data. The following general rules apply: • Doubling the scan area doubles the file size. •... -
Page 214: When [Binary] Or [Halftone] Is Selected
Appendix When [Binary] or [Halftone] is selected *1 This size can be configured on the USB TWAIN menu. When [Gray-scale] is selected *1 This size can be configured on the USB TWAIN menu. -
Page 215: When [8 Colors] Or [8 Colors (Halftone)] Is Selected
How File Size Changes Depending on Scan Area and Resolution When [8 colors] or [8 colors (halftone)] is selected *1 This size can be configured on the USB TWAIN menu. When [256 colors] is selected *1 This size can be configured on the USB TWAIN menu. -
Page 216: When [16770K Colors] Is Selected
Appendix When [16770K colors] is selected *1 This size can be configured on the USB TWAIN menu. When Using this Machine for Sending Scan Data The following tables show file sizes in accordance with the scan area and reso- lution settings, when scanning is performed using Scan to E-mail, Scan to File (SMB/FTP), or the delivery server function. -
Page 217: When [Black And White:text], [Black And White:text/Photo] Or [Black And White:photo] Is Selected
How File Size Changes Depending on Scan Area and Resolution When [Black and White:Text], [Black and White:Text/Photo] or [Black and White:Photo] is selected When [Black and White:Gray Scale] is selected When [Color:Full Color] is selected... -
Page 218: Option
Appendix Option ❖ ❖ ❖ ❖ Special Table • Table Type 4000 Provides comfortable installation of this machine. -
Page 219: Specifications
Specifications Specifications Type: Desktop flatbed color scanner Scanning method Fixed document scanning and moving document scan- ning Scanning area • Exposure Glass • ADF Main direction : Main direction: 215mm (8.5”) Max. 215mm (8.5”) Max. Sub-direction : Sub-direction: 297mm (11.7”) Max. 2000mm (78.7”) Max. - Page 220 Appendix Self diagnosis function Automatically turns the power off and back on, when a system freeze of the machine has occurred. Main features • Supports network TWAIN driver • Scan to Print • Scan to E-mail • Scan to Folder (SMB) •...
-
Page 221: Software Information
GPL/LGPL application source code derived from this software without spe- used in this product, please access ht- cific prior written permission. tp://www.ricoh.com/support/linux/. THIS SOFTWARE IS PROVIDED BY THE REGENTS AND CONTRIBU- BSD License Application TORS “AS IS” AND ANY EXPRESS... -
Page 222: The Apache Software License Application Software
Appendix THIS SOFTWARE IS PROVIDED The Apache Software License “AS IS” AND ANY EXPRESSED OR IMPLIED WARRANTIES, INCLUD- Application Software ING, BUT NOT LIMITED TO, THE IMPLIED WARRANTIES OF MER- This product includes software devel- CHANTABILITY AND FITNESS oped by the Apache Software Foun- FOR A PARTICULAR PURPOSE dation (http://www.apache.org/). - Page 223 Software Information In legalese: We specifically permit and encourage the use of this software as the basis of The authors make NO WARRANTY commercial products, provided that or representation, either express or all warranty or liability claims are as- implied, with respect to this software, sumed by the product vendor.
-
Page 224: Tiff Software
Appendix The IJG distribution formerly includ- IN NO EVENT SHALL SAM LEF- ed code to read and write GIF files. To FLER OR SILICON GRAPHICS BE avoid entanglement with the Unisys LIABLE FOR ANY SPECIAL, INCI- LZW patent, GIF reading support has DENTAL, INDIRECT OR CONSE- been removed altogether, and the GIF QUENTIAL DAMAGES OF ANY... - Page 225 Software Information CMU AND THE REGENTS OF THE THIS SOFTWARE IS PROVIDED BY UNIVERSITY OF CALIFORNIA DIS- THE COPYRIGHT HOLDERS AND CLAIM ALL WARRANTIES WITH CONTRIBUTORS “AS IS” AND ANY REGARD TO THIS SOFTWARE, IN- EXPRESS OR IMPLIED WARRAN- CLUDING ALL IMPLIED WAR- TIES, INCLUDING, BUT NOT LIM- RANTIES OF MERCHANTABILITY I T E D...
-
Page 226: Md5 Software License Agreement
Appendix • Redistributions in binary form MD5 Software License must reproduce the above copy- right notice, this list of conditions Agreement and the following disclaimer in the documentation and/or other ma- Copyright (C) 1991-2, RSA Data Secu- terials provided with the distribu- rity, Inc. -
Page 227: Expat
Software Information Expat Copyright © 1998, 1999, 2000 Thai Open Source Software Center Ltd. and Clark Cooper Copyright © 2001, 2002 Expat main- tainers. Permission is hereby granted, free of charge, to any person obtaining a copy of this software and associated documentation files (the “Software”), to deal in the Software without re- striction, including without limitation... -
Page 228: Index
INDEX About Paper Tray Settings , 162 Caution , 1 About Print Scan Ready screen , 162 Change Order , 100 , 107 Access Control and Access Mask , 52 Checking the Scanner Location , 23 Accessing the Scanner , 89 Checking Transmission Results , 142 ADF , 12 Cleaning , 193... - Page 229 Edge Smoothing , 78 How File Size Changes Depending on Scan Area and Resolution , 205 Editing and printing scan files , 178 How to Interpret the Indicators , 15 E-mail , 104 How to Read the Function Table , 41 Procedure Breakdown , 125 E-mail Address , 103 E-mail Address Book Data Format and...
- Page 230 MAC Address , 54 Paper Source Tray , 107 Main Host Name , 97 Part Names and Replacing Intervals of the Consumable Parts , 195 Making Scan Settings , 136 PC card slot , 13 Maximum Number of Search Results , 104 Performing Scan Operation , 140 Max.
- Page 231 Special Table , 210 Specifications , 211 Scanned Image Files Sent to FTP Servers , 158 Specifying the Number of Copies , 165 Scanned Image Files Sent to Shared sRGB , 66 Folders , 151 Starting a Scan Operation , 140 Scanned Page Counter , 68 Start key , 12 Scanned Sheet Counter , 68...
- Page 232 Wait Time for Additional Scanning (WSM) , 68 Warning , 1 What You Can Do with the TWAIN Driver , 179 When an Error Message Appears , 183 When An Original Is Jammed In ADF , 181 When Scanning is Not Performed as Expected , 182 When Using this Machine as a TWAIN Scanner , 205...
- Page 233 In accordance with IEC 60417, this machine uses the following symbols for the main power switch: a means POWER ON. b means POWER OFF. Copyright © 2004...
- Page 234 EN USA G422-8602...