Advertisement
Quick Links
PLEASE CONTACT MOEN FIRST
For Installation Help, Missing or
Replacement Parts
(USA)
1-800-BUY-MOEN (1-800-289-6636)
WWW.MOEN.COM
(Canada)
1-800-465-6130
www.moen.ca
POR FAVOR, CONTÁCTESE PRIMERO CON MOEN
Para obtener ayuda de instalación, piezas
faltantes o de recambio
(Costa Este)
011 52 (800) 718-4345
WWW.MOEN.COM.MX
VEUILLEZ D'ABORD CONTACTER MOEN
En cas de problèmes avec l'installation, ou pour obtenir toute pièce
manquante ou de rechange
1-800-465-6130
WWW.MOEN.CA
HELPFUL TOOLS
For safety and ease of faucet replacement, Moen recommends the
use of these helpful tools.
HERRAMIENTAS ÚTILES
Para que el cambio de la llave sea fácil y seguro, Moen le reco-
mienda usar estas útiles herramientas.
OUTILS UTILES
Par mesure de sécurité et pour faciliter l'installation, Moen suggère
l'utilisation des outils suivants.
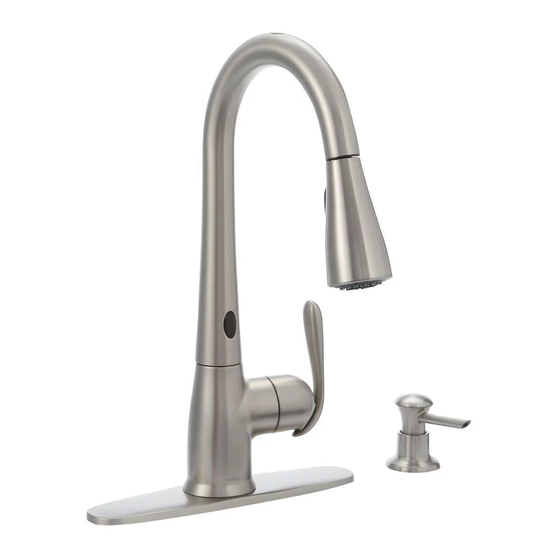
MOTIONSENSE™ HANDS-FREE
KITCHEN FAUCET
MEZCLADORA PARA COCINA
MOTIONSENSE™ MANOS LIBRES
ROBINET DE CUISINE MAINS
LIBRES MOTIONSENSE
*Faucet model image may differ slightly
*La imagen del modelo de su mezcladora puede variar ligeramente
*L'image du modèle de robinet peut différer légèrement
Image is for reference only
(Style varies by model)
La imagen es sólo como referencia
(El estilo varía por el modelo)
L'illustration n' e st offerte qu'à titre indicatif seulement
(Le style varie selon le modèle)
Record Purchased Model Number:
Registre el Número de Modelo adquirido:
Inscrire le numéro du modèle acheté :
_______________________
(Save instruction sheet for future reference)
(Guarde la hoja de instrucciones para futura referencia)
(Conserver ces directives pour consultation ultérieure)
Register Online:
Regístrese en línea:
S'enregistrer en ligne :
www.moen.com/product-registration
INS10613A - 7/18
MC
Advertisement

Related Manuals for Moen MotionSense Align 7565EC


Summary of Contents for Moen MotionSense Align 7565EC
- Page 1 (El estilo varía por el modelo) HERRAMIENTAS ÚTILES L’illustration n’ e st offerte qu’à titre indicatif seulement Para que el cambio de la llave sea fácil y seguro, Moen le reco- (Le style varie selon le modèle) mienda usar estas útiles herramientas.
- Page 2 * Use only non-rechargeable alkaline batteries. * Para lograr el mejor desempeño, use baterías alcalinas no recargables. * Pour un meilleur rendement, utiliser des piles alcalines non rechargeables. Y ** ** Optional A/C Adapter with Power Splitter 169031 (sold separately). The outlet for the AC power adapter will require continuous power.
- Page 3 INS10613A - 7/18 Parts List CAUTION — PRIOR TO OLD FAUCET REMOVAL: Ensure available clearance for control box installation. See page 5 for A. Faucet body Q. Hose weight mounting options. B. Spray wand R. Control box & electronic box C.
- Page 4 Recommended con guration Optional Control Box on left con guration Con guración recomendada Caja de control optativa en con guración izquierda Montage recommandé Boîtier de contrôle optionnel pour montage à gauche Optional Soap Dispenser on left con guration Optional Control Box wall mounting – Order Kit 177566 Dosi cador de jabón optativo en con guración izquierda Montaje de pared para caja de control optativa –...
- Page 5 Si tiene problemas con el espacio libre al tratar de montar la caja de control en el tubo roscado de montaje, póngase en contacto con Soporte al Cliente Moen al 1-800-BUY-MOEN o vaya a Para mayor facilidad de servicio, monte la caja de control a un mínimo de 12"...
- Page 6 Three Hole Application / Aplicación de Single Hole Application / Aplicación de un solo tres agujeros / Installation sur trois ouvertures agujero / Installation sur ouverture unique For 3 Hole Applications: 1. Place deck plate gasket (H) onto deck plate (G). 2.
- Page 7 INS10613A - 7/18 DO NOT PULL ON DATA CABLE NO TIRE DEL CABLE DE DATOS NE PAS TIRER SUR LE CÂBLE DE DONNÉES IMPORTANT IMPORTANTE IMPORTANT Slide mounting washer (N) up onto faucet body (A) under sink and secure with mounting nut (O). Use care to make sure data cable (E) is not pinched.
- Page 8 Tighten mounting nut (O) with installation tool (U). Use screwdriver through hole in installa- tion tool (U) to tighten firmly. Apriete la tuerca de montaje (O) con la herramienta de instalación (U). Use un destornillador a través del orificio en la herramienta de instalación (U) para apretar firmemente. Serrer l’...
- Page 9 INS10613A - 7/18 Remove and discard protective cap from spray wand (B) (make sure o-ring and screen are in place). Install spray wand (B) to upper connection of pulldown hose (D). Tighten hose nut until flush with spray wand. DO NOT overtighten. Retire y deseche la tapa protectora de la varilla rociadora (B) (asegúrese de que el anillo de caucho y el filtro estén en su lugar).
- Page 10 Recommended/Recomendado/Recommandé IMPORTANT FIRMLY PUSH IMPORTANTE EMPUJE CON FIRMEZA IMPORTANT : POUSSER FERMEMENT Insert data cable (E) to data port on bottom of control box (R). Ensure cable is pushed all the Attach control box (R) onto hose guide nut (P) until it snaps into place. This is the recom- way into the control box.
- Page 11 INS10613A - 7/18 Battery holder location Ubicación del soporte para pilas Emplacement du porte-piles Install Zone Zona de instalación Zone d’installation Locate hose weight locator mark (F) on pulldown hose (D). Install hose weight (Q) just above Select location for battery holder (X). Before installation, verify that the battery holder wire will reach connection on bottom of control box (R).
- Page 12 Mounting Option 2/ Mounting Option 1 / Opción de montaje 1 / Option de montage 1 Opción de montaje 2/ Option de montage 2 Attach battery holder (X) to wall with hook & loop fastener (T). First, attach one side of hook and loop fastener to wall. Then attach other piece to back of battery holder. Option: Attach battery holder to wall with screw (V) provided.
- Page 13 INS10613A - 7/18 See included Quick Start Guide (QSG0002) for start-up process. Consulte la Guía de encendido rápido (QSG00002) incluida para ver el proceso de puesta en marcha. Voir le Guide de démarrage rapide (QSG00002) pour le processus de démarrage. Use zip ties (S) if desired to manage faucet hoses, data cable and battery holder cable.
- Page 14 Wave Sensor Check Handle Check Veri cación del sensor de ondas Veri cación del monomando Véri cation du détecteur de mouvement Véri cation de la poignée Check to ensure handle is working properly. Turn on water with handle to test that hot and Check to ensure wave sensor is working properly.
- Page 15 INS10613A - 7/18 Sensor Options / Opciones de los sensores / Options de capteur Disable/Enable Wave Sensor Alternate method to enable Wave Sensor Alternate method to enable Wave Sensor Método alternativo para activar el sensor de ondas Método alternativo para activar el sensor de ondas Desactive/Active el sensor de ondas Autre méthode pour activer le détecteur de mouvement Autre méthode pour activer le détecteur de mouvement...
- Page 16 Option/Opción/Option Preferred Liquid Liquido Preferido Liquide Préféré For models with soap dispenser: Insert soap dispenser Tighten nut (J) by hand. Install soap bottle (K) and tighten by hand. Fill soap bottle base (M) through gasket (I) and sink hole. Note: not included with preferred liquid.
- Page 17 INS10613A - 7/18 Hold hose with a wrench at top of filter connection. Unscrew Rinse debris from filter screen. Reassemble filter into housing and tighten using two with second wrench. Remove filter screen. wrenches. Enjuague las impurezas de la malla del filtro. Sostenga la manguera con una llave en la parte superior de Vuelva a armar el filtro en el bastidor y apriételo usando dos Rincer le filtre pour enlever tous les débris.
- Page 18 Irregular Flow Flujo Irregular Débit réduit 1. Unscrew Spray Wand (J) assembly. Clean Screen (I) as shown by rinsing it for a few seconds to 2. Remove the O-ring and Screen (I). remove any possible debris. Turn off water before reinstalling Screen and O-ring.
-
Page 19: Troubleshooting
INS10613A - 7/18 Troubleshooting If faucet does not appear to be functioning prop- erly, repeat the faucet startup process Data Startup process definition: Disconnect the battery holder cable (Y) and leave disconnected for 10 seconds. Reinsert battery holder cable (Y) and ensure cable is pushed all the Hot Side way into the control box (S) (Refer to step 13). -
Page 20: Resolución De Problemas
Resolución de Problemas Si la mezcladora no parece estar funcionando correctamente, repita el proceso de puesta en Datos marcha de la mezcladora. Definición de proceso de puesta en marcha: Desconecte el cable del soporte para pilas (Y) y déjelo Lado desconectado durante 10 segundos. -
Page 21: Résolution De Problèmes
INS10613A - 7/18 Résolution de problèmes Si le robinet ne semble pas fonctionner correcte- ment, recommencer le processus de démarrage du Données robinet. Définition du processus de démarrage : Débrancher le Côté eau câble du porte-piles (Y) et le laisser débranché pendant dix chaude (10) secondes. -
Page 22: Disclaimer Of Warranties
What is Covered by This Limited Warranty, and the Applicable Warranty Periods Moen “(Seller”) warrants that the MotionSense™ System (“the Product”) will be free from defects in materials and manufacturing workmanship. Moen warrants that the faucet will be leak-free and drip-free under normal use, and that the Product’ s control box (which houses the hydraulic system) and finish will be free from defects in material and manufacturing workmanship for: (1) the lifetime of the Original Consumer Purchaser;... - Page 23 Moen, l’ e rreur d’installation, l’usage abusif ou incorrect du Produit ou tout dommage causé par l’utilisation de produits nettoyants contenant des agents abrasifs, de l’alcool...
- Page 24 Moen Incorporated Moen de Mexico, S.A. de C.V. Moen Inc. 25300 Al Moen Drive Carretera Saltillo-Monterrey KM 14.7 2816 Bristol Circle North Olmsted, Ohio 44070-8022 Ramos Arizpe, Coahuila Oakville, Ontario L6H 5S7 U.S.A. Mexico 25900 Canada INS10613A - 7/18 ©2018 Moen Incorporated...