Advertisement
- 1 Package Contents
- 2 Overview
- 3 Parts and Features
- 4 Auto-Empty Dock
- 5 Position the Dock
- 6 Remove Protective Strip
- 7 Remove Protective Film
- 8 Power On and Charge
- 9 Download the Tapo App and Connect to Wi-Fi
- 10 Cleaning
- 11 Care and Maintenance
- 12 Empty the Bin
- 13 Clean the Filter
- 14 Clean the Main Brush
- 15 Clean the Side Brush
- 16 Clean the Caster Wheel
- 17 Clean Main Wheels
- 18 Clean the LiDAR and Sensors
- 19 Clean the Charging Contacts
- 20 Replace the Bag
- 21 Clean Up the Dust Channel
- 22 Troubleshooting
- 23 Voice Prompts for Issues
- 24 Energy Saving Mode
- 25 Documents / Resources
Package Contents

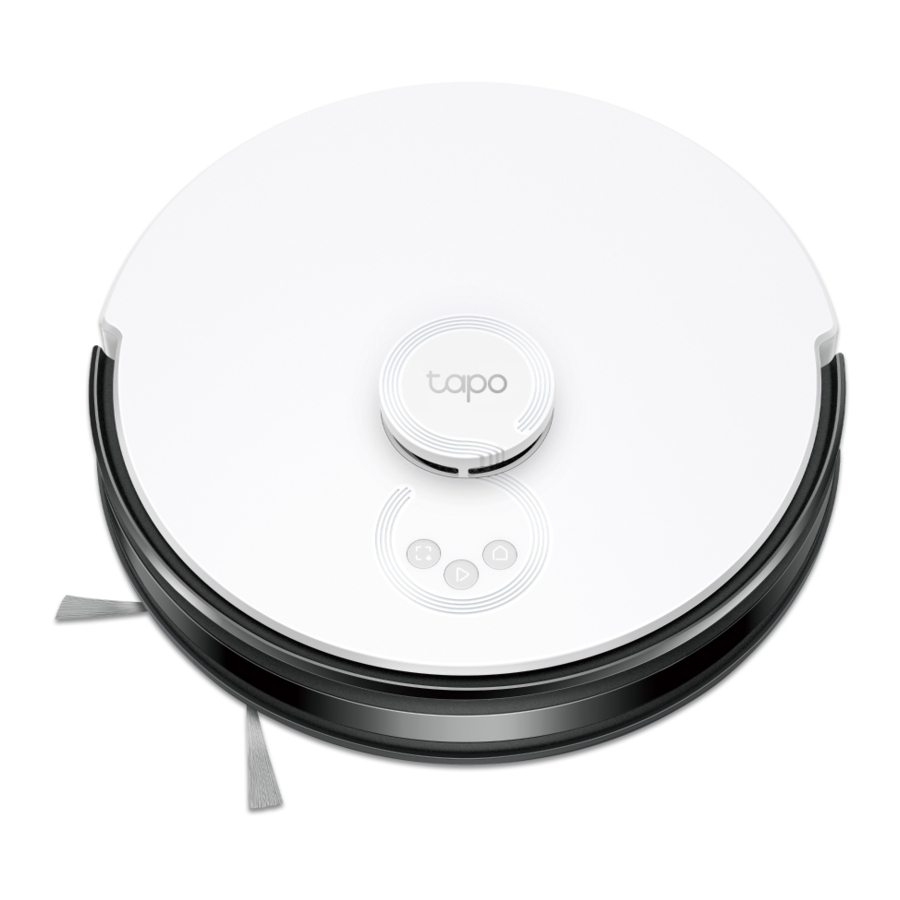
Overview
Robot Vacuum

 Power/Clean
- Press once: Start/pause cleaning.
- Press and hold for 5 seconds: Turn on/off the robot vacuum. *For the first use, slide the power switch from OFF to ON to turn on.
 Dock
Dock
- Return to the dock to charge.
- Empty the bin when docked.
 Spot Cleaning/Child Lock
- Press once: Start spot cleaning.
- Press and hold for 5 seconds: Turn on/off the child lock.
 Combination Button
- Press and hold simultaneously for 5 seconds: Enter setup mode to configure network.
- Press and hold simultaneously for 10 seconds: Restore to factory default settings.
 LED
LED
- Red: Battery level < 20%; Error
- Orange: Battery level between 20% and 80%
- Green: Battery level > 80%
Parts and Features

Auto-Empty Dock

Top cover
Open to install/take out the dust bag. Put the cover back on each time you open it.
Dust Collection Port
The dust in the robot vacuum will be collected into the dust bag through the port.
LED Indicator
- White: Working properly
- Off: Robot vacuum is connected to the dock; sleeping.
- Solid Red: Dust bag not installed; top cover not closed.
- Flashing Red: Error
Position the Dock

- Place the dock on a level surface, flat against a wall, without obstacles within 1.5m (4.9ft) in front and 0.5m (1.6ft) on left and right.
- Connect the power cord to the power source. Ensure the cable is kept tidy.
 NOTE:
NOTE:
- To ensure a better user experience, make sure the area is with good Wi-Fi signals.
- Do not place it in direct sunlight. Ensure the area around the dock is free of clutter to improve docking performance.
- To prevent the risk of your robot vacuum falling downstairs, ensure that the dock is placed at least 1.2m (4 ft) away from stairs.
- Always keep the dock powered on, otherwise the robot vacuum will not automatically return. And do not move the dock frequently.
Remove Protective Strip

Before use, remove the protective strips on both sides of the front bumper.
Remove Protective Film

Remove the protective film on the front bumper.
Power On and Charge

Slide the power switch from OFF to ON to turn on your robot vacuum.
Notes
- If the power switch is in the ON position, you can also press and hold the
![]() button for 5 seconds to turn on/off your robot vacuum.
button for 5 seconds to turn on/off your robot vacuum. - If the power switch is in the OFF position, the robot vacuum will automatically turn on when it is charged on the dock, and turn off when it leaves the charging dock.
Place the robot vacuum on the charging dock or tap ![]() to send it back to the dock to charge.
to send it back to the dock to charge.
It will return to the dock at the end of a cleaning job and whenever it needs to recharge.

Notes
- When the LED of the charging dock flashes 3 times and then goes out, the charging will begin.
- We recommend that you charge the robot vacuum fully for about 4 hours prior to starting the first cleaning job.
Download the Tapo App and Connect to Wi-Fi
- Download the Tapo app from the App Store or Google Play, then log in.
![www.apple.com]()
![play.google.com]()
OR
![]()
![]()
- Open the Tapo app, tap + icon, and select your model. Follow the step-by-step instructions to easily set up your robot vacuum.
![]()


In the Tapo app, you can enjoy the following functions.
- Smart Maps
Create smart maps to tell your robot vacuum where to clean. - Cleaning Modes & Preferences
Customize vacuum power, cleaning times, and cleaning areas. - Scheduled Cleaning
Set an automatic cleaning schedule, then the robot vacuum will clean automatically at the set time and return to the dock after cleaning. - Custom Zones & Virtual Walls
Add restricted zones and virtual walls to prevent access to certain areas and rooms.
Cleaning

![]() Press Once
Press Once
Start/pause cleaning.
![]() Press Once
Press Once
Start spot cleaning.
Notes
- Cleaning cannot start if the battery is too low. Charge your robot vacuum first.
- Pick up obstacles like wires, clothing, and plastic bags. Loose wires and objects may get caught in the robot vacuum, resulting in disconnection or damage to wires and property.
- Put away high pile carpet before cleaning. You can choose to avoid carpeted areas in the app.
- Do not pick up the robot vacuum during cleaning.
- If the cleaning area is too small, the area may be cleaned twice.
- If the robot vacuum is paused for 10 minutes, it will automatically enter sleep mode and the cleaning job will be canceled.
The robot vacuum will automatically explore and clean your home in neat rows. It will return to the charging station at the end of a cleaning job and whenever it needs to recharge.

In Spot Cleaning mode, it will clean a rectangular area of 1.5m × 1.5m (4.9ft × 4.9ft) centered on itself.

Care and Maintenance
To maintain optimal performance, maintain the robot vacuum according to the following guidelines.
| Part | Maintenance Frequency | Replacement Frequency* |
| Dustbin | Clean/wash as needed | / |
| Filter | Once a week | 3-6 months |
| Main Brush | Every 2 weeks | 6-12 months |
| Side Brush | Once a month | 3-6 months |
| Dust Bag | / | Replaced when it is full |
| Caster Wheel | Clean as needed | / |
| Main Wheels | Once a month | / |
| Sensors | Once a month | / |
| Charging Contacts | Once a month | / |
*Replacement frequency may vary depending on the actual situation. Parts should be replaced if visible wear appears.
Empty the Bin
- Remove the dustbin.
![]()
- Open the dustbin to empty the dustbin.
![]()
- Place the dustbin back inside the robot vacuum.
![]()


Clean the Filter
- Remove the dustbin and open the lid.
![]()
- Remove the filter.
![]()
- Clean the filter with a cleaning brush.
![]()
- Wash the dustbin and filter.
![]()
![warning]() Do not wash with hot water or detergents.
Do not wash with hot water or detergents. - Air-dry the dustbin and filter thoroughly, then install the filter in the previous orientation.


Clean the Main Brush
- Turn the robot vacuum over, then unlatch and remove the main brush cover.
![]()
- Remove the brush and its end cap.
![]()
- Remove any hair or debris with the cleaning brush.
![]()
- Re-install the cap and main brush. Press on the main brush cover to lock it in place.
![]()


Clean the Side Brush

- Pull firmly to remove the side brush and remove any entangled debris. Wipe with a damp cloth if needed.
- Re-install the side brush and press it tightly to ensure it is installed in place.
Clean the Caster Wheel

- Pull firmly to remove the caster wheel and remove hair or dirt.
- Re-install the caster wheel and press it firmly in place.
Clean Main Wheels

Wipe main wheels with a clean, dry cloth.
Clean the LiDAR and Sensors

Wipe the LiDAR and sensors with a clean, dry cloth.
Clean the Charging Contacts

Wipe the charging contacts with a clean, dry cloth.
Replace the Bag
- Open the top cover and pull up the handle of the dust bag to remove.
![]()
- Throw away the used dust bag.
![]()
- Install a new dust bag and put the cover back on.
![]()


Put the cover back on each time you open it.
Clean Up the Dust Channel

If the LED flashes red after replacing the dust bag, please check if the dust channel is blocked by foreign objects. If the dust channel is blocked, use a screwdriver to remove the transparent cover of the dust channel, and clean out foreign objects.
Troubleshooting
| Issues | Solution |
| Setup failure |
|
| Charging failure |
|
| Recharge failure |
|
| Abnormal operation | Shut down and try again. |
| Abnormal noise during cleaning | There may be foreign matter entangled in the main brush, side brush or wheels. Please clean up after shutdown. |
| Decreased cleaning ability or dust leakage |
|
| Failure to connect to Wi-Fi |
|
| Scheduled cleaning doesn't work |
|
| Whether the robot vacuum consumes power when it is placed on the dock | The power consumption is very low when the robot vacuum is placed on the dock, which helps the battery to maintain optimal performance. |
| Whether the robot vacuum needs to be charged for 16 hours for the first three times | Lithium battery has no memory effect when in use, and there is no need to wait when it is fully charged. |
| After the robot vacuum returns to the dock, automatic dust collection does not start. |
|
| Automatic dust collection is interrupted after startup or dust collection is not thorough. |
|
| The interior of the dock is dirty. |
|
If the corresponding issues cannot be solved by referring to the above methods, please contact our Technical Support.
Voice Prompts for Issues
| Voice Prompt | Solution |
| Error 1: Battery Error. Please refer to the manual or app. | The battery temperature is too high or too low. Please wait until the battery temperature changes to 0℃- 40℃ (32℉- 104℉). |
| Error 2: Wheel Module Error. Please refer to the manual or app. | Please check whether there are foreign objects stuck in the wheels, and restart the robot vacuum. |
| Error 3: Side Brush Error. Please refer to the manual or app. | Please check whether there are foreign objects stuck in the side brush, and restart the robot vacuum. |
| Error 4: Suction Fan Error. Please refer to the manual or app. | Please check whether there are foreign objects stuck in the fan port, and restart the robot vacuum. Please clean the dust box and filter, and restart the robot vacuum. |
| Error 5: Main Brush Error. Please refer to the manual or app. | Please remove the main brush and clean the main brush, the connection part of the main brush, the main brush cover and the dust suction port. Please restart the robot vacuum after cleaning. |
| Error 7: LiDAR Error. Please refer to the manual or app. | Please check whether there are foreign objects in the laser sensor, and restart the robot vacuum after cleaning. |
| Error 8: Abnormal operation. Please check whether the power switch is turned on. | Please toggle the power switch on the robot vacuum to "ON". |
If the corresponding issues cannot be solved by referring to the above methods, please contact our Technical Support.
Energy Saving Mode
When the robot vacuum is docked, press and hold the Power button ![]() and the Dock button
and the Dock button ![]() for more than 15 seconds until the LED turns off. And it will enter the Energy Saving mode.
for more than 15 seconds until the LED turns off. And it will enter the Energy Saving mode.
In this mode, only the charging feature will work. Other functions will not work, such as LEDs will be off, sensors will not work, and Wi-Fi will be disconnected.
To exit the Energy Saving mode, press the Power button ![]() on the robot vacuum. It will restart to normal mode automatically.
on the robot vacuum. It will restart to normal mode automatically.

Documents / Resources
References
Download manual
Here you can download full pdf version of manual, it may contain additional safety instructions, warranty information, FCC rules, etc.
Download TP-Link Tapo RV30C Plus, Tapo RV30C - LiDAR Navigation Robot Vacuum Manual
Advertisement
Thank you! Your question has been received!

Need Assistance?
Do you have a question about the Tapo RV30C Plus that isn't answered in the manual? Leave your question here.