Table of Contents
Advertisement
Quick Links
QUICK INSTALLATION GUIDE
Please read the Safety Information in the "Operating Instructions" before using this
machine. It contains important information related to USER SAFETY and PREVENTING
EQUIPMENT PROBLEMS.
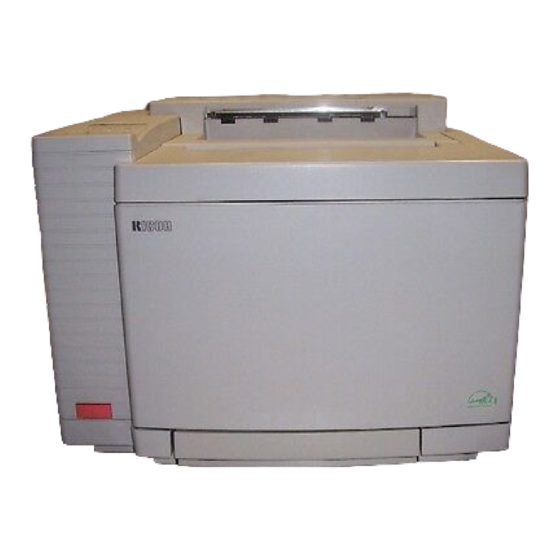
UNPACKING THE PRINTER AND
WHERE TO PUT YOUR PRINTER
CHECKING THE CONTENTS OF THE BOX
Your printer's location should be carefully chosen because
environmental conditions greatly affect its performance.
Warning
Caution
Make sure that the wall outlet is near the machine and
To prevent injury, it is recommended that at least two people
freely accessible, so that in the event of an emergency, it
can be easily unplugged.
are used to lift the printer.
Warning
Check the contents of the box according to the following
Only connect the machine to the power source described on
list. If one or more items are missing, please contact your
this sheet.
sales or service representative.
Avoid multi-wiring.
Important
Do not damage, break or make any modifications to the
The interface cable is not included in the box. It is your
power cord. Do not place heavy objects on it, pull it hard or
responsibility to provide the interface cable appropriate for
bend it more than necessary. These actions could cause
the computer that you are using.
an electric shock or fire.
Caution
Quick Installation Guide (this sheet)
Keep the machine away from humidity and dust. A fire or
Operating Instructions
an electric shock might occur.
CD-ROM
Place the machine on a strong and level surface. Otherwise,
the machine might fall and cause personal injury.
Caution
If you use the machine in a confined space, make sure
there is a continuous flow of air.
Toner Cartridge (Black)
Optimum Environmental Conditions
Toner Cartridge (Yellow)
The recommended temperature and humidity
Toner Cartridge (Cyan)
%RH
80
Toner Cartridge (Magenta)
70
60
50
20
Fuser Cleaner
Photoconductor Unit
Fuser Oil Bottle
Power Cord
The machine must be level within 5 mm, 0.2" both front to right and left to right.
Syringe
To avoid possible build-up of ozone, make sure to locate this machine in a large
well ventilated room that has an air turnover more than 30m
Additional Documentation
Environments to Avoid
Remove the plastic bag.
Locations exposed to direct sunlight or strong light
Lift the printer and move it to the place where you want to
Dusty areas
install it.
Areas with corrosive gases
When lifting the printer, use the inset grips on both sides of the printer.
Areas excessively cold, hot, or humid
Locations near an air conditioner or humidifier
Locations near other electronic equipment
Locations where the printer might be subjected to frequent
strong vibration
Power Connection
Connect the power cord to a power source with a following specifications:
TPOH115E
220-240V, 50/60Hz, 4 A or more
Remove adhesive tape [A] from the printer.
Space Required for Installing the Printer
Leave enough space around the printer. This space is necessary to operate the
printer. The recommended (or minimum) space requirements are as follows:
A
TPOH125E
A: more than 10 cm (4.0")
B: more than 40 cm (15.6")
C: more than 10 cm (4.0")
D: more than 70 cm (27.6")
G033-8610
<G033-8610>
INSTALLING THE TONER CARTRIDGES
Warning
Do not incinerate spilled toner or used toner. Toner dust
might ignite when exposed to an open flame.
Disposal can take place at our authorized dealer or at an
appropriate collection site.
If you dispose of the used toner containers yourself, dispose
of them according to your local regulations.
Caution
Do not open the front cover when the paper tray is pulled
out halfway. If you do, it might cause a personal injury.
Caution
Do not eat or swallow toner.
Keep toner (used or unused) and toner cartridges out of reach of children.
Caution
Our products are engineered to meet the highest standards of quality
and functionality. When purchasing expendable supplies, we
recommend using only those provided by an authorized dealer.
Open the front cover by pulling the front cover open lever.
Hold the new toner cartridge (cyan) and shake it well, about
10 times, as shown in the illustration.
10 C
17.5 C
27 C
32.5 C
50 F
63.5 F
80.6 F
90.5 F
TPOH145E
Possible operation range
Recommended range
3
/hr/person.
Important
If the toner cartridge is not shaken enough, toner might not be evenly
distributed in the cartridge. In this case, the print quality might be reduced.
Important
Remove the tape [1] and the protective cover [2] as shown in the illustration.
Align the toner cartridge (cyan) to the "C" mark of the printer as shown in
the illustration. Slide the cartridge in along the printer' s guide rail.
A
Note
D
B
Do not use excessive force in sliding in the cartridge.
When inserting the cartridge, the side with the seal should be up.
Repeat steps 2 - 4 for installing the magenta, yellow, and
TPOH055E
black toner cartridges. When installing, start with the
C
magenta toner cartridge, then yellow, and then black.
Close the front cover until the center of the front cover
locks securely.
INSTALLING THE PHOTOCONDUCTOR
UNIT
Important
Do not touch the surface of the photoconductor unit. This could damage
the photoconductor unit and reduce the print quality.
Do not expose the photoconductor unit to a light source greater than 800
luxes for more than two minutes. This could damage the photoconductor
unit and reduce the print quality.
Open the front cover by pulling the front cover open lever
and open the top cover by pulling the top cover open lever.
Lift the green lock levers to a vertical position.
TPOH145E
Remove the pins on the both side of the photoconductor unit.
TPOT015E
Remove the protective sheet.
1
2
Insert the photoconductor unit so that the protruding
green axles on both sides are aligned with the tracks
inside the green lock levers. Lower it until the gears
TPOT035E
mesh securely.
TPOH235E
Important
TPOT045E
When inserting the photoconductor unit, be careful not to touch
or damege the surface.
Return the green lock levers to their original positions.
TPOH245E
Important
Do not return lock levers with force. If you cannot lock them
easily, remove the photoconductor unit from the printer. Then
re-insert it again until the gears mesh securely. After that, try
again to return the levers to their original positions.
Close the front and top covers until the centers of the covers
lock securely.
TPOH195E
TPOH205E
TPOH225E
TPOH215E
INSTALLING THE FUSER OIL BOTTLE
AND FUSER CLEANER
Caution
Do not incinerate the oil bottle. This action could cause a fire or a personal injury.
Caution
Spilt oil is very slippery. If oil is spilt, wipe it up with an alkaline cleaner.
Open the top cover by pulling the top cover open lever.
TPOH265E
Remove the orange lock pins.
TPOH275E
Important
These pins will be used when moving or transporting the
printer. Be sure to keep them for future use.
Insert the oil bottle. When inserting, the side with the label should
be facing toward you, and the mouth of the bottle facing down.
TPOH285E
Install the fuser cleaner. When installing, the roller should
be facing toward you.
TPOH295E
Turn the lock levers to hold the oil bottle and fuser cleaner.
Note
Turn the right lock levers clockwise, and the left one
counterclockwise.
TPOH296E
Close the top cover until the center of the cover locks
securely.
Advertisement
Chapters
Table of Contents
Troubleshooting

Related Manuals for Ricoh AP204


Summary of Contents for Ricoh AP204
- Page 1 Lower it until the gears TPOT035E mesh securely. Align the toner cartridge (cyan) to the “C” mark of the printer as shown in the illustration. Slide the cartridge in along the printer’ s guide rail. Important...
- Page 2 “Paper Supported by Your Printer” in the “Operating Instructions”. Pull the paper tray out of the printer. Place it on a flat surface. TPOH325E Attach the power cord to the socket on the back side of the printer.
- Page 3 G033 Operator’ s Manual...
-
Page 4: Safety Information
Safety Information When using your equipment, the following safety precautions should always be followed. Safety During Operation In this manual, the following important symbols are used: R WARNING Indicates a potentially hazardous situation which, if instruc- tions are not followed, could result in death or serious injury. R CAUTION Indicates a potentially hazardous situation which, if instructions are not followed, may result in minor or moderate injury or dam-... - Page 5 RCAUTIONS • Protect the equipment from dampness or wet weather, such as rain, snow, and so on. • Unplug the power cord from the wall outlet before you move the equipment. While moving the equipment, you should take care that the power cord will not be damaged under the equipment.
-
Page 6: Energy Star Program
Low-power mode (Energy Saver mode). This printer automatically lowers its power consumption 60 minutes after the last operation has been completed. To exit Low-power (Energy Saver) mode, press any key on the operation panel. To change the setting of the Energy Saver mode, see page 99. -
Page 7: Color Guide
CMY color model. When mixed in equal proportions the CMY color model produces black. Note CMY is also called subtractive or reflective color. Your printer uses CMY toner plus K (black) toner (CMYK color model) to provide full color printing. - Page 8 Color Guide The colors of the RGB color model can be mixed to produce the cyan, magenta, and yellow of the CMY color model and vice versa. Two colors of one model are mixed to produce the color of the other model (mixing blue and green produces cyan, for example).
- Page 9 Printed Color Your printer produces full-color output using four toner colors: cyan, magenta, yellow, and black. These four colors make up the CMYK color model. Note Mixing CMY in equal proportions should hypothetically produce pure black, but imperfections in the ink cause an equal measure of these colors to produce a muddy or dark brown.
-
Page 10: Example Of Color Adjustments Using The Printer Driver
Quality Settings Resolution Resolution is the number of dots the printer can print within one inch. The higher the resolution, the better the quality of the printed image. Resolution is expressed in units of dpi, which stands for dots per inch. - Page 11 Toner Saving Turning on Toner Saving reduces the amount of toner used for printing. This setting does not help to improve printout quality, but instead is used when printing preliminary drafts of a document. Limitation • Turning on the Toner Saving can cause output to become blurred and re- sult in very thin lines not printing at all.
- Page 12 Color Settings The colors produced by the printer do not exactly match those you see on your monitor. This is because the computer uses the reflected color model (RGB) while the printer uses the emitted color model (CMYK). For details, see => P.iv “Color Printing Basics”.
- Page 13 Brightness This setting controls the overall brightness of the image. Moving the slider to the plus (+) side increase brightness, while moving it to the minus (-) side decreases brightness. Contrast This setting controls the range between the darkest and lightest shade of an image.
- Page 14 Color Balance These settings let you control the relative intensity of the individual colors of the additive color model (red, green, blue). Note The position of the color bar also affects the complementary color relation- ship. Red, for example, is printed using magenta and yellow toner, so in- creasing the level of red also decreases the level of cyan.
-
Page 15: Manuals For Your Printer
Manuals for Your Printer There are two manuals that describe the procedures separately for the installa- tion of your printer and for the operation and maintenance of your printer and its optional equipment. To enhance safe and efficient operation of your printer, all users should read and follow the instructions contained in the following manuals. -
Page 16: How To Read This Manual
How to Read this Manual Symbols In this manual, the following symbols are used: R WARNING: This symbol indicates a potentially hazardous situation which, if instructions are not followed, could result in death or serious injury. R CAUTION: This symbol indicates a potentially hazardous situation which, if instructions are not followed, may result in minor or moderate injury or damage to prop- erty. -
Page 17: Table Of Contents
2. Installing Options Available Options ... 8 Installing the Memory Unit ... 9 Installing the RICOH-SCRIPT 2 Type204 ... 11 Installing the Network Interface Board Type204 ... 13 Installing the IEEE 1284 Parallel Type204 ... 15 Installing the Paper Feed Unit Type204 ... 17 Installing the Paper Cassette Type204 ... - Page 18 Windows 95/98 - Installing the IPDL-C Printer Driver ... 30 Installing the Printer Driver Using Plug and Play ... 31 Installing the Printer Driver Without Using Plug and Play ... 34 Setting Up Options ... 36 Canceling a Print Job ... 37 Windows 3.1x - Installing the IPDL-C Printer Driver ...
- Page 19 Replacing the Waste Toner Bottle ... 86 Replacing the Fuser Oil Bottle and Ozone Filter ... 87 Replacing the Fuser Cleaner ... 89 7. Making Printer Settings with the Operation Panel Setting Menus ... 92 Protecting the Menus ... 94 Protecting the Menus ...
-
Page 20: Getting Acquainted
Features of Your Printer Office Color Printer You can enjoy the versatility of a full color printer and the performance of a monochrome laser in a single compact unit. Text, spreadsheets, presentations, design and other documents containing images can be beautifully printed in full color. -
Page 21: Guide To The Printer
Note that there are four grips, two on the left side and two on the right side of the printer. 7. Front Cover Open Lever Press this lever to open the front cover. -
Page 22: Exterior - Rear View
Exterior - Rear View 1. Ventilator These holes help to keep compo- nents inside the printer from over- heating. Also, this cover should be removed to replace the ozone filter. Note Do not leave the ventilator ob- structed or blocked. Doing so creates the danger of malfunc- tion due to overheating. -
Page 23: Interior
Getting Acquainted Interior 1. Fuser Cleaner This cleans unnecessary toner from the fuser roller. 2. Fuser Oil Bottle This bottle holds oil used for fus- ing toner on the paper. 3. Photoconductor Unit This contains a photoconductor unit belt that is used to compose the image being printed. -
Page 24: Operation Panel
Tells you whether the printer is on- line or off-line. Stays on while the printer is on-line (a state in which the printer can re- ceive data from the computer). Stays off when the printer is off-line (a state in which printer can not re- ceive data). - Page 25 Getting Acquainted...
-
Page 26: Installing Options
2. Installing Options R CAUTION • Make sure to turn off the printer and wait for about 30 minutes before in- stalling options. Not waiting for the printer to cool down can result in a burn. • It is recommended that at least two persons are used to lift the machine. -
Page 27: Available Options
Installing Options Available Options The following options can be installed to your printer. 1. Memory Unit You can install one of the following memory units. • Memory Unit Type204 (16MB) • Memory Unit Type204 (32MB) 2. RICOH-SCRIPT 2 Type204 3. Interface Board You can install up to two interface boards. -
Page 28: Installing The Memory Unit
Before touching it, touch some- thing metal to remove static electric- ity from you. Turn off the printer’s power switch and remove all cables and cords from the printer. Remove both screws and remove the printer board from the printer as shown in the illustration. - Page 29 Note A coin can be used to fasten the screws. Plug the printer’s power cord back into the printer and the wall out- let. Turn on the printer’s power switch. Print a configuration page to con- firm that the memory unit is prop- erly installed.
-
Page 30: Installing The Ricoh-Script 2 Type204
Tilt it upwards so that it is 45 degrees from parallel to the printer board (1 1 1 1 1 ), and slide it into the slot. Then tilt it down so that it is parallel to the board (2 2 2 2 2 ). It should make an audible click as it pops into place. - Page 31 Note A coin can be used to fasten the screws. Plug the printer’s power cord back into the printer and the wall out- let. Turn on the printer’s power switch. Print a configuration page to con- firm that the module is properly installed.
-
Page 32: Installing The Network Interface Board Type204
Use a shielded network interface cable. The network interface board can be attached to either the front or the back side of the printer board. This procedure is for attaching to the front side. You cannot install two network in- terface boards at a time. - Page 33 (6") from the end of the cable. Attach the ferrite core to loop. Attach the network interface cable to the network interface connector of the printer as shown in the il- lustration. TPOP330E Connect the other end of the net- work interface cable to the net- work.
-
Page 34: Installing The Ieee 1284 Parallel Type204
Installing the IEEE 1284 Parallel Type204 Note The parallel interface board can be attached to either the front or the back side of the printer board. This procedure is for attaching to the front side. You cannot install two parallel in- terface boards at a time. - Page 35 Plug the printer’s power cord back into the printer and the wall out- let. Turn on the printer’s power switch. Print a configuration page to con-...
-
Page 36: Installing The Paper Feed Unit Type204
Remove the bag [C] and the styro- foam packing [D] from the paper feed unit. Remove both pieces of adhesive tape [E]. Turn off the printer ’s power switch, and remove all cables and cords from the printer. TPOP190E TPOP200E... - Page 37 Installing Options Place the paper feed unit on a flat surface. Lift the printer using the inset grips on both sides of the printer. Important It is recommended that at least two people are used to lift the printer. Align the printer onto the 3 up- right pins [G] on the paper feed unit and then lower it gently.
- Page 38 Attach the connector cover [J], re- moved from the printer in step K K K K K , to the paper feed unit. Attach the connector cover [K], removed from the paper feed unit in step K K K K K , to the printer.
- Page 39 If it still does not work, contact your sales or service representative. Important To make the printer recognize the installed option properly, you must setup the option with the printer driver. => P.36, 40 or 44 “Setting Up Options”...
-
Page 40: Installing The Paper Cassette Type204
• Paper cassette • Installation Guide Carefully pull the paper tray (tray1 or tray2) out of the printer and place it on a flat surface. Note Keep the paper tray with paper in a cool and dark place. - Page 41 Installing Options...
-
Page 42: Configuring The Printer For The Network With The Operation Panel
After installing the optional network interface board, configure it for the net- work using the printer’s operation panel. Note If you want to print from your Macintosh computer, the optional RICOH- SCRIPT 2 Type204 is required. The following table shows the operation panel settings and their default set- tings. -
Page 43: Your Network
*1: NetBEUI appears on the panel display, but is not supported. Note It is recommended that you should not select protocols that are not used on your network. Limitation If you want to select EtherTalk, you should install the optional RICOH-SCRIPT 2 Type204. Active Protocol TCP/IP NetWare... - Page 44 {T} until the protocol you want to use appears. 4 Press { { { { { Enter} } } } } . If you use TCP/IP, you should assign the IP address to your printer. Note To get the IP address for your printer, contact your network administrator.
- Page 45 “35. Access CTL” and “36. Access Mask” using the same procedure for speci- fying the IP address. If you use TCP/IP, you should make settings for “37 Net Boot”. You can select how to assign the printer’s address using the computer. Select one of items on the table below. Menu item on...
- Page 46 Select”, the frame type detected by the printer first is adopted. If your net- work can use more than two frame types, the printer fails to select the cor- rect frame type, if the “Auto Select” is selected. In this case, select the ap- propriate frame type.
- Page 47 Setting Up the Printer for Network with the Operation Panel 6 Press { { { { { Enter} } } } } . The configuration page is now printed. Check the contents of the configu- ration page. 7 Press { { { { { On Line} } } } } .
-
Page 48: Installing The Ipdl-C Printer Driver
The required printer driver is supplied on the CD-ROM that comes with your printer. Preparation Set up the printer and connect it to your computer as described in the “Quick Installation Guide”. The procedures in this section assume that the printer is connected to your printer by a parallel interface cable. -
Page 49: Windows 95/98 - Installing The Ipdl-C Printer Driver
When upgrading to a new version of the printer driver, de- lete the old version, and then install the new one. Normally you can use plug and play to install the printer driver. If your system does not support plug and play, add the printer from the [Printers] window. -
Page 50: Installing The Printer Driver Using Plug And Play
Installing the Printer Driver Using Plug and Play Preparation Check to make sure that the printer is connected properly to your computer, and that computer power is turned off. Turn on the printer. Turn on your computer. Continue with one of the procedures below in accordance with what appears on your computer’s screen. - Page 51 Installing the IPDL-C Printer Driver Plug and Play Installation 1 Use the following procedure to install the printer when the [New Hardware Found] dialog appears after you turn on the printer and then your computer. Insert the CD-ROM that comes with the printer, into your computer’s CD- ROM drive.
- Page 52 Plug and Play Installation 2 Use the following procedure to install the printer when the [Device Driver Wizard] appears after you turn on the printer and then your computer. Insert the CD-ROM that comes with the printer into your computer’s CD- ROM drive, and then click [Next].
-
Page 53: Installing The Printer Driver Without Using Plug And Play
Installing the IPDL-C Printer Driver Installing the Printer Driver Without Using Plug and Play Turn on the printer and then your computer, and then use the following proce- dure to install the printer driver. Close all applications that are currently running. - Page 54 Change the name of the printer if you want, and then click [Next]. Specify whether or not you want to print a test page, and then click [Finish]. The printer driver files are copied from the CD-ROM to your computer’s hard disk.
-
Page 55: Setting Up Options
Click [Start], point to [Settings], and then click [Printers]. The [Printers] window appears. Select the icon of the printer you want to use by clicking it. On the [File] menu, click [Properties]. Click [Setup] tab, and then click [Installable Options]. -
Page 56: Canceling A Print Job
You can also open the print job queue window by double-clicking the printer icon in the [Printer] window. Make sure that the printer’s On Line indicator is lit, press the printer’s { { { { { Re- set} } } } } key. -
Page 57: Windows 3.1X - Installing The Ipdl-C Printer Driver
[OK]. Click [OK]. In the [List of Printers] box, select the name of the printer whose driver you want to install by clicking it, and then click [OK]. The printer driver files are copied from the CD-ROM to your computer’s hard... - Page 58 After installation is complete, click [Close] to close the [Printers] dialog. Restart Windows. After Windows restarts, setup any options you have installed on the printer. Reference => P.40 “Setting Up Options”. Windows 3.1x - Installing the IPDL-C Printer Driver...
-
Page 59: Setting Up Options
From the Program Manager [Main] group, open the [Control Panel] and double- click the [Printers] icon. The [Printers] dialog appears. In the [Installed Printers] box, select the name of the printer you want to use by clicking on it, and then click [Setup…]. A dialog for making printer driver settings appears. -
Page 60: Canceling A Print Job
Click [Close] to close the dialog. Click [Close] to close the dialog. Make sure that the printer’s On Line indicator is lit, press the printer’s { { { { { Re- set} } } } } key. The message appears on the operation panel display indicating that the print job is being cancelled. -
Page 61: Windows Nt4.0 - Installing The Ipdl-C Printer Driver
CD-ROM containing the printer driver. Important Never have two versions of the same printer driver installed on your system at the same time. When upgrading to a new printer driver version, uninstall the old version, and then install the new one. - Page 62 Change the name of the printer if you want, and then click [Next]. If the printer is to be shared over a network, click [Shared] to select it. Selecting [Shared] causes the computer you are on to operate as the printer server.
-
Page 63: Setting Up Options
Setting Up Options Click [Start], point to [Settings], and then click [Printers]. The [Printers] window appears. Select the icon of the printer you want to use by clicking it. On the [File] menu, click [Properties]. The printer properties dialog appears. -
Page 64: Canceling A Print Job
You can also open the print job queue window by double-clicking the printer icon in the [Printer] window. Make sure that the printer’s On Line indicator is lit, press the printer’s { { { { { Re- set} } } } } key. - Page 65 Installing the IPDL-C Printer Driver...
-
Page 66: Paper And Other Media
(Length: 210 to 297 mm, Width: 100 to 216 mm) *1: Based on paper that is 80 g/m *2: You should specify the paper size with the printer driver and operation panel. Optional 250-sheet Paper Tray (Paper Feed Unit Type204) -
Page 67: Precautions For Paper
When loading paper into the paper tray, make sure that the print side is facing Cautions in storing paper Paper should always be stored properly. Improperly stored paper might damege the paper, resulting in poor print quality, paper misfeeds, or printer damage. Follow the precautions below. • Avoid storing paper in humid areas. - Page 68 Paper not supported by this printer Avoid using the following types of paper that are not supported by this printer. • Paper whose weight is heavier or lighter than the limitation •...
-
Page 69: Printable Area
• Paper that has already been printed on (with the exception of preprinted letterhead) Note The ink used for the former printing by a copier, or an inkjet printer and so on might do harm to the fusing unit of this printer due to a difference in fusing temperatures. -
Page 70: Loading Paper
(Tray 1) only. Loading paper Carefully pull the paper tray out of the printer and place it on a flat surface. Slide the paper guides to positions that match the size of paper you want to load. -
Page 71: Specifying Paper Size Using The Operation Panel
Specifying paper size using the operation panel Use the following procedure to specify the paper size from the printer’s op- eration panel after loading custom size paper into the standard paper tray. Note You can set the custom paper in the standard tray (tray 1) only. - Page 72 {U} and {T} {T} to display “Cus- Use {U} tom,” and then press { { { { { Enter} } } } } . This following message appears. <Custom> UT/# Width 140mm Use {U} {U} and {T} {T} to change the third (leftmost) digit of the paper width.
-
Page 73: Switching Between Paper Trays
The paper tray you specify in the following procedure is cleared when the printer is turned off. A A A A A Press { { { { { Media} } } } } . Power... -
Page 74: Troubleshooting
Displayed error message The displayed error messages appear on the printer’s panel display. Printed Error Message The error message shown below is output by the printer whenever there is not enough memory to print your data. Error Message There is not enough memory in your printer to print this page. -
Page 75: Error & Status Messages On The Operation Panel
Note The panel display can show only one error message at a time. Printing a Con- figuration Page shows all current printer errors under the Printer Error item of the Printer Information section. => P.101 “Printing the Configuration Page” Message... - Page 76 500 pages (A4 5% chart) after this mes- sage appears for cyan, magenta, or yellow toner. Printing is disabled when the printer runs out of any one toner color. => P.80 “Replacing the Toner Car- tridges” Remove the misfed paper. => P.71 “Re- moving Misfed Paper”...
- Page 77 => P.80 “Replacing the Toner Cartridges” Check if a waste toner bottle is installed in the printer. If there is a bottle in- stalled, replace the waste toner bottle. => P.86 “Replacing the Waste Toner Bottle” Check if the interface cable is inserted into the printer and your computer securely.
- Page 78 Panel” If this does not clear the error message, contact your sales or service representa- tive. Remove the RICOH-SCRIPT 2 kit from the printer and turn off and on the printer's power switch. Then, try to perform your printer job.
-
Page 79: Getting Printer Information Over The Network
Note If you cannot solve the problem by taking above actions, turn the printer power off and then back on again. If this does not clear the error message, write down the error number and the message, and contact your sales or service represen- tative. - Page 80 => P.80 “Replace the Toner Cartridge” Replace the yellow toner cartridge. => P.80 “Replace the Toner Cartridge” Turn the printer off and on. If this doesn’t clear the problem, contact your sales or service representative. Contact your sales or service represen- tative.
- Page 81 There is a difference between the paper type in the paper tray and the requested paper type from the computer. Performing Self The printer is now prepar- Check ing for printing. Please Wait The printer is now prepar- ing for printing.
-
Page 82: Printer Configuration
The waste toner bottle is full. Printer Configuration You can check the printer’s settings using the following methods. UNIX Use the info command of rsh, rcp, or ftp. For more information, => “Operating Instructions” of the optional network interface board. - Page 83 *3: Input Tray: Status Messages Normal NoTray PaperEnd ID number of the output tray (not used for this printer) Name Name of the output tray Status Current status of the output tray ID number of the emulation used by the printer...
-
Page 84: Printer Doesn't Print
=> P.101 “Printing the Configura- tion Page” If you can print a test page but cannot get the printer to print when you issue a print command from your com- puter, it probably means there is a problem with your computer. - Page 85 If you cannot solve the problem by taking above actions, contact your sales or service representative. Solutions If not, the data is not being sent to the printer. If your printer is connected to the computer using the interface cable Check if the printer port settings are correct.
-
Page 86: Other Printing Problems
It takes too much time to resume printing. Possible Causes, Descriptions, and Solutions This message is printed when the printer does not have The following are the actions you should take when you encounter memory shortage problems. If these actions do not solve the problem individually, try them in combina- tion with each other. - Page 87 Troubleshooting Status It takes too much time to print. It takes too much time to perform [Color] is selected on the printer driver’s [Setup] tab. black and white printing. Desired tray isn’t used for the out put. Printed side gets dirty.
- Page 88 You might use paper not supported by this printer. Use the appropriate type of paper. => P.49 “Paper not sup- ported by this printer” Check if the surface where the printer is located is level, and not angled in anyway. remove and reinstall the corresponding toner cartridge.
- Page 89 Troubleshooting Status Changing the color settings with the printer driver causes a [Color Setting] tab. drastic change in printout color. Also note that the sample shown by the printer driver is Photograph printing looks rough. Color documents are printed in black and white.
-
Page 90: Removing Misfed Paper
If misfeeds persist, contact your sales or service representative. Do not touch the photoconductor unit when removing misfed paper. If you do, the photoconductor unit might be damaged. To reset the printer after a misfeed, it is necessary to open and close any of covers. R CAUTION •... -
Page 91: When The Message "Remove Misfeed From Tray" Appears
When the Message “Remove Misfeed From Tray” Appears Pull out the paper tray. Note If your printer has an optional paper feed unit installed, check all paper trays for misfeeds. Carefully pull the misfed paper. Make sure that you do not leave any misfed paper in the printer. -
Page 92: When The Message "Open Rear Cover Remove Misfeed" Appears
Take care to avoid contact with the toner as you re- move misfed paper. Open the rear cover of the printer. If the paper has not entered the fusing unit, carefully pull it out. If the paper is inside the fusing unit, open the top cover. -
Page 93: When The Message "Remove Misfeed From Output Tray" Appears
Take care to avoid contact with the toner as you re- move misfed paper. Open the printer’s rear cover. Open the top cover, and then slide the pressure release levers towards the “OPEN” mark to release the pressure between the rollers. -
Page 94: Cleaning And Adjusting The Printer
Cleaning and Adjusting the Printer Press the printer’s power switch to turn off power. Open the front cover by pulling the front cover open lever and open the top cover by pulling the top cover open lever. - Page 95 Troubleshooting Hold the inset grip of the photo- conductor unit, pull it straight up, and remove it from the printer. Important Exposing the photoconductor unit to light for too long can re- duce its performance. Clean the charge wire as quickly as pos- sible.
-
Page 96: Adjusting The Image Density
After pressing a key, wait until the display changes as described, until you perform the next key operation. Press the printer’s power switch to turn on power. Press { { { { { Menu} } } } } . TPOH250E... -
Page 97: Adjusting The Setting Of "Registration" Of The Optional Tray
Use A4 or 8 the configuration page. Press the printer’s power switch to turn on power. Press { { { { { Menu} } } } } . UT/# to the right. - Page 98 { { { { { Enter} } } } } . The “Maintenance” menu appears. <Maintenance> 1.Toner Level T Cleaning and Adjusting the Printer {U} and {T} Use {U} Registration”, and then press { { { { { En- ter} } } } } .
-
Page 99: Replacing Consumables
Do not insert the toner cartridge into the printer with force. If you do, the printer might be damaged. - Page 100 Open the front cover by pulling the front cover open lever. Carefully pull out the toner car- tridge for the color indicated on the panel display. Important Pull the toner cartridge out slowly and carefully to prevent spilling of toner. Note Place the old toner cartridge on paper or some other material to...
-
Page 101: Replacing The Photoconductor Unit
Slowly and carefully slide the new toner cartridge into the printer. Important Do not push the toner cartridge with force. If you do, the printer might be damaged. If it sticks, pull it out and try again. Close the front cover. Press the center of the cover until it locks se- curely into place. - Page 102 Display of the “Change PCU” mes- sage is based on a printed page counter kept internally by the printer. It is meant as a general guide to photoconductor unit life only. Actual photoconductor unit life depends on the printing condi- tions.
- Page 103 Do not return lock levers with force. If you cannot lock them easily, pull the photoconductor unit from the printer. Then rein- sert it again until the gears mesh securely. After that, try returning the levers to their original posi- tions.
- Page 104 Data In Reset Error Menu Escape Media Enter This displays the Printer Menu. <Menu> IPDL-C Menu Use {U} {U} and {T} {T} to display “Main- tenance”, and then press { { { { { Enter} } } } } .
-
Page 105: Replacing The Waste Toner Bottle
Waste Toner is Full Note Before removing the waste toner bottle from the printer, spread pa- per or some other material around the area you are working to keep toner from making floor dirty. Open the front cover by pulling the front cover open lever. -
Page 106: Replacing The Fuser Oil Bottle And Ozone Filter
Important Dispose of used ozone filters as gen- eral burnable refuse. Slide the top cover open lever to- wards the front of the printer, and open the top cover. Replacing Consumables TPOH620E... - Page 107 Rotate the oil bottle lock levers to release the bottle, and then remove the oil bottle from the printer. Insert the oil bottle into the printer. When inserting, the side with the label should be facing towards you, and the mouse of the bottle facing down.
-
Page 108: Replacing The Fuser Cleaner
If you do, it might result in receiving a burn or an injury. Slide the top cover open lever to- wards the front of the printer, and open the top cover. Rotate the lock levers to release the lock. - Page 109 Troubleshooting Press { { { { { Menu} } } } } . Power Error Menu Media This displays the Printer Menu. <Menu> IPDL-C Menu Use {U} {U} and {T} {T} to display “Main- tenance”, and then press { { { { { Enter} } } } } .
-
Page 110: Making Printer Settings With The Operation Panel
Though the factory default settings of the printer are suitable for most printing jobs, the Printer Menu gives you access to a number of settings that control basic printer operations. Printer Menu settings you make are retained even when you turn off the printer. -
Page 111: Setting Menus
Making Printer Settings with the Operation Panel Setting Menus Press { { { { { Menu} } } } } . Power Error Menu Media The following message appears on the panel display. <Menu> IPDL-C Menu Use {U} {U} and {T} {T} to display the screen for the setting you want to change, and then press { { { { { Enter} } } } } . - Page 112 Press { { { { { On Line} } } } } to put the printer on line. The message appears. Take Offline Then Press Reset Press { { { { { On Line} } } } } again to put the printer off-line.
-
Page 113: Protecting The Menus
Protecting the Menus This procedure lets you protect Printer Menu settings against accidental changes. It makes it impossible to change the Printer Menu settings you make with the normal procedure unless you perform the required key operation. In a network environment, protecting settings restricts changes to Printer Menu settings to network administrators. -
Page 114: Changing The Menu Settings Without Removing Protect
Changing the Menu Settings without Removing Protect This procedure allows you to change Printer Menu settings without turning off menu protection. The changes you make are automatically protected as soon as you register them. Press { { { { { Menu} } } } } . -
Page 115: Removing Protect
Making Printer Settings with the Operation Panel Removing Protect Check if the On Line indicator stays on. If not, press { { { { { On Line} } } } } to enter the on-line condition. Press { { { { { Enter} } } } } , then { { { { { Escape} } } } } , and then { { { { { Menu} } } } } . -
Page 116: Menu Table
3. Energy Saver 4. Transfer (Rate) 5. Image Memory 6. Parallel 1 7. Parallel 2 8. Bi-direction 9. Printer Lang (Printer Language) 10. Language 32. IP Address~39. Active PTL. 1. Toner Level => P.77 “Adjusting the Image Density” 2. Reinstall =>... -
Page 117: Menu Settings
Note Shaded settings indicate default settings. 1. Job Timeout You can specify how long the printer waits before terminating a print job when the printer doesn't receive the end of that print job. • 000 second (off: endless wait) • 001 to 999 seconds 2. - Page 118 • 45 minutes • 60 minutes Important After the printer enters the Energy Saver mode, it takes some time to warm up again when print data is received. 4. Transfer You can specify the data transfer speed of the parallel interface. If you are having trouble with data transfers, try changing this setting to “Normal”.
- Page 119 Do not use the “ACK outside” setting. 8. Bi-direction You can specify the printer response mode for status fetch requests when the standard parallel interface is being used. Use the “Standard” setting when you are experiencing problems while the printer is connected to another manufacturer’s print box.
-
Page 120: Printing The Configuration Page
Error Menu Escape Media Enter The Printer Menu appears. Use {U} {U} and {T} {T} to display “List Print”, and then press { { { { { Enter} } } } } . The “List Print” menu appears. <List Print>... -
Page 121: Interpreting Configuration Page
Reference Firmware Version This shows the printer firmware version. Printer ID This is the serial number assigned to the printer board by its manufacturer. Total Installed RAM This is the total amount of memory installed on the printer. Option Interface This indicates whether there is an optional parallel interface board or network interface board installed in the printer. -
Page 122: Status List
This shows current “System Menu” settings. Network These are the settings and status of the optional network interface board. They appear when an optional network interface board is installed on the printer. Error Log This is a log of printer errors. -
Page 123: Printing The Color Sample
Making Printer Settings with the Operation Panel Printing the Color Sample Use the following procedure to print the Color Sample. Note You should select A4 or 8 Press {Menu}. Power Error Menu Media The Printer Menu appears. Use {U} and {T} to display “List Print”, and then press {Enter}. -
Page 124: Resetting Menus
Take Offline Then Press Reset Press { { { { { On Line} } } } } again to put the printer off line. Press { { { { { Reset} } } } } . This resets all menus to their initial factory defaults, and returns to the normal display screen. - Page 125 Making Printer Settings with the Operation Panel...
-
Page 126: Appendix
Memory Capacity and Paper Size The following table shows the relationship between printable paper sizes and memory capacity. Resolution: 300dpi Total Printer JIS B5 " 10 Memory (182 x 257 mm) (Executive) 16 MB 32 MB 48 MB : Printing is possible regardless of data volume. - Page 127 The error message shown below is output by the printer whenever there is not enough memory to print your data. Note If you are using the RICOH-SCRIPT 2, see the documentation that comes with it for information about its memory. The following are the actions you should take when you encounter memory shortage problems.
-
Page 128: Moving And Transporting The Printer
Moving and Transporting the Printer R CAUTION • When moving the printer a consumable items installed, be sure to keep it level to avoid spilling the fusing oil. If oil is spilt, wipe it with alkaline cleaner. Otherwise, the oily surfaces can create the danger of slipping and per- sonal injury. -
Page 129: Specifications
IPDL-C: 300dpi, 600dpi RICOH-SCRIPT 2: 300dpi, 600dpi Parallel Interface Conforms to the standard centronics Inteface A standard 36-pin printer cable and a parallel port on the host computer Mode Compatible, Nibble Connector IEEE P1284-B *Do not use a cable more than 2.5 meters (8.2 feed) long. -
Page 130: Power Consumption
Less than 55 dB(A) Stand-by Less than 48 dB(A) *The above measurements are made in accordance with ISO7779 at operation position. Dimensions: Printer only 500 mm (19.7") With optional paper 500 mm (19.7") feed unit With optional paper feed unit 500 mm (19.7") -
Page 131: Options
• Memory Unit Type204 (16MB) • Memory Unit Type204 (32MB) Options Paper Feed Unit Type204 Paper Size: => P.47 “Paper and Other Media Supported by this Printer” Paper Weight: => P.47 “Paper and Other Media Supported by this Printer” Paper Cassette Type204 Paper Size: =>... - Page 132 Network Interface Board Type204 Topology: Ethernet (10BaseT/100Base TX) Protocols: TCP/IP, IPX/SPX, AppleTalk Interface Connector: RJ45 Required Cable: STP (Shielded Twisted Pair) cable Category/Type 5 or better *A cable is not included with this option. Memory Unit Type204 (16MB) and Memory Unit Type204 (32MB) Memory Type: EDO (Extended Data Output) RAM Number of Pins:...
-
Page 133: Comsumbles
All this means that a toner cassette might require replacement sooner than the normal life described above. Toner cartridges that come with the printer are for setup purposes, and will not provide the number of pages described above. -
Page 134: Glossaries
Ethernet A network protocol used by Local Area Networks (LANs). Installing an op- tional network board in the printer allows it to be connected to a network and serve as a network printer. Graphics Command Command is for printing lines, circles, ellipses, and other graphics. - Page 135 Output port of print data from the computer to the printer. With a parallel connection, for example, your computer outputs data from its LPT1 printer port. In the case of a network printer, data is output from the port that is con- figured for printing.
-
Page 136: Index
Image Memory, 99 Image Printing, viii Inset grips, 2 Interface Board, 8 IP Address, 23 IPDL-C, 103 IPDL-C Menu, 98 IPDL-C Printer Driver, 29 Job Timeout, 98 Language, 100 Media, 52, 54 Media key, 5 Memory, 108 Memory Capacity, 107... - Page 137 Printer Settings, 91 Rear cover, 3 Reference, 102 Registration, 78 Reset key, 5 RGB, iv RGB color model, iv RICOH-SCRIPT 2 Type204, 8, 11 Saturation, x Status List, 103 Subnet Mask, 23 System, 103 System Menu, 98 Toner cartridges, 4, 80...
-
Page 138: Network Interface Board
Network Interface Board Type204 (Option) OPERATING INSTRUCTIONS Read this manual carefully before you use this product and keep it handy for future reference. For safety, please follow the instructions in this manual. - Page 139 Network Interface Board Type204 (Option) OPERATING INSTRUCTIONS...
- Page 140 To get maximum use from this machine, all operators should carefully read and follow the instructions in this manual. Please read the Safety Information in the “Operating Instructions” that comes with the printer before using this machine. It contains important information related to USER SAFETY and PREVENTING EQUIPMENT PROBLEMS.
- Page 142 TABLE OF CONTENTS Introduction... 1 Setting Up the Printer in a Network ... 2 Printing without Using a Print Server ... 2 Printing with a Windows NT Print Server ... 3 Printing as a NetWare Print Server ... 3 1. Windows 95/98 Configuration Configuring Windows 95/98 ...
- Page 143 Executing the Installation Shell Script ... 49 Executing the Installation Shell Script ... 52 Printing Method ... 55 Printing with rsh, rcp, ftp... 55 Status Representation of Printer ... 58 Displaying INformation ... 58 Copying Information to the File ... 58 6. Appendix Multi Direct Print...
-
Page 144: Introduction
Introduction This manual contains detailed instructions on configuring your printer for use as a network printer. The actual procedures may differ depending on your net- work environment. Use the procedures for your network environment. Windows 95 / 98 Windows NT... -
Page 145: Setting Up The Printer In A Network
Setting Up the Printer in a Network Printing without Using a Print Server You don't have to use a print server. The actual procedure differs depending on your operating system. Macintosh UNIX AppleTalk TCP/IP TCP/IP TCP/IP Windows 95 / 98 Windows NT4.0... -
Page 146: Printing With A Windows Nt Print Server
• Windows NT 4.0 Printing as a NetWare Print Server The Network Interface Board allows you to set up your printer in a NetWare en- vironment as either a print server or a remote printer. A dedicated NetWare print server is not required. If a dedicated print server is being used, your printer should be configured as a remote printer. - Page 147 Configure as Print Server Print Server Note The actual procedures for configuring your printer may differ depending on the version of NetWare. • NetWare 3.12J • NetWare 4.xJ The actual procedures for configuring your client computer may differ de- pending on the operating system.
- Page 148 Configure as Remote Printer Remote Printer Note The actual procedures for configuring your printer may differ depending on the version of NetWare. • NetWare 3.12J P.31 • NetWare 4.xJ P.38 The actual procedures for configuring your client computer may differ de- pending on the operating system.
- Page 150 1. Windows 95/98 Configuration ® ® You can use your printer as a network printer with Windows 95 and Windows 98 using the Multi Direct Print application and the TCP/IP protocol. This chap- ter explains how to configure your printer and Windows.
-
Page 151: Windows 95/98 Configuration
Preparing to Print The network must be configured as described below. Configuring the Printer Configure your printer to use the TCP/IP protocol. • Confirm that the TCP/IP protocol is set to be active. (The factory default is Active) • Assign an IP address and make other settings required for using the TCP/IP protocol. -
Page 152: Installing The Multi Direct Print Application
Note You must install Multi Direct Print and the appropriate printer driver in order to print. To be able to browse the printer via the network, PRINTER MAN- AGER FOR CLIENT needs to be installed. Insert the CD-ROM that comes with the printer into your computer's CD- ROM drive. -
Page 153: Setting Up The Printer Driver
When the uninstallation is complete, restart the computer. Setting Up the Printer Driver Using Multi Direct Print to print is not possible until the printer driver is in- stalled and the correct port selected. Preparation The target printer must be turned on before starting the installation process. - Page 154 The printers which have replied to a broadcast from the computer are list- ed here. To print to a computer that is not on this list, or to directly input the printer, highlight [New Printer] by clicking it, and click [Next >], and then input the port name with procedure F.
- Page 155 Windows 95/98 Configuration Configuration is complete. When you print, the printing procedure is no different. When you select the printer configured here, the computer automatically uses Multi Direct Print.
- Page 156 2. Windows NT 4.0 Configuration ® You can use your printer as a network printer with Windows NT 4.0 using the Multi Direct Print application and the TCP/IP protocol. This chapter explains how to configure your printer and Windows NT.
-
Page 157: Windows Nt 4.0 Configuration
Follow the instructions below to configure the Network Interface Board and Windows NT to use the TCP/IP ptotocol. Configuring the Printer Configure your printer to use the TCP/IP protocol. • Confirm that the TCP/IP protocol is set to be active. (The factory default is Active) •... -
Page 158: Installing The Multi Direct Print Application
Note You must install Multi Direct Print and the appropriate printer driver in order to print. To be able to browse the printer via the network, PRINTER MAN- AGER FOR CLIENT needs to be installed. To install this software you must be logged on as a member of the Adminis- trators group. -
Page 159: Setting Up The Printer Driver
When the uninstallation is complete, restart the computer. Setting Up the Printer Driver Using Multi Direct Print to print is not possible until the printer driver is in- stalled and the correct port is selected. Preparation The target printer must be turned on before starting the installation process. - Page 160 Any port can be selected during the installation, however, LPT1 is recom- mended. In the [Printers] window, highlight the icon of the printer you want to use by clicking it. On the [File] menu, click [Properties]. Click the [Ports] tab, and then click [Add Port].
- Page 161 Windows NT 4.0 Configuration ministrator to confirm the printer name. For more information, refer to P.87 “The Others” Limitation You cannot use a host name that begins with “%%”. Confirm the port name in the [Port Name] box, and click [Finish].
-
Page 162: Setting Up A Client Computer
Any port can be selected during the installation, however, LPT1 is recom- mended. Click [Start], point to [Settings], and then click [Printers]. Select the icon of the printer you want to use by clicking it. On the [File] menu, click [Properties]. Click the [Details] tab, and click [Add Port]. -
Page 163: Windows Nt 4.0
The printers attached to the network are displayed. Select the name of the printer you want to use by clicking it, and click [OK]. Click [OK]. Confirm that the port name is displayed in the [Print to the following port] box, and click [OK]. -
Page 164: Configuring Lpr Port Printing
This is a procedure to change the printer port to LPR. Click [Start], point to [Settings], and then click [Printers]. Select the icon of the printer you want to use by clicking it. On the [File] menu, click [Properties]. - Page 165 Windows NT 4.0 Configuration...
-
Page 166: Netware Configuration
3. NetWare Configuration This chapter describes how to configure your printer to use as a print server or a remote printer in a NetWare environment. Note NetWare must be set to Active using the operation panel of your printer. For... -
Page 167: Installing The Nib Setup Tool
NetWare Configuration Installing the NIB Setup Tool A utility called the NIB Setup Tool is provided to configure your printer to work in a NetWare environment. Installing the PRINTER MANAGER FOR ADMIN- ISTRATOR installs the NIB Setup Tool to your printer. This section describes how to install the PRINTER MANAGER FOR ADMINISTRATOR, and how to run the NIB Setup Tool. -
Page 168: Running The Nib Setup Tool
The installation program starts. After the confirmation dialog appears, the installation program is complete. Running the NIB Setup Tool Click [Start], point to [Programs], and then click [NIB Setup Tool (NIB240-E)] in the [PRINTER MANAGER FOR ADMINISTRATOR] program. Installing the NIB Setup Tool... -
Page 169: Configuring The Network Interface Board Using The Nib Setup Tool
Limitation When the Wizard method is used, the Network Interface Board is configured to work as a Print Server. To configure it as a remote printer, use the Property Sheet method. For more information, refer to P.29 “NetWare 3.x Configuration”... - Page 170 The factory default name is already entered. You should change it if neces- sary. Input the name of the Printer into the [Printer Name] box, and the name of the Print Queue into the [Print Queue Name] box. The factory default is “Print Server Name” followed by “_1 _Q”( quotation marks are not included).
- Page 171 If you want change the settings, click [< Back] and make the settings again. Cliking [Next >], the NIB Setup Tool automatically creates the Print Server, the Printer, and the Print Queue on NetWare. After a confirmation dialog appears, select [Quit] and click [Finish] to exit the...
-
Page 172: Netware 3.X Configuration
NetWare 3.x Configuration The actual procedures for configuring your printer differ depending on whether the Network Interface Board is configured as a print server or as a remote print- er. This section describes how to configure it in the NetWare 3.x environment. - Page 173 Note If you don't know which Network Interface Board you are configuring, print the Configuration Page using the printer's operation panel, and select the MAC address that is on the page. Confirm that the MAC and IPX addresses are correct, and click [Finish].
-
Page 174: Setting Up As Remote Printer
A In the [Print Server Configuration Menu], select [Queues Serviced By Printer]. B Select the printer created in the Step L L L L . C Press { { { { Insert} } } } to select a queue serviced by the printer. Note You can select more than one queue at a time. - Page 175 D In the [Remote Printer No.] box, input the printer number. Important Use the same printer number as that to be created in the printer server. E Click [OK] to close the property sheet. F After the message appears to confirm the reboot, click [Yes].
- Page 176 A In the [Print Server Configuration Menu], select [Queues Serviced By Printer]. B Select the printer created in the Step L L L L . C Press { { { { Insert} } } } to select a queue serviced by the printer. Note You can select more than one queue at a time.
- Page 177 Start the print server by inputting as follows from the console of the Net- Ware Server. If it is running, restart it after exiting it. To exit CAREE: unload pserver To start CAREE: load pserver print_server_name Note If the printer works as configured, “Waiting for job” appears.
-
Page 178: Netware 4.X Configuration
NetWare 4.x Configuration The actual procedures for configuring your printer differ depending on whether the Network Interface Board is configured as a print server or as a remote print- er. This section describes how to configure it in the NetWare 4.x environment. - Page 179 Note If you don't know which Network Interface Board you are configuring, print the Configuration Page using the printer's operation panel, and select the MAC address that is on the page. Confirm that the MAC and IPX addresses are correct, and click [Finish].
- Page 180 A Select the container object the printer is located in, and click [Create] in the [Object] menu. B In the [Class of new object] box, click “Printer” to highlight it, and click [OK]. C In the [Printer name] box, input the name of the printer.
-
Page 181: Setting Up As Remote Printer
To confirm if the printer is configured correctly, enter as follows from the command prompt. F:> NLIST USER /A/B If the printer works as configured, the name of the print server appears as an attached user. Setting Up as Remote Printer... - Page 182 D In the [Print server Operation mode] group, click [As Remote Printer]. E In the [Remote Printer No.] box, input the number of the printer. Important Use the same number as that of the printer to be created in the print server. G Click [OK] to close the property sheet.
- Page 183 A Select the container object the printer is located in, and click [Create] in the [Object] menu. B In the [Class of new object] box, click “Printer” to highlight it, and click [OK]. C In the [Printer name] box, input the name of the printer.
- Page 184 B In the [Available objects] box, click the queue created in the step L L L L to high- light it, and click [OK]. C In the [Printers] group, click the printer assigned in the step B B B B to high- light it,and click [Printer Number].
-
Page 185: Setting Up A Client Computer
Any port is selected during the installation, however, LPT1 is recommend- Click [Start], point to [Settings], and then click [Printers]. In the [Printers] window, select the icon of the printer you want to use by clicking it. On the [File]] menu, click [Properties]]. -
Page 186: Windows 3.1X
Remove the ' ' ' ' marks from the [Form feed] and the [Enable banner] check box- Note You should not check these boxes here, since they should be specified us- ing the printer driver. If they are checked, the printer might not print cor- rectly. When Using the PostScript Printer Driver Follow these steps to set up for the PostScript Printer Driver A Click the [PostScript] tab. - Page 187 Remove the marks from the [Form feed] and the [Enable banner] check boxes. Note You should not check these boxes here, since they should be specified us- ing the printer driver. If they are checked, the printer might not print cor- rectly. Click [OK] to close the [NetWare Settings] dialog.
-
Page 188: Macintosh Configuration
Mac OS. This chapter de- scribes how to configure your printer for MacOS8. If you are using a different version, refer to the manual that comes with your version of the Mac OS for more information. -
Page 189: Configuring The Printer
If the network has several same model printers, the names will be the same. Printers that have the same name will have their names changed slightly in the Chooser. For example, three printers named “printer” will appear in the chooser as “printer0”, “printer1” and “printer2”. -
Page 190: Unix Configuration
5. UNIX Configuration This chapter explains how to set up a network printer and check the print status using UNIX. Limitation If the printer language is IPDL-C, you cannot print from a UNIX workstation. The optional PostScript kit is required to print from a UNIX workstation. -
Page 191: Installing With The Installation Shell Script
When you use NIS (Network Information Service) or DNS, you should con- figure the server before running this installation shell script. Refer to the manual that came with the printer configuration utility of your OS for additional information. Assigning IP Address Preparation Configure your printer to use the TCP/IP protocol. -
Page 192: Executing The Installation Shell Script
If you do not log in with root, the installation shell script will not run. Get installation shell script from the printer. A Move to the directory copying installation shell script. B Use ftp to connect to the printer having the IP address that you just con- figured. # ftp 192.168.15.16 Connected to 192.168.15.16... - Page 193 The current directory must be followed by a period. Input a number to select the workstation OS that you are using. Network printer install shell Copyright RICOH CO.,LTD. 1994-1998 Select your workstation OS type. 1. SunOS 4.x.x 2. Solaris 2.x (SunOS5.x) 3.
- Page 194 If the host name of the printer has already been configured, input nothing and press {Return}. Nothing is added to the /etc/hosts file. Input the host name of a printer. Enter Printer host name : pomelo Note The host name is added to the /etc/hosts file.
-
Page 195: Executing The Installation Shell Script
:sd=/usr/spool/pomelo_prnd:\ :lf=/usr/adm/pomelo_prnd-errs:\ :mx#0: Note The /etc/printcap file is used to register the name and attributes of a printer. You must make an entry for the network printer in the /etc/printcap file of all workstations using the network printer. pomelo # Network Printer... - Page 196 The first line of the field is the name of the printer. You use this name when logging on to a network printer from a workstation. You can define several different names by separating each name with the “|”...
- Page 197 # chgrp daemon pomelo_prnd # chmod 775 pomelo_prnd Making of Log File Log file of error messages is created in the /usr/adm directory. The log file name is the name that added “d-errs” to the last part of the printer name.
-
Page 198: Printing Method
Depending on the type of work station being used, input the following. BSD UNIX workstation % lpr -P printer_name file_name [ file_name... ] For example: printer name is r_prn, file names are file1 and file2 % lpr -P r_prn file1 file2 Solaris, HP-UX % lp -d printer_name file_name [ file_name... ]... - Page 199 [ file_name... ] Limitation To print using the mput com- mand you must first set the printer emulation to R-PS2. You cannot print when emulation is set to IPDL-C. Note You can use wild cards ( * or ? ) for the file name with the mput command.
- Page 200 The following is an example of printing two files, named file1 and file2 ftp> mput file1 file2 Finish ftp. ftp> bye Printing Method...
-
Page 201: Status Representation Of Printer
If you use a BSD UNIX workstation, you can use the following commands to have information and the status of the printer displayed or copied to a file. Displaying INformation Use the lpq command to display the status of the printer or information on the print job. % lpq -P printer_name Use the rsh command or ftp to display information about the specified parame- ter. - Page 202 Status Representation of Printer % ftp host_name User: user_name password: ftp> get parameter file_name...
- Page 203 UNIX Configuration...
-
Page 204: Appendix
Multi Direct Print Multi Direct Print is a Windows program that allows you to print on a Peer-to- Peer network. This program allows you to print directly to a network printer, even if there is no print server. Requirement Microsoft Windows 95/98 Microsoft Windows NT 4.0... -
Page 205: [Network]
Select to display the printers which can print using the selected protocol. [Network] When you select a printer with the [Select Printer] dialog, the IP address is input automatically. Port Name To select a printer using a host name or a domain name, input the name here. -
Page 206: Configuring The Network Interface Board With A Web Browser
Web Browser The Network Interface Board functions as a Web server in addition to allowing a printer to function as a network printer. You can use a Web browser to view the printer status and configure the Network Interface Board. - Page 207 Limitation The computer must be on a net- work that has access to the Internet in order to access the Ricoh web- site. Important It costs to use the browser to access a website.
-
Page 208: Assigning Ip Address With Arp+Ping
The MAC address (Ethernet address) of the Network Interface Board is required in order to use ARP and PING to assign the IP address. The MAC address can be seen on the printer configuration page. Reference For additional information on printing a configuration page, refer to the Op- eration Instructions of your printer. -
Page 209: Remote Maintenance By Telnet (Mshell)
Appendix Remote Maintenance by Telnet (mshell) You can view the printer status and configure the network interface board using telnet. Note You should specify a password so that only the network administrator, or a person having network administrator privileges, can use remote mainte- nance (mshell). -
Page 210: Command List
The Network Interface Board is reset automatically when the settings are changed. When the Network Interface Board is reset, the active print job which has already been sent tot the printer, will finish printing. However, jobs that haven't been sent yet will be cancelled. Command List This is a list of commands that can be done via remote maintenance. - Page 211 IP addresses that can print are as follows. The XXX is a variable that means any number from 1 to 255 is acceptable. Access Control Mask 0.0.0.0 Configuration Method Access Control Address Access Control Mask IP addresses that can access the printer XXX.XXX.XXX.XXX...
- Page 212 Use the set command to allow/prevent remote access for each protocol. msh> set protocol {up | down} Protocol appletalk “Up” means active and "Down” means inactive. tcpip netware netbeui diprint Remote Maintenance by Telnet (mshell) IP addresses that can access the printer 192.XXX.XXX.XXX 192.168.XXX.XXX 192.168. 15.XXX 192.168. 15. 16...
- Page 213 Note If you prohibit remote access using TCP/IP and then logout, you cannot use remote access. If this was a mistake, you can use the printer operation panel to allow access by TCP/IP. When you prevent access via TCP/IP, you are also prevented from using lpr, ftp and rsh.
- Page 214 System Log Information Use the syslog command to display information stored in the printer's system log. msh> syslog Reference For more information on the displayed information, refer to P.80 “System Log Information”. SNMP Use the snmp command to display and edit SNMP configuration settings such as the community name.
- Page 215 Appendix Access Type read write trap Protocol configuration You should use the following command to set the protocols to active or inac- tive. If you set a protocol to inactive, you cannot use all the registered num- bers for it. msh>...
- Page 216 Note The default factory password is “password”. Input “passwd”. msh> passwd Input the current password. Old password: Input the new password. New password: Note The password must consist of 3 to 8 alphanumeric characters and symbols. Upper and lower case characters are considered unique. For example, R is different from r.
-
Page 217: Snmp
Protocol) agent using the UDP and IPX protocols. Using the SNMP man- ager you can get information about the printer. The factory default community names are “public” and “ricoh”. You can get MIB information using these community names. Reference For more information about configuring the community name, refer to “SNMP”... -
Page 218: Understanding The Displayed Information
The type of print command used. Bytes The size of the file in bytes. Understanding the Displayed Information P.70 “Status of Printer”. Printing or being prepared for printing. Waiting to be transferred to the printer. P.70 “Status of Printer”. P.58 “Status Representa-... -
Page 219: Network Statistical Information
The time the print job was started. The time the print job was completed. Reception number of file unit. Number of bytes of received data. P.70 “Status of Printer”. Meaning The time that passed since the network interface board started. -
Page 220: Configuring The Network Interface Board
Understanding the Displayed Information P.70 “Information about the Network Interface Meaning Up means active, Down means inactive. Internal version number. AppleTalk protocol in selection. Network number. Macintosh printer name. The type of printer. Name of the zone that the printer belongs to. - Page 221 Appendix Item Name TCP/IP Mode diprint telnet download EncapType Network boot Filter Max DSTs Address Netmask Broadcast Gateway AccessCtrl AccessMask Time server Home page URL Home page link name Help page URL SNMP protocol Meaning Up means active, Down means inactive. Frame type.
- Page 222 Share name[1] Shell mode Understanding the Displayed Information Meaning (this value is fixed) Frame type. Remote printer number. Remote printer name. Print server name. Name of the connect file server. Context of print server. Active mode. (this value is fixed) Time of the job timeout.
-
Page 223: Message List
Appendix Message List This is a list of messages recorded to the the printer's sytem log. The system log can be viewed using the the syslog command. System Log Information You can use the following methods to view the system log. - Page 224 The specified log file is opened. The print queue is not assigned to the printer. Using NetWare Admin, assign the print queue to the printer, and then re- start it. Print services are not available for the print queue. Confirm that the volume of the print queue exists on the specified print server.
- Page 225 Confirm the file code and the set- tings of the filter option. The connection was cut by a counterpart. Check the printer to which you requested to print. Cannot accept the print request.(max. 5 sessions) Confirm the status of the printer...
- Page 226 You should use only the print, stat, status, syslog, info, and prnlog commands. You should access the printer only with rsh and rcp remote shell commands. The command line is too long. You must use a file name with the stat, status, syslog, info, prnlog, and install commands.
- Page 227 Error numbers in the messages are codes for service representatives. Something is wrong with your printer. Confirm the status of the printer. The agent is complete. Reset the printer or turn the printer off and on. The received packet was ignored since the length of the packet exceeds the limit.
-
Page 228: Please Be Careful
When file server of NetWare exists in the network of remote side, ISDN line con- tinues being connected by packet sent from printer, there may be a thing asked great communication charges. Because this is a thing by specification of Net- Ware, you need to cope by network administration shown in the following in or- der to evade this problem. -
Page 229: When Print Postscript From Windows
Settings] tab of property of printer. Printing after Resetting the Printer After resetting the remote printer, it will be cut off from the print server for about 30-40 seconds before connecting again. During this interval print jobs may be ac- cepted, but they will not be printed. - Page 230 Windows NT Server 3.51, 4.0 can be configured as a DHCP server. Give the printer a static address Configure the DHCP server to so that the printer has a static address. Note When numerical DHCP server exists, turn an equal reservation into all DHCP server.
- Page 231 Appendix changes in a printer name configured by Network Interface Board. However, only 13 characters appear here from beginning of printer name. • When IP address is not assigned from DHCP server, a network interface board uses 11.22.33.44 as temporary IP address.
-
Page 232: Specification
Specification LAN interface 100BASE-TX, 10BASE-T Frame type EthernetII, IEEE802.2, IEEE802.3, SNAP Protocol • IPX/SPX • TCP/IP • AppleTalk SNMP MIB-II, PrinterMIB, HostResourceMIB NetWare 3.11, 3.12, 3.2, 4.1, 4.11, IntranetWare Windows 95 Windows 98 Windows NT 4.0 UNIX MacOS 7.1 or greater Specification... -
Page 233: Index
INDEX UEUSA EE GB... - Page 234 RICOH-SCRIPT2 Type204 (Option) OPERATING INSTRUCTIONS Read this manual carefully before you use this product and keep it handy for future reference. For safety, please follow the instructions in this manual.
- Page 235 Printed in Japan G503-8600...
- Page 236 Introduction Please read the Safety Information in the “Operating Instructions” that comes with the printer before using this machine. It contains important information related to USER SAFETY and PREVENTING EQUIPMENT PROBLEMS. Important Parts of this manual are subject to change without prior notice. In no event will the company be liable for direct, indirect, special, incidental, or consequential damages as a result of handling or operating the machine.
- Page 237 Copyright © 1999...
- Page 238 How to Read this Manual Symbols In this manual, the following symbols are used: R WARNING: This symbol indicates a potentially hazardous situation which, if instructions are not followed, could result in death or serious injury. R CAUTION: This symbol indicates a potentially hazardous situation which, if instructions are not followed, may result in minor or moderate injury or damage to property.
- Page 239 Getting Acquainted with RICOH-SCRIPT2 Type204... 1 Unpacking the RICOH-SCRIPT2 Type204 ... 1 About the CD-ROM ... 1 Installing the RICOH-SCRIPT2 (DIMM) to Your Printer ... 3 Features of the RICOH-SCRIPT2... 4 Printing with the RICOH-SCRIPT2 ... 5 Operation Panel ... 6 Messages on the Operation Panel ...
- Page 240 RPS2 Menu Table... 54 Printing the Configuration Page ... 55 Interpreting the Configuration Page ... 56 Printer Memory and VM Area ... 57 Precautions for RICOH-SCRIPT2 ... 58 Differences between RICOH-SCRIPT2 and “PostScript ence Manual, Second Edition” ... 58 Other Precautions ... 58 INDEX...
-
Page 242: Getting Acquainted
1. Getting Acquainted Getting Acquainted with RICOH-SCRIPT2 Type204 Unpacking the RICOH-SCRIPT2 Type204 Check the contents of the box for the following items. • DIMM (RICOH-SCRIPT2 Type204) • Installation Guide • Operating Instructions (this manual) About the CD-ROM Note The CD-ROM comes with your printer. - Page 243 Getting Acquainted FOLDER NAME HELP RPS2 For Macintosh FOLDER NAME Printer Descrip- tions Fonts Fonts ColorSync™ Pro- files Zone Name ENGLISH Operating Instructions in English (PDF file) DEUTSCH Operating Instructions in German (PDF file) FRANCAIS Operating Instructions in French (PDF file)
-
Page 244: Installing The Ricoh-Script2 (Dimm) To Your Printer
FOLDER NAME HELP RPS2 Installing the RICOH-SCRIPT2 (DIMM) to Your Printer Reference See the “Operating Instructions” that comes with the printer for details on in- stalling the RICOH-SCRIPT2 (DIMM) to your printer. Getting Acquainted with RICOH-SCRIPT2 Type204 Comments English Operating Instruc-... -
Page 245: Features Of The Ricoh-Script2
RICOH-SCRIPT2 prints text, graphics, images, and just about any other type of complex data. - Interpreter An interpreter is software that analyzes PostScript data and converts it to print- able data. RICOH-SCRIPT2 converts PostScript data into data that can be print- ed by your printer. -
Page 246: Printing With The Ricoh-Script2
Monochrome/Color printing RICOH-SCRIPT2 supports monochrome and full color printing. Image printing modes RICOH-SCRIPT2 supports two different image printing modes. One is suit- able for printing photographs, and the other for text. Built-in color profiles RICOH-SCRIPT2 comes with three color profiles (Photograph, Presentation, and Solid Color). -
Page 247: Operation Panel
The display shows the current status of the printer and error messages. On Line indicator Tells you whether the printer is on-line or off-line. Stays on while the printer is on-line (a state in which the printer can receive data from the computer). - Page 248 Reference For more information on the operation panel, see the “Operating Instruc- tions” that comes with your printer. For more information on the operation panel, see P.49 “Making Printer Set- tings with the Operation Panel”. Operation Panel Pressing this key when the printer is on- line cancels the ongoing print job.
-
Page 249: Messages On The Operation Panel
• there are errors in the data to be sent to the printer. Some errors can be solved by adding memory to your printer. For more infor- mation on printer memory and VM area, see P.57 “Printer Memory and VM Area”. -
Page 250: Using Ricoh-Script2 With Windows
2. Using RICOH-SCRIPT2 with Before Installing RICOH-SCRIPT2 Follow the steps below to use RICOH-SCRIPT2 with Windows operating sys- tem. Install the printer driver. Install the printer driver and PPD file. The printer driver and PPD file you should install depend on the version of Windows operating system you are using. -
Page 251: Ricoh-Script2 Printer Drivers For Windows 95/98/Nt4.0
Using RICOH-SCRIPT2 with Windows RICOH-SCRIPT2 Printer Drivers for Windows 95/98/NT4.0 The following shows the folders of the printer drivers for Windows that are in- cluded in the CD-ROM that comes with the printer. For Windows 95/98 FOLDER NAME DRIVERS RPS2 For Windows NT4.0... - Page 252 Operation under Windows NT with a RISC processor (MIPS R Series, Alpha Axp, Power PC) is not supported. Display resolution 480 dots or better Note Make sure that sufficient hard disk space is available on your computer. Before Installing RICOH-SCRIPT2...
-
Page 253: Using Ricoh-Script2 With Windows 95/98
ROM drive. Click [Browse]. Note The Windows 95/98 printer driver is on the following folder on the CD- ROM: \DRIVERS\RPS2\WIN95_98\(language) Use the [Drives:] list box to select the CD-ROM drive. In the [Folders] box, double-click [DRIVERS], [RPS2], and then [WIN95_98]. -
Page 254: Setting Up Options
Setting Up Options Click [Start], point to [Settings], and then click [Printers]. The [Printers] window opens. Select the icon of the printer you want to use by clicking it. On the [File] menu, click [Properties]. The Printer Properties appears. Click the [Device Options] tab. -
Page 255: Accessing The Printer Properties
Profiles set in the [Color Management] tab are not supported. Click [Start], point to [Settings], and then click [Printers]. The [Printers] window opens. Select the icon of the printer you want to use by clicking it. On the [File] menu, click [Properties]. The Printer Properties dialog appears. -
Page 256: Printer Properties' Tabs And Their Settings
You can use this dialog to make basic settings, such as the number of cop- ies, the print range, etc. Select the printer you want to use from the [Name] list box of the [Printer] group, and then click [Properties]. - Page 257 Use to specify the number of copies of a print job. Important With some applications, the number of copies specified with the applica- tion takes priority over the number of copies specified with the printer driver. More Options Click to open the [More Paper Options] dialog. You can specify the paper type in this dialog.
- Page 258 In the [For this TrueType font:] list in the upper part of the dialog, select the TrueType font for which you want to specify a substitution font by clicking Use the [Printer font for:] list box to select the printer font you want to spec- ify.
- Page 259 When the printer is connected to the network. Uncheck both [Send CTRL+D before job] and [Send CTRL+D after job]. When the printer is connected to your computer via parallel interface cable. Check both for [Send CTRL+D before job] and [Send CTRL+D after job]. Also, make sure that [ASCII data] is checked.
-
Page 260: Using Ricoh-Script2 With Windows Nt4.0
Limitation Installing the printer driver requires full control access rights. To install the printer driver, log on as an Administrator or a Power Users group member. Important The CD-ROM containing the Windows NT Server network operating system Version 4.0, or the Windows NT Workstation operating system is required for... - Page 261 Finally, click [Open]. Click [OK]. A printer model selection dialog appears. Select the name of the printer whose driver you want to install by clicking it, and then click [Next]. A dialog for changing the printer name appears.
-
Page 262: Setting Up Options
Setting Up Options Click [Start], point to [Settings], and then click [Printers]. The [Printers] window opens. Select the icon of the printer you want to use by clicking it. On the [File] menu, click [Properties]. The Printer Properties appears. Click the [Device Settings] tab. -
Page 263: Accessing The Printer Properties
Making Printer Properties Settings Click [Start], point to [Settings], and then click [Printers]. The [Printers] window opens. Select the icon of the printer you want to use by clicking it. On the [File] menu, click [Properties]. The Printer Properties dialog appears. -
Page 264: Printer Properties' Tabs And Their Settings
General users can change the settings in an application's [Print] dialog. Select the application's [Print] command on the [File] menu. The [Print] dialog opens. Make sure that the displayed printer name is the printer you want to use, and then click [Properties]. The Default Document Properties dialog appears. - Page 265 [16 MB ], [32 MB ], [48 MB ]. Option Tray Use this to specify if the optional tray unit is installed on the printer. The fol- lowing settings are available: [None] and [Tray 2]. Reference For more information on the options, see the printer's “Operating Instruc-...
-
Page 266: Default Document Properties' Tabs And Their Settings
Note All paper sizes that can be used with Windows NT4.0 are displayed, how- ever, only the paper sizes supported by the printer can be selected. Reference For more information on paper sizes supported by this printer, see the printer's “Operating Instructions”. - Page 267 Scale], [Color]. • TrueType Font Use this to set the TrueType font printing method. Selecting [Substitute with Device Font] causes TrueType fonts to be replaced with the printer's fonts in accordance with the font substitution table. PostScript Options • Mirrored Output Select this option to print a mirror image of your document by reversing the horizontal coordinates.
- Page 268 Turning on this setting tells the printer to automatically switch to the other tray when it has the same size of paper as the current tray when paper runs out while printing. • Color Mode Use this to set the output color to [Black & White] or [Color].
-
Page 269: Using Adobe ® Pagemaker ® Version 6.0 Or 6.5
Installing the PPD Files ® Close Adobe PageMaker Insert the CD-ROM that comes with your printer into your computer's CD- ROM drive. Select the CD-ROM drive. In the [Folders] box, double-click [DRIVERS], [RPS2], and then [WIN95_98]. Then double-click the folder of the appropriate language. -
Page 270: Windows Headers
Windows Headers Headers are appended to the print data, and contain RICOH-SCRIPT2 com- mands required for proper printing. The default setting appends the headers to the data automatically for each print job, so you can print without worrying about the header data. You can specify how header data is sent to the printer with Windows 95/98. -
Page 271: Windows Network Environment
PostScript data is processed in units called “jobs”, and each job should have an EOF (End Of File = Ctrl+D) to indicate the end of the data to the printer. The printer continues to perform processing with the interpreter until receiving the EOF. -
Page 272: Using Ricoh-Script2 With Macintosh
3. Using RICOH-SCRIPT2 with Before Installing RICOH-SCRIPT2 Follow the steps below to use RICOH-SCRIPT2 with the Macintosh LaserWriter 8 printer driver. Install the PPD file. Install the unique PPD file for this printer. Reference P.33 “Installing the PPD Files” Install the ColorSync™ profile. -
Page 273: Ricoh-Script2 Printer Drivers For Macintosh
The PPD files are required when using the LaserWriter 8 driver for printing. The LaserWriter 8 refers to these files when printing, and the PPD files utilize the unique functions of the printer, such as color printing and resolution. English... -
Page 274: Installing The Ppd Files
Double-click the [Printer Descriptions] folder of the CD-ROM, and then dou- ble-click the folder having the appropriate language name to open it. Drag the PPD file for your printer and drop it into the [Printer Descriptions] folder located inside the [Extensions] folder on your Macintosh hard disk. -
Page 275: Installing The Colorsync™ Profiles
Installing the ColorSync™ Profiles ColorSync™ Profiles ColorSync™ profiles make it possible for the printer to print colors of similar in- tensity to those that appear on your computer display. You must install the Col- orSync™ profiles to use this feature. - Page 276 Insert the CD-ROM into the CD-ROM driver of your Macintosh. The icon of the CD-ROM appears. Double-click the CD-ROM icon. The contents of the CD-ROM are displayed. Double-click [ColorSync™ Profiles] folder of the CD-ROM to open it. Drag all four files in the folder into the [ColorSync™ Profiles] folder on your Macintosh hard disk.
-
Page 277: Setting Up The Ppd Files And Options
Setting Up the PPD Files and Options Note The printer may not appear in the [Chooser] dialog if there are too many print- er drivers in your system folder. If this happens, try removing some printer drivers from your system folder. If this does not correct the problem, your printer driver might not be installed correctly. - Page 278 [16 MB ], [32 MB ], [48 MB ]. Option Tray Use this to specify if the optional tray unit is installed to the printer or not. The following settings are available: [None], [Tray 2]. Reference For more informations on options, see the printer's “Operating Instructions”.
-
Page 279: Setting Up For Printing
On the [File] menu, click [Page Setup]. The [LaserWriter 8 Page Setup] dialog opens. Make sure that the printer you want to use is shown in [Format for:]. Then, use [Paper] to select the paper size your want to use. -
Page 280: Laserwriter 8.3X Or Earlier
Make sure that your printer is selected in the [Printer] box, make the printer settings you want. Note Available settings for Paper Source are: [Auto Tray Select], [Tray 1] , [Tray 2] (option). Reference If you use LaserWriter 8.3x or earlier, see P.39 “LaserWriter 8.3x or Earlier”. -
Page 281: Laserwriter 8.4X Or Later
Selecting [OHP Transparency] as the paper type automatically changes the color profile to the OHP settings. Note Selecting [Printer's Default] means selecting the items set with the printer's op- eration panel. Reference For more information on Color Setting, Color Profile, and Dithering, see P.51 “RPS2 Menu”. - Page 282 Your Macintosh prepares the color rendering dictionary (CRD) based on the selected profile and attaches the CRD to the print data. The print data is sent to the printer with the CRD. The printer converts the print data from RGB to CMYK based on the attached CRD.
- Page 283 Using RICOH-SCRIPT2 with Macintosh Reference For more information on Color Setting, Color Profile, and Dithering, see P.51 “RPS2 Menu”.
-
Page 284: Installing Screen Fonts
Note The screen fonts included in the CD-ROM are as follows: AG-Ricoh, HN- Ricoh, CS-Ricoh, BM-Ricoh, ZC-Ricoh, ZD-Ricoh. Installing Screen Fonts Start up your Macintosh. - Page 285 Using RICOH-SCRIPT2 with Macintosh possible for each font to avoid such jagged appearances. Screen fonts are provid- ed for this printer in 10, 12, 14, 18 and 24 point sizes.
-
Page 286: Appendix
Enable Ether- Talk. For more information, see the printer's “Operating Instructions”. When the printer runs out of paper in the RPS2 mode, it waits for the specified job timeout pe- riod for paper to be loaded. The data is cleared when the job timeout period is exceeded. - Page 287 Status Possible Causes and Solutions A PostScript error might occur if there is not enough memory in the printer, or there are er- rors in the print data sent to the printer. • In some cases, increasing the memory may solve this problem.
- Page 288 P.26 “ [Advanced] Tab” Macintosh • LaserWriter 8.3x or earlier Use the [Print Options] dialog. “LaserWriter 8.3x or Earlier” • LaserWriter 8.4x or later Use the [Print Specific Options] on the [Printer] dialog. P.40 “LaserWriter 8.4x or Later” Troubleshooting P.39...
- Page 289 Turn on “Image Memory”. Turning on the “Image Memory” can cause printing to take a long time. See the print- er's “Operating Instructions” that comes with your printer for details on the “Image Memory”. An error message is occasionally printed. Increase memory.
-
Page 290: Making Printer Settings With The Operation Panel
Selecting the Printer Language The printer language is normally set to the IPDL-C mode. You can change the printer language to the RPS2 (RICOH-SCRIPT2) mode using the following pro- cedure. Press { { { { Menu} } } } . -
Page 291: Setting Menus
Before performing the following procedure, make sure that the printer lan- guage is set to the RPS2 mode. Make sure that the printer language is set to the RPS2 mode. Check if the following message appears on the panel display. - Page 292 “Printing the Configuration Page” RPS2 Menu Settings that you can specify are described below. Settings made with the printer driver normally take priority, except when a printer driver setting is set to use the printer's settings. Color Mode Use this to select either monochrome or color printing.
- Page 293 • Fine Select this setting to perform color matching based on the printer's built-in color rendering dictionaries, and perform CMYK conversion. It makes it possible to print colors that are close to the displayed colors on the com- puter screen.
- Page 294 Use this setting to specify how long the printer waits before terminating a print job when the printer doesn't receive the end of the current print job. You can specify a time ranging from 0 to 999 seconds, or you can turn this feature off (no time limit).
-
Page 295: Rps2 Menu Table
Appendix Parallel IF 2 Use this setting to use a second parallel interface by installing the optional parallel interface board. You can specify the timing of the second parallel in- terface. When “System Default” is selected, the setting in the “System Menu” is used. -
Page 296: Printing The Configuration Page
Printing the Configuration Page Use the following procedure to print a configuration page which shows the cur- rent printer settings. Make sure that the printer language is set to the RPS2 mode. Check if the following message appears on the panel display. RPS2 Ready Press { { { { Menu} } } } . -
Page 297: Interpreting The Configuration Page
Appendix Interpreting the Configuration Page Reference Shows the printer system version, ID, etc. You can also see the status of the paper tray and the total number of pages printed to date. Tray Status Shows the status of the paper trays. “Tray 2” is shown when the optional tray unit is installed to the printer. -
Page 298: Printer Memory And Vm Area
48MB Note The “VM” of the PostScript printer is the memory area outside of the page memory and program area. If the data sent from the computer is very com- plex, printing is impossible because of insufficient printer memory. This is called a “VM error”. -
Page 299: Precautions For Ricoh-Script2
Language Reference Manual, Second Edition” from Adobe Systems Incorporat- ed are described below. • RICOH-SCRIPT2 does not support the user path cache function, and its pro- cessing is not compatible with any PostScript program using that function. This function originated in Display PostScript, and it is not used by the most printer drivers. -
Page 300: Index
Advanced PostScript Options , 17 Advanced tab , 25 Auto Tray Switch , 16 , 25 Available PostScript Memory , 22 Available printer memory , 16 CD-ROM , 1 Color Appearance , 25 Color control , 15 Color Mode , 16 , 26... - Page 301 Print as a negative image , 15 Printer Features , 25 Printer features , 16 printer language , 49 Printer Properties , 13 , 21 Windows 95 , 13 Windows NT4.0 , 21 Reset key , 7 Resolution , 15 , 25...