Table of Contents
Advertisement
Available languages
Available languages
Quick Links
Advertisement
Table of Contents

Related Manuals for Anker NEBULA Capsule Pro


Summary of Contents for Anker NEBULA Capsule Pro
- Page 1 Nebula Capsule Pro Owner’s Manual...
- Page 2 English Deutsch Español Français Italiano Nederlands Português 日本語 العربية...
-
Page 3: Safety Instructions
Safety Instructions Read all instructions before you use this device. Do not make any changes or create settings that are not described in this manual. If physical injury, loss of data or damage is caused by failure to follow instructions, the warranty does not apply. - Page 4 • Never place heavy or sharp objects on this device. • To avoid electric shock, do not disassemble. • Use attachments or accessories specified by the manufacturer only. • Avoid extreme vibrations as they may damage the internal components. Hearing Safety •...
- Page 5 by burning. • When the remote control is not used for a long period of time, remove the battery. • Replace the remote control battery only with the same or an equivalent type. • Batteries contain chemical substances and should be disposed of properly.
-
Page 6: What's Included
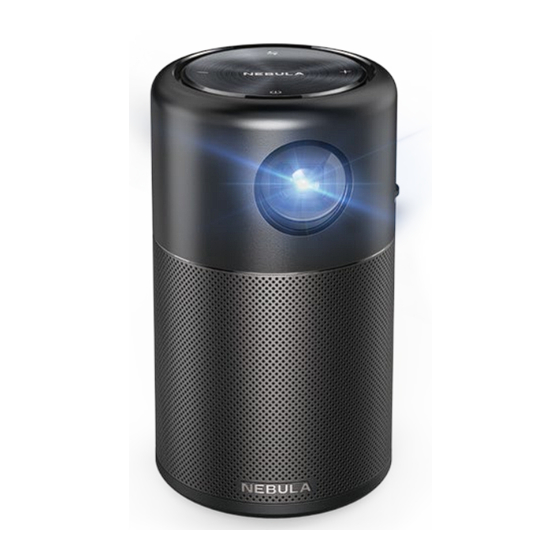
What’s Included NEBULA BY ANKER Nebula Capsule Owner’s Manual Overview Front View Lens Focus Adjusting knob Speaker... -
Page 7: Rear View
Rear View Air ventilation (outlet) Infrared Receiver INPUT • Connect to power supply • Connect to a USB flash drive (via supplied OTG cable) HDMI Connect to a playback device via HDMI output Bottom View Tripod socket... -
Page 8: Top View
Top View • Press to switch between Bluetooth speaker mode and projector mode. LED indicators • Solid blue: Operating in projector mode. • Flashing blue: Ready to pair / Bluetooth pairing (Bluetooth speaker mode). • Solid blue: Bluetooth connected (Bluetooth speaker mode). -
Page 9: Remote Control
Remote Control Power on / off Switch to HDMI connection Mouse mode Navigation Confirm the selected content Home Back View more options Volume up / down... -
Page 10: Getting Started
Getting Started Placement Place this device on a surface table, flat table in front of the projection surface. For best results, the projection surface should be white and flat. The distance between this device and the projection surface must be a minimum of 0.58 meters (23”) and a maximum of 3.08 meters (121”) to get a projection image from 20 to 100 inches. -
Page 11: Preparing The Remote Control
④ Rotate the focus by adjusting knob to get the best focus. ⑤ For first time use, follow the on-screen instructions to complete the basic settings. To give your Nebula Capsule Pro the fastest, safest charge, use the supplied charger only. -
Page 12: Nebula App
Nebula App To easily control this device, we recommend you to download the devoted Nebula App, Capsule Control. Using this app, you can use your smartphone’s keyboard to input text and use the screen as a mouse . ① Download the Capsule Control app from the App Store (iOS devices) or Google Play (Android devices). - Page 13 ① Press to switch to Bluetooth speaker mode. ② Enable Bluetooth on your smartphone and select [Nebula Capsule Pro] as the device to be added. Nebula capsule B. Projector Mode You can connect Bluetooth headphones or a speaker to Capsule Pro while in projector mode.
-
Page 14: App Manager
[Auto Keystone Enable / disable auto Correction] keystone correction. Correct keystone manually. [Keystone Correction] Default value is 0. [Front]: The device is located in front of the projection surface. [Rear]: The device is located behind the projection surface. [Front Ceiling]: The device is hanging from the ceiling in an upside down position. - Page 15 Other Press to access the home menu, select [Settings] find more settings. [General] Select an on-screen display [Language] language. [Keypad Tone] Turn on / off the keypad tone. [Automatic Sleep 5 min / 15 min / 30 min Interval] [Background] Select a background.
- Page 16 Enjoy Connect to HDMI Playback Devices This device supports connections with various HDMI playback devices such as TV stick, TV box, DVD player, set-top box (STB), game machine or other devices. ① Connect this device to an HDMI playback device with an HDMI cable (not provided).
- Page 17 For iOS devices: For Android devices: Certain content may be unavailable to be casted due to copyright restrictions. In this case, you can stream those content via the same app installed in your Nebula Capsule Pro.
- Page 18 Apps Once connected to a wireless network, you can access online services, enjoy movies, music and pictures, and browse internet. Apart from the apps installed, you can also install any other apps either from the Nebula App Store or by a USB flash drive. ①...
-
Page 19: Specifications
Specifications Specifications and design are subject to change without notice. Power supply: 9V 2A (QC2.0) Power consumption: < 10W Standby power consumption: < 0.5W Display technology: 0.2inch 854*480p DLP Light source: RGB LED Projection image size: 20 - 100 inch Resolution: 854 x 480 Pixel Brightness: 150 ANSI Lumens Contrast ratio: 400:1... -
Page 20: Troubleshooting
Troubleshooting ① Fail to power on by the remote control? • Hold for 2 seconds on the projector to power • When powered off, you cannot use the remote control to power on. ② The remote control doesn’t work? • Remove the protective tab to activate the remote control batteries. - Page 21 Notice Declaration of Conformity This product complies with the radio interference requirements of the European Community. Hereby, Anker Technology Co., Limited. declares that this device is in compliance with the essential requirements and other relevant provisions of Directive 2014/53/EU. For the Declaration of Conformity, visit the Web site www.
-
Page 22: Fcc Notice
FCC notice This device complies with the FCC rules, Part 15. Operation is subject to the following two conditions: (1) This device may not cause harmful interference, and (2) This device must accept any interference received, including interference that may cause undesired operation. - Page 23 limits set forth for an uncontrolled environment. This equipment should be installed and operated with a minimum distance of 20cm between the radiator and your body. This transmitter must not be co-located or operated in conjunction with any other antenna or transmitter.
-
Page 24: Warranty
Trademarks HDMI, and HDMI logo and High-Definition Multimedia Interface are trademarks or registered trademarks of HDMI licensing LLC in the United States and other countries. The Bluetooth® word mark and logos are registered trademarks owned by Bluetooth SIG, Inc. Other trademarks and trade names are those of their respective owners. - Page 25 Sicherheitsinformationen Lesen Sie alle Anweisungen sorgfältig durch, bevor Sie das Gerät verwenden. Nehmen Sie keine Änderungen oder Einstellungen vor, die nicht in diesem Handbuch beschrieben sind. Wenn Personenschäden, Datenverluste oder Schäden auf eine Missachtung der Anweisungen zurückzuführen sind, gilt keine Gewährleistung. Einrichtung •...
- Page 26 • Handhaben Sie das Gerät mit Vorsicht. Vermeiden Sie es, das Objektiv zu berühren. Lassen Sie Kinder nicht unbeaufsichtigt mit dem Gerät hantieren. • Stellen Sie keine schweren oder scharfkantigen Gegenstände auf dieses Gerät. • Nehmen Sie das Gerät nicht auseinander – es besteht die Gefahr von Stromschlägen.
- Page 27 die verschluckt werden könnte. Bewahren Sie die Fernbedienung stets außerhalb der Reichweite von Kindern auf. • Explosionsgefahr! Halten Sie die Batterien von Hitze, Sonneneinstrahlung und offenen Flammen fern. Entsorgen Sie Batterien keinesfalls im Feuer. • Falls Sie die Fernbedienung für einen längeren Zeitraum nicht verwenden, entfernen Sie die Batterie.
- Page 28 Im Lieferumfang NEBULA BY ANKER Nebula Capsule Owner’s Manual Übersicht Vorderseite Objektiv Fokusregler Lautsprecher...
- Page 29 Rückseite Belüftung (Austritt) Infrarotempfänger EINGANG • Verbindung zur Stromversorgung • Verbindung zu einem USB-Flashlaufwerk (über mitgeliefertes OTG-Kabel) HDMI Verbindung zu einem Wiedergabegerät mit HDMI®-Ausgang Unterseite Stativsockel...
- Page 30 Oberseite • Umschalten zwischen den Modi Bluetooth®- Lautsprecher und Projektor. LED-Anzeige • Leuchtet weiß: Betrieb im Projektor-Modus. • Blinkt blau: Bereit zum Koppeln/Bluetooth- Kopplung (Modus Bluetooth®-Lautsprecher). • Leuchtet blau: Aktive Bluetooth-Verbindung (Modus Bluetooth®-Lautsprecher). • Leuchtet rot: Ladevorgang. • Leuchtet grün: Vollständig aufgeladen. •...
- Page 31 Fernbedienung Ein- / Ausschalten Umschalten auf HDMI-Verbindung Maus-Modus Navigation Bestätigen Sie den ausgewählten Inhalt Home Zurück Weitere Optionen anzeigen Lauter / leiser...
- Page 32 Erste Schritte Platzierung Platzieren Sie das Gerät auf einem stabilen, ebenen Tisch vor der Projektionsfläche. Die besten Ergebnisse erhalten Sie mit einer weißen und ebenen Projektionsfläche. Der Abstand zwischen dem Gerät und der Projektionsfläche muss mindestens 0,58 m und höchstens 3,8 m betragen. Damit erhalten Sie eine Bildgröße von 20 bis 100 Zoll.
-
Page 33: Vorbereiten Der Fernbedienung
Projektionsfläche oder Wand aus. ④ Stellen Sie die optimale Bildschärfe am Fokusregler ein. ⑤ Befolgen Sie bei der ersten Verwendung die Bildschirmanweisungen, um die grundlegenden Einstellungen vorzunehmen. Verwenden Sie zum schnellen und sicheren Aufladen Ihres Projektors Nebula Capsule Pro stets das mitgelieferte Ladegerät. - Page 34 Nebula App Wir empfehlen Ihnen, zur mühelosen Steuerung des Geräts die Nebula App herunterzuladen. Mit dieser App können Sie Text über die Tastatur Ihres Smartphones eingeben und das Display als Maus verwenden. ① Laden Sie die Capsule Control App aus dem App Store (iOS-Geräte) oder bei Google Play (Android- Geräte) herunter.
- Page 35 ① Drücken Sie , um in den Modus Bluetooth- Lautsprecher zu schalten. ② Aktivieren Sie Bluetooth auf Ihrem Smartphone und wählen Sie als neues Gerät [Nebula Capsule Pro] aus. Nebula capsule B. Modus Projektor Im Modus Projektor können Sie andere Bluetooth- Kopfhörer oder -Lautsprecher verwenden.
- Page 36 Manuelle Keystone-Korrektur [Keystone-Korrektur] (Trapezkorrektur). Der Standardwert ist 0. [Vorderseite]: Das Gerät befindet sich vor der Projektionsfläche. [Rückseite]: Das Gerät befindet sich hinter der Projektionsfläche. [Vorderseite Decke]: Das Gerät hängt umgedreht von der [Modus „Projektor“] Decke. Das Bild wird um 180 Grad gedreht.
- Page 37 Sonstiges Drücken Sie , um das Home-Menü zu öffnen, und wählen Sie [Einstellungen], um weitere Einstellungen zu suchen. [Allgemein] Wählen Sie eine Sprache für die [Sprache] Bildschirmanzeige aus. Aktivieren/deaktivieren Sie [Tastentöne] Tastentöne. [Autom. 5 Min. / 15 Min. / 30 Min. Abschaltintervall] [Hintergrund] Wählen Sie einen Hintergrund aus.
- Page 38 Viel Spaß Verbindung zu HDMI-Wiedergabegeräten D i e s e s G e r ä t u n t e r s t ü t z t Ve r b i n d u n g e n m i t verschiedenen HDMI-Wiedergabegeräten, z.
- Page 39 Sie können den Bildschirm Ihres Smartphones oder Tablets drahtlos auf die Projektionsfläche übertragen. Für iOS-Geräte: Für Android-Geräte: Aufgrund urheberrechtlicher Beschränkungen ist Screencast für manche Inhalte nicht verfügbar. Sie können diese Inhalte jedoch über die auf Ihrem Nebula Capsule Pro installierte App streamen.
- Page 40 Apps Sobald die Verbindung zu einem WLAN besteht, können Sie auf Online-Services zugreifen, Filme, Musik und Bilder genießen und im Internet surfen. Abgesehen von den installierten Apps können Sie beliebige weitere Apps aus dem Nebula App Store oder von einem USB-Flash-Laufwerk installieren. ①...
-
Page 41: Technische Daten
Technische Daten Änderungen der technischen Daten und des Designs ohne Vorankündigung vorbehalten. Stromversorgung: 9V 2A (QC2.0) Stromverbrauch: < 10 W Standby-Leistungsaufnahme: < 0,5 W Display-Technologie: 0,2 Zoll 854x480 p DLP Lichtquelle: RGB-LED Projektions-Bildgröße: 20-100 Zoll Auflösung: 854 x 480 Pixel Helligkeit: 150 ANSI-Lumen Kontrastverhältnis: 400:1 Projektionsverhältnis: 1.3... -
Page 42: Fehlerbehebung
Fehlerbehebung ① Das Einschalten per Fernbedienung funktioniert nicht? • Halten Sie am Projektor 2 Sekunden lang gedrückt, um ihn einzuschalten. • Wenn er ausgeschaltet ist, können Sie ihn nicht an der Fernbedienung einschalten. ② Die Fernbedienung funktioniert nicht? • Entfernen Sie die Batterieschutzfolie von der Fernbedienung. - Page 43 Hinweis Dieses Produkt ist mit hochwertigen Materialien und Komponenten für Recycling und Wiederverwertung konzipiert. Dieses Produkt ist mit hochwertigen Materialien und Komponenten für Recycling und Wiederverwertung konzipiert. Dieses Symbol bedeutet, dass das Produkt nicht als Hausmüll entsorgt werden darf, sondern einer angemessenen Sammelstelle für das Recycling zugeführt werden muss.
-
Page 44: Garantie
Garantie Klare 30-Tage-Geld-zurück-Garantie We n n S i e d a s u n b e s c h ä d i g t e P ro d u k t i n d e r unbeschädigten Originalverpackung innerhalb von 30 Tagen ab Kaufdatum zurückgeben, wird Ihnen der GESAMTE KAUFPREIS ERSTATTET. -
Page 45: Instrucciones De Seguridad
Instrucciones de seguridad Lea y comprenda todas las instrucciones antes de utilizar este dispositivo. No realice cambios ni ajustes que no estén descritos en este manual. En caso de producirse daños físicos, pérdida de datos o daños por no seguir las instrucciones, no se aplicará... - Page 46 • No coloque nunca objetos pesados o afilados sobre el dispositivo. • Para evitar una descarga eléctrica, no desmonte el dispositivo. • Utilice únicamente los accesorios especificados por el fabricante. • Evite vibraciones extremas. Podrían dañarse los componentes internos. Protección auditiva •...
- Page 47 • ¡Riesgo de explosión! Mantenga las pilas alejadas del calor, la luz del sol o el fuego. Nunca arroje las pilas al fuego. • Si no va a utilizar el mando a distancia durante un tiempo prolongado, extraiga la batería. •...
- Page 48 Contenido NEBULA BY ANKER Nebula Capsule Owner’s Manual Descripción general Vista frontal Lente Mando de ajuste de enfoque Altavoz...
-
Page 49: Vista Trasera
Vista trasera Ventilación de aire Receptor de (salida) infrarrojos ENTRADA • Conectar a una fuente de alimentación • Conectar a una unidad flash USB (con el cable OTG suministrado) HDMI Conectar a un dispositivo de reproducción con salida HDMI Vista inferior Soporte para trípode... -
Page 50: Vista Superior
Vista superior • Pulse para alternar entre el modo de altavoz Bluetooth y el modo de proyector. Indicador LED • Blanco fijo: Funciona en modo de proyector. • Parpadeo azul: Listo para emparejar / emparejamiento Bluetooth (modo de altavoz Bluetooth). •... -
Page 51: Mando A Distancia
Mando a distancia Encender o apagar Cambiar a conexión HDMI Modo de ratón Navegación Confirmar el contenido seleccionado Inicio Atrás Ver más opciones Subir/Bajar volumen... - Page 52 Primeros pasos Colocación Coloque el dispositivo sobre una mesa plana y estable, delante de la superficie de proyección. Para obtener los mejores resultados, la superficie de proyección debería ser blanca y plana. La distancia entre el dispositivo y la superficie de proyección debe ser un mínimo de 0,58 metros (23 pulgadas) y un máximo de 3,08 metros (121 pulgadas) para obtener una imagen de proyección de entre 20 y 100 pulgadas.
-
Page 53: Preparación Del Mando A Distancia
④ Gire el mando de ajuste de enfoque para obtener el mejor enfoque. ⑤ La primera vez que lo use, siga las instrucciones en pantalla para completar la configuración básica. Para cargar el Nebula Capsule Pro de la forma más rápida y segura, utilice únicamente el cargador suministrado. - Page 54 Aplicación Nebula Le recomendamos descargar la aplicación Nebula para controlar el dispositivo de forma más fácil. La aplicación le permite usar el teclado de su smartphone para introducir texto y usar la pantalla a modo de ratón. ① Descargue la Capsule Control aplicación desde App Store (dispositivos iOS) o Google Play (dispositivos Android).
- Page 55 Puede utilizar este dispositivo como altavoz Bluetooth. ① Pulse para cambiar al modo de altavoz Bluetooth. ② Active la función de Bluetooth en su smartphone y seleccione [Nebula Capsule Pro] como dispositivo a añadir. Nebula capsule B. Modo de proyector En el modo de proyector puede utilizar otros auriculares o altavoces Bluetooth.
- Page 56 Activar / desactivar la [Corrección trapezoidal corrección trapezoidal automática] automática. Corrección trapezoidal [Corrección manual. El valor trapezoidal] predeterminado es 0. [Frontal]: El dispositivo está situado en la parte delantera de la superficie de proyección. [Trasero]: El dispositivo está situado detrás de la superficie de proyección.
- Page 57 Cuando se han instalado más de 3 aplicaciones, seleccione [Todas] en la parte inferior de la página de inicio para acceder a la página de [Aplicaciones]. Seleccione una aplicación, pulse en el mando a distancia y, a continuación, puede escoger entre [Mover a página de inicio] o [Desinstalar].
- Page 58 Compruebe si está usando la [Comprobar versión más reciente. Siga las actualización] instrucciones en pantalla para actualizar la versión del firmware. [Acerca de] Se borrarán todos los datos [Recuperación] guardados en el almacenamiento integrado. Disfrute Conexión a dispositivos de reproducción HDMI Este dispositivo es compatible con diversos dispositivos de reproducción HDMI como TV Box, TV Stick, reproductores de DVD, set-top box (STB),...
- Page 59 HDMI Proyección de pantalla Puede proyectar la pantalla de su smartphone o tablet en la superficie de proyección de forma inalámbrica. Para dispositivos iOS: Para dispositivos Android:...
- Page 60 Cuando esto suceda, puede transmitir los contenidos mediante la aplicación instalada en su Nebula Capsule Pro. Aplicaciones Una vez conectado a una red inalámbrica, puede acceder a los servicios en línea, disfrutar de películas, música y fotografías, y navegar por Internet.
-
Page 61: Especificaciones
dispositivo de almacenamiento USB 2.0 mediante el cable OTG suministrado. ① Pulse para acceder al menú de inicio. ② Seleccione [Gestor de archivos] y pulse ③ Seleccione un archivo y, a continuación, pulse Especificaciones Las especificaciones y el diseño están sujetos a cambios sin previo aviso. -
Page 62: Resolución De Problemas
CPU: Quad core A7 OS: Android 7.1 RAM: DDR de 2 GB ROM: eMMC de 16 GB Controladores de altavoz: 5 W Wi-Fi: IEEE802.11a/b/g/n frecuencia dual 2,4G/5G Versión de Bluetooth: V4.2 Sistema de archivos USB: FAT32 Tipo de batería incorporada: Polímero de litio Capacidad: 5200 mAh 3,85 V Tiempo de reproducción de vídeos: aproximadamente 2,5 horas en modo batería... - Page 63 ④ ¿Se invierte la imagen de la proyección? • Pulse para acceder al menú de inicio, seleccione [Configuración] > [Modo del proyector] y seleccione el estado correcto. ⑤ ¿No puede conectarse a una red Wi-Fi? • Actualice la lista de redes disponibles e inténtelo de nuevo.
- Page 64 Aviso Este producto cumple los requisitos de interferencias radioeléctricas de la Comunidad Europea. Este producto se ha diseñado y fabricado con materiales y componentes de gran calidad que pueden reciclarse y reutilizarse. Este símbolo indica que el producto no debe desecharse como residuo doméstico, sino que debe depositarse en un lugar de recogida adecuado para su reciclaje.
-
Page 65: Consignes De Sécurité
Consignes de sécurité Veuillez lire et comprendre toutes les instructions avant d'utiliser cet appareil. N'apportez pas de modifications ou de paramètres qui ne sont pas décrits dans ce manuel. Si des dommages corporels, des pertes de données ou des dommages sont causés par le non-respect des instructions, la garantie ne s'applique pas. - Page 66 • Ne jamais placer d'objets lourds ou coupants sur cet appareil. • Pour éviter tout choc électrique, ne pas le démonter. • Utiliser uniquement des accessoires ou pièces de rechange spécifiés par le fabricant. • Éviter les vibrations importantes. Cela peut endommager les composants internes.
- Page 67 batteries à l'écart de la chaleur, du soleil ou du feu. Ne jamais jeter les batteries dans le feu. • Lorsque la télécommande n'est pas utilisée pendant une longue période, retirer la pile. • Remplacer la pile de la télécommande uniquement avec le même type de pile ou équivalent.
-
Page 68: Ce Qui Est Inclus
Ce qui est inclus NEBULA BY ANKER Nebula Capsule Owner’s Manual Présentation Vue avant Lentille Molette de mise au point Haut-parleur... -
Page 69: Vue Arrière
Vue arrière Ventilation (sortie d'air) Récepteur infrarouge INPUT • Raccordement de l'alimentation • Connexion à une clé USB (via le câble OTG fourni) HDMI Connexion àun périphérique de lecture avec sortie HDMI Vue de dessous Attache du trépied... -
Page 70: Vue De Dessus
Vue de dessus • Basculer entre le mode Enceinte Bluetooth et le mode de projection. Indicateur LED • Blanc fixe : fonctionnement en mode de projection. • Bleu clignotant : prêt pour l'appairage Bluetooth (mode enceinte Bluetooth). • Bleu fixe : connecté en Bluetooth (mode enceinte Bluetooth). - Page 71 Télécommande Marche/arrêt Passer à la connexion HMDI Mode souris Navigation Confirmer le contenu sélectionné Accueil Retour Afficher plus d'options Augmenter/diminuer le volume...
- Page 72 Pour démarrer Placement Placez l'appareil sur une table stable et plate, en face de la surface de projection. Pour de meilleurs résultats, la surface de projection doit être plane et de couleur blanche. La distance entre l'appareil et la surface de projection doit être au minimum de 0,58 mètres (23") et au maximum de 3,08 mètres (121") pour obtenir une image de projection de 20 à...
-
Page 73: Préparer La Télécommande
⑤ Lors de la première utilisation, suivez les instructions à l'écran pour effectuer les réglages de base. Pour recharger votre Nebula Capsule Pro de la manière la plus rapide et la plus sûre, utilisez le chargeur fourni uniquement. - Page 74 Application Capsule Control Nous vous recommandons de télécharger l'application Capsule Control pour contrôler plus facilement le projecteur. Cette application vous permet d'utiliser le clavier de votre smartphone pour saisir du texte et d’utiliser l'écran comme bouton de la souris. ① Téléchargez l'application Capsule Control sur l'App Store (appareils iOS) ou Google Play (Android).
- Page 75 Bluetooth A. Mode enceinte Bluetooth Vous pouvez utiliser cet appareil comme une enceinte Bluetooth. ① Appuyez sur pour passer en mode enceinte Bluetooth. ② Activez le Bluetooth sur votre smartphone et sélectionnez [Nebula] pour ajouter l'appareil. Nebula capsule B. Connexion à une enceinte Bluetooth Vous pouvez utiliser d'autres écouteurs ou enceintes Bluetooth.
-
Page 76: Gestionnaire D'application
Permet de corriger [Correction du trapèze] manuellement le trapèze. La valeur par défaut est 0. [De face]: L'appareil est situé en face de la surface de projection. [Arrière]: L'appareil est situé derrière la surface de projection. L’image est inversée horizontalement. [De face inversée]: L'appareil [Mode de projection] est suspendu au plafond, à... - Page 77 Autres Appuyez sur pour accéder au menu d'accueil, sélectionnez [Paramètres] pour trouver plus d'options. [Général] Sélectionner la langue affichée à [Langue] l'écran. [Tonalité du Activer/désactiver la tonalité du clavier] clavier. [Veille automatique] 5 min / 15 min / 30 min [Arrière-plan] Sélectionner un arrière-plan.
- Page 78 Profiter Se connecter à un périphérique de lecture HDMI Cet appareil prend en charge les connexions avec divers périphériques de lecture HDMI tels que Ies récepteurs TV, les clés TV, les lecteurs DVD, les boîtiers décodeurs, les consoles de jeux ou d'autres appareils.
- Page 79 Pour les appareils Android : Il est possible que certains contenus ne puissent pas être diffusés, en raison de restrictions de droit d'auteur. Dans ce cas, vous pouvez diffuser ces contenus via la même application installée sur votre Nebula Capsule Pro.
- Page 80 Applications Une fois connecté à un réseau sans fil, vous pouvez accéder aux services en ligne, profiter de films, de musique et images, ainsi que naviguer sur Internet. Outre les applications installées, vous pouvez également installer d'autres applications soit à partir de l'App Store de Nebula ou via une clé...
-
Page 81: Spécifications
Spécifications Les spécifications et la conception sont susceptibles d’être modifiées sans préavis. Alimentation : 9 V 2 A (QC2.0) Consommation : <10 W Consommation en veille : < 0,5 W Technologie d'affichage : 0,2 po 854*480p DLP Source de lumière : LED RVB Taille d'image projetée : De 20 à... -
Page 82: Dépannage
Dépannage ① Vous ne parvenez pas à allumer l'appareil avec la télécommande ? • Appuyez sur pendant 2 secondes pour mettre sous tension le projecteur. • Lorsqu'il est éteint, vous ne pouvez pas utiliser la télécommande pour allumer l'appareil. ② La télécommande ne fonctionne pas ? •... - Page 83 Avis Ce produit est conforme aux exigences en matière d'interférences radio de la Communauté européenne. Ce produit a été conçu et fabriqué avec des matériaux et composants de haute qualité, qui peuvent être recyclés et réutilisés. Ce symbole signifie que le produit ne doit pas être jeté...
-
Page 84: Garantie
Garantie Garantie de remboursement sous 30 jours pour toute raison Vous pouvez retourner votre produit en bon état et dans son emballage dans les 30 jours suivant l'achat pour recevoir un remboursement complet pour quelque raison que ce soit. Si le motif de retour n'est pas lié... -
Page 85: Informazioni Sulla Sicurezza
Informazioni sulla sicurezza Leggere e comprendere tutte le istruzioni fornite in questo manuale prima di utilizzare il dispositivo. Non apportare modifiche o effettuare impostazioni non descritte in questo manuale. La garanzia non si applica in caso di lesioni fisiche, perdita di dati o danni causati dal mancato rispetto delle istruzioni. - Page 86 • Non collocare mai oggetti pesanti o appuntiti sul dispositivo. • Per evitare scosse elettriche, non smontare il prodotto. • Usare esclusivamente accessori specificati dal produttore. • Evitare vibrazioni estreme. Potrebbero danneggiare i componenti interni. Sicurezza acustica • Per evitare danni acustici, l'ascolto non deve avvenire a livelli di volume alti per lunghi periodi.
- Page 87 da calore, luce solare o fuoco. Non gettare mai le batterie nel fuoco. • Quando il telecomando non viene utilizzato per un lungo periodo di tempo, rimuovere la batteria. • Sostituire la batteria del telecomando solo con una dello stesso tipo o di tipo equivalente. •...
- Page 88 Contenuto NEBULA BY ANKER Nebula Capsule Owner’s Manual Panoramica Vista anteriore Obiettivo Manopola di regolazione della messa a fuoco Altoparlante...
-
Page 89: Vista Posteriore
Vista posteriore Aerazione (uscita aria) Ricevitore a infrarossi INPUT • Collegamento all'alimentazione • Collegamento a un'unità flash USB (tramite cavo OTG in dotazione) HDMI Collegamento a un dispositivo di riproduzione con uscita HDMI Vista dal basso Attacco per cavalletto... -
Page 90: Vista Dall'alto
Vista dall'alto • Premere per passare dalla modalità altoparlante Bluetooth alla modalità proiettore. Indicatore LED • Bianco fisso: funzionamento in modalità proiettore. • Blu lampeggiante: pronto per l'associazione/ associazione Bluetooth (modalità altoparlante Bluetooth). • Blu fisso: connesso al Bluetooth (modalità altoparlante Bluetooth). - Page 91 Telecomando Accensione/Spegnimento Passaggio alla connessione HDMI Modalità mouse Navigazione Confermare il contenuto selezionato Home Parte posteriore Visualizzare più opzioni Aumento/Diminuzione del volume...
- Page 92 Per iniziare Posizionamento Posizionare il dispositivo su un tavolo stabile e piano davanti alla superficie di proiezione. Per ottenere i migliori risultati, la superficie di proiezione deve essere bianca e piana. La distanza tra il dispositivo e la superficie di proiezione deve essere di minimo 0,58 metri (23") e massimo 3,08 metri (121") per ottenere un'immagine di proiezione da 20 a 100 pollici.
-
Page 93: Preparazione Del Telecomando
⑤ Per il primo utilizzo, seguire le istruzioni visualizzate sullo schermo per completare le impostazioni di base. Per una ricarica di Nebula Capsule Pro rapida e sicura, usare il caricabatterie in dotazione. - Page 94 App Nebula Si consiglia di scaricare l'app Nebula per controllare più facilmente il dispositivo. Utilizzando questa app è possibile utilizzare la tastiera dello smartphone per inserire il testo e utilizzare lo schermo dello smartphone come pulsante del mouse. ① Scaricare l'app Capsule Control dall'App Store (dispositivi iOS) o da Google Play (dispositivi Android).
- Page 95 ① Premere per passare alla modalità altoparlante Bluetooth. ② Attivare il Bluetooth sullo smartphone e selezionare [Nebula Capsule Pro] come dispositivo da aggiungere. Nebula capsule B. Modalità proiettore È possibile utilizzare una cuffia o un altoparlante Bluetooth in modalità proiettore.
- Page 96 Per correggere manualmente [Correzione l'immagine trapezoidale trapezoidale] proiettata. Il valore predefinito è 0. [Anteriore]: il dispositivo si trova davanti alla superficie di proiezione. [Posteriore]: il dispositivo si trova dietro la superficie di proiezione. [Anteriore sul soffitto]: il dispositivo è appeso al soffitto in [Modalità...
-
Page 97: Altre Impostazioni
Altre impostazioni Premere per accedere al menu home, selezionare [Impostazioni] per trovare altre impostazioni. [Generale] Selezionare una lingua visualizzata [Lingua] sullo schermo. Attivare/disattivare i toni della [Toni tastiera] tastiera. [Intervallo sospensione 5 min/15 min/30 min automatico] [Sfondo] Selezionare uno sfondo. [Data e ora] Attivare o disattivare [Data e ora... - Page 98 Sfruttare al meglio il dispositivo Collegamento ai dispositivi di riproduzione HDMI Questo dispositivo supporta i collegamenti a vari dispositivi di riproduzione HDMI, ad esempio TV box, TV stick, lettori DVD, decoder, console per videogiochi o altri dispositivi. ① Collegare il dispositivo a un dispositivo di riproduzione HDMI con un cavo HDMI (non fornito).
- Page 99 Per i dispositivi Android: Alcuni contenuti potrebbero non essere disponibili per la proiezione a causa di restrizioni dovute al copyright. In questo caso è possibile riprodurre in streaming tali contenuti tramite la stessa app installata nel dispositivo Nebula Capsule Pro.
- Page 100 Una volta connessi a una rete wireless, è possibile accedere ai servizi online, godersi film, musica e foto e navigare in internet. Oltre alle app installate, è possibile installare anche altre app sia dal Nebula App Store o da un'unità flash USB. ①...
- Page 101 Specifiche Le specifiche e il design sono soggetti a modifiche senza preavviso. Alimentazione: 9 V 2 A (QC2.0) Consumo energetico: < 10 W Consumo energetico in standby: < 0,5 W Tecnologia display: DLP 0,2 pollici 854*480p Sorgente luminosa: LED RGB Dimensioni immagine di proiezione: 20 - 100 pollici Risoluzione: 854 x 480 pixel Luminosità: 150 ANSI Lumens...
-
Page 102: Risoluzione Dei Problemi
Risoluzione dei problemi ① Non si riesce ad accendere il dispositivo utilizzando il telecomando? • Premere a lungo per 2 secondi sul proiettore per accenderlo. • Quando è spento, non è possibile utilizzare il telecomando per accenderlo. ② Il telecomando non funziona? •... -
Page 103: Garanzia
Attenzione Il prodotto è progettato e realizzato con materiali e componenti di alta qualità, riciclabili e riutilizzabili. Questo simbolo indica che il prodotto non deve essere smaltito tra i rifiuti domestici e deve essere consegnato presso un centro di raccolta per il riciclo. Seguire le normative locali e non smaltire il prodotto e le batterie ricaricabili tra i rifiuti domestici. - Page 104 Veiligheidsinstructies Lees alle instructies voordat u dit apparaat gebruikt. Breng geen wijzigingen aan en maak geen instellingen die niet in deze handleiding worden beschreven.Indien lichamelijk letsel, het verlies van gegevens of schade wordt veroorzaakt door het niet opvolgen van instructies, is de garantie niet van toepassing.
- Page 105 de oplader uit het stopcontact.U kunt het gebruik hervatten nadat het apparaat is afgekoeld. • Ga altijd voorzichtig om met dit apparaat. Raak de lens niet aan. Laat kinderen niet zonder toezicht gebruik maken van het apparaat. • Plaats nooit zware of scherpe voorwerpen op dit apparaat.
- Page 106 Batterij • Vervang de ingebouwde batterij niet zelf. Neem contact op met een erkend servicecentrum om de batterij te laten vervangen. • De afstandsbediening bevat een knoopcelbatterij die kan worden ingeslikt. Houd de afstandsbediening buiten bereik van kinderen. • Explosiegevaar! Houd batterijen uit de buurt van hitte direct zonlicht of vuur.
- Page 107 • Onjuist onderhoud kan leiden tot letsel of schade aan dit apparaat. • Laat al het onderhoud over aan gekwalificeerd onderhoudspersoneel. Let op: • Er wordt mogelijk gevaarlijke optische straling uitgezonden door dit apparaat. • Staar niet in de lichtstraal. Het felle licht kan uw ogen beschadigen.
-
Page 108: Wat Zit Er In De Doos
WAT ZIT ER IN DE DOOS? NEBULA BY ANKER Nebula Capsule Owner’s Manual Overzicht Vooraanzicht Lens Scherpstelknop Luidspreker 1 0 6... - Page 109 Achteraanzicht Ventilatie (uitlaat) Infraroodontvanger INGANG • Aansluiten op voeding • Voor het aansluiten van een USB-stick (via meegeleverde OTG-kabel) HDMI Aansluiten op een afspeelapparaat via HDMI- uitgang Onderaanzicht Statiefaansluiting...
- Page 110 Bovenaanzicht • Druk om te schakelen tussen de Bluetooth- luidsprekermodus en de projectormodus. Led-indicatielampjes • Brandt blauw: Gebruik in de projectormodus. • Knippert blauw: Klaar om te koppelen/ koppelen via Bluetooth (Bluetooth- luidsprekermodus). • Brandt blauw: Verbonden via Bluetooth (Bluetooth-luidsprekermodus). •...
- Page 111 Afstandsbediening In-/uitschakelen Overschakelen naar HDMI- aansluiting Muismodus Navigatie Geselecteerde inhoud bevestigen Start Terug Meer opties weergeven Volume omhoog / omlaag...
-
Page 112: Aan De Slag
AAN DE SLAG Plaatsing Plaats dit apparaat op een stabiele, vlakke tafel voor het projectieoppervlak. Voor de beste resultaten moet het projectieoppervlak wit en vlak zijn. De afstand tussen dit apparaat en het projectieoppervlak moet minimaal 0,58 meter en maximaal 3,08 meter bedragen voor een projectiebeeld van 20 tot 100 inch. -
Page 113: De Afstandsbediening Voorbereiden
④ Draai aan de scherpstelknop voor een optimale scherpstelling. ⑤ Volg bij het eerste gebruik de instructies op het scherm om het instellen van de basisinstellingen te voltooien. Gebruik alleen de meegeleverde oplader om uw Nebula Capsule Pro zo snel en veilig mogelijk op te laden. - Page 114 Nebula-app We raden u aan de speciale Nebula-app, Capsule Control, te downloaden om dit apparaat eenvoudig te bedienen.Met deze app kunt u het toetsenbord van uw smartphone gebruiken om tekst in te voeren en het scherm gebruiken als muis. ① Download de Capsule Control-app uit de App Store (iOS-apparaten) of Google Play (Android-apparaten).
- Page 115 ① Druk op om over te schakelen naar de Bluetooth-luidsprekermodus. ② Schakel Bluetooth in op uw smartphone en selecteer [Nebula Capsule Pro] als het apparaat om toe te voegen. Nebula capsule B. Projectormodus U kunt in de projectormodus een Bluetooth- hoofdtelefoon of een luidspreker verbinden met de Capsule Pro.
- Page 116 [Auto] / [Standaardmodus] / [Beeldmodus] [Batterijmodus] [Kleurtemperatuur] [Normaal] / [Koel] / [Warm] [Automatische Schakel automatische trapeziumcorrectie] trapeziumcorrectie in of uit. Voer handmatig [Trapeziumcorrectie] trapeziumcorrectie uit. De standaardwaarde is 0. [Voorkant]: het apparaat bevindt zich voor het projectieoppervlak. [Achterkant]: het apparaat bevindt zich achter het projectieoppervlak.
- Page 117 Als er meer dan 3 apps zijn geïnstalleerd, kunt u [Alle] op de onderste regel van de startpagina selecteren om de pagina [Apps] te openen. Selecteer een app en druk op de afstandsbediening. Overige Druk op om het startmenu te openen en selecteer vervolgens [Instellingen] voor meer instellingen.
- Page 118 Controleer of de nieuwste versie van de firmware wordt gebruikt. [Controleren op Volg de instructies op het updates] scherm om de softwareversie bij te werken. [Over] Alle gegevens op de ingebouwde [Herstel] opslag worden gewist. Genieten Aansluiten op HDMI- afspeelapparaten D i t a p p a ra a t o n d e r s t e u n t v e r b i n d i n g e n m e t verschillende HDMI-afspeelapparaten, waaronder tv- sticks, tv-boxes, tv-sticks, dvd-spelers, set-top boxes...
- Page 119 HDMI Het scherm casten U kunt het scherm van uw smartphone of tablet draadloos op het projectieoppervlak casten. Voor iOS-apparaten: Voor Android-apparaten:...
- Page 120 Als dit het geval is, kunt u deze inhoud streamen door dezelfde app op uw Nebula Capsule Pro te installeren. Apps Zodra het apparaat is verbonden met een draadloos netwerk, hebt u toegang tot online services, kunt u genieten van films, muziek en afbeeldingen en kunt u surfen op het internet.
-
Page 121: Een Usb-Opslagapparaat Aansluiten
Een USB-opslagapparaat aansluiten Met dit apparaat kunt u met behulp van de meegeleverde OTG-kabel genieten van muziek, video's en afbeeldingen, of apps installeren die zijn opgeslagen op een USB 2.0-opslagapparaat. ① Druk op om het startmenu te openen. ② Selecteer [Bestandsbeheer] en druk op ③... -
Page 122: Problemen Oplossen
Lichtbron: RGB-led Grootte projectiebeeld: 20 - 100 inch Resolutie: 854 x 480 pixels Helderheid: 150 ANSI-lumen Contrastverhouding: 400:1 Projectieverhouding: 1,3 Projectieafstand: 0,58 m tot 3,08 m CPU: Quadcore A7 OS: Android 7.1 RAM: 2GB DDR ROM: 16GB eMMC Luidsprekerdrivers: 5 W Wifi: IEEE802.11a/b/g/n dubbele frequentie 2,4/5 GHz Bluetooth-versie: V4.0 USB-bestandssysteem: FAT32... - Page 123 in te schakelen. ② Werkt de afstandsbediening niet? • Verwijder het beschermlipje om de batterijen in de afstandsbediening te activeren. ③ Hebt u last van wazig beeld? • Draai aan de scherpstelknop voor een optimale scherpstelling. ④ Omgekeerd projectiebeeld? • Druk op om het startmenu te openen, selecteer vervolgens [Instellingen] >...
- Page 124 Handelsmerken HDMI, het HDMI-logo en High-Definition Multimedia Interface zijn handelsmerken of geregistreerde handelsmerken van HDMI licensing LLC in de Verenigde Staten en andere landen. Het Bluetooth®-woordmerk en de Bluetooth®-logo's zijn geregistreerde handelsmerken die eigendom zijn van Bluetooth SIG, Inc. Andere handelsmerken en handelsnamen zijn het eigendom van hun respectievelijke eigenaren.
- Page 125 Houd rekening met het volgende: Alle verstrekte verzendlabels moeten binnen 20 dagen na de datum van uitgifte door de ondersteuning van Nebula worden gebruikt.
-
Page 126: Instruções De Segurança
Instruções de segurança Leia todas as instruções antes de usar este dispositivo. Não faça alterações e não crie configurações que não estejam descritas neste manual.Se ocorrerem lesões físicas, perda de dados ou danos devido ao incumprimento das instruções, a garantia não será aplicável. - Page 127 • Manuseie este dispositivo sempre com cuidado. Evite tocar na lente. Não permita que crianças manuseiem o dispositivo sem supervisão. • Nunca coloque objetos pesados ou afiados neste dispositivo. • Para evitar choques elétricos, não desmonte o dispositivo. • Use somente anexos ou acessórios especificados pelo fabricante.
- Page 128 • O telecomando contém uma pilha tipo botão que pode ser ingerida. Mantenha o controlo remoto fora do alcance de crianças. • Risco de explosão! Mantenha a pilha afastada de calor, luz solar direta ou fogo. Nunca elimine as baterias com fogo. •...
- Page 129 • Radiação ótica possivelmente perigosa emitida pelo dispositivo. • Não olhe para o feixe em funcionamento. A luz brilhante pode causar lesões nos olhos.
-
Page 130: Descrição Geral
ESTÁ INCLUÍDO NEBULA BY ANKER Nebula Capsule Owner’s Manual Descrição geral Vista frontal Lente B o t ã o d e a j u s t e d a focagem Altifalante... -
Page 131: Vista Traseira
Vista traseira R e c e t o r Ventilação (saída) infravermelhos ENTRADA • Ligue a fonte de alimentação • Ligar a uma unidade flash USB (através do cabo OTG fornecido) HDMI Ligue um dispositivo de reprodução através da saída de HDMI Vista inferior Ficha para tripé... - Page 132 Vista superior • Prima para alternar entre o modo de coluna Bluetooth e o modo de projetor. Indicadores LED • Azul sólido: em funcionamento no modo de projetor. • Azul intermitente: pronto a emparelhar/ emparelhamento por Bluetooth (modo de altifalante Bluetooth). •...
-
Page 133: Controlo Remoto
Controlo remoto Ligar/desligar Mudar para a ligação HDMI Modo de rato Navegação Confirmar o conteúdo selecionado Página inicial Voltar Ver mais opções Aumentar/Diminuir volume... - Page 134 COMEÇAR Localização Coloque este dispositivo numa mesa estável e lisa em frente à superfície de projeção. Para obter os melhores resultados, a superfície de projeção deve ser branca e plana. A distância entre este dispositivo e a superfície de projeção deve ter um mínimo de 0,58 metros e um máximo de 3,08 metros para obter uma imagem entre 20 e 100 polegadas.
-
Page 135: Preparar O Telecomando
④ Rode a focagem ajustando o botão para obter a melhor focagem. ⑤ Na primeira utilização, siga as instruções no ecrã para efetuar as definições básicas. Para a carga mais rápida e segura para o seu Nebula Capsule Pro, utilize apenas o carregador fornecido. - Page 136 Aplicação Nebula P a r a c o n t r o l a r f a c i l m e n t e e s t e d i s p o s i t i v o , recomendamos que transfira a aplicação Nebula dedicada, a Capsule Control.Através desta aplicação, poderá...
- Page 137 ① Prima o botão para mudar para o modo de altifalante Bluetooth. ② Ative o Bluetooth no seu smartphone e selecione [Nebula Capsule Pro] como o dispositivo a ligar. Nebula capsule B. Modo de projetor Pode ligar os auscultadores Bluetooth ou um altifalante ao Capsule Pro quando no modo de projetor.
- Page 138 [Auto] / [Modo padrão] / [Modo de imagem] [Modo de bateria] [Temperatura da cor] [Normal] / [Frio] / [Quente] [Correção trapezóide Ative/desative a correção automática] trapezóide automática. C o r r i j a m a n u a l m e n t e [Correção trapezóide] o t r a p e z o i d e .
- Page 139 desinstale-a. Quando estão instaladas mais de 3 aplicações, pode selecionar [Todas] na linha inferior da página inicial para aceder à página [Aplicações]. Selecione uma aplicação e prima o botão no telecomando e, em seguida, poderá selecionar [Mover para Ecrã inicial] ou [Desinstalar].
- Page 140 [Utilizar o Selecione o formato de 24 horas formato de 24 ou de 12 horas. horas] [Atualizar] Verifique se tem a versão mais [Procurar recente. Siga as instruções atualização] apresentadas no ecrã para atualizar a versão do software. [Sobre] Todos os dados no [Recuperação] armazenamento incorporado serão apagados.
- Page 141 HDMI Projeção do ecrã Pode projetar sem fios o ecrã do seu smartphone ou tablet para a superfície de projeção. Para dispositivos iOS: Para dispositivos Android:...
- Page 142 Neste caso, pode transmitir esse conteúdo através da mesma aplicação instalada no seu Nebula Capsule Pro. Aplicações Uma vez ligado a uma rede sem fios, pode aceder a serviços online, ver filmes e imagens, ouvir músicas e navegar na internet.
- Page 143 Ligue a um dispositivo de armazenamento USB Com este dispositivo, pode desfrutar de música, vídeos e imagens, ou instalar aplicações que estão guardadas num dispositivo de armazenamento USB 2.0, utilizando o cabo OTG fornecido. ① Prima o botão para aceder ao menu inicial. ②...
-
Page 144: Resolução De Problemas
Fonte de luz: LED RGB Tamanh Resolução: 854 x 480 pixéis Luminosidade: 150 ANSI Lumens Relação de contraste: 400:1 Relação de projeção: 1.3 Distância de projeção: 0,58 m a 3,08 m CPU: Quad Core A7 Sistema operativo: Android 7.1 RAM: 2 GB DDR ROM: 16GB eMMC Drivers das colunas: 5W Wi-Fi: IEEE802.11a/b/g/n Frequência dupla 2.4 G / 5 G... - Page 145 • Remova a lingueta de proteção para ativar a pilha do telecomando. ③ Imagem desfocada? • Rode a focagem ajustando o botão para obter a melhor focagem. ④ A imagem projetada está invertida? • Prima o botão para aceder ao menu inicial, selecione [Definições]>[Modo de projetor] e mude para o estado correto.
-
Page 146: Marcas Comerciais
Marcas comerciais HDMI e o logótipo HDMI e High-Definition Multimedia Interface são marcas comerciais ou registadas da HDMI Licensing LLC nos Estados Unidos e em outros países. A palavra, a marca e os logótipos Bluetooth® são marcas comerciais registadas da Bluetooth SIG, Inc. Outras marcas comerciais e nomes comerciais são propriedade dos respetivos donos. - Page 147 devem ser utilizadas dentro de 20 dias a partir da data de emissão pelo Suporte Nebula.
- Page 148 安全にご使用いただくために 本製品を使用する前に、すべての指示を読んで理解 してください。このマニュアルで説明されていない 変更または設定はしないでください。指示に従わな かったことが原因で身体の傷害、データの損失、破 損が発生しても、保証の対象になりません。 セットアップ • 火災や感電のリスクを軽減するため、本製品を 雨や湿気にさらさないでください。また、花び んなど液体の入った物を本製品の上に置かない でください。 • 本製品をテーブルクロスやカーペットなど柔ら かい表面の上に置かないでください。 • 本製品を、 多くの埃や汚れが付きやすい場所や、 強い磁場を発生する機器の近くに置かないでく ださい。 • 過熱を防ぐため、通気を妨げたり換気口をふさ いだりしないでください。 • 本製品は決して狭いスペースに置かないでくだ さい。本製品の周囲は換気のためのスペースを 常に十分に確保してください。 • 本製品を直射日光、熱、大きな温度変化、湿気 から保護してください。極端な温度を避けて ください。本製品とアクセサリの適正温度は 0 ~ 35 ° C です。 • 本製品を長時間使用していると、表面が高温にな ります。その場合は直ちにシャットダウンし、充 電器をはずしてください。...
- Page 149 いでください。 • 感電を防ぐため、分解しないでください。 • 弊社指定の付属品およびアクセサリのみを使用 してください。 • 極端な振動を避けてください。内部の部品が破 損するおそれがあります。 再生時の安全性 • 聴覚障害を避けるため、長時間、大きな音量で 聴かないでください。音量は適切なレベルに設 定してください。 充電 • 充電器のタイプは Q 183 、出力電圧/電流は DC 9 V / 2 A です。安全のため、電源を切る場合 は電源プラグを電源ソケットから抜いてくださ い。充電器は本製品の近くに据え置き、すぐ利 用できるようにしてください。 • この充電器は屋内使用専用です。 • 充電時は、デバイスを風通しのよい標準室温 ( 5 ~ 25 ° C を推奨)の場所に置いてください。 •...
- Page 150 • リモコンを長期間使用しない場合は、電池をは ずしてください。 • 電池は、同じタイプまたは同等品とのみ交換し てください。 • 電池・バッテリーには化学物質が含まれており、 適切に廃棄する必要があります。 • 本製品は定期的に充電してください。 本製品は、 バッテリーが完全に放電された状態では保管し ないでください。 クリーニング • 糸くずの出ない柔らかい布を使用してくださ い。クリーニングに液体、気体、可燃性の洗浄 剤を使用しないでください。 • レンズのコーティング膜の損傷を避けるため、 いかなるレンズクリーニング用洗浄液も使用し ないでください。レンズのクリーニングにはク リーニングペーパーを使用してください。 修理 • 本製品のいかなる修理もお客様ご自身ではなさ らないでください。 • メンテナンスが不適切な場合、けがをしたり、 本製品が損傷したりするおそれがあります。 注意 • 本製品からは、身体に良くない光線が放出され ます。 • 動作時の光線をのぞき込まないでください。明 るい光で目を傷めるおそれがあります。...
- Page 151 内容物 NEBULA BY ANKER Nebula Capsule Owner’s Manual 概要 正面図 レンズ フォーカス調整ノブ スピーカー...
- Page 152 背面図 換気口(出口側) 赤外線レシーバー INPUT • 電源に接続 • USB フラッシュドライブに接続(付属の OTG ケーブルを使用) HDMI HDMI 出力経由で再生機器接続 底面図 三脚ソケット...
- Page 153 上面図 • Bluetooth スピーカーモードもしくはプロジ ェクタモードかを切り替えます。 LED インジケータ • 青色の点灯:プロジェクターモードで動作 しています。 • 青色の点滅:ペアリング準備完了または Bluetooth ペアリング中(Bluetooth スピー カーモード)です。 • 青色の点灯:Bluetooth で接続済み (Bluetooth スピーカーモード)です。 • 赤色の点灯:充電中です。 • 緑色の点灯:フル充電済みです。 • 音量を上げ下げします。 • 2 秒間長押しすると、電源のオン/オフが 切り替わります。 • 電源がオンの場合に押すと、スタンバイと スタンバイからの再開を切り替えます。 換気口(入口側)...
- Page 154 リモコン 電源のオン / オフ HDMI 接続切り替え マウスモード切り替え ナビゲーションボタン 決定 ホーム 戻る その他のオプション表示 音量アップ / ダウン...
- Page 155 はじめに 設置 本製品を、投影面の前にある安定した平らなテーブ ルの上に置いてください。よりきれいに投影するた め、投影面は白くて平らな面を推奨します。本製品 と投影面との距離は、最小 0 . 58 メートル、最大 3 . 08 メートルの範囲内で調整し、約 20 ~ 100 インチの 大きさで投影します。 • 本製品を投影面に向けて傾ける必要はあり ません。内蔵のキーストーン補正機能を利 用して、投影画像を補正できます。 • 投影画像の大きさは、デバイスと投影面の 距離で決まります。よりきれいに投影する ため、投影画像を 40 ~ 80 インチの範囲に 設定することを推奨します。...
- Page 156 リモコンを準備する ① 初めて使用するときは、保護タブを外してリモコ ンの電池を通電させてください。 ② 電池を交換するには、ロックを解除して電池コン パートメントを開け、新しい電池を正しい極性(+ / -)で挿入し、電池コンパートメントを閉じてロッ クします。 使い始める ① 初めて使用する前に、付属のケーブルと充電器を 使用して内蔵バッテリーをフル充電します。 ② プロジェクターの を 2 秒間長押しして、電源 をオンにします。 ③ プロジェクターを適切な投影面または壁に向けま す。 ④ 最適なフォーカスになるように、フォーカス調整 ノブを回します。 ⑤ 初回使用時は、画面の指示に従って基本設定を完 了します。 Nebula Capsule Pro を速く、安全に充電する ため、付属の充電器以外は使用しないでくだ さい。...
- Page 157 Nebula アプリ 本製品をスムーズにご利用いただくために Nebula アプ リをダウンロードすることをお勧めします。このアプ リを使用すると、お使いのスマートフォンのキーボー ドによるテキスト入力や、スクリーンを利用したマウ ス操作をご利用いただけます。 ① Nebula Connect アプリを App Store ( iOS 機器の場合) または Google Play ( Android 機器の場合)からダウン ロードします。 ② スマートフォンで Bluetooth を有効にし、追加する 機器として [Nebula] を選択します。 ③ Nebula Connect アプリを開き、画面の指示に従って 接続セットアップを完了します。 設定 初めて本製品の電源を入れた際に、主な設定を完了さ せてください。 ネットワーク 本製品は、ワイヤレス(...
- Page 158 Bluetooth A Bluetooth スピーカーモード 本製品は、 Bluetooth スピーカーとして使用できます。 ① を押して、 Bluetooth スピーカーモードに切り 替えます。 ②スマートフォンで Bluetooth を有効にし、追加す る機器として [Nebula Capsule Pro] を選択します。 Nebula capsule B プロジェクターモード プロジェクターモードでは、他の Bluetooth ヘッド フォンまたはスピーカーを使用できます。 ① を押してホームメニューにアクセスし、[設 定]> [Bluetooth] を選択し、 を押します。 ② 画面の指示に従って、接続を完了します。 プロジェクター を押してホームメニューにアクセスし、 [設定] >[プロジェクター]を選択し、...
- Page 159 キーストーンを手動で補正 [キーストーン補正] します。デフォルト値は 0 です。 [前面への投影]:本製品が 投影面の前にある設定です。 [リア ( 背面)への投影]: 本製品が投影面の背後にあ る設定です。 [天井への設置:前面への 投影]:本製品が天井から [ プ ロ ジ ェ ク タ ー モ 逆さまに吊り下がっている ード] 設定です。画像が 180 度回 転されます。 [天井への設置:リア ( 背面 ) への投影]:本製品が投影 面の背後で天井から逆さま に吊り下がっている設定で す。 画像が 180 度回転され、 左右が反転します。...
- Page 160 その他 を押してホームメニューにアクセスし、 [設定] を選択すると、その他の設定にアクセスできます。 [一般] 画面に表示される言語を選択し [言語] ます。 キー音のオンとオフを切り替え [キー音] ます。 [ オ ー ト ス リ ー 5 分間/ 15 分間/ 30 分間 プ間隔] [背景] 背景を選択します。 [日付と時間] [ 日 付 と 時 間 の 日付と時間の自動設定を有効ま 自動設定] たは無効にします。 [日付] 日付を手動で設定します。 [時間]...
- Page 161 使用方法 HDMI 再生機器に接続する 本製品は、スティック型機器や DVD プレーヤー、セ ットトップボックス( STB )、ゲーム機など、さま ざまな HDMI 再生機器との接続をサポートしていま す。 ① 本製品を HDMI 再生機器に HDMI ケーブル ( 別売 り ) で接続します。 ② を 押 し て ホ ー ム メ ニ ュ ー に ア ク セ ス し、 [HDMI] を選択し、...
- Page 162 画面ミラーリング スマートフォンやタブレット端末の画面を投影面に 投射できます。 iOS 機器の場合: Android 機器の場合: 特定アプリ上のコンテンツによっては、著作 権上の制限により、スクリーンキャストを利 用 で き な い 場 合 が あ り ま す。 そ の 場 合 は、 Nebula Capsule Pro に同一アプリがインスト ールされていれば、該当するコンテンツをス トリーミングできます。...
- Page 163 アプリ ワイヤレスネットワークに接続すると、様々なオン ラインサービスにアクセスしたり、動画、音楽、写 真を表示または再生して楽しんだり、インターネッ トを利用したりできます。すでにインストールさ れているアプリとは別に、 Nebula App Store または USB フラッシュドライブから、他のアプリをインス トールすることもできます。 ① を押してホームメニューにアクセスします。 ② インターネットサービスを選択し、 を押し ます。 USB ストレージ機器に接続する 本製品では、音楽、動画、写真を楽しんだり、 USB 2 . 0 ストレージ機器に保存されたアプリを付属の OTG ケ ーブルを利用してインストールしたりできます。 ① を押してホームメニューにアクセスします。 ② [ファイルマネージャー]を選択し、 を押 します。 ③ ファイルを選択し、 を押します。...
- Page 164 製品仕様 仕様およびデザインは予告なく変更されるこ とがあります。 電源: 9 V 2 A ( QC2 . 0 ) 消費電力:< 10 W スタンバイ時消費電力:< 0 . 5 W ディスプレイ: 0 . 2 インチ 854 x 480p DLP 光源: RGB LED 投影画像サイズ: 20 ~ 100 インチ 解像度: 854 x 480 ピクセル 輝度:...
- Page 165 トラブルシューティング ① リモコンで電源をオンにできません。 • プロジェクター上の を 2 秒間長押しして、 電源をオンにします。 • 電源がオフの場合、リモコンを使用して電源を オンにすることはできません。 ② リモコンが機能しません。 • 保護タブをはずして、リモコンの電池を通電さ せます。 ③ 投影した画像がぼやけてしまいます。 • 最適なフォーカスになるように、フォーカス調 整ノブを回します。 ④ 投影された画像の向きが逆向きになってしまいま す。 を押してホームメニューにアクセスし、 [設 • 定] >[プロジェクタモード]を選択し、正し い状態に切り替えます。 ⑤ Wi - Fi ネットワークに接続できません。 • 利用可能なネットワークのリストを更新し、接 続をやり直します。 • ワイヤレスルーターまたは本製品を再起動し、 接続をやり直します。...
- Page 166 注意事項 本製品は、リサイクルおよび再利用が可能 な高品質の素材/部品で設計、製造されて います。 本製品を廃棄する際はお住まいの自治体の ルールに従ってください。 保証 • 最大 24 ヶ月保証 ご購入日から 18 ヶ月以内に製品不具合が生じた場合 は、弊社カス タマーサポートで確認後、迅速に同一 の製品と交換致します ( ただし、説明書の通りに製 品をご使用いただいた場合に限ります ) 。また Anker Japan 公式サイトに会員登録をしていただくと、保 証期間が 24 ヶ月まで延長されます ( 登録無料 ) 。 製品の不具合の場合、返送にかかる送料も弊社が負 担致しますが、適用はご購入いただいた国内のみに なります。...
- Page 167 إرشادات السالمة اقرأ كل اإلرشادات وافهمها جي د ً ا قبل استخدام هذا الجهاز. ال تجر ِ أي تغييرات غير مذكورة في هذا الدليل على اإلعدادات. في حال وقوع إصابة جسدية أو فقدان بيانات أو حدوث ضرر نتيجة عدم االلتزام بهذه .اإلرشادات،...
- Page 168 .استخدم المرفقات والملحقات التي تحددها الجهة المص ن ّ عة فقط • .تج ن ّ ب االهتزازات المفرطة، فقد يلحق ذلك ضرر ً ا بالمكونات الداخلية • سالمة السمع • لتفادي إلحاق الضرر بالسمع، ال تستمع إلى الموسيقى لفترات زمنية طويلة...
- Page 169 .مناسب اشحن هذا الجهاز بانتظام. ال تخز ّ ن هذا الجهاز إذا كانت بطاريته • .فارغة تما م ً ا التنظيف استخدم قطعة قماش ناعمة وخالية من الوبر. ال تستخدم مطل ق ً ا • المنظفات السائلة أو الغازية أو القابلة لالشتعال بسهولة لغرض .التنظيف...
- Page 170 اللوازم المض م ّ نة NEBULA BY ANKER Nebula Capsule Owner’s Manual لمحة عامة نظرة على الجهاز من الجانب األمامي العدسة مفتاح ضبط التركيز مك ب ّر الصوت...
- Page 171 نظرة على الجهاز من الجانب الخلفي مستقبل األشعة تحت الحمراء )التهوية (منفذ اإلدخال • االتصال بمصدر طاقة OTG محمول (باستخدام كبلUSB االتصال بمحرك أقراص • )المتوفر HDMI مدخل HDMI االتصال بجهاز تشغيل مزوّ د بمخرج نظرة على الجهاز من الجانب السفلي مأخذ...
- Page 172 نظرة على الجهاز من الجانب العلوي Bluetooth اضغط للتبديل بين وضع مك ب ّر الصوت بتقنية • .ووضع جهاز اإلسقاط LED مؤشر • .ضوء أبيض ثابت: التشغيل في وضع جهاز اإلسقاط Bluetooth ضوء أزرق وامض: جاهز لالقتران / اإلقران عبر •...
- Page 173 جهاز التحكم عن ب ُ عد للتشغيل / إيقاف التشغيل HDMI التبديل إلى اتصال وضع الماوس التنقل تأكيد المحتوى المحدد الرئيسية الجهة الخلفية عرض المزيد من الخيارات رفع مستوى الصوت / خفضه...
- Page 174 بدء االستخدام مكان وضع الجهاز ضع هذا الجهاز على طاولة ثابتة ومسط ّ حة أمام سطح اإلسقاط. للحصول .على أفضل النتائج، يجب أن يكون سطح اإلسقاط أبيض اللون ومسط ّ ح ً ا 23( يجب أن تبلغ المسافة بين هذا الجهاز وسطح اإلسقاط 85,0 أمتار بوصات) كحد...
- Page 175 .④ قم بتدوير مفتاح ضبط التركيز للحصول على أفضل مستوى تركيز ⑤ عند االستخدام للمرة األولى، اتبع اإلرشادات التي تظهر على الشاشة .إلكمال اإلعدادات األساسية بأسرع طريقة وأكثرهاNebula Capsule Pro لشحن جهاز .أما ن ً ا، استخدم الشاحن المو ف َّ ر فقط...
- Page 176 Nebula تطبيق لتسهيل التح ك ّ م بالجهاز. فمن خاللNebula نوصيك بتنزيل تطبيق استخدام هذا التطبيق، يمكنك استخدام لوحة مفاتيح هاتفك الذكي إلدخال .النصوص واستخدام الشاشة كمفتاح الماوس (لألجهزةApp Store منCapsule Control ① قم بتنزيل تطبيق (لألجهزة التي تعمل بنظامGoogle Play ) أوiOS التي تعمل بنظام .)Android ]Capsule Control[ ...
- Page 177 Bluetooth تقنية Bluetooth أ- وضع مك ب ّ ر الصوت بتقنية .Bluetooth يمكنك استخدام هذا الجهاز كمك ب ّر صوت بتقنية ① اضغط على .Bluetooth للتبديل إلى وضع مك ب ّر الصوت بتقنية Nebula Capsule] على هاتفك الذكي وحددBluetooth ② قم بتمكين .[ كالجهاز...
- Page 178 لتصحيح المحور يدو ي ً ا. القيمة ][تصحيح المحور .0 االفتراضية هي [الجهة األمامية]: عند وضع الجهاز أمام ][وضع جهاز اإلسقاط .سطح اإلسقاط [الجهة الخلفية]: عند وضع الجهاز .خلف سطح اإلسقاط [السقف األمامي]: عندما يتدلى الجهاز من السقف رأ س ً ا على عقب. يتم تدوير .الصورة...
- Page 179 إعدادات أخرى ]للوصول إلى القائمة الرئيسية، ثم حدد [اإلعدادات اضغط على .للعثور على المزيد من اإلعدادات ][عام .حدد لغة العرض من الشاشة ][اللغة .لتشغيل / إيقاف تشغيل نغمة لوحة المفاتيح ][نغمة لوحة المفاتيح [الفاصل الزمني للنوم 5 دقائق / 51 دقيقة / 03 دقيقة ]التلقائي...
- Page 180 االستمتاع HDMI االتصال بأجهزة التشغيل المزو ّ دة بـ مثلHDMI يدعم هذا الجهاز االتصاالت بأجهزة تشغيل مختلفة مزوّ دة بـ ، أو جهاز فك التشفيرDVD ، أو مش غ ّ ل أقراصTV stick ، أوTV box .)، أو جهاز ألعاب أو أجهزة أخرىSTB( ...
- Page 181 :iOS لألجهزة التي تعمل بنظام :Android لألجهزة التي تعمل بنظام قد ال تتوفر بعض المحتويات للعرض جرّ اء القيود المتعلقة بحقوق النشر. في هذه الحال، يمكنك تشغيل هذه البيانات عبر .Nebula Capsule Pro التطبيق نفسه الذي تم تثبيته في جهاز...
- Page 182 التطبيقات عندما تتصل بشبكة السلكية، يصبح بإمكانك الوصول إلى الخدمات عبر ً اإلنترنت واالستمتاع باألفالم والموسيقى والصور وتص ف ّ ح اإلنترنت. وفض ال عن التطبيقات المثبتة مسب ق ً ا، يمكنك أي ض ً ا تثبيت أي تطبيقات أخرى سواء ....
- Page 183 المواصفات .إن المواصفات والتصميم عرضة للتغيير من دون إشعار )QC2.0( 2 أمبير اإلمداد بالطاقة: 9 فولت استهالك الطاقة: <01 واط استهالك الطاقة في وضع االستعداد: <5,0 واط تقنية الشاشة: تقنية المعالجة الرقمية للضوء 2,0 بوصة 458*084 بكسل (اللون األحمر واألخضرRGB يدعمLED المصدر الضوئي: ضوء )واألزرق...
- Page 184 فهرنهايت، < %09 رطوبة األبعاد (العرض*االرتفاع*العمق): 86*021 مم / 27,4*76,2 بوصة الوزن: 074 جم / 6,61 أونصة استكشاف األخطاء وإصالحها ① هل تعجز عن تشغيل الجهاز بواسطة جهاز التح ك ّ م عن بعد؟ اضغط مطوّ ال ً على • .لمدة...
- Page 185 إشعار يتوافق هذا المنتج مع متطلبات الهيئة األوروبية الخاصة .بتداخل الترددات الالسلكية تم تصميم هذا المنتج وتصنيعه باستخدام مواد ومكونات عالية .الجودة يمكن إعادة تدويرها وإعادة استخدامها يشير هذا الرمز إلى أنه يجب عدم التخلص من المنتج على أنه من المهمالت المنزلية العادية، بل يجب تسليمه إلى المنشأة...
- Page 186 +49 (0) 69 9579 7960 (DE) Mon-Fri 6:00 - 11:00 +81 03 4455 7823 (日本) 月-金 9:00-17:00 © Anker Technology Co., Limited. All rights reserved. NEBULA and the NEBULA logo are trademarks of Anker Technology Co., Limited, registered in the United States and other countries.