
Related Manuals for Ricoh LANIER AP2610


Summary of Contents for Ricoh LANIER AP2610
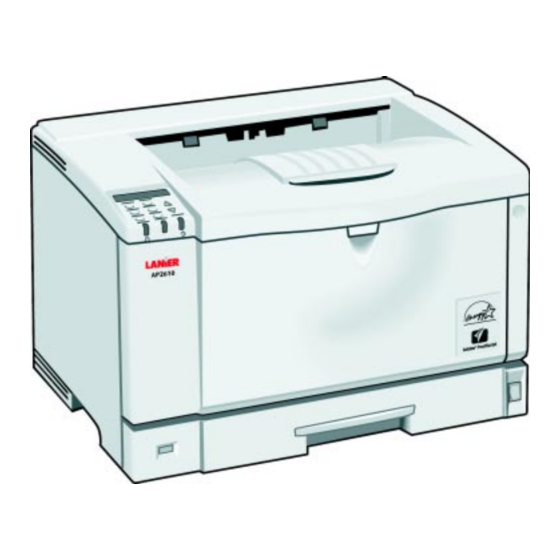
- Page 1 Operators Guide AP2610 AP2610 AP2610 AP2610 Printer Reference you r docu ment m an a ge m ent pa r tne r...
- Page 2 Introduction This manual contains detailed instructions on the operation and maintenance of this machine. To get maximum versatility from this machine all operators should carefully read and follow the instructions in this manual. Please keep this manual in a handy place near the machine. Please read “Safety Information”...
- Page 3 Trademarks Microsoft, Windows and Windows NT are registered trademarks of Microsoft Corporation in the United States and/or other countries. Novell, Netware, NDS are registered trademarks or Novell, Inc. PostScript is a registered trademark of Adobe Systems, Incorporated. PCL is a registered trademark of Hewlett-Packard Company. AppleTalk, Apple, Macintosh, TrueType and LaserWriter are registered trade- marks of Apple Computer, Incorporated.
- Page 4 Manuals for This Printer Manuals for This Printer The following manuals describe the operational procedures and maintenance of this machine. To enhance safe and efficient operation of this printer, all users should read and follow the instructions carefully. ❖ ❖ ❖ ❖ Quick Installation Guide Describes how to install the printer.
- Page 5 How to Read This Manual Symbols In this manual, the following symbols are used: R WARNING: This symbol indicates a potentially hazardous situation which, if instructions are not followed, could result in death or serious injury. R CAUTION: This symbol indicates a potentially hazardous situation which, if instructions are not followed, may result in minor or moderate injury or damage to property.
-
Page 6: Table Of Contents
TABLE OF CONTENTS 1. Setting Up the Printer Driver and Canceling a Print Job PCL 6/5e - Accessing the Printer Properties ........... 1 Windows 95/98/Me - Accessing the Printer Properties ........1 Windows 2000/Windows XP - Accessing the Printer Properties....2 Windows NT 4.0 - Accessing the Printer Properties ........ - Page 7 4. Sample Print/Locked Print Sample Print....................51 Printing a Sample Print File................51 Deleting a Sample Print File................. 53 Checking the Error Log ................54 Locked Print....................56 Printing a Locked Print File ................56 Deleting the Locked Print File ..............58 Checking the Error Log ................
- Page 8 System Menu ..................124 System Parameters..................124 Changing the System Menu............... 128 Host Interface Menu ................130 Host Interface Parameters ................ 130 Changing the Host Interface Menu ............135 PCL Menu ....................137 PCL Parameters..................137 Changing the PCL Menu................139 Language Menu ..................
-
Page 9: Setting Up The Printer Driver And Canceling A Print Job
1. Setting Up the Printer Driver and Canceling a Print Job PCL 6/5e - Accessing the Printer Properties Windows 95/98/Me - Accessing the Printer Properties Changing the default printer settings A A A A Click [Start] on the taskbar, point to [Settings], and then click [Printers]. The [Printers] window appears. -
Page 10: Windows 2000/Windows Xp - Accessing The Printer Properties
Setting Up the Printer Driver and Canceling a Print Job C C C C Make any settings you require and click [OK]. D D D D Click [OK] to start printing. Windows 2000/Windows XP - Accessing the Printer Properties Changing the default printer settings - Printer Properties Limitation ❒... - Page 11 PCL 6/5e - Accessing the Printer Properties B B B B Click to select the icon of the printer whose default settings you want to change. C C C C On the [File] menu, click [Printing Preferences...]. The Printing Preferences Properties appears. D D D D Make any settings you require and click [Apply].
-
Page 12: Windows Nt 4.0 - Accessing The Printer Properties
Setting Up the Printer Driver and Canceling a Print Job Windows NT 4.0 - Accessing the Printer Properties Changing the default printer settings - Printer Properties Limitation ❒ Changing the setting of the printer requires Full Control access permission. Members of Administrators, Server Operators, Print Operators, and Power Users groups have Full Control permission by default. - Page 13 PCL 6/5e - Accessing the Printer Properties Making printer settings from an application To make the printer settings for a specific application, open the [Printer Properties] dialog box from that application. The following example describes how to make settings for the WordPad application that comes with Windows NT 4.0. Note ❒...
-
Page 14: Rpcs - Accessing The Printer Properties
Setting Up the Printer Driver and Canceling a Print Job RPCS - Accessing the Printer Properties Windows 95/98/Me - Accessing the Printer Properties Changing the default printer settings A A A A Click [Start] on the taskbar, point to [Settings], and then click [Printers]. The [Printers] window appears. -
Page 15: Windows 2000/Windows Xp - Accessing The Printer Properties
RPCS - Accessing the Printer Properties Windows 2000/Windows XP - Accessing the Printer Properties Changing the default printer settings - Printer Properties Limitation ❒ Changing the setting of the printer requires Manage Printers permission. Members of the Administrators and Power Users groups have Manage Print- ers permission by default. - Page 16 Setting Up the Printer Driver and Canceling a Print Job D D D D Make any settings you require and click [Apply]. Note ❒ Settings you make here are used as the default settings for all applications. E E E E Click [OK].
-
Page 17: Windows Nt 4.0 - Accessing The Printer Properties
RPCS - Accessing the Printer Properties Windows NT 4.0 - Accessing the Printer Properties Changing the default printer settings - Printer Properties Limitation ❒ Changing the setting of the printer requires Full Control access permission. Members of Administrators, Server Operators, Print Operators, and Power Users groups have Full Control permission by default. - Page 18 Setting Up the Printer Driver and Canceling a Print Job Making printer settings from an application To make the printer settings for a specific application, open the [Printer Properties] dialog box from that application. The following example describes how to make settings for the WordPad application that comes with Windows NT 4.0.
-
Page 19: Postscript - Setting Up For Printing
PostScript - Setting Up for Printing PostScript - Setting Up for Printing Windows 95/98/Me - Accessing the Printer Properties Changing the default printer settings Note ❒ With some applications, the printer driver's settings are not used, and the ap- plication's own default settings are applied. A A A A Click [Start] on the taskbar, point to [Settings], and then click [Printers]. -
Page 20: Windows 2000/Windows Xp - Accessing The Printer Properties
Setting Up the Printer Driver and Canceling a Print Job Windows 2000/Windows XP - Accessing the Printer Properties Changing the default printer settings - Printer Properties Limitation ❒ Changing the setting of the printer requires Manage Printers permission. Members of the Administrators and Power Users groups have Manage Print- ers permission by default. - Page 21 PostScript - Setting Up for Printing D D D D Make any settings you require and click [Apply]. Note ❒ Settings you make here are used as the default settings for all applications. E E E E Click [OK]. Making printer settings from an application To make the printer settings for a specific application, open the [Print] dialog box from that application.
-
Page 22: Windows Nt 4.0 - Accessing The Printer Properties
Setting Up the Printer Driver and Canceling a Print Job Windows NT 4.0 - Accessing the Printer Properties Changing the default printer settings - Printer Properties Limitation ❒ Changing the setting of the printer requires Full Control access permission. Members of Administrators, Server Operators, Print Operators, and Power Users groups have Full Control permission by default. - Page 23 PostScript - Setting Up for Printing Making printer settings from an application To make the printer settings for a specific application, open the [Printer Properties] dialog box from that application. The following example describes how to make settings for the WordPad application that comes with Windows NT 4.0. Note ❒...
-
Page 24: Macintosh - Setting Up For Printing
Setting Up the Printer Driver and Canceling a Print Job Macintosh - Setting Up for Printing Making paper settings from an application A A A A Open the file you want to print. B B B B On the [File] menu, click [Page Setup]. The [AdobePS Page Setup] dialog box appears. -
Page 25: Canceling A Print Job
Canceling a Print Job Canceling a Print Job Windows 95/98/Me, Windows 2000, Windows XP, Windows NT 4.0 - Canceling a Print Job A A A A Double-click the printer icon on the Windows taskbar. A window appears, showing all the print jobs that are currently queuing to be printed. -
Page 26: Macintosh - Canceling A Print Job
Setting Up the Printer Driver and Canceling a Print Job Macintosh - Canceling a Print Job A A A A Double-click the printer's icon on the desktop. A window appears, showing all the print jobs that are currently queuing to be printed. -
Page 27: Uninstalling The Printer Driver And Software
2. Uninstalling the Printer Driver and Software Uninstalling the PCL 6/5e Printer Driver This section describes how to uninstall the printer driver. The actual procedure may differ depending on the operating system. Follow one of the appropriate procedures below. Windows 95/98/Me - Uninstalling the PCL 6/5e Printer Driver A A A A Close all applications that are currently running. -
Page 28: Windows Nt 4.0 - Uninstalling The Pcl 6/5E Printer Driver
Uninstalling the Printer Driver and Software E E E E Click [Yes] to uninstall the printer driver. Note ❒ Before upgrading the printer driver, restart your computer after uninstall- ing the old version of the printer driver. Windows NT 4.0 - Uninstalling the PCL 6/5e Printer Driver Limitation ❒... -
Page 29: Uninstalling The Rpcs Printer Driver
Uninstalling the RPCS Printer Driver Uninstalling the RPCS Printer Driver This section describes how to uninstall the printer driver. The actual procedure may differ depending on the operating system. Follow one of the appropriate procedures below. Windows 95/98/Me - Uninstalling the RPCS Printer Driver A A A A Close all applications that are currently running. -
Page 30: Windows Nt 4.0 - Uninstalling The Rpcs Printer Driver
Uninstalling the Printer Driver and Software Windows NT 4.0 - Uninstalling the RPCS Printer Driver Limitation ❒ Uninstalling a printer driver requires Full Control access permission. Mem- bers of the Administrators, Server Operators, Print Operators, and Power Us- ers groups have Full Control Permission by default. When you install a printer driver, log on using an account that has Full Control permission. -
Page 31: Uninstalling The Postscript Printer Driver
Uninstalling the PostScript Printer Driver Uninstalling the PostScript Printer Driver This section describes how to uninstall the PostScript printer driver. The actual procedure may differ depending on the operating system. Follow one of the appropriate procedures below. Windows 95/98/Me - Uninstalling the PostScript Printer Driver A A A A Close all applications that are currently running. -
Page 32: Windows Nt 4.0 - Uninstalling The Postscript Printer Driver
Uninstalling the Printer Driver and Software Windows NT 4.0 - Uninstalling the PostScript Printer Driver Limitation ❒ Uninstalling a printer driver requires Full Control access permission. Mem- bers of the Administrators, Server Operators, Print Operators, and Power Us- ers groups have Full Control Permission by default. When you uninstall a printer driver, log on using an account that has Full Control permission. -
Page 33: Paper And Other Media
3. Paper and Other Media Paper and Other Media Supported by This Printer Paper Types and Sizes This section describes the type, size, feed direction, and maximum amount of pa- per that can be loaded into each paper tray in this printer. Important ❒... - Page 34 Paper and Other Media Note ❒ The printable paper size depends on the memory size of the printer and print data, see p.153 “Memory Capacity and Paper Size”. ❒ For more information about the meanings of the abbreviations, see the notes at the bottom of each table.
- Page 35 Paper and Other Media Supported by This Printer ❍* Custom Size — — × 15.35) 267 × 390 ❍ 8K (10 16K (7.68 × 10 195 × 267 ❍ 267 × 195 ❍ • ❍ Means that the size is supported but the paper size should be set with the con- trol panel.
- Page 36 Paper and Other Media × 14 ❍ ✩ ✩ Legal (LG) × 11 ❍ ✩ ✩ Letter (LT) 11 × 8 ❍ ✩ ✩ × 8 × 8 ❍ × 10 ❍ Executive (Exec.) × 7 ❍ 11.26 × 16.54 ❍...
- Page 37 Paper and Other Media Supported by This Printer • ❍ Means that the size is supported but the paper size should be set with the con- trol panel. There is no dial on the tray. See p.40 “Loading Paper in the Bypass Tray” See p.47 “Loading envelopes into the Envelope Feeder Unit”...
- Page 38 Paper and Other Media ❖ ❖ ❖ ❖ Output Paper Sizes (Metric version) 297 × 420 ❍ ❍ ❍ ❍ 257 × 364 ❍ ❍ ❍ ❍ B4 JIS 210 × 297 ❍ ❍ ❍ ❍ 297 × 210 ❍ ❍...
- Page 39 Paper and Other Media Supported by This Printer ❖ ❖ ❖ ❖ Output Paper Sizes (Inch version) 11 × 17 11 × 17 ❍ ❍ ❍ ❍ × 14 ❍ ❍ ❍ ❍ Legal (LG) × 11 ❍ ❍ ❍ ❍...
- Page 40 Paper and Other Media 7.68 × 10 ❍ ❍ ❍ ❍ × 7.68 ❍ ❍ ❍ ❍ • ❍ Means that the size is supported and that the paper size should be set with the control panel. There is no dial on the tray. •...
-
Page 41: Paper Recommendations
Paper and Other Media Supported by This Printer Paper Recommendations Note the following suggestions when handling or selecting paper used with this printer. Loading Paper • Confirm the paper types of the printer. For more information, see p.33 “Types of Paper and Other Media”. Print quality cannot be guaranteed if other paper types are used. - Page 42 Paper and Other Media ❖ ❖ ❖ ❖ OHP transparencies • Load only one OHP transparency at the same time onto the Bypass Tray. • When loading an OHP transparency onto the Bypass Tray, set the printer to Transparency mode with the control panel. •...
- Page 43 Paper and Other Media Supported by This Printer • Load the envelopes with the flaps aligned to the left side fence. The flaps should be securely folded up. • Confirm that there is no air in the envelopes before loading. •...
-
Page 44: Printable Area
Paper and Other Media • damp • excessively curled or twisted • stuck together • damaged in any way • with stamps attached • with windows, holes, perforations, cutouts or embossing • with metal clasps, string ties or metal folding bars •... -
Page 45: Loading Paper And Other Media
Loading Paper and Other Media Loading Paper and Other Media B B B B While lifting the front side of the Loading Paper in the Paper tray, pull it out of the printer. Tray Load paper in the optional Paper Feed Unit by following the proce- dures below. - Page 46 Paper and Other Media D D D D Important Carefully slide the paper tray into ❒ If you want to use the paper size the printer until it stops. and feed direction that are not indicated on the paper size dial, set the dial to “p”.
- Page 47 Loading Paper and Other Media E E E E B Slide the tray until it stops. Load paper into the tray with the print side down. ZCEY170J C Return the catches to their orig- ZCEY130J inal positions. Important ❒ Confirm that the top of the stack is not higher than the limit mark inside the tray.
-
Page 48: Loading Paper In The Bypass Tray
Paper and Other Media Note Loading Paper in the Bypass ❒ If you load A4K or lager, or Tray × 11 Kor larger, slide out the Bypass Tray extension (A) and then flip it open (B). Reference With the Bypass Tray, you can load up to 100 pages at the same time. - Page 49 Loading Paper and Other Media D D D D E Press { { { { T T T T } } } } or { { { { U U U U } } } } to select the Set the paper size and feed direc- paper size you want to use.
- Page 50 Paper and Other Media C C C C Press { { { { Enter #} } } } . Loading custom sized paper in the Bypass Tray Paper Input: Bypass Size Important ❒ The settings of custom sized paper The following message appears on that take effect are not the settings the panel display.
- Page 51 Loading Paper and Other Media D D D D Press { { { { T T T T } } } } or { { { { U U U U } } } } to display "Pa- Setting the Bypass Tray Paper Type per Type".
-
Page 52: Loading Paper In The Optional Paper Tray
Paper and Other Media Important Loading Paper in the Optional ❒ If you want to use paper sizes or Paper Tray feed directions that are not list- ed on the paper size dial, adjust the dial to “p”. In this case, you Reference should set the paper size using With the Paper Feed Unit, you can... -
Page 53: Loading Envelopes
Loading Paper and Other Media D D D D Load paper into the paper tray Loading Envelopes with the print side down. As there are many kinds of envelopes, be sure to check if those to be used are supported by this printer. Reference For more information about enve- lopes, see p.33 “Types of Paper and... - Page 54 Paper and Other Media B B B B D D D D Load envelopes until they stop, Set the envelope size and feed di- with the print side up and the rection using the control panel as sides of the flaps on the left as follows: shown below.
- Page 55 Loading Paper and Other Media E Press { { { { U U U U } } } } or { { { { T T T T } } } } to select the Loading envelopes into the Envelope envelope type you want to use.
- Page 56 Paper and Other Media D D D D F F F F Push the bottom plate down until While pinching the side guides, it locks into place. slide them along the edge of the envelope stack. ZDDP360E E E E E ZGDY370E Load envelopes into the Envelope G G G G...
- Page 57 Loading Paper and Other Media I I I I D Press { { { { U U U U } } } } or { { { { T T T T } } } } to display Set the envelope size and feed di- “Tray Paper Size”.
- Page 58 Paper and Other Media J After the panel display chang- es, press { { { { On Line} } } } . Menu On Line Job Reset Escape Form Feed Enter Power Error Data In "Ready" message appears on the control panel. Ready J J J J Start printing with the computer.
-
Page 59: Sample Print/Locked Print
4. Sample Print/Locked Print Sample Print ❒ If the first set of the sample print Use this function to print only the first set of a multiple-set print jobs. The re- file is not as you expected and you maining sets are saved on the option- do not want to print the remaining al Hard Disk Drive in the printer. - Page 60 Sample Print/Locked Print F F F F L L L L Press { { { { Enter #} } } } . Click [OK]. G G G G After making all desired settings, Menu On Line click [OK]. H H H H Start printing from the applica- Job Reset Escape...
-
Page 61: Deleting A Sample Print File
Sample Print P P P P C C C C Press { { { { Enter #} } } } to print the file. Press { { { { Enter #} } } } . The following message appears on Menu On Line the panel display. -
Page 62: Checking The Error Log
Sample Print/Locked Print G G G G C C C C Press { { { { On Line} } } } . Press { { { { Enter #} } } } . Menu Menu On Line On Line Job Reset Escape Job Reset Escape... - Page 63 Sample Print G G G G Press { { { { On Line} } } } . Menu On Line Job Reset Escape Form Feed Enter Power Error Data In "Ready" appears on the panel dis- play. Ready...
-
Page 64: Locked Print
Sample Print/Locked Print Locked Print Use this function to maintain privacy Printing a Locked Print File when printing confidential docu- ments. Documents will not be printed The following procedure describes out automatically, unless a password how to print a locked print file with is entered, using the control panel af- the PCL printer driver. - Page 65 Locked Print I I I I M M M M Press { { { { T T T T } } } } or { { { { U U U U } } } } to display a file Start printing from the applica- tion's print dialog box.
-
Page 66: Deleting The Locked Print File
Sample Print/Locked Print P P P P C C C C Press { { { { Enter #} } } } . Press { { { { Enter #} } } } . The following message appears on Menu On Line the panel display. -
Page 67: Checking The Error Log
Locked Print I I I I C Repeat steps A A A A and B B B B to enter Press { { { { On Line} } } } . the remaining password digits, and then press { { { { Enter #} } } } . Menu On Line If the password is not correct,... - Page 68 Sample Print/Locked Print C C C C F F F F Press { { { { Enter #} } } } . Press { { { { T T T T } } } } or { { { { U U U U } } } } to check "Error File(s)", and then press { { { { Escape} } } } .
-
Page 69: Troubleshooting
5. Troubleshooting Error & Status Messages on the Control Panel Messages/Second messages Description Solution Call Service: EC An error has occurred in the First, turn the power switch printer. off and then on. If the message Power Off On appears again, call your sales /If Error Reoccur or service representative. - Page 70 Troubleshooting Messages/Second messages Description Solution Close The front cover is open. Close the front cover. Front Cover Close Rear/Paper The paper exit cover or the Close the paper exit cover or rear cover is open. the rear cover. Exit Cover Close The cover of the Mailbox is Close the cover of the Mail-...
- Page 71 Error & Status Messages on the Control Panel Messages/Second messages Description Solution Hardware Problem An error has occurred in the First, turn the power switch optional Hard Disk Drive. off and then on, If the message appears again, call your sales or service representative.
- Page 72 Troubleshooting Messages/Second messages Description Solution Hardware Problem An error has occurred in the First, turn the power switch printer. off and then on. If the message NV-RAM appears again, call your sales or service representative. Hardware Problem An error has occurred in the First, turn the power switch optional Memory Unit.
- Page 73 Error & Status Messages on the Control Panel Messages/Second messages Description Solution HDD Full The maximum HDD area size Delete the disused form/font for form/font has been ex- types. ceeded. HDD Full The optional Hard Disk Drive Delete any unnecessary stored is full.
- Page 74 Troubleshooting Messages/Second messages Description Solution Load Paper The paper type and size set- Load paper into the tray indi- cated, then press { { { { Enter #} } } } to tings for this tray do not /Paper Size: match the size and type of pa- resume printing.
- Page 75 Error & Status Messages on the Control Panel Messages/Second messages Description Solution Ready The printer is online and If you want to take the printer offline, press { { { { On Line} } } } . ready to make prints. Remove Misfeed There is misfeed in the Duplex Remove the misfed paper.
- Page 76 Troubleshooting Messages/Second messages Description Solution Replace The toner cartridge is not set Set the toner cartridge correct- correctly or toner is almost ly. See p.90 “Replacing the Toner Cartridge run out. Toner Cartridge”. The toner dust is full. Prepare a new toner cartridge. If the image density gets too light, replace the toner car- tridge with a new one.
-
Page 77: Getting Printer Information Over The Network
Error & Status Messages on the Control Panel Getting Printer Information over the Network Printer current status You can check the printer's status using the telnet command. ❖ ❖ ❖ ❖ telnet Use the status command. ❖ ❖ ❖ ❖ UNIX Use the lpq or lpstat command or stat parameter of rsh, rcp, or ftp. - Page 78 Troubleshooting Messages Description Comments NVRAM Error An error has occurred in the First, turn the power switch printer. off and then on. If the message appears again, call your sales or service representative. Error: IEEE 1394 Board An error has occurred in the First, turn the power switch optional 1394 Interface Unit.
- Page 79 Error & Status Messages on the Control Panel Messages Description Comments Mismatch: Paper Size and The paper type setting of the Load paper of the indicated Type tray differs from that of actual paper size and type into the paper type in the tray. paper tray being used.
- Page 80 Troubleshooting Messages Description Comments Replace Maintenance Kit It is time to replace parts in- Replace parts. See p.144 cluded in the Maintenance “MAINTENANCE KIT Type Kit. 2600”. Shift Tray Error An error has occurred in the 1- First, turn the power switch bin Shift Sort Tray.
- Page 81 Error & Status Messages on the Control Panel Printer configuration You can check the printer configuration using telnet. ❖ ❖ ❖ ❖ telnet Use the info command. ❖ ❖ ❖ ❖ UNIX Use the info parameter of rsh, rcp, or ftp. Reference For more information, see “Remote Maintenance by Telnet (mshell)”...
- Page 82 Troubleshooting ❖ ❖ ❖ ❖ *2 Input Tray: Paper Size Paper Size Description A3 (297 × 420) A3 K B4JIS (257 × 364) A4 (297 × 210) A4 (210 × 297) B5JIS (257 × 182) B5JIS (182 × 257) A5 (210 × 148) A5 (148 ×...
- Page 83 Error & Status Messages on the Control Panel ❖ ❖ ❖ ❖ *3 Input Tray: Status Status Description Normal NoTray There is no paper tray PaperEnd There is no paper in the paper tray ❖ ❖ ❖ ❖ *4 Output Tray: Name Name Description Standard Tray...
-
Page 84: Printer Does Not Print
Troubleshooting Printer Does Not Print Possible Cause Solutions Is the power on? Confirm that the cable is securely plugged into the power outlet and the printer. Turn on the power switch. Press { { { { On Line} } } } so the indicator lights. Does the On Line indica- tor stay on? Does the Error indicator... - Page 85 Printer Does Not Print Possible Cause Solutions Is the Data In indicator If not blinking or lit, the data is not being sent to the printer. blinking or lit after starting ❖ ❖ ❖ ❖ If the printer is connected to the computer using the in- the print job? terface cable Make sure the following printer port settings are correct:...
- Page 86 Troubleshooting Possible Cause Solutions Do you print via a net- Confirm that the "Ethernet" setting is correct from the control pan- work? el. See p.130 “Host Interface Menu”. The setting governs the data transfer speed used by the Network Interface Board. Three options are available: •...
-
Page 87: Other Printing Problems
Other Printing Problems Other Printing Problems Status Possible Causes, Descriptions, and Solutions The print side of the page is a Adjust the image density. hazy gray. See p.101 “Making Printer Settings with the Control Panel”. If paper is curled, correct it. If you continuously print data that contains extremely small amount of words or images in the printable area, the printed side of the page could be a hazy gray. - Page 88 Troubleshooting Status Possible Causes, Descriptions, and Solutions Paper misfeeds occur frequent- Check the paper size settings. The size set with the paper size dial might be different from the actual paper size. Make the correct dial setting. See p.37 “Loading Paper and Other Media”. Use the recommended paper.
- Page 89 Other Printing Problems Status Possible Causes, Descriptions, and Solutions Network configurations you Print a configuration page and check the network settings. have made do not become effec- tive. Printing from a Macintosh with Set the Ethernet speed of the machine to 10Mbps. If you want the network standard model is to use the machine with Macintosh at the Ethernet speed of slow.
-
Page 90: Removing Misfed Paper
Troubleshooting Removing Misfed Paper When a paper misfeed occurs, an error message appears on the panel display. The procedure you should follow to remove misfed paper depends on the loca- tion of the misfeed, which is indicated on the panel display. R CAUTION: •... -
Page 91: When "Remove Misfeed Internal Path/Open Front Cover" Appears
Removing Misfed Paper C C C C B B B B Open the front cover by pushing While lifting the front side of the the front cover release button, toner cartridge, pull it out of the and then close it to reset the mis- printer. -
Page 92: When "Remove Misfeed Paper Exit Cover" Appears
Troubleshooting D D D D Holding the grips of the toner car- When "Remove Misfeed Paper tridge, insert it into the printer Exit Cover" Appears until it stops. R CAUTION: • When removing misfed paper, do not touch the fusing section because it becomes very hot. - Page 93 Removing Misfed Paper B B B B E E E E Open the paper exit cover. If the misfed paper is in the fus- ing unit, remove it. A Open the rear cover by push- ing the two knobs. ZGDY390J C C C C Remove the misfed paper.
- Page 94 Troubleshooting G G G G J J J J Pull the fusing unit out. Push the lock levers of the fusing unit down until it clicks. ZGDX223N H H H H ZGDX225N While holding the tab, remove K K K K the misfed paper.
-
Page 95: When "Remove Misfeed Duplex Unit" Appears
Removing Misfed Paper C Close the rear cover of the Du- When "Remove Misfeed plex Unit. Duplex Unit" Appears R CAUTION: • When removing misfed paper, do not touch the fusing section because it becomes very hot. Important ❒ Forcefully removing misfed paper may cause paper to tear and leave ZGDY330J scraps of paper in the Dupelx Unit. - Page 96 Troubleshooting F Close the cover of the Duplex Important Unit. ❒ When A5L paper misfeeds, If the error message appears you might not be able to re- again, go to step move it by pulling the Du- plex Unit out. In this case, pull the paper tray out and remove the paper.
-
Page 97: When "Remove Misfeed Mailbox" Appears
Removing Misfed Paper When "Remove Misfeed When "Remove Misfeed Upper Mailbox" Appears Tray Unit" Appears Important Important ❒ Forcefully removing misfed paper ❒ Forcefully removing misfed paper may cause paper to tear and leave may cause paper to tear and leave scraps of paper in the Mailbox. -
Page 98: Replacing The Toner Cartridge
Troubleshooting Replacing the Toner Cartridge R WARNING: Important • Do not incinerate spilled toner ❒ Do not expose the toner cartridge or used toner. Toner dust to light for a long time. Do not might ignite when exposed to leave the front cover open for a an open flame. - Page 99 Replacing the Toner Cartridge B B B B E E E E Be sure to put the toner cartridge Place the toner cartridge on a flat on a stable, flat surface. surface. Pull out the tape inside the unit horizontally while hold- Note ing the cartridge with one hand as ❒...
- Page 100 Troubleshooting G G G G Push down the toner cartridge to settle it in appropriate position. ZGDT140J H H H H Close the front cover. ZGDH130J Important ❒ Do not close the front cover with force. If you cannot close the cover easily, pull out the toner cartridge from the printer and insert it again.
-
Page 101: Cleaning And Adjusting The Printer
Cleaning and Adjusting the Printer Cleaning and Adjusting the Printer D D D D Load paper into the paper tray Cleaning the Friction Pad with the print side up. Carefully slide the paper tray into the print- If the friction pad is dirty, a multi- er until it stops. -
Page 102: Cleaning The Paper Feed Roller
Troubleshooting C C C C Lift the paper tray slightly then Cleaning the Paper Feed pull it out until it stops, and while Roller lifting the front side of the tray, pull it out of the printer. If the paper feed roller is dirty, a mis- feed might occur. - Page 103 Cleaning and Adjusting the Printer E E E E H H H H Slide the green lock lever to the Move the printer to the place left (A A A A ), so that the paper feed where it was placed. Carefully roller can be released (B B B B ).
-
Page 104: Cleaning The Registration Roller
Troubleshooting C C C C Pull the toner cartridge out of the Cleaning the Registration printer by holding the grips of the Roller cartridge. If the registration roller is dirty, a mis- feed might occur. In this case, clean the roller as follows: R WARNING: •... -
Page 105: Adjusting The Image Density
Cleaning and Adjusting the Printer E E E E Holding the grips of the toner car- Adjusting the Image Density tridge, insert it into the printer until it stops. You can adjust the image density when the print side of the page is a shaded or print image is too light. -
Page 106: Adjusting The Registration Of The Trays
Troubleshooting C C C C Press { { { { Enter #} } } } . Adjusting the Registration of the Trays Image Density: (-3 +3) You can adjust the registration of each tray. The vertical adjustment is D D D D Press { { { { U U U U } } } } or { { { { T T T T } } } } to set the image used for all trays. - Page 107 Cleaning and Adjusting the Printer B B B B A After confirming that "Prt. Test Press { { { { U U U U } } } } or { { { { T T T T } } } } to display the Sheet"...
- Page 108 Troubleshooting C Press { { { { U U U U } } } } or { { { { T T T T } } } } to set the dig- it of the registration value (mm). The vertical horizonal Printable area TS3X001N...
-
Page 109: Menu Chart
6. Making Printer Settings with the Control Panel Menu Chart This section describes how to change the default settings of the printer and pro- vides information on the parameters included in each menu. Some items in the menu appear only when certain options are installed. Category Function menu ⇒... - Page 110 Making Printer Settings with the Control Panel Category Function menu System⇒ p.124 MisfeedRecovery Prt. Err Report Auto Continue Memory Overflow Sub Paper Size Page Size Edge-Edge Print Duplex Output Tray Job Separation Energy Saver Memory Usage Unit Of Measure Edge Smoothing Resolution Toner Saving Spool Printing...
- Page 111 Menu Chart The "WL.LAN Signal" menu appears only when "IEEE 802.11b" is selected in "LAN Type" in the Host Interface menu. While the printer is On Line, press { { { { Enter #} } } } , and then press { { { { Escape} } } } . Finally, press { { { { Menu} } } } .
-
Page 112: Accessing The Main Menu
Making Printer Settings with the Control Panel Accessing the Main Menu Press { { { { Menu} } } } , and “Menu” appears on the panel display. Menu On Line Job Reset Escape Form Feed Enter Power Error Data In This menu shows the following nine items which can be displayed one by one pressing { { { { U U U U } } } } or { { { { T T T T } } } } . - Page 113 Accessing the Main Menu ❒ After making the printer settings, be sure to return to the previous menu by pressing { { { { Escape} } } } . Menu On Line Job Reset Escape Form Feed Enter Power Error Data In ZDDS024N ❒...
-
Page 114: Paper Input Menu
Making Printer Settings with the Control Panel Paper Input Menu There are five menu items in the “Paper Input” menu. • Bypass size • Tray Paper Size • Paper type • Tray Locking • Tray Priority Reference For more information about loading paper in the tray, see p.37 “Loading Pa- per and Other Media”. - Page 115 Paper Input Menu Menu Description Paper Type If you use different kinds of paper, you set the paper type for Tray 1, Tray 2, Tray 3 or Bypass Tray. ❖ ❖ ❖ ❖ Tray 1, Tray 2, Tray 3 Plain Paper, Recycled Paper, Special Paper, Color Paper, Let- terhead, Preprinted, Prepunched, Bond paper, Cardstock ❖...
-
Page 116: Changing The Paper Input Menu
Making Printer Settings with the Control Panel Changing the Paper Input Menu A A A A Press { { { { Menu} } } } . Menu On Line Job Reset Escape Form Feed Enter Power Error Data In “Menu” appears on the panel display. B B B B Press { { { { U U U U } } } } or { { { { T T T T } } } } to display the “Paper Input”... - Page 117 Paper Input Menu F F F F Press { { { { U U U U } } } } or { { { { T T T T } } } } to select the tray type you want to use. G G G G Press { { { { Enter #} } } } .
-
Page 118: List/Test Print Menu
Making Printer Settings with the Control Panel List/Test Print Menu There are five menu items in the “List/Test Print” menu. • Config. Page • Menu List • PS Font List • PCL Config.Page • Hex Dump List/Test Print Parameters Menu Description Config. - Page 119 List/Test Print Menu B B B B Press { { { { T T T T } } } } or { { { { U U U U } } } } to display the “List/Test Print” menu. Menu: List/Test Print C C C C Press { { { { Enter #} } } } .
-
Page 120: Interpreting The Configuration Page
Making Printer Settings with the Control Panel E E E E Press { { { { On Line} } } } . Menu On Line Job Reset Escape Form Feed Enter Power Error Data In “Ready” appears on the panel display. Ready Interpreting the Configuration Page System Reference... - Page 121 List/Test Print Menu Paper Input Shows the settings made under the “Paper Input” menu. Reference For more information, see p.106 “Paper Input Menu”. Maintenance Shows the settings made under the “Maintenance” menu. Reference For more information, see p.114 “Maintenance Menu”. System Shows the settings made under the “System”...
-
Page 122: Maintenance Menu
Making Printer Settings with the Control Panel Maintenance Menu There are 11 menu items in the “Maintenance” menu. • Image Density • Registration • ROM Update • Curl Prevention • HDD Format • WL.LAN Signal • WL.LAN Defaults • Key Repeat •... -
Page 123: Maintenance Menu Parameters
Maintenance Menu Maintenance Menu Parameters Menu Description Image Density You can select the print image density. -3 to 3 Reference For more information, see p.97 “Adjusting the Image Densi- ty”. ❖ ❖ ❖ ❖ Prt. Test Sheet Registration You can print the registration test sheet. Tray 1, Tray 2, Tray 3, Bypass Tray, Duplex backside Note ❒... - Page 124 Making Printer Settings with the Control Panel Menu Description WL. LAN Signal You can check the signal strength when using the wireless LAN. Reference For more information about displaying the signal strength, see p.120 “Displaying the Signal Strength”. WL. LAN Defaults You can reset the wireless LAN settings to the default.
-
Page 125: Changing The Maintenance Menu
Maintenance Menu Changing the Maintenance Menu Protecting the menus A A A A Check if the On Line indicator is on. If not, press { { { { On Line} } } } to enter the "Ready" condition. B B B B Press { { { { Enter #} } } } , then { { { { Escape} } } } , and then { { { { Menu} } } } . - Page 126 Making Printer Settings with the Control Panel G G G G Press { { { { On Line} } } } . Menu On Line Job Reset Escape Form Feed Enter Power Error Data In "Ready" appears on the panel display. Ready Canceling the protection A A A A...
- Page 127 Maintenance Menu Formatting Hard Disk Drive Type 2600 If you are formatting the Hard Disk Drive for the first time, follow the proce- dures below using the control panel. A A A A Press { { { { Menu} } } } . “Menu”...
- Page 128 Making Printer Settings with the Control Panel Displaying the Signal Strength If you need to check the IEEE 802.11b (Wireless LAN) signal, select "WL.LAN Signal" in the "Maintenance" menu. A A A A Press { { { { Menu} } } } . Menu On Line Job Reset...
- Page 129 Maintenance Menu E E E E Press { { { { Enter #} } } } . One of the following messages appears on the panel display. WL.LAN Signal Good 100% WL.LAN Signal Fair WL.LAN Signal Poor WL.LAN Signal Unavailable Note ❒...
- Page 130 Making Printer Settings with the Control Panel G G G G Press { { { { On Line} } } } . Menu On Line Job Reset Escape Form Feed Enter Power Error Data In “Ready” appears on the panel display. Ready Resetting the IEEE 802.11b (Wireless LAN) Settings If you need to reset the wireless LAN setting, select "WL.LAN Defaults"...
- Page 131 Maintenance Menu C C C C Press { { { { Enter #} } } } . Menu On Line Job Reset Escape Form Feed Enter Power Error Data In The following message appears on the panel display. Maintenance: Image Density D D D D Press { { { { T T T T } } } } or { { { { U U U U } } } } to display "WL.LAN Defaults".
-
Page 132: System Menu
Making Printer Settings with the Control Panel System Menu There are 17 menu items in the “System” menu. • MisfeedRecovery • Prt. Err Report • Auto Continue • Memory Overflow • Sub Paper Size • Page Size • Edge-Edge Print •... - Page 133 System Menu Menu Description Auto Continue You can set whether Auto Continue is enabled. When it is on, printing continues after a system error occurs. • Off • 0 minute • 1 minute • 5 minutes • 10 minutes • 15 minutes Note ❒...
- Page 134 Making Printer Settings with the Control Panel Menu Description Output Tray You can select the default output tray. When you select "Auto Tray Sw.", the printer automatically changes to another output tray if an output tray becomes full. This function is available only when the Mailbox or the 1-bin Shift Sort Tray is installed.
- Page 135 System Menu Menu Description Edge Smoothing You can set whether Edge Smoothing is enabled. When it is on, jagged lines appear more smoothly. Set it to off when the print im- age contains fine gradation in tone. • On • Off Note ❒...
-
Page 136: Changing The System Menu
Making Printer Settings with the Control Panel Changing the System Menu A A A A Press { { { { Menu} } } } . Menu On Line Job Reset Escape Form Feed Enter Power Error Data In “Menu” appears on the panel display. B B B B Press { { { { U U U U } } } } or { { { { T T T T } } } } to display the “System”... - Page 137 System Menu E E E E Press { { { { Enter #} } } } . The following message appears on the panel display. Energy Saver: E.Saver On/Off F F F F Press { { { { U U U U } } } } or { { { { T T T T } } } } to display "E. Saver Timer". Energy Saver: E.
-
Page 138: Host Interface Menu
Making Printer Settings with the Control Panel Host Interface Menu There are six menu items in the “Host Interface” menu. • I/O Buffer • I/O Timeout • Network Setup • IEEE 1394 Setup • IEEE 802.11b • USB Setting Host Interface Parameters Menu Description I/O Buffer... - Page 139 Host Interface Menu Menu Description Network Setup Note ❒ Items only appear in the Network Setup when the related op- tions are installed. "IEEE 1394 Setup" appears only when the optional IEEE 1394 board is installed. "IEEE 802.11b" appears only when the optional IEEE 802.11b board is installed. Reference For more information about the "Network Setup", see "Config- uring the Printer for the Network"...
- Page 140 Making Printer Settings with the Control Panel Menu Description ❖ ❖ ❖ ❖ Network Boot Network Setup You can set how the Network Interface Board acquires TCP/IP settings. Note ❒ Default: None ❖ ❖ ❖ ❖ Frame Type (NW) You can set the Frame Type for NetWare. Note ❒...
- Page 141 Host Interface Menu Menu Description You can make settings for using IEEE 1394. This menu appears IEEE 1394 Setup only when the optional IEEE 1394 board is installed. ❖ ❖ ❖ ❖ IP Address1394 You can set the IP address for IEEE 1394 (IP over 1394). Note ❒...
- Page 142 Making Printer Settings with the Control Panel Menu Description You can make settings for using the wireless LAN. This menu ap- IEEE 802.11b pears only when the optional IEEE 802.11b board is installed. ❖ ❖ ❖ ❖ Comm.Mode You can set the transmission mode for IEEE 802.11b. Note ❒...
-
Page 143: Changing The Host Interface Menu
Host Interface Menu Changing the Host Interface Menu A A A A Press { { { { Menu} } } } . Menu On Line Job Reset Escape Form Feed Enter Power Error Data In “Menu” appears on the panel display. B B B B Press { { { { U U U U } } } } or { { { { T T T T } } } } to display the “Host Interface”... - Page 144 Making Printer Settings with the Control Panel E E E E Press { { { { Enter #} } } } . The following message appears on the panel display. I/O Timeout: *15 seconds F F F F Press { { { { U U U U } } } } or { { { { T T T T } } } } to select how many minutes the printer waits before end- ing a print job.
-
Page 145: Pcl Menu
PCL Menu PCL Menu There are eight menu items in the “PCL Menu” . • Orientation • Form Lines • Font Source • Font Number • Point Size • Font Pitch • Symbol Set • Ext. A4 Width PCL Parameters Menu Description Orientation... - Page 146 Making Printer Settings with the Control Panel Menu Description Point Size You can set the point size you want to use for the default font. 4 to 999.75 by 0.25 Note ❒ Default: 12.00 ❒ This setting is effective only for a variable-space font. Font Pitch You can set the number of characters per inch you want to use for the default font.
-
Page 147: Changing The Pcl Menu
PCL Menu Changing the PCL Menu A A A A Press { { { { Menu} } } } . Menu On Line Job Reset Escape Form Feed Enter Power Error Data In "Menu" appears on the panel display. B B B B Press { { { { U U U U } } } } or { { { { T T T T } } } } to display "PCL Menu", and then press { { { { Enter #} } } } . - Page 148 Making Printer Settings with the Control Panel E E E E Press { { { { On Line} } } } . Menu On Line Job Reset Escape Form Feed Enter Power Error Data In "Ready" appears on the panel display. Ready...
-
Page 149: Language Menu
Language Menu Language Menu You can select the language you use. Available language as are follows: English, French, German, Italian, Spanish, Dutch, Swedish, Norwegian, Danish, Finnish, Portuguese, Czech, Polish, Hungarian Note ❒ Default: English Changing the Language Menu You can change the language by the following procedures below. A A A A Press { { { { Menu} } } } . - Page 150 Making Printer Settings with the Control Panel C C C C Press { { { { Enter #} } } } . Menu On Line Job Reset Escape Form Feed Enter Power Error Data In The following message appears on the panel display. Language: *English D D D D...
-
Page 151: Appendix
7. Appendix Replacing Parts The maintenance kit contains parts necessary for maintaining the printer. When “Replace Maintenance Kit” appears on the panel display, install the replacement parts included in the maintenance kit. R WARNING: • It is dangerous to handle the plug with wet hands. An electric shock might occur. -
Page 152: Maintenance Kit Type 2600
Appendix MAINTENANCE KIT Type 2600 Checking the contents of the box Check the contents of the box according to the following list. If one or more items are missing, contact your sales or service representative. Description Quantity Friction pad for 1 pc See p.145 “Replacing the Fric- the paper tray... -
Page 153: Replacing The Friction Pad
Replacing Parts Preparing to replace the parts You should replace all the parts included in Maintenance Kit at the same time. Be sure to replace them in the following order: A A A A Check the contents of the box for the following items: •... -
Page 154: Replacing The Paper Feed Rollers
Appendix E E E E H H H H Use a sharp-pointed item like a Push the friction pad until it locks ball-point pen, to release the two securely. catches that lock the friction pad. I I I I If your printer is equipped with the optional Paper Feed Unit(s), follow the same procedure when replacing the friction pad. -
Page 155: Replacing The Transfer Roller
Replacing Parts D D D D Note If the printer is equipped with the ❒ If the printer is equipped with optional Paper Feed Unit(s), fol- low the same procedure when re- the optional Paper Feed Unit, placing the paper feed roller. do not move the printer and the unit together, they are not se- If you installed two Paper Feed... - Page 156 Appendix C C C C Important To avoid making your hands ❒ Do not insert the roller on the dirty with toner from the transfer roller, wear the gloves included back of the socket, or the printer in the maintenance kit. might be damaged.
-
Page 157: Replacing The Fusing Unit
Replacing Parts I I I I A Open the rear cover by push- Push down the toner cartridge to ing the two knobs. insert it in its appropriate posi- tion. ZGDX210J B Remove the rear cover in a hor- ZGDT140J izontal direction. - Page 158 Appendix C C C C F F F F Pull the fusing unit out. Insert the rear cover to the inside grooves on both sides of the print- er in a horizontal direction. ZGDX223N D D D D Replace the new fusing unit into ZGDX221J the printer.
-
Page 159: Collate And Shift Collate
Collate and Shift Collate Collate and Shift Collate Reference For more information about collate and shift collate, see the printer driver's Help file. ❖ ❖ ❖ ❖ Collate Outputs can be assembled as sets in sequential order. ❖ ❖ ❖ ❖ Shift Collate The shift tray moves backward or forward each time the copies of one set or those of each job are delivered, and makes the next copy to shift when deliv- ered to differentiate each set or jobs. -
Page 160: Spool Printing
Appendix Spool Printing With spool printing, the whole data of a print job is saved in the Printer Hard Disk before printing. To use this function, set it from the menu. See p.124 “Sys- tem Menu”. Important ❒ Do not turn off the printer or the computer when a print job is being spooled and the Data In indicator is blinking. -
Page 161: Memory Capacity And Paper Size
Memory Capacity and Paper Size Memory Capacity and Paper Size The following tables show the typical memory requirements of the RPCS printer language. Memory requirements depend on your print data and printing envi- ronment, such as the "Memory Priority" setting or total memory size that the printer has available. -
Page 162: Setting Of The "Font Priority
Appendix Setting of the “Font Priority” Resolution (dpi) Memory Paper Size Capacity 600 x 600 1200 x 1200 ❍ ❍ 32MB ❍ ❍ 96MB ❍ ❍* A4 (210 × 297) 32MB ×11) ❍ ❍ Letter (8 96MB ❍ ❍* 32MB ❍... -
Page 163: Moving And Transporting The Printer
Moving and Transporting the Printer Moving and Transporting the Printer R CAUTION: Moving the printer in the short distance • When lifting the machine, use the inset grips on both sides. A A A A Confirm that the followings are Otherwise the printer could true: break or cause injury if dropped. - Page 164 Appendix D D D D Lift the printer and move it to the Removing the Duplex Unit place where you want to install it. A Push down the lever on right R CAUTION: side of the Duplex Unit (A A A A ) •...
-
Page 165: Specifications
Specifications Specifications Mainframe ❖ ❖ ❖ ❖ Configuration: Desktop ❖ ❖ ❖ ❖ Print Process: Laser beam scanning & Electrophotographic printing Dual component toner development ❖ ❖ ❖ ❖ Printing Speed: × 11L) Maximum 26 pages per minute (A4L, 8 Note ❒... - Page 166 Appendix ❖ ❖ ❖ ❖ Paper Weight: See p.25 “Paper and Other Media Supported by This Printer” ❖ ❖ ❖ ❖ Power Source: 120V, 60 Hz, 8.4A or more ❖ ❖ ❖ ❖ Power Consumption: Maximum 870 W or less Printing 610 W or less •...
- Page 167 Specifications ❖ ❖ ❖ ❖ Warm-up Time: Less than 19 seconds (23°C, 73F) ❖ ❖ ❖ ❖ Paper Capacity: Standard paper tray 250 sheets (80g/m , 20 lb.bond) Bypass Tray 100 sheets (80g/m , 20 lb.bond) Optional Paper Feed Unit × 2 500 sheets ×...
-
Page 168: Options
Appendix Options Paper Feed Unit Type 2600 ❖ ❖ ❖ ❖ Dimensions (W× × × × D× × × × H): 468 × 545 × 130 mm (18.4 × 19.7 × 5.1 inches) (without pins on the unit) ❖ ❖ ❖ ❖ Paper Weight: 60 –... - Page 169 Specifications 1-bin Shift Sort Tray Type 2600 ❖ ❖ ❖ ❖ Dimensions (W × × × × D × × × × H): 465 × 395 × 160 mm (18.3 × 15.6 × 6.3 inches) ❖ ❖ ❖ ❖ Paper Size: See p.25 “Paper and Other Media Supported by This Printer”.
- Page 170 Appendix Memory Unit TypeB 64MB ❖ ❖ ❖ ❖ Module Type: SO-DIMM (Small Outline Dual-in-line Memory Module) ❖ ❖ ❖ ❖ Memory Type: SDRAM (Synchronous Dynamic RAM) ❖ ❖ ❖ ❖ Number of Pins: 144 pins Network Interface Board Type 2610 ❖...
- Page 171 Specifications ❖ ❖ ❖ ❖ Allowed cable hops in a bus: Maximum 16 ❖ ❖ ❖ ❖ Power supply: Nonpower supply Cable Power repeated (IEEE 1394a-2000 compliant) 802.11b Interface Unit TypeA (R-WL11) ❖ ❖ ❖ ❖ Transmission Spec.: Based on IEEE 802.11b (Wireless LAN) ❖...
-
Page 172: Consumables
Appendix Consumables R CAUTION: • Our products are engineered to meet the highest standards of quality and functionality. When purchasing expendable supplies, we recommend using only those specified by an authorized dealer. ❖ ❖ ❖ ❖ Toner Cartridge Printable number of pages per cartridge Toner Cartridge 20,000 pages A4, 5% test chart... -
Page 173: Information About Installed Software
Information about Installed Software Information about Installed Software expat Expat(Version 1.1). Copyright 1998, 1999 James Clark. All rights reserved. • The software installed on this product includes the expat application soft- ware Version 1.1 (hereinafter "expat 1.1"). • The product manufacturer has not made any modification to the source code of the expat 1.1. -
Page 174: Netbsd
Appendix NetBSD Copyright Notice of NetBSD For all users to use this product: This product contains NetBSD operating system: For the most part, the software constituting the NetBSD operating system is not in the public domain; its authors retain their copyright. The following text shows the copyright notice used for many of the NetBSD source code. - Page 175 Information about Installed Software Authors Name List All product names mentioned herein are trademarks of their respective owners. The following notices are required to satisfy the license terms of the software that we have mentioned in this document: • This product includes software developed by the University of California, Berkeley and its contributors.
-
Page 176: Index
INDEX Hard Disk Drive Type 2600 , 161 1394 interface cable , 162 HDD Format , 114 1394 Interface Unit Type 4510 , 162 Hex Dump , 110 1-bin Shift Sort Tray Type 2600 , 161 Host Interface , 104 , 130 AD410 , 160 IEEE 1394 Setup , 130 adhesive labels , 34... - Page 177 Network Interface Board , 159 , 162 Quick Installation Guide , ii Network Printing Guide , ii Network Setup , 130 NIB , 159 Registration , 114 registration roller, cleaning , 96 Resolution , 124 OHP transparencies , 34 ROM Update , 114 On Line indicator , 76 RPCS Windows 2000, uninstalling , 21...
- Page 178 Windows 2000 PCL 5e, uninstalling , 19 PCL 6, uninstalling , 19 PostScript, uninstalling , 23 printer properties, PCL , 2 printer properties, PostScript , 12 printer properties, RPCS , 7 RPCS, uninstalling , 21 Windows 95/98/Me PCL 5e, uninstalling , 19 PCL 6, uninstalling , 19 PostScript, uninstalling , 23 printer properties, PCL , 1...
- Page 179 Copyright © 2001...
- Page 180 UE USA G073-8617...
- Page 181 Warranty...
- Page 182 Customer Vision® our commitment to your complete satisfaction www.lanier.com your document management partner Lanier Worldwide, Inc. | 2300 Parklake Drive, N.E. | Atlanta, GA USA 30345...