Advertisement
Quick Links
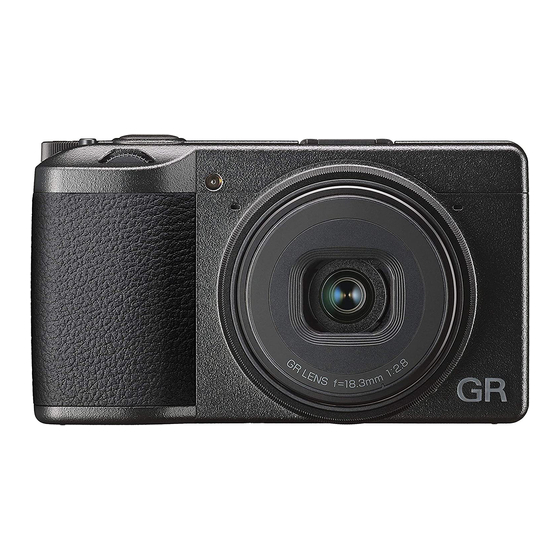
FAQ GR III and GR IIIx
Below is a list of frequently asked questions and corresponding answers for the
GRIII and GR IIIx digital cameras.
◆General function and specification
Q: What accessories are provided with this camera?
A: The following accessories are providing with this camera.
•Hand Strap
•USB cable I-USB166 (Type CType A)
•Rechargeable lithium-ion battery DB-110
•USB power adaptor AC-U1
•Power plug
•Hot shoe cover (Set on camera)
•Ring cap
GR III:GN-1(BK) (Set on camera)
GR IIIx:GN-2 (BK) (Set on camera)
•Instruction manual
* No camera case nor SD (SDHC) Memory Cards are included with the camera.
Q: What are the optional accessories for this camera?
A: The optional accessories are as follows:
•Rechargeable Battery (DB-110)
•Battery charger (BJ-11)
•AC adapter kit (K-AC166)
•External viewfinder:
For GR III: External viewfinder (GV-1), External mini viewfinder (GV-2)
For GR IIIx: External mini viewfinder (GV-3)
•Flash:
External P-TTL Flash: PENTAX AF540FGZ / PENTAX AF540FGZII / PENTAX AF360FGZ /
• Conversion lens / Lens adapter:
For GR III: Wide-angle conversion lens (GW-4), Lens adapter (GA-1)
For GR IIIx:Tele conversion lens (GT-2), Lens adapter (GA-2)
• Case:
For GR III: Soft Case (GC-9), Soft Case (GC-10)
For GR III and GR IIIx: Soft Case (GC-11), Soft Case (GC-12)
PENTAX AF360FGZII / PENTAX AF201FG
RICOH IMAGING Europe S.A.S.
Parc ICADE Paris Orly-Rungis
7-9 avenue Robert Schuman
94150 Rungis
France
Advertisement

Related Manuals for Ricoh GR III


Summary of Contents for Ricoh GR III
- Page 1 For GR III: Wide-angle conversion lens (GW-4), Lens adapter (GA-1) For GR IIIx:Tele conversion lens (GT-2), Lens adapter (GA-2) • Case: For GR III: Soft Case (GC-9), Soft Case (GC-10) For GR III and GR IIIx: Soft Case (GC-11), Soft Case (GC-12)
- Page 2 Q: Are there any other necessary items that are not included in the kit? A: None required; the GR III and GR IIIx have about 2GB of storage space as internal memory. If you want to store more images, please prepare a card with a capacity that matches the number of images you will take.
- Page 3 This can be set in the [Crop] menu in the recording settings menu In the case of the GR III, when set to [35mm] or [50mm], the angle of view changes from the normal 28mm to the equivalent of 35mm or 50mm, and the screen display also changes.
- Page 4 MF mode. Q: Is there any function for reduce camera shake? A: Yes, there is the built-in sensor-shift Shake Reduction system (SR) with 3-axis both of GR III and GR IIIx.. □ *You can set [On] or [Off] at...
- Page 5 [RAW]: Record RAW (DNG) image (14bit) [RAW]+[JPEG]: Record both RAW image and JPEG image at same time. Aspect Ratio [3:2], [1:1] Crop GR III: [35mm], [50mm] and [Off] GR IIIx: [50mm], [71mm] and [Off] JPEG [L], [M], [S] and [XS] Color Space...
- Page 6 Q: What is the maximum magnification for macro close-up photography? A: The GR III is 0.35x with the camera alone and 0.48x with the wide conversion lens (GW-4) attached. The GR IIIx is 0.25x with the camera alone and 0.17x when the tele conversion lens (GT-2) is attached.
-
Page 7: Power Supply / Battery
◆Power supply / Battery Q: What kind of battery does the camera use? A: The rechargeable lithium-ion battery DB-110. The DB-65 for GR / GR ll /GR DIGITAL series or dry cell can’t be used for GR IlI and GR IIIx. Q: How long can the rechargeable lithium-ion battery DB-110 be used for? A: As a guide of using time are as below. -
Page 8: Memory Card
*The GRlll has 2GB built in memory. As of October 2021 *Tested" denotes only that the operation of the product has been checked by RICOH IMAGING and in no way constitutes a guarantee to customers that the product is suited to their requirements. -
Page 9: Shooting Function
・You can set it to [ADJ Mode Setting] and [Fn Button Setting] at C ,2 [Customize Controls] menu. ・For GR IIIx * For the GR III, the same functions as below are available with firmware version 1.30 or later (click here). - Page 10 A: By changing the saturation, color or contrast you can create characteristic images. Standard Normal image Vivid Create sharp and colorful image. Monotone Black & White Soft Monotone Create soft impression of B&W image Hard Monotone Create solid impression of B&W image Hi-Contrast B&W Create B&W image that emphasize contrast.
- Page 11 A: In shooting mode, press the direct key ▲ (macro mode button) to enter macro mode. The GR III can shoot AF within a range of 6 to 12 cm from the lens tip. The GR IIIx can be shoot AF within a range of 12 to 24cm from the lens tip.
- Page 12 You can select from [Auto], [On] or [Off] You can’t select [On] at the (movie) mode Highlight Correction You can select from [Auto], [Low], [Medium], [High] or [Off] Shadow Correction ・The noise of image may be noticeable if you select [High] of the [Shadow Correction] . Q: What is the [Preview]? A: You can check the depth of field before shooting the image.
- Page 13 Q: What is the function of [B(Bulb)], [T(Time)] and [BT(Bulb Timer)] ? A: You can select B, T and BT f or the shutter speed in M mode. Shutter Speed Function B (Bulb) The image continues to be exposed while the shutter release button is pressed.
- Page 14 Select [INT] and press [Fn] button. Set above 4 items Interval Set interval time from 00:01 to 60:00 Number of Shots Set the number of shots as [∞] or [2 to 99] Start Interval Set the timing of first shot as [NOW] or [Set Time] Start Time Set the Times of Day if you select [Set time] at [Start Interval] ・Depend on the shooting settings, the time until next shot may longer than time that set at Interval.
- Page 15 *Please mount the camera on a tripod *Set exposure, focus mode and white balance and confirm the composition. It will composite as these settings. *After first shot by release the shutter, it will continuously release the shutter at minimum interval. *It is recommended to use Self-Timer mode to avoid the camera shake of first shot in case [Now] is selected for [Start Interval].
- Page 16 Auto Process noise reduction on judging of Shutter speed, ISO speed and temperature. Process noise reduction when the shutter speed is longer than 1 second. Not process noise reduction The status lamp will brink during process of noise reduction Q: What is the function of [High-ISO Noise Reduction]? A: You can set the noise reduce function as below.
- Page 17 When the other item is selected, proceed to the step No.5. 3.Select [Custom Options] and press direct key. The selection of ISO sensitivity will display. 4.Select ISO sensitivity by ▲▼ direct key 5.Press [OK] button. *It may take longer time to save the processed image than usual when the [Noise Reduction] is set. Q: How to operate [ND Filter]? A: You can decrease 2 steps of the brightness by using ND filter.
- Page 18 ・Select from [Highlight Edge], [Extract Edge] or [Off]. Screen display of GR III (firmware version 1.41 or earlier) To update to the latest GR III firmware version, click here. Link :https://www.ricoh-imaging.co.jp/english/support/digital/gr3_s.html Screen display of GR IIIx and GR III firmware version 1.50 or later.
- Page 19 A: When the touch panel operation is on, double-tapping the screen will return the focus frame to the center position. *For the GR III, this function is effective with firmware version 1.30 or later. To update to the latest GR III firmware version, click here.
- Page 20 Select [Save Interim Images] Select one of 4 method and press [OK] Contents of settings are displayed. When you shoot next image select [Next shot] Press [OK] and return to capture screen. and press [OK]. Press [MENU] to return [Drive] Capture the first shot.
- Page 21 Highlight Correction: Auto or Off Correction Shadow Correction: Auto, Low, Medium, High or Off To update to the latest GR III firmware version, click here. For GR IIIx and GR III firmware version 1.30 or later. Image Control Standard, Vivid, Monotone, Hard Monotone, High-Contrast B&W, Positive Film, Bleach Bypass, Retro, Cross process (#1), Custom 1 and Custom 2 Peripheral Illumination.
- Page 22 Shooting Assist: Movie SR On or Off □ *When [Touch AF] is activated in the C ,2[Customize Controls] menu, autofocus can be performed usin g the touch panel even while recording movies. *You can record a movie continuously up to 4GB 0r 25 minutes. Recording stops when the memory card or internal memory becomes full.
- Page 23 Q: Can the amount of flash light be adjusted by the camera? A: Yes. □ Select a compensation value with the [Flash Exposure Comp.] at the ,2 [Exposure Setting] mode. Setting can be made in the range from -2.0EV to +1.0EV at 1/3EV steps. Q: Is it corresponded with the GF-1 flash unit? A: No, there is no interlock function.
- Page 24 The camera automatically selects the exposure value with priority given to the aperture value "F11". *For GR III (firmware version 1.41 or earlier) versions, you can choose between "Normal" and "Open Priority". To update to the latest GR III firmware version, click here.
-
Page 25: Playback Function
Movie Edit (Divide) *In the firmware version 1.50 or later of the GR IIIx and GR III, the monotone function is added to the JPEG image quality adjustment. The filter effect function and the color adjustment function when monotone is selected have been equipped. - Page 26 To update to the latest GR III firmware version, click here. Image Edit For GR IIIx and GR III firmware version 1.50 or later. RAW Development JPEG Recorded Pixels, Aspect Ratio, Color Space, White Balance, Image Control, Peripheral Illumination Correction, Sensitivity, High-ISO Noise Reduction and Shadow Correction.
- Page 27 When you have finished configuring all of the settings, press [OK] button. A new JPEG image is saved. Q: Specification of LCD Monitor A: The main specifications of the GR III and GR IIIx are as follows. Type 3.0inch TFT color LCD (aspect ratio 3:2), Approx. 1037K dots, Wide viewing angle,...
- Page 28 Does not use touch AF Please use the GR III with the latest firmware. To update to the latest GR III firmware version, click here. For GR IIIx and GR III (firmware version 1.40 or later) A: You can perform operations such as selecting functions and setting the AF point for shooting You can also pinch in and out during playback to change the magnification or flick to view the previous and next images.
- Page 29 AF Point Sets the AF point to the touched pint. AF point + Focus Sets the AF point to the touched point and performs autofocus. AF point + Focus + Shoot Sets the AF point to the touched point, perform autofocus, and shoots. Does not use touch AF...
- Page 30 The camera turns on and enters the playback mode. The camera is recognizes as a device (RICOH GR III or RICOH GR IIIx ) by the computer. When a memory card is inserted, the files on the memory card are displayed.
- Page 31 When developing RAW images, use in-camera RAW development with the DNG images taken with the GR III or GR IIIx stored in the [***RICIOH] folder in the [DCIM] folder of the SD card or use commercially available PC software for RAW development that supports DNG format.
- Page 32 ◆Print Connection Q. Does the camera support the "PRINT Image Matching III"? A. Yes, it does. Q. Does the camera support the [PictBridge]? A. No, it doesn’t. ◆Communication device connection Q: Is it possible to connect to a communication device and control the camera or import images fr om the device? A: By connecting the camera to a communication device via Bluetooth®...
- Page 33 ・You can switch between Bluetooth® connection and wireless LAN connection by operating Image Sync. ・For the GR IIIx and GR III (firmware version 1.50 or later), when using Image Sync (version 2.1.8 or later), the Auto Resize (XS size) transfer function has been added.
- Page 34 Please use the GR III with the latest firmware. To update to the latest GR III firmware version, click here. For GR IIIx and GR III (firmware version 1.50 or later) Recording location information The location information of the communication device is recorded in the image.
- Page 35 ・Wide Conversion Lens (GW-1), (GW-2) and (GW-3) are not compatible with the GR III and GR IIIx. ・The lens adapter (GA-1) is designed for use with the GR III only and cannot be used with the GR IIIx. Q: Please tell me about the tele conversion lens (GT-2).
- Page 36 ・The tele conversion lens (GT-1) cannot be used with the GR III. ・The lens adapter (GA-2) is designed for use with the GR IIIx only and cannot be used with the GR III. Q: What new functions have been added to the firmware upgrade of the GR III? A: Please refer to the firmware update page for information on enhancements.