Table of Contents
Advertisement
Quick Links
Advertisement
Table of Contents

Related Manuals for SolarEdge SMI-180


Summary of Contents for SolarEdge SMI-180
- Page 1 SolarEdge Safety & Monitoring Interface (SMI-180) Installation Guide Version 1.0...
-
Page 2: Disclaimers
The material furnished in this document is believed to be accurate and reliable. However, SolarEdge assumes no responsibility for the use of this material. SolarEdge reserves the right to make changes to the material at any time and without notice. You may refer to the SolarEdge web site (www.solaredge.com) for the most updated version. -
Page 3: Support And Contact Information
Inverter and power optimizer model. Serial number of the product in question. The error indicated on the inverter screen or on the SolarEdge Monitoring Portal, if there is such an indication. System configuration information, including the type and number of modules connected and the number and length of strings. -
Page 4: Table Of Contents
Reporting and Monitoring Installation Data The SolarEdge Monitoring System Providing Installation Information Paper Template Creating a Site in the SolarEdge Monitoring Portal Chapter 4: Connecting the SMI to an Inverter Connecting the DC Out Cables to the SMI Connecting the Inverter to the SMI... - Page 5 Contents Communication Display Maintenance Information Status Screens - Operational Mode Initial SMI Status Telemetry Status ID Status Server Communication Status IP Status ZigBee Status Communication Ports Status Chapter 6: Setting Up Communication Communication Types Communication Connectors Creating an Ethernet (LAN) Connection Creating an RS485 Bus Connection Additional Connection Options Creating a Wireless ZigBee Connection...
-
Page 6: Handling And Safety Instructions Safety Symbols
SMI. WARNING! The SMI is designed to work in conjunction with non-SolarEdge inverters and with SolarEdge power optimizers equipped with the IndOp™ technology. It will NOT work with the SolarEdge fixed string voltage mode. Therefore, string lengths and system design must comply with the inverter design guidelines. - Page 7 HANDLING AND SAFETY INSTRUCTIONS WARNING! If the photovoltaic array is exposed to light, it supplies DC voltage to the power optimizers. CAUTION! This unit must be operated under the specified operating conditions as described in the Specifications chapter. NOTE The following warning symbols appear on the SMI warning label: Risk of electric shock Risk of electric shock from energy stored in the capacitor.
-
Page 8: Chapter 1: Introducing The Safety And Monitoring Interface (Smi) For Large Scale Installations
2. Communication of the module-level data sent from the power optimizers to the SolarEdge monitoring portal. SolarEdge offers also the monitoring interface (MI) , which includes only the second feature above. The SMI supports the SolarEdge optimizer SafeDC™ feature. The SafeDC™ mechanism automatically shuts down module voltage whenever the grid power is shut down, thus providing greater safety during installation, maintenance and firefighting. -
Page 9: The Smi External Interfaces
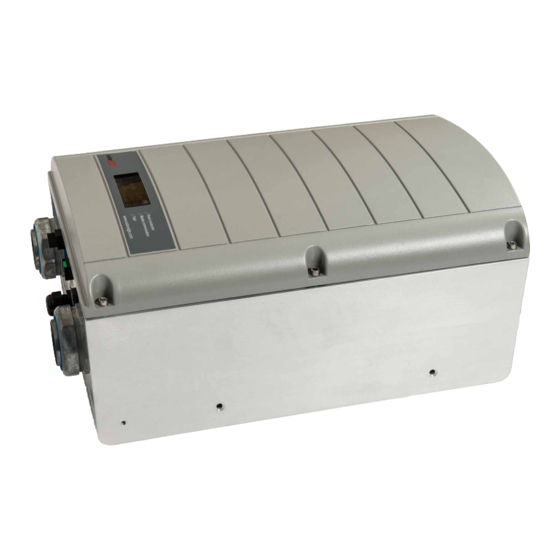
Chapter 1: Introducing the Safety and Monitoring Interface (SMI) for Large Scale The SMI External Interfaces The following shows the SMI connectors and interfaces: Figure 3: SMI interfaces ON/OFF Switch: Turning this switch ON (1) starts the operation of the power optimizers. Turning it OFF (0) reduces the power optimizer voltage to a low and safe value. -
Page 10: The Smi Internal Interfaces
3. Open the cover’s six Allen screws and carefully remove the cover. CAUTION! When removing the cover, make sure not to damage internal components. SolarEdge will not be held responsible for any components damaged as a result of incautious cover removal. -
Page 11: Accessing The Internal Compartments
Chapter 1: Introducing the Safety and Monitoring Interface (SMI) for Large Scale Accessing the Internal Compartments The SMI is divided into two compartments by a plate. The top compartment on the plate includes the communication board, the LCD screen and user buttons, the power supply connector and communication connectors. -
Page 12: Chapter 2: Smi Installation
Refer to the sticker on the SMI that specifies its Serial Number and its Electrical Ratings. Provide the serial number when contacting SolarEdge support. The serial number is also required when opening a new site in the SolarEdge monitoring portal. - Page 13 Chapter 2: SMI Installation 2. Position the mounting bracket against the wall and mark the drilling hole locations. Ensure that the flat side of the bracket is at the bottom. Figure 6: Wall mounting bracket 3. Use at least two bracket holes. Additional holes can be used to fix the bracket.Determine which and how many holes to use according to mounting surface type and material.
- Page 14 Mounting the SMI To mount the SMI horizontally: 1. Determine the SMI mounting location, on a rail or on the floor, as follows: To allow proper heat dissipation, maintain 2'' / 5 cm minimum clearance areas between the SMI and other objects. Make sure the mounting surface or structure can support the weight of the SMI.
- Page 15 Chapter 2: SMI Installation Functional earthling is required to enable the over-voltage protection. To earth the SMI, connect a grounding cable to the grounding location at the rear of the SMI. The grounding cable must be at least 1.5mm . You may use a cable of up to 50mm Figure 12: Grounding point SMI-Installation Guide MAN-01-00157-1.0...
-
Page 16: Connecting Pv Strings To The Smi
Connecting PV Strings to the SMI Connecting PV Strings to the SMI The following procedure describes how to connect the DC cables from the power optimizer strings to the SMI. A typical installation has up to 18 strings connected to an SMI through a combiner box. Figure 13: String connection To determine how many strings can be connected to the SMI: Verify that the cumulative short circuit current (I... - Page 17 Chapter 2: SMI Installation To connect DC strings to the SMI: 1. Open the lower compartment of the SMI as described in Accessing the Internal Compartments on page 10. Figure 14: Connection area 2. Use an Allen key to loosen the 5/16” screws of the SMI DC power distribution blocks. 3.
- Page 18 Connecting PV Strings to the SMI 6. Fasten the Allen screws of the power distribution blocks. Apply a torque of 30 N*m / 22 lb.*ft Figure 16: DC IN cables connected If grounding of the DC wires is required, refer to the following figure that demonstrates proper and improper grounding locations (marked 3and ×).
-
Page 19: Connecting To A Dc Power Supply
Connecting to a DC Power Supply The SMI is powered from a separate DC power supply unit (PSU, not provided by SolarEdge). Use a PSU with 48V nominal voltage. The input of the SMI can be connected to voltages 30-55 VDC, and each SMI will consume 12W. - Page 20 Connecting to a DC Power Supply Figure 18: Power supply connection To connect the power supply: 1. Strip 0.32''/ 8 mm of the power cable wire insulation. 2. Remove the seal from one of the openings in gland #3 and insert the wires through the opening. If the cable is not thick enough to seal the opening, use a free opening in gland #1 or #2.
-
Page 21: Chapter 3: Commissioning The Safety And Monitoring Interface
Chapter 3: Commissioning the Safety and Monitoring Interface Chapter 3: Commissioning the Safety and Monitoring Interface This chapter describes how to activate the system, pair the power optimizers to the SMI and verify the proper functioning of the system. Activating the System 1. -
Page 22: Pairing Power Optimizers To The Smi
4. Wait for the completion of the pairing (remaining seconds is 0). If pairing fails, an error is displayed. In this case, repeat the pairing steps. If the problem persists, contact SolarEdge Support. When pairing succeeds, the following message is displayed:... -
Page 23: Verifying Proper Operation
(and should be within the operating range of the SMI). 2. Take note of the serial # on the SMI label. This information is used in the SolarEdge monitoring portal to identify this inverter and is needed to open a new site in the monitoring portal. -
Page 24: Reporting And Monitoring Installation Data
The logical and physical mapping can be used for debugging a problem using the SolarEdge monitoring portal. If you do not report the physical and logical mapping of the installed power optimizers to SolarEdge, the SolarEdge monitoring portal will show the logical layout indicating which power optimizers are connected to which SMI, but will not show strings or the physical location of power optimizers. -
Page 25: Providing Installation Information
Chapter 3: Commissioning the Safety and Monitoring Interface The SMI may be connected to the SolarEdge monitoring portal via LAN or via an external modem connected to the SMI's RS232 connector. Alternatively, you can connect the SMI to another SMI that is already connected to the server, in a master-slave configuration. -
Page 26: Chapter 4: Connecting The Smi To An Inverter
Chapter 4: Connecting the SMI to an Inverter Chapter 4: Connecting the SMI to an Inverter Up to 10 SMIs may be connected to each inverter (MPP tracker). The DC out cables connect the SMI to the inverter. Connection to the inverter is the last stage of installation. Connecting the DC Out Cables to the SMI 1. -
Page 27: Connecting The Inverter To The Smi
Chapter 4: Connecting the SMI to an Inverter 9. Fasten the Allen screws of the power distribution blocks. Apply torque of 30 N*m/ 22 ft*lb. Figure 21: DC out cables connected Connecting the Inverter to the SMI 1. Verity that the pairing procedure is complete, as described in Pairing power optimizers to the SMI on page 21. -
Page 28: Verifying Proper Operation
Pdc [w]: Specifies the expected DC output power. 2. Take note of the serial # on the SMI label. This information is used in the SolarEdge monitoring portal to identify this SMI and is needed when opening a new site in the monitoring portal. -
Page 29: Chapter 5: User Interface
Chapter 5: User Interface Chapter 5: User Interface LCD User Buttons Four buttons are located inside the SMI above the LCD panel and are used for controlling the LCD menus, as shown below: Figure 22: LCD Internal menu buttons Esc: Moves the cursor to the beginning of the currently displayed parameter; goes to the previous menu, and cancels a value change with a long press (until Aborted is displayed). -
Page 30: Smi Configuration - Setup Mode
SMI Configuration – Setup Mode SMI Configuration – Setup Mode You can configure the SMI using one of the following: The internal LCD user buttons. When using this option, the SMI cover is removed. The external LCD light button. When using this option, removing the SMI cover is not required. This option of configuration includes a less detailed configuration menu. - Page 31 Chapter 5: User Interface Main menu: L a n g u a g e < e n g > C o m m u n i c a t i o n D i s p l a y M a i n t e n a n c e I n f o r m a t i o n Language: E n g l i s h...
-
Page 32: Configuring The Smi Using The External Lcd Light Button
Configuring the SMI Using the External LCD Light Button Configuring the SMI Using the External LCD Light Button Use the LCD light button for communication setup and for displaying the Error log and Warning Log without having to open the SMI cover. There are fewer menus available when using this configuration option;... - Page 33 Chapter 5: User Interface The following shows a hierarchical tree of the menu options that appear when using the LCD light button: Main menu: O p t i m i z e r p a i r i n g L a n g u a g e <...
-
Page 34: Configuration Menu Options
SMIs. 2. Select Server to set which communication method is used to communicate between the SMI and the SolarEdge monitoring portal. Refer to Setting Up Communication on page 40 for a full description of these communication options. - Page 35 Chapter 5: User Interface Communication: S e r v e r < L A N > L A N C o n f R S 4 8 5 – 1 C o n f < S > R S 4 8 5 - 2 C o n f <...
-
Page 36: Display
U p g r a d e - S D C a r d Date and Time: Set the internal real-time clock. If connected to the SolarEdge monitoring portal, the date and time are set automatically and only time zone should be set. -
Page 37: Information
DSP 1: The DSP digital control board firmware version o CPU: The communication board firmware version NOTE Please have these numbers ready when you contact SolarEdge support. Error Log: Displays the last five errors. Warning Log: Displays the last five warnings. -
Page 38: Telemetry Status
M E S S A G E > Server: The method of connection to the SolarEdge monitoring portal S_OK: The connection to the SolarEdge monitoring portal is successful (should appear only if the SMI is connected to the server). Status: Displays OK if the SMI established successful connection and communication with the specified server port/SMI (LAN, RS485 or ZigBee module). -
Page 39: Ip Status
< S E > < M P S > < - - > DEV: The type of device that was configured to a specific port (based on the port’s functionality), as follows: o SE: SolarEdge device (default) o MTR: Revenue meter o LGR: Non-SolarEdge logger... - Page 40 MPS: ZigBee multipoint slave (for a ZigBee router module) o For a revenue meter reader, refer to the supported revenue meters page at http://www.solaredge.com/articles/se-supported-devices. o SS: SunSpec - for a non-SolarEdge logger ##: The total number of slaves detected on the specific port SMI-Installation Guide MAN-01-00157-1.0...
-
Page 41: Chapter 6: Setting Up Communication
Power optimizers send information to the SMI via the DC power lines (the PV output circuit). The information is sent from the SMI to the SolarEdge monitoring portal through the Internet. In order to send the data from the SMI, a communication connection must be set up, as described in this chapter. -
Page 42: Communication Connectors
Communication Connectors Communication Connectors Two communication glands are used for connection of the various communication options. Each gland has three openings. The table below describes the functionality of each opening. Unused openings should remain sealed. Gland# Opening Functionality Cable Size (diameter) One small External antenna cable 2-4 mm... -
Page 43: Creating An Ethernet (Lan) Connection
Chapter 6: Setting Up Communication Creating an Ethernet (LAN) Connection This communication option enables using an Ethernet connection to connect the SMI to the monitoring portal through a LAN. Figure 25: Example of Ethernet connection To connect the Ethernet cable: 1. - Page 44 SMI to the same switch/router or to different switches/routers, as needed. Each SMI sends its monitored data independently to the SolarEdge monitoring portal. 1 The SMI connection does not support RX/TX polarity change. Supporting crossover Ethernet cables depends on the switch capabilities.
-
Page 45: Creating An Rs485 Bus Connection
4. Verify the connection, as described in Verifying the Connection on page 49. Creating an RS485 Bus Connection The SMI can connect to other SolarEdge devices, such as other SMIs, or SolarEdge control and communication gateways. The SMI can also connect to non-SolarEdge devices, such as revenue grade meters or non-SolarEdge inverters and read their data for display in the SolarEdge monitoring portal. - Page 46 Device Type is used to select the specific port configuration. The following devices are supported: o SolarEdge (default for RS485-1): Used when connecting to SolarEdge devices, such as: other SMIs, gateways, or inverters. By default, all SolarEdge devices are pre-configured as slaves on the RS485-1 port.
- Page 47 Chapter 6: Setting Up Communication To connect the RS485 communication bus: Use a four-wire twisted-pair cable for the connection. 1. Remove the SMI cover, as described in Opening and Closing the SMI Cover on page 9. 2. Remove the seal from one of the openings in communication gland #2 and insert the wire through the opening.
- Page 48 (Ethernet, GSM or ZigBee). To configure the RS485 communication bus: By default, all SolarEdge devices are pre-configured as slaves on the RS485-1 port. Slaves can be further configured using the RS485-1 Conf option in the Communication menu. 1. Enter Setup mode, as described in SMI Configuration – Setup Mode on page 29 2.
-
Page 49: Additional Connection Options
RS485-1 ConfÜProtocol Ü Master c. RS485-1 Conf Ü Slave Detect The system starts automatic detection of the SolarEdge slave SMI units connected to the master SMI. The SMI should report the correct number of slaves. If it does not, verify the connections and terminations. -
Page 50: Verifying The Connection
2. Switch the AC to the inverter ON (as described in its manual). If applicable, turn the inverter DC Safety Switch to ON. 3. Wait for the SMI to connect to the SolarEdge monitoring server. This may take up to two minutes. A message similar to the following appears on the LCD panel:... -
Page 51: Chapter 7: Errors And Troubleshooting
Chapter 7: Errors and Troubleshooting Chapter 7: Errors and Troubleshooting This appendix describes the error messages that appear on the LCD panel when an error occurs, and how to troubleshoot them. Troubleshooting Communication - S_OK is Not Displayed If S_OK is not displayed, perform the following: To troubleshoot Ethernet communication: When Ethernet communication is used, the Server Communication Status window can be used to identify the location of the error. - Page 52 3. Check that the selected communication option is properly configured. 4. Use a method independent of the SolarEdge SMI to check whether the network and modem are operating properly. For example, connect a laptop to the Ethernet router and connect to the Internet.
-
Page 53: Error Codes
§ Re-install in a cooler location. Broken or unconnected Faulty Temp. Sensor If the fault persists, contact SolarEdge support. temperature sensor. Hardware Error Internal hardware error. If the fault persists, contact SolarEdge support. SMI-Installation Guide MAN-01-00157-1.0... - Page 54 Error Codes Error LCD Message Description Troubleshooting Internal HW Error Internal hardware error. If the fault persists, contact SolarEdge support. 4, 5, 12,18- SW Error Internal software error. If the fault persists, contact SolarEdge support. 42, 45 SMI-Installation Guide MAN-01-00157-1.0...
-
Page 55: Chapter 8: Smi Specifications
Chapter 8: SMI Specifications Chapter 8: SMI Specifications Mechanical Specifications Figure 31: SMI vertical mounting - front, side and rear views (mm / in) Figure 32: Vertical mounting bracket dimensions SMI-Installation Guide MAN-01-00157-1.0... - Page 56 Mechanical Specifications Figure 33: SMI horizontal mounting - front, side and isometric views SMI-Installation Guide MAN-01-00157-1.0...
-
Page 57: Technical Specifications
Chapter 8: SMI Specifications Technical Specifications DC Input Number of DC Inputs Input Type PG29 x 2 Maximum Voltage 1000 Maximum Continuous Current 180 (MI: 160) Lightning Protection Overvoltage Category Rating OVC2 Altitude Rating 2000 / 6570 m/ft Temperature rating of the connected 90 / 194 C°/F°... - Page 58 Technical Specifications Installation Specifications Dimensions (W x D x H) 317 x 214 x 540 / 12.5 x 8.4 x 21 mm/in Weight 25 / 55 kg/ lb Operating Temperature Range -20 to +60 / -4 to +140 °C/°F Protection Rating IP66 Relative Humidity 0 to 100...