
Related Manuals for Immergas Hydro 3


Summary of Contents for Immergas Hydro 3
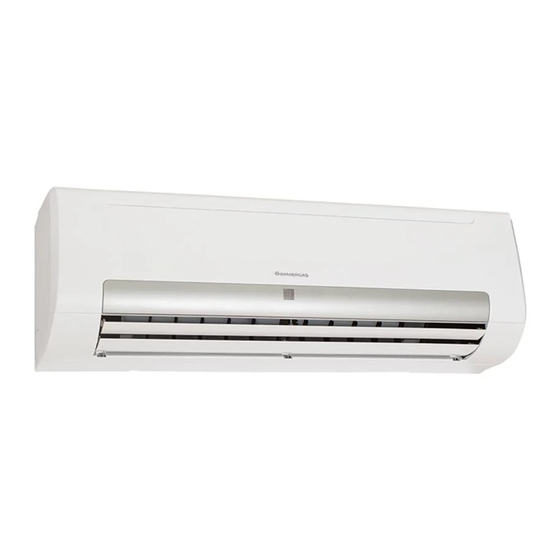
- Page 1 HYDRO 3 - 4 Ventilconvettore Istruzioni e avvertenze idronico murale Wall-mounted Instructions and warnings hydronic fan coil...
- Page 2 Cliente il costo dei ricambi, della manodopera ed il diritto fisso di chiamata. Il materiale sostituito in garanzia è di esclusiva proprietà della Immergas S.p.A. e deve essere reso senza ulteriori danni (pena la decadenza della garanzia), munito degli appositi tagliandi debitamente compilati ad opera del Centro Assistenza Tecnica Autorizzato Immergas.
- Page 3 Gentile Cliente, Ci complimentiamo con Lei per aver scelto un prodotto Immergas di alta qualità in grado di assicurarLe per lungo tempo benessere e sicurezza. Quale Cliente Immergas Lei potrà sempre fare affidamento su un qualificato Servizio di Assistenza Autorizzato, preparato ed aggiornato per garantire costante efficienza al Suo kit idronico murale ad acqua. Legga con attenzione le pagine che seguono: potrà...
-
Page 4: Table Of Contents
INDICE 1 Raccomandazioni importanti ........... 5 1.1 Avvertenze................... 5 1.2 Installazione................7 1.3 Collegamento idraulico............. 8 1.4 Cablaggio elettrico..............9 2 Presentazione del prodotto ............. 11 2.1 Consigli importanti..............11 2.2 Caratteristiche tecniche............11 2.3 Accessori in dotazione. -
Page 5: Raccomandazioni Importanti
RACCOMANDAZIONI Non sostituire un fusibile con un altro di corrente nomi- nale errata o con altri cavi in caso di malfunzionamento. IMPORTANTI L’utilizzo di cavi in sostituzione del fusibile potrebbe dan- neggiare l’unità e generare incendi. 1.1 AVVERTENZE. L’apparecchio può essere utilizzato da bambini di età non Non esporsi al flusso dell’aria per periodi prolungati. - Page 6 Dopo un uso prolungato, controllare che i raccordi di fis- Non installare il ventilconvettore in ambienti soggetti a saggio dell’unità non siano danneggiati. perdita di gas infiammabili. Se danneggiati, l’unità potrebbe cadere e provocare lesioni La perdita e lo stazionamento del gas in prossimità del ven- all’utente.
-
Page 7: Installazione
1.2 INSTALLAZIONE. Diisegno dimensionale Modello HYDRO 3 - 4 732 mm 915 mm 290 mm 663 mm Per l’installazione dell’unità interna o dei relativi condotti, Per l’installazione, utilizzare gli accessori in dotazione e le parti specificate. seguire rigorosamente le istruzioni riportate nel presente In caso contrario, potrebbero verificarsi perdite d’acqua,... -
Page 8: Collegamento Idraulico
Adottare le opportune precauzioni durante l’installazio- ne in caso di vento forte o eventuali calamità atmosferi- che o telluriche. Una installazione inadeguata può causare la caduta dell’u- nità e danni a cose e persone. Non installare il ventilconvettore in: - Ambienti che contengono petrolato (es.: vaselina, di- stillati di petrolio). -
Page 9: Cablaggio Elettrico
1.4 CABLAGGIO ELETTRICO. Per gli interventi elettrici, rispettare le norme nazionali e locali in materia di cablaggio e le presenti istruzioni Non collegare il ventilconvettore all’alimentazione fino a di installazione. Utilizzare un circuito elettrico dedicato quando non saranno stati completati i cablaggi e il colle- per l’alimentazione. - Page 10 Schema elettrico Ventilconvettore. Circolazione per rilevamento temperatura Offset di temperatura per chiusura valvola Se attivata consente di far circolare aria a bassa velocità ad Consente di selezionare a quale temperatura sotto/sopra il intervalli regolari per un controllo più preciso della tempe- set point far chiudere la valvola a 2 vie.
-
Page 11: Presentazione Del Prodotto
PRESENTAZIONE DEL PRODOTTO 2.1 CONSIGLI IMPORTANTI. Ispezione e manipolazione dell’unità. Al momento della consegna, controllare l’imballo e comu- nicare immediatamente eventuali danni allo spedizioniere. Durante la manipolazione dell’unità, considerare quanto segue: • Fragile, maneggiare con cura. • Selezionare in anticipo il percorso lungo cui trasportare l’unità. -
Page 12: Accessori In Dotazione
2.3 ACCESSORI IN DOTAZIONE. Verificare che nell’imballo siano presenti tutti gli accessori per l’installazione. Nome Figura Quantità Funzione Vite ST3.9x25 per pannello di Fissaggio del pannello di installazione con tasselli installazione Tubo espanso in plastica Nastro di avvolgimento Tubo di scarico Ø 60 Copertura condotta murale Telecomando Supporto telecomando... -
Page 13: Componenti
• FORCED COOL 2.4 COMPONENTI. Aprire il pannello anteriore per visualizzare il pulsante tem- La spia di FUNZIONAMENTO lampeggia, il ventilcon- poraneo del pannello di visualizzazione (14 Fig. 4). vettore passa in modalità AUTO dopo il raffreddamento Questa funzione viene utilizzata per avviare temporanea- forzato con una velocità... -
Page 14: Installazione
INSTALLAZIONE FORATURA DEL MURO E MONTAGGIO DEL PAN- NELLO DI INSTALLAZIONE. Pannello di installazione e relativa direzione (unità: mm) 3.1 INSTALLAZIONE DELL’UNITÀ INTERNA. (Fig. 5 e 6). LUOGO DI INSTALLAZIONE. • Fissare il pannello di installazione (Fig. 7) L’installazione nei luoghi elencati di seguito può essere - Applicare la coibentazione adesiva anticondensa sul re- problematica. - Page 15 Legenda: 2000mm 1 - Pannello di montaggio dell’unità interna 2 - Figura dell’unità interna Installazione corretta Installazione errata Installazione errata Legenda: 1 - Pannello di montaggio dell’unità interna 2 - Linea orizzontale Legenda: 1 - Unità interna 2 - Pannello di montaggio dell’unità interna 3 - Coibentazione adesiva anticondensa 4 - Parete...
- Page 16 INSTALLAZIONE TUBI DI COLLEGAMENTO E DRE- N.B.: piegare e posizionare il tubo con cautela. NAGGIO Assicurarsi che il tubo non fuoriesca dal retro dell’unità • Drenaggio interna. - Inserire il tubo di drenaggio in modo da farlo pendere Assicurarsi che il tubo di drenaggio sia allacciato corretta- leggermente verso il basso.
- Page 17 • Collegamento dei tubi e fasciatura (Fig. 12) Avvolgere il cavo di collegamento, il tubo di drenaggio e i cablaggi con del nastro in maniera sicura e uniforme, come indicato di seguito. - L’acqua condensata generata nella parte posteriore dell’u- nità...
-
Page 18: Installazione Dei Tubi Dell'acqua
3.2 INSTALLAZIONE DEI TUBI DELL’ACQUA. COLLEGAMENTO DEL TUBO DELL’ A CQUA Il collegamento del tubo dell’acqua deve essere eseguito da tecnici esperti utilizzando due chiavi per il serraggio dei tubi dell’unità interna (Fig. 14). - Al primo collegamento, espellere completamente l’aria attraverso l’apposita valvola di espulsione (Fig. -
Page 19: Schema Di Cablaggio
3.3 SCHEMA DI CABLAGGIO Ai sensi delle norme nazionali vigenti, i cablaggi fissi devo- no disporre di un dispositivo di disconnessione onnipolare integrato con distanza tra i contatti pari ad almeno 3 mm su tutti i poli e un differenziale da almeno 10 mA. L’apparecchio deve essere installato conformemente alle norme nazionali vigenti. - Page 20 SCHEMA DELLA MORSETTIERA PRECAUZIONI PER L’INSTALLAZIONE DEL TELECO- MANDO (Fig. 18) Per i cablaggi, consultare lo schema dei cablaggi dell’unità - Non gettare o colpire il telecomando. interna. - Prima dell’installazione, azionare il telecomando e verifi- Il cavo di alimentazione deve essere di tipo H05RN-F o carne la posizione nel raggio di ricezione.
-
Page 21: Messa In Servizio
3.4 MESSA IN SERVIZIO. INTERVALLO DI FUNZIONAMENTO • Il test deve essere eseguito solo dopo aver completato l’in- Per un funzionamento sicuro ed efficace, utilizzare l’impianto stallazione. alle temperature seguenti. • Si prega di controllare i seguenti punti prima di eseguire il Temperatura Temperatura am- Temperatura acqua... - Page 22 REGOLAZIONE DELLA DIREZIONE DEL FLUSSO DELL’ A RIA Quando l’unità è in funzione, è possibile regolare la griglia di mandata per modificare la direzione del flusso e rendere la temperatura ambiente più omogenea. In questo modo, anche il comfort della stanza aumenterà. Regolare il getto dell’aria in posizione orizzontale (Fig.
-
Page 23: Impostazioni Dei Parametri / Utilizzo
IMPOSTAZIONI DEI PARAME- TRI / UTILIZZO 4.1 TELECOMANDO. Legenda: 1 - Coperchio batterie 2 - Vano batterie 3 - Batterie 4.2 INSERIMENTO DELLE BATTERIE NEL TELECOMANDO. Inserire due batterie AAA nel seguente modo (Fig. 20): - rimuovere il coperchio batterie premendo e spingendo verso il basso. -
Page 24: Pulsantiera Telecomando
4.3 PULSANTIERA TELECOMANDO. Legenda: 1 - On / Off 2 - Velocità del ventilatore 3 - Impostazione 4 - Direzione dell’ a ria 5 - Orologio 6 - Time On 7 - Time Off 8 - ECO 9 - C / H (Freddo / Caldo) 10 - Reset 11 - Lock (Bloccaggio) 12 - OK... -
Page 25: Display Telecomando
Pulsante Funzione (All’interno del telecomando). Premere questo pulsante con un ago da 1 mm per azzerare l’impostazione Reset vigente e ripristinare il telecomando. Lock (Bloccag- (All’interno del telecomando). Premere questo pulsante con un ago da 1 mm per bloccare o sbloccare il gio) telecomando, disattivando in tal modo tutti i pulsanti dello stesso, tranne il pulsante “LOCK”. -
Page 26: Modalita' Di Funzionamento
4.6 MODALITA’ DI Modalità riscaldamento (HEAT). FUNZIONAMENTO. In modalità riscaldamento, il climatizzatore permette solo Modalità automatica (AUTO). di riscaldare. Nella modalità automatica (AUTO), l’apparecchio per aria - Premere il pulsante “MODE” e selezionare il funzionamen- condizionata seleziona automaticamente la modalità di to in modalità... -
Page 27: Funzione Timer On / Off (Accensione / Spegnimento A Tempo)
4.7 FUNZIONE TIMER ON / OFF (ACCENSIONE / SPEGNIMENTO A TEMPO). L’apparecchio può essere acceso / spento mediante un timer. Programmazione per impostare l’accensione program- mata (Time On). - Premendo il pulsante “TIME ON” sul display del teleco- mando appaiono “SET”, “HOUR” e “ON”. - Ad ogni impulso l’... -
Page 28: Raccomandazioni - Manutenzione E Riparazione
RACCOMANDAZIONI - MANU- 5.2 MANUTENZIONE DOMESTICA. prima di pulire il ventilconvettore, assicurarsi che N.B.: TENZIONE E RIPARAZIONE l’alimentazione sia scollegata. 5.1 CONSIGLI PER L’UTENTE. verificare che il cablaggio non sia rotto o discon- N.B.: - Assicurarsi che non vi siano ostruzioni lungo lo scarico e nesso. - Page 29 Pulizia del filtro dell’aria e della griglia dell’aria Per la pulizia del filtro è possibile utilizzare un aspi- • pulita. rapolvere o dell’acqua pulita. Se la quantità di polvere accumulata è eccessiva, utilizzare una spazzola a se- Il filtro dell’aria può impedire l’infiltrazione di polvere tole morbide e un detergente non aggressivo, quindi o di altre particelle.
-
Page 30: I Sintomi Seguenti Non Costituiscono Un Problema Per Il Ventilconvettore
5.3 I SINTOMI SEGUENTI NON COSTITUISCONO UN PROBLEMA PER IL VENTILCONVETTORE. Sintomi Stato • Il ventilconvettore non sia avvia subito dopo aver premuto il pulsante ON/OFF sul telecomando. L’impianto non funziona. Se la spia di funzionamento lampeggia, l’impianto è in condizioni normali. •... -
Page 31: Assistenza Per La Risoluzione Dei Guasti
5.4 ASSISTENZA PER LA RISOLUZIONE DEI GUASTI. Problemi del ventilconvettore e relative cause. N.B.: se si verifica uno dei malfunzionamenti seguenti, ar- restare l’apparecchio, scollegare l’alimentazione e contattare il centro di assistenza tecnica. • La spia di funzionamento lampeggia velocemente (due volte al secondo). - Page 32 Problemi del telecomando e relative cause. N.B.: prima di richiedere assistenza o la riparazione control- lare i punti della tabella riportata di seguito. Sintomi Cause Soluzione Selezionando la modalità automatica, il ventil- Controllare se la modalità indicata sul display è convettore varierà...
-
Page 33: Dati Tecnici
DATI TECNICI. HYDRO 3 HYDRO 4 Alimentazione elettrica V / Ph / Hz 220 - 240 / 1 / 50 220 - 240 / 1 / 50 492 / 454 / 400 825 / 689 / 590 Portata aria (H / M / L) - Page 34 INDEX 1 Important recommendations..........35 1.1 Warnings................... 35 1.2 Installation................37 1.3 Plumbing connection.............. 38 1.4 Wiring..................39 2 Introducing the product ............41 2.1 Important advice..............41 2.2 Technical specifications............41 2.3 Accessories provided............... 42 2.4 Components.
- Page 35 IMPORTANT Do not insert fingers, rods or other objects into the air inlet or outlet. RECOMMENDATIONS High speed rotation of the fan can cause injury. 1.1 WARNINGS. Do not use flammable sprays, such as lacquers or paint, The device can be used by children at least 8 years old as near to the unit.
- Page 36 Do not expose children, plants or animals to the direct Do not use or spray cleaning liquids or aerosols. Use a flow of air. soft dry cloth to clean the unit. The direct flow could have negative effects on children, an- Otherwise this could cause a serious electrical discharge.
- Page 37 1.2 INSTALLATION. Dimensional drawing Model HYDRO 3 - 4 732 mm 915 mm 290 mm 663 mm Strictly follow these instructions to install the indoor unit Use the accessories provided and the specified parts for installation. or its pipes. Otherwise this could cause a water leak, an electric shock or a fire.
- Page 38 Do not install the fan coil in: - Environments containing petrolatum (ex.: vaseline, petroleum distillates). - Environments with salty air (near coasts). - Environments with caustic gases (e.g. sulphur) in the air (near spa areas). - Environments subject to strong voltage variations (in factories).
- Page 39 1.4 WIRING. For electrical work, comply with the national and local regulations on wiring and follow these installation in- Do not connect the fan coil to the supply voltage until wir- structions. Use a dedicated electrical circuit for power. ing has been completed and the pipes have been connected. If the capacity of the electrical circuit is insufficient or is faulty, this could cause an electric shock or a fire.
- Page 40 Fan coil wiring diagram. Circulation for temperature detection. Temperature offset for valve closure. When activated, it allows low-speed air to circulate at regular Allows you to select at which temperature below/above the intervals for more precise control of room temperature. set point to close the 2-way valve Cold anti-fan function.
- Page 41 INTRODUCING THE PRODUCT 2.1 IMPORTANT ADVICE. Inspecting and handling the unit. Upon delivery, check the packaging and immediately report any damage to the shipping company. Consider the following when handling the unit: Fragile, handle with care. • • Choose the route for transporting the unit in advance. •...
- Page 42 2.3 ACCESSORIES PROVIDED. Make sure the package contains all of the installation accessories. Name Figure Quantity Function ST3.9x25 screw for installation panel with studs Plastic foam pipe Wrapping tape Ø 60 Drain pipe Wall-mounted pipe cover Remote control Remote control mount Mount for the remote control Assembly screw (ST2.9 Installing the remote control...
- Page 43 • FORCED COOL 2.4 COMPONENTS. Open the front panel to see the temporary button for the The OPERATION LED flashes, the fan coil switches to display panel (14 Fig. 4). AUTO mode after forced cooling with a HIGH fan speed This function is used to temporarily start the unit if the remo- for 30 minutes.
- Page 44 INSTALLATION DRILLING THE WALL AND MOUNTING THE INSTAL- LATION PANEL. Installation panel and right way up (unit: mm) (Fig. 5 and 6). 3.1 INSTALLING THE INDOOR UNIT. • Fixing the installation panel (Fig. 7) PLACE OF INSTALLATION. - Apply the anti-condensation adhesive insulation on the Installation in the places listed below could be problema- back of the unit’s metal installation plate to prevent the tic.
- Page 45 Key: 2000mm 1 - Indoor unit installation panel 2 - Indoor unit figure Correct installation Incorrect installation Incorrect installation Key: 1 - Indoor unit installation panel 2 - Horizontal line Key: 1 - Indoor unit 2 - Indoor unit installation panel 3 - Anti-condensation adhesive insulation 4 - Wall...
- Page 46 INSTALLING THE CONNECTION AND DRAIN PIPES Note: bend and position the pipe carefully. • Drainage Ensure the pipe does not protrude from the back of the - Insert the drain pipe so that it slopes slightly downwards. indoor unit. In (Fig. 9) shows the proper installation and those that Make sure the drain pipe is connected correctly.
- Page 47 • Connecting the pipes and binding them (Fig. 12) Wrap the connection cable, the drain pipe and wires secu- rely and evenly with tape, as shown below. - The condensed water generated at the back of the indoor unit is collected in a special tank and conveyed outside the room.
- Page 48 3.2 INSTALLING THE WATER PIPES. CONNECTING THE WATER PIPE The water pipe must be connected by expert technicians using two spanners for tightening the pipes of the indoor unit (Fig. 14). - When connected for the first time, completely expel the air from the coils through the outlet valve (Fig.
- Page 49 3.3 WIRING DIAGRAM Pursuant to applicable national regulations, fixed wiring must have an integrated single-pole disconnect device with a distance between contacts of at least 3 mm on all poles and a circuit breaker of at least 10 mA. The device must be installed in compliance with the national regulations in force.
- Page 50 TERMINAL BLOCK DIAGRAM PRECAUTIONS WHEN INSTALLING THE REMOTE CONTROL (Fig. 18) For wiring, refer to the wiring diagram for the indoor unit. - Single-phase indoor unit. - Do not throw or hit the remote control. The power cable must be H05RN-F or higher minimum - Before installation, try the remote control and check its cross section of 1.5 mm position is within the reception range.
- Page 51 3.4 COMMISSIONING. OPERATING RANGE For safe and efficient operation, use the system with the • The test must be performed only after completing instal- following temperatures. lation. • Please check the following points before testing. Temperature • The unit must be installed properly. Inlet water Room temperature temperature...
- Page 52 ADJUSTING THE AIR FLOW DIRECTION When the unit is working, the flow grid can be adjusted to change the flow direction and make the room temperature more homogeneous. This way, room comfort will also in- crease. Adjust the horizontal air jet (Fig.
- Page 53 PARAMETER SETTINGS / USE 4.1 REMOTE CONTROLLER. Key: 1 - Batteries cover 2 - Batteries compartment 3 - Batteries 4.2 INSERTING THE BATTERIES INTO THE REMOTE CONTROL. Insert two batteries AAA in the following way (Fig. 20): - remove the batteries cover by pressing and pushing down. - Insert the batteries into the remote control, checking the correct position of the positive and negative poles indicated inside the batteries compartment.
- Page 54 4.3 REMOTE CONTROL BUTTON. Key: 1 - On / Off 2 - Fan speed setting 3 - Adjust 4 - Air direction setting 5 - Time setting 6 - Timer On 7 - Timer Off 8 - Economic operation 9 - Cool/ Heat 10 - Reset 11 - Lock 12 - Confirm button...
- Page 55 Button Function (Inside the remote control). Press this button with a 1 mm needle to clear the current setting and reset Reset the remote control. (Inside the remote control). Press this button with a 1 mm needle to lock or unlock the remote control, Lock thus deactivating all buttons of the same, except the “LOCK”...
- Page 56 4.6 MODE SETTING. Heating mode (HEAT). Automatic mode (AUTO). In heating mode, the air conditioner only allows heating. In automatic mode (AUTO), the air conditioning unit au- - Press the “MODE” button and select the heating mode tomatically selects the cooling (COOL) or heating (HEAT) operation (HEAT);...
- Page 57 4.7 TIMER ON / OFF FUNCTION. The appliance can be switched on / off using a timer. Programming to set the programmed ignition (Time On). - Pressing the “TIME ON” button on the remote control display shows “SET”, “HOUR” and “ON”. - At each pulse the switch-on time increases by half an hour.
- Page 58 RECOMMENDATIONS - MAIN- 5.2 HOUSEHOLD MAINTENANCE. before cleaning the fan coil, make sure it is Note: TENANCE AND REPAIRS unplugged. 5.1 ADVICE FOR THE USER. make sure the wiring is not broken or discon- Note: - Make sure there are no obstructions along the drain or on nected.
- Page 59 Cleaning the air filter and the clean air grid. The filter can be cleaned with a vacuum cleaner or clean • water. If the amount of accumulated dust is excessive, The air filter can prevent the infiltration of dust or use a soft bristled brush and a mild detergent, then other particles.
- Page 60 5.3 THE FOLLOWING SYMPTOMS DO NOT CONSTITUTE A PROBLEM FOR THE FAN COIL. Symptoms Status • The fan coil does not start immediately after the ON/OFF key is pressed on the remote control. The system does not work. If the operation LED flashes, the system is in normal condition. •...
- Page 61 5.4 TROUBLESHOOTING SUPPORT. Fan coil problems and their causes. Note: if one of the following malfunctions occurs, stop the device, unplug it and contact the service centre. • The operation LED flashes quickly (twice per second). • The LED continues flashing quickly after the power has been switched off and back on.
- Page 62 Remote control problems and their causes. Note: check the points in the table below before requesting service or repairs. Symptoms Causes Solution Check if the mode indicated on the display is When automatic mode is selected, the fan coil “AUTO”. automatically changes the fan speed.
- Page 63 TECHNICAL DATA. HYDRO 3 HYDRO 4 Power supply V / Ph / Hz 220 - 240 / 1 / 50 220 - 240 / 1 / 50 492 / 454 / 400 825 / 689 / 590 Air flow (H / M / L)
- Page 64 Per richiedere ulteriori approfondimenti specifici, i Professionisti del settore possono anche avvalersi dell’indirizzo e-mail: consulenza@immergas.com To request further specific details, sector Professionals can also use the following e-mail address: consulenza@immergas.com Immergas S.p.A. 42041 Brescello (RE) - Italy Tel. 0522.689011 Fax 0522.680617...