
Related Manuals for SolarEdge Home EV Charger


Summary of Contents for SolarEdge Home EV Charger
- Page 1 Installation Guide SolarEdge Home EV Charger Installation Guide with SetApp Configuration For Australia...
-
Page 2: Revision History
Revision History Revision History Version 1.1 October 2022 Product name changed from Smart EV Charger to SolarEdge Home EV Charger Version 1.0 July 2022 Initial release SolarEdge Home EV Charger Installation Guide... -
Page 3: Table Of Contents
Chapter 1: Introduction to SolarEdge Home EV Charger Packages Contents and Required Equipment Chapter 2: Connectors and Interfaces Buzzer Main Procedures Chapter 3: Qualified Electrician - Connecting the AC Wire to the SolarEdge Home EV Charger Required Equipment Main Procedure Grid Connection Guidelines... - Page 4 Appendix A: Qualified Electrician - Connecting the SolarEdge Home EV Charger to an Energy Meter Energy Meter DIP Switches Mechanical Specifications Technical Specifications - SolarEdge Home EV Charger (Australia and New Zealand) Support Contact Information SolarEdge Home EV Charger Installation Guide...
-
Page 5: Handling And Safety Instructions
Ne pas dépasser une telle note avant que les conditions requises soient totallement comprises et accomplies. NOTE Denotes additional information about the current subject. IMPORTANT SAFETY FEATURE Denotes information about safety issues. SolarEdge Home EV Charger Installation Guide... -
Page 6: Important Safety Instructions
WARNING! Before operating the SolarEdge Home EV Charger, ensure that the SolarEdge Home EV Charger grounded properly. This product must be connected to a grounded, metal, permanent wiring system, or an equipment-grounding conductor must be run with the circuit conductors and connected to the equipment grounding terminal or lead on the product. - Page 7 Hot surface – To reduce the risk of burns, do not touch. Caution, risk of danger WARNING! The SolarEdge Home EV Charger must be connected to a dedicated AC branch circuit with a maximum Overcurrent Protection Device (OCPD) of 50A. ...
- Page 8 CAUTION! This unit must be operated according to the technical specification datasheet provided with the unit. NOTE This SolarEdge Home EV Charger s provided with an IMI (Isolation Monitor Interrupter) for ground fault protection NOTE The SolarEdge Home EV Charger is rated. Unused conduit entry and glands should be sealed with appropriate seals.
-
Page 9: Ev Charging Safety Instructions
CAUTION! Do not use an extension cord between the SolarEdge Home EV Charger Cable and the SolarEdge Home EV Charger. You may use a conversion adapter only if it has been approved by SolarEdge. SolarEdge Home EV Charger Installation Guide... -
Page 10: Chapter 1: Introduction To Solaredge Home Ev Charger
Charger cable, protecting the plug from rain when not plugged into the vehicle. The SolarEdge Home EV Charger offers the following connection options to the grid: Direct AC connection to the SolarEdge Home EV Charger. To be performed only by a qualified electrician. -
Page 11: Packages Contents And Required Equipment
Chapter 1: Introduction to SolarEdge Home EV Charger 11 Packages Contents and Required Equipment SolarEdge Home EV Charger Package SolarEdge Home EV Charger Station SolarEdge Home EV Charger mounting bracket and tightening screws EV Cable Package EV Cable EV Cable Locker Required Equipment... -
Page 12: Chapter 2: Connectors And Interfaces
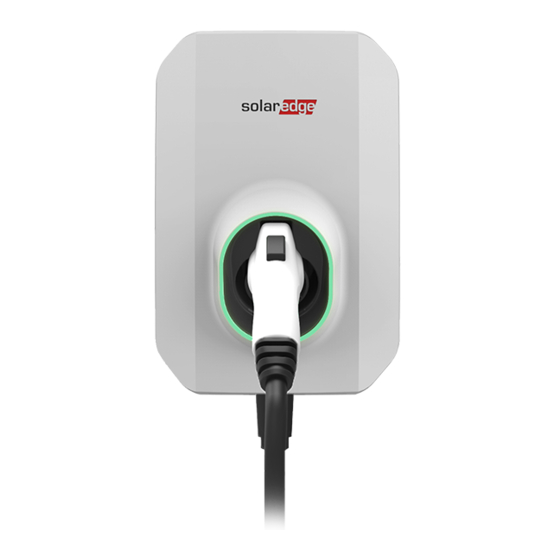
Chapter 2: Connectors and Interfaces Figure 2: SolarEdge Home EV Charger connectors and interfaces SolarEdge Home EV Charger cable connector: Used for connecting the cable to the SolarEdge Home EV Charger SolarEdge Home EV Charger push button: Pressing the button has the following... -
Page 13: Buzzer
Chapter 2: Connectors and Interfaces 13 Plug holder: Holds the plug when not being used. SolarEdge Home EV Charger LED ring indicator: Indicates the SolarEdge Home EV Charger statuses as described in the following table: LED Ring Color Indication Description No power... - Page 14 Buzzer Event Buzzer Indication Connected to EV 1 short beep Charging starts 2 short beeps + 1 long beep Error 5 beeps SolarEdge Home EV Charger Installation Guide...
-
Page 15: Main Procedures
Charger and other objects: from the top and sides of the SolarEdge Home EV Charger At least from the bottom of the SolarEdge Home EV Charger if installing it indoors, if outdoors. 3. Position the mounting bracket against the mounting surface and mark at least three drilling hole locations (refer to Mechanical Specifications on page 49 for mounting bracket dimensions). - Page 16 Main Procedures To mount the SolarEdge Home EV Charger on the bracket: 1. Lift and hang the SolarEdge Home EV Charger on the mounted bracket (see the following figure). Figure 4: Mounting the SolarEdge Home EV Charger 2. Fasten the supplied bolt to the SolarEdge Home EV Charger.
- Page 17 Figure 5: SolarEdge Home EV Charger connectors 3. Rotate the cable connector clockwise to fasten it (see the following figure). Figure 6: SolarEdge Home EV Charger cable connection 4. Assemble the two parts of the cable lock around the cable connector. Push the parts together until they click to lock (see the following figure).
-
Page 18: Chapter 3: Qualified Electrician - Connecting The Ac Wire To The Solaredge Home Ev Charger
Removing the SolarEdge Home EV Charger Covers The SolarEdge Home EV Charger has two covers: a top cover and a bottom cover. You must remove both covers to open the SolarEdge Home EV Charger. To remove the SolarEdge Home EV Charger covers: 1. -
Page 19: Setting The Circuit Breaker Ratings
Figure 8: SolarEdge Home EV Charger top cover CAUTION! When removing the covers, make sure not to damage the internal components. SolarEdge will not be held responsible for any components damaged as a result of incautious cover removal. Setting the Circuit Breaker Ratings DIP Switches... -
Page 20: Directly Connecting The Ac Grid To The Solaredge Home Ev Charger
Figure 9: SolarEdge Home EV Charger DIP switch interface To set the circuit breaker ratings: Adjust the SolarEdge Home EV Charger DIP switches according to your circuit breaker rating to set maximum allowed AC current from the grid. By default, the DIP switch is set to the 32A which is the maximum allowed AC current. - Page 21 Chapter 3: Qualified Electrician - Connecting the AC Wire to the SolarEdge Home EV Charger 21 3. Insert the AC cable through the gland and tighten the screws (see the figure in step 4. Insert the wire ferrules into the round openings according to the labels on the terminal blocks (G,L1, N) and close the levers –...
-
Page 22: Connecting Rs485 Between Inverters And The Solaredge Home Ev Charger
Connecting RS485 between Inverters and the SolarEdge Home EV Charger The RS485 option enables creating a bus of connected SolarEdge devices, in this case the SolarEdge Home Wave Inverter, Single Phase or the SolarEdge Home Hub Inverter and the SolarEdge Home EV Charger for communication with the Monitoring Platform. - Page 23 Figure 10: RS485 connection between the SolarEdge Home Wave Inverter, Single Phase (1), SolarEdge Home Hub Inverter (2) and the SolarEdge Home EV Charger Figure 11: RS485 bus connection between SolarEdge Home Wave Inverter(s), Single Phase and the SolarEdge Home EV Charger To connect RS485 between the inverter and the SolarEdge Home EV Charger: 1.
- Page 24 h. Check that the wires are fully inserted and cannot be pulled out easily i. Push the RS485 terminal block firmly all the way into the connector. j. For the SolarEdge Home Wave Inverter, Single Phase: terminate the first and last SolarEdge device in the chain by switching a termination DIP-switch inside the inverter to ON (move the left switch up).
- Page 25 2. In the SolarEdge Home EV Charger: a. Remove the seal from one of the openings in the communication gland at the bottom of the SolarEdge Home EV Charger and insert the RS485 wires from the inverter through the opening.
-
Page 26: Rs485 Bus Configuration
5. Verify the connection of the leader to the monitoring platform, as described in the next section. Creating an RS485 Bus Connection to SolarEdge Inverter or Gateway The RS485 option enables creating a bus of connected devices, consisting of up to 31 follower devices and 1 leader device. -
Page 27: Closing The Solaredge Home Ev Charger Covers
Closing the SolarEdge Home EV Charger Covers To close the SolarEdge Home EV Charger covers: 1. Place the bottom cover on the SolarEdge Home EV Charger and tighten the screws (see the following figure). 2. Place the top cover on the bottom cover, insert and tighten screws (see the following figure). - Page 28 To configure the RS485 bus connection to the SolarEdge Home Wave Inverter, Single Phase: 1. Connect all the inverters and SolarEdge Home EV Chargers to the RS485 bus. 2. Turn on all the inverters and the SolarEdge Home EV Chargers.
-
Page 29: Setting The Circuit Breaker Limit Value
The Ring LED is Green either: blinking, pulsating or continually on. Setting the Circuit Breaker Limit Value In case you are using a SolarEdge Home Wave Inverter, Single Phase and SetApp, set the circuit breaker limit value to prevent tripping. -
Page 30: Chapter 4: Configuring And Using Solaredge Home Ev Charger With Mysolaredge
2. Scan the QR barcode on the silver sticker located on the side of the device. To configure and use mySolarEdge: 1. Login using your credentials. 2. Press the SolarEdge Home EV Charger pushbutton ( Figure 2 ) for 5 seconds to establish a Wi-Fi connection between the SolarEdge Home EV Charger and the smartphone. - Page 31 Chapter 4: Configuring and Using SolarEdge Home EV Charger with mySolarEdge 31 6. Follow the on-screen instructions to configure and use mySolarEdge with SolarEdge Home EV Charger. SolarEdge Home EV Charger Installation Guide...
-
Page 32: Chapter 5: Charging Instructions
Chapter 5: Charging Instructions Chapter 5: Charging Instructions 1. Verify that the green LED ring is ON indicating that the SolarEdge Home EV Charger is ON and ready to charge. 2. Unplug the SolarEdge Home EV Charger plug. 3. Connect the SolarEdge Home EV Charger plug to the charging socket of the vehicle and push firmly until it clicks into the socket. -
Page 33: Chapter 6: Qualified Electrician - Setting Up Communication
SolarEdge Home EV Charger to the monitoring platform. Only communication products offered by SolarEdge are supported. Wi-Fi A Wi-Fi connection is provided for connecting my SolarEdge app and SetApp to the monitoring platform. An antenna is required and available from SolarEdge for extending the Wi-Fi range. -
Page 34: Communication Connectors
Cable for external wireless or cellular 2 - 4 mm, with cut communication Figure 12: Communication Gland The communication board has a standard RJ45 terminal block for Ethernet connection and a 6-pin terminal block for RS485 connection. SolarEdge Home EV Charger Installation Guide... -
Page 35: Creating An Ethernet (Lan) Connection
For details refer to: . To connect the Ethernet cable: 1. Remove the SolarEdge Home EV Charger covers as described in Removing the EV Charger Standalone Covers on page 1. SolarEdge Home EV Charger Installation Guide... - Page 36 4. Remove the rubber fitting from the gland and insert the CAT5/6 cable through the gland and through the gland opening in the SolarEdge Home EV Charger. 5. Insert the cable through the opening in the SolarEdge Home EV Charger towards the communication board.
- Page 37 Brown Reserved Figure 16: Standard cable wiring 7. Use a pre-crimped cable to connect via gland #1 to the RJ45 plug on the SolarEdge Home EV Charger's communication board or, if using a spool of cable, connect as follows: a. Insert the cable through the gland.
-
Page 38: Verifying The Connection To The Monitoring Platform
Verifying the Connection to the Monitoring Platform a. Turn ON the AC to the SolarEdge Home EV Charger by turning ON the circuit breaker on the main distribution panel. WARNING! ELECTRICAL SHOCK HAZARD. Do not touch uninsulated wires when the SMI cover is removed. -
Page 39: Chapter 7: Qualified Electrician - Configuring And Using Solaredge Home Ev Charger With Setapp
Using SolarEdge Home EV Charger with SetApp After installing the SolarEdge Home EV Charger configure it, then enable charging and other advanced features (e.g. scheduling, excess solar charging) with SetApp. You can connect communication options at this stage, as described in Qualified Electrician - Setting Up Communication on page 33. -
Page 40: Viewing Communication Status
Viewing Communication Status The communication option used by the SolarEdge Home EV Charger to communicate with the monitoring platform. The communication option used to communicate between multiple SolarEdge devices. 2. Tap the Server red arrow to set the communication method to be used for communication between the SolarEdge Home EV Charger and the SolarEdge monitoring platform. -
Page 41: Chapter 8: Errors And Troubleshooting
For the following system errors, when an error occurs, the red LED ring lights ON and the buzzer beeps 5 times. The error messages are displayed on the mobile app screen. If the error persists- contact SolarEdge Support. Error code Displayed Error message... - Page 42 Chapter 8: Errors and Troubleshooting Error code Displayed Error message Description and Troubleshooting tab of the mySolarEdge App. SolarEdge Home EV Charger Installation Guide...
- Page 43 Home EV Charger cable from the vehicle. Turn the inverter AC circuit breaker OFF and ON. Reconnect the SolarEdge Internal Error Home EV Charger Cable to the 1Cx4; 1Cx5; 1Cx12 -1Cx13 Disconnect from EV vehicle. If the EV Charger is powered...
- Page 44 Disconnect from EV charging. If this error occurs, the vehicle cannot be charged. Charging retries ended Charging retries ended 1CxE;1CxF Disconnect the SolarEdge Disconnect from EV Home EV Charger cable from SolarEdge Home EV Charger Installation Guide...
- Page 45 Chapter 8: Errors and Troubleshooting 45 Error code Displayed Error message Description and Troubleshooting the vehicle. Contact SolarEdge Support. SolarEdge Home EV Charger Installation Guide...
-
Page 46: Appendix A: Qualified Electrician - Connecting The Solaredge Home Ev Charger To An Energy Meter
SolarEdge Home EV Charger to an Energy Meter This section provides instructions for connecting the SolarEdge Home EV Charger to an Energy Meter. An Energy Meter is required for Smart Energy Management applications, such as controlled Excess Solar charging. - Page 47 Energy Meter's installation guide. 2. Remove the seal from one of the openings in the communication gland at the bottom of the SolarEdge Home EV Charger and insert the RS485 wires from the meter through the opening (see Figure 18 ).
- Page 48 6. Connect the connector back to the RS485-1 port. 7. In the meter, ensure the RS485-1 DIP switch is down. See Figure 17 . 8. In the meter, set the Modbus address 1-3 of the meter according to Table 1 SolarEdge Home EV Charger Installation Guide...
-
Page 49: Mechanical Specifications
Mechanical Specifications 49 Mechanical Specifications The following figure provides SolarEdge Home EV Charger dimensions in [in] / [mm]. Figure 19: SolarEdge Home EV Charger dimensions SolarEdge Home EV Charger Installation Guide... -
Page 50: Technical Specifications - Solaredge Home Ev Charger (Australia And New Zealand)
To extend Wi-Fi communication, use optional Wi-Fi antenna. For antenna specification refer to: https://www.solaredge.com/sites/default/files/se-wifi-zigbee-wireless-antenna-datasheet-na.pdf Optional cellular kit can be ordered When SolarEdge Home EV Charger is connected to the inverter, an import/export meter is required for controlled excess solar charging SolarEdge Home EV Charger Installation Guide... - Page 51 Technical Specifications - SolarEdge Home EV Charger (Australia and New Zealand) 51 STANDARD COMPLIANCE IEC 61851-21-2 Safety IEC 61851-1 INSTALLATION SPECIFICATIONS Dimensions 309 x 190 x 154 (H x W x D) EV Charger Weight 2.85 Protection Rating(connected to IP54 ...
-
Page 52: Support Contact Information
Before contact, make sure to have the following information at hand: Model and serial number of the product in question. The error indicated on the product's mobile application. The communication method to the SolarEdge ,monitoring platform , if the site is connected. SolarEdge Home EV Charger Installation Guide...