Accu-Chek Aviva Expert Standard Owner’s Booklet
Blood sugar meter
Hide thumbs
Also See for Aviva Expert:
- Quick start manual (2 pages) ,
- Owner's booklet (46 pages) ,
- Start manual (2 pages)
Table of Contents
Advertisement
Quick Links
Accu-chek Aviva expert
©2009 Roche Diagnostics. All rights reserved.
Assembled and distributed in the u.S.A. by:
Roche Diagnostics
9115 hague Road
Indianapolis, IN 46256
www.accu-chek.com
Accu-chek, Accu-chek AVIVA, Accu-chek
AVIVA eXPeRT, and Accu-chek MuLTIcLIX are
trademarks of Roche.
45702_std.indb 1
10:02 am
2 Feb 08
bG Test
Bolus Advice
My Data
Settings
Aviva Expert
Blood SUGAR MeteR
10:02 am
2 Feb 08
bG Test
Bolus Advice
My Data
Settings
Standard Owner's Booklet
10/29/09 1:41:46 PM
Advertisement
Table of Contents
Troubleshooting

Related Manuals for Accu-Chek Aviva Expert


Summary of Contents for Accu-Chek Aviva Expert
- Page 1 ©2009 Roche Diagnostics. All rights reserved. Assembled and distributed in the u.S.A. by: Roche Diagnostics 9115 hague Road Indianapolis, IN 46256 www.accu-chek.com Accu-chek, Accu-chek AVIVA, Accu-chek AVIVA eXPeRT, and Accu-chek MuLTIcLIX are trademarks of Roche. 45702_std.indb 1 10/29/09 1:41:46 PM...
- Page 2 Aspects of the Accu-chek Aviva expert system, including the meter, code key, and test strips, and their use, are covered by one or more of the following united States patents: 5,352,351; 4,999,582; 5,997,817; 5,053,199; Re. 36,268; 5,438,271; 5,366,609; 6,645,368; 6,662,439;...
-
Page 3: Before You Start Testing
Accu-chek customer care Service center at 1-800-688-4578. Damaged test strips can cause inaccurate results, which could lead to improper treatment. • Carefully dispose of used test strips and lancets. • Home use of the ACCU‑CHEK Aviva Expert system is limited to capillary whole blood testing. 45702_std.indb 1 10/29/09 1:41:46 PM... - Page 4 • The meter, test strips, and control solution are only for use outside the body (in vitro). Do not eat the test strips. Do not swallow or inject the control solution, or use the control solution for any purpose other than testing the Accu-chek Aviva expert system. 45702_std.indb 2...
- Page 5 About Testing Yourself or Others WARNING: certain substances can interfere with the Accu-chek Aviva expert blood glucose system and cause falsely high results. For example, peritoneal dialysis solutions containing icodextrin (such as Extraneal) or certain immunoglobulin therapies that contain maltose (such as Octagam 5 %) cause inaccurate results. For more information, refer to the Test Strip Package Insert or ask your healthcare professional.
- Page 6 • Refer to the Test Strip and Control Solution Package Inserts for additional health‑related information. • It is always a good idea to have a back‑up testing method available. Failure to test could cause a delay in treatment decisions and lead to a serious medical condition. examples of back-up testing methods include a back-up meter or testing by a lab.
-
Page 7: Table Of Contents
Before You Start Testing Introduction The Accu-chek Aviva expert System 1 Understanding Your New System 1.1 Overview 1.2 The ACCU‑CHEK Aviva Expert Meter at a Glance 1.3 Summary of Features 1.4 Screen content and Navigation 2 Testing Your Blood Sugar 2.1 Overview 2.2 coding Your Meter... - Page 8 2.5 Detailed Blood Sugar Results 2.6 Understanding Blood Sugar Test Results 2.7 unusual Test Results 2.8 Symptoms of High or Low Blood Sugar 3 Control Testing 3.1 Overview 3.2 Why Perform control Tests 3.3 About the control Solutions 3.4 Performing a control Test 3.5 understanding control Test Results 4 Managing Your Data 4.1 Overview...
- Page 9 5 Changing Meter Settings 5.1 Overview 5.2 Setting bG Test Reminders: After High bG, After Low bG, After Meal 5.3 Setting Alarm Clock Reminders: bG Test, Injection, Other 5.4 Setting Date Reminders: Dr. Visit, Lab Test 5.5 Setting Bolus Advice for the First Time 5.6 Setting Time Blocks, Health Events, Advice Options: Bolus Advice Set Up 5.7 Setting Warning Limits: hyper, hypo 5.8 Turning Key Lock On or Off...
- Page 10 6.6 List of errors 7 Care and Maintenance 7.1 Overview 7.2 Changing the Batteries 7.3 Power-Saving Tips 7.4 cleaning the Meter 7.5 Maintenance and Testing 8 Troubleshooting 8.1 Overview 8.2 Troubleshooting the Accu-chek Aviva expert Meter 45702_std.indb 4 10/29/09 1:41:47 PM...
- Page 11 9 Technical Information 9.1 Overview 9.2 Product Limitations 9.3 Specifications 9.4 Product Safety Information 9.5 Disposing of the Meter, Strips, Lancets, and Batteries 9.6 Warranty 9.7 Additional Supplies 9.8 Information for healthcare Professionals Appendices Appendix A: Abbreviations Appendix B: carb units Appendix c: explanation of Symbols Appendix D: Meter Settings and Range Limits Glossary...
- Page 12 45702_std.indb 6 10/29/09 1:41:47 PM...
-
Page 13: Introduction
Introduction Whether the Accu-chek Aviva expert meter is your first blood sugar meter or you have used a meter for some time, please take the time to read the Getting Started Guide, the Standard Owner’s Booklet, and the Advanced Owner’s Booklet carefully before you use your new meter. To use it correctly and dependably, you need to understand its operation, screen displays, and all individual features. -
Page 14: The Accu-Chek Aviva Expert System
The ACCU‑CHEK Aviva Expert System The Accu-chek Aviva Expert meter is for quantitative blood sugar testing using ACCU‑CHEK Aviva test strips. The meter has many features including: • Bolus advice calculation • Daily time blocks that can be adjusted to fit your lifestyle •... - Page 15 Testing sites include traditional fingertip site along with palm, forearm, upper arm, thigh, and calf. The Accu-chek Aviva expert meter is also indicated for the management of diabetes by calculating an insulin dose or carbohydrate intake based on user-entered data.
- Page 16 The system includes: • ACCU‑CHEK Aviva Expert meter with three AAA batteries (already inserted) • ACCU‑CHEK Aviva test strips and code key • ACCU‑CHEK Aviva control solution WARNING: Any object coming into contact with human blood is a potential source of infection (see: Clinical and Laboratory Standards Institute: Protection of Laboratory Workers from Occupationally Acquired Infections;...
-
Page 17: Understanding Your New System
Understanding Your New System 1.1 Overview 1.2 The ACCU‑CHEK Aviva Expert Meter at a Glance 1.3 Summary of Features 1.4 Screen content and Navigation 45702_std.indb 11 10/29/09 1:41:47 PM... -
Page 18: Overview
1.1 Overview Your new meter has several features to assist you in managing your diabetes. It is important you understand the features and how to operate the meter correctly. NOTES: • This booklet shows sample screens. The screens in this booklet may look slightly different from the screens on the meter. -
Page 19: The Accu-Chek Aviva Expert Meter At A Glance
1.2 The ACCU‑CHEK Aviva Expert Meter at a Glance Infrared (IR) Window Display Shows menus, results, Transfers data from the messages, and data stored in meter to a computer. the diary. Code Key Slot Buttons Insert code key here with... - Page 20 Top View Code Key Batteries Infrared (IR) Window (for example) Insert batteries according to the + and - symbols in the battery compartment. Test Strip Test Strip Container Control Solution Bottle Yellow Window - Touch blood drop (for example) (for example) or control solution here.
- Page 21 The meter has seven buttons and two soft keys. 10:02 am 2 Feb 08 bG Test Bolus Advice My Data Settings Left Soft Key Right Soft Key Up Arrow Right Arrow Enter Down Arrow Left Arrow Backlight Power On/Off NOTES: •...
- Page 22 Table of Buttons and Soft Keys Button Name Function Left Arrow Move or scroll to the left in a screen. < Right Arrow Move or scroll to the right in a screen. > up Arrow Move or scroll up in a screen. Down Arrow Move or scroll down in a screen.
- Page 23 Table of Button Combinations Button Combination Name Function When the buttons are locked, press and unlock keys unlocks the buttons. hold until the Main Menu appears. 45702_std.indb 17 10/29/09 1:41:54 PM...
-
Page 24: Summary Of Features
1.3 Summary of Features Display The meter has a full‑color graphic LCD (Liquid Crystal Display) that displays current and historical information. Backlight • The backlight helps you read the information on the meter display under different lighting conditions. • When the meter is turned on, the backlight is set to the medium level. •... - Page 25 Key Lock • The key lock feature allows you to lock all of the buttons on the meter, except for the power on/off button. • The key lock serves as a safety measure against unintentional activation of meter functions. • For more information, see Chapter 5, “Changing Meter Settings.” Signal Settings •...
- Page 26 Bolus Advice (Optional) • The term “bolus” refers to the delivery of insulin all at once rather than slowly throughout the day, usually used to compensate for meals or high blood sugar. • Bolus advice calculates a bolus for you that is adapted to the time of day and your changing situations. •...
- Page 27 Data Transfer • You can transfer your data stored on the meter to a computer. • For more information, see Chapter 4, “Managing Your Data.” Warning Limits for Hypo and Hyper Blood Sugar Levels • You can select hypo (low) and hyper (high) blood sugar limits that best fit your needs. Whenever a blood sugar test result is above or below this range, the meter displays a warning.
- Page 28 Time Blocks • Time blocks allow you to divide a day into different time periods. • Setting time blocks to fit your own schedule helps you and your healthcare professional see how patterns in your blood sugar are affected by your daily activities and lifestyle. •...
- Page 29 Without bolus advice, you need to consider the following when setting up time blocks: • Determine the appropriate time range by reviewing the end time for each time block. • Review the acceptable blood sugar target range (low and high) for each time block. With bolus advice, you need to consider the following when setting up time blocks: •...
- Page 30 Health Events health events can be selected to indicate how you are feeling or what you are doing that might affect your diabetes. The meter allows you the option of setting a percentage for each health event if you set up bolus advice.
- Page 31 Blood Sugar Test Reminders (Optional) The meter can be set up to remind you to retest your blood sugar after a high blood sugar test result, after a low blood sugar test result, or after a meal. An after high blood sugar test reminder example: •...
- Page 32 Date Reminders • The meter can be set up to remind you of upcoming appointments or dates, such as a “Dr. Visit” or a “Lab Test.” • For more information, see Chapter 5, “Changing Meter Settings.” Alarm Clock Reminders • The meter has alarm clock reminders which can be used as a helpful way to remind you when to test throughout the day.
-
Page 33: Screen Content And Navigation
1.4 Screen Content and Navigation This section provides an explanation of how to understand and navigate the screens on the meter. Each time the meter is turned on, this splash screen (ACCU‑CHEK logo screen) is displayed for a short period of time. 45702_std.indb 27 10/29/09 1:41:54 PM... - Page 34 Features on the Main Menu: Sound Icon Vibrate Icon Appears when the beeper is Appears when vibrate is turned on. 10:02 am 2 Feb 08 turned on. bG Test Date Bolus Advice Time My Data Low Battery Icon Settings Menu Options Appears when the meter batteries are low.
- Page 35 Features on a screen: Title Bar Highlighted Option View Data 2 Feb 08 Primary menu title is displayed When a menu choice or item 8:06 pm here. is selected, it is highlighted in 5:33 pm blue. Secondary Title Bar 4:06 pm Scroll Bar When necessary, a secondary 1:52 pm...
- Page 36 Information can be entered on some screens. Numerical entry fields appear as pop-up entry fields. When an option must be selected, it appears as a pop-up menu. • To open a pop‑up menu or entry field, press =. • Press to select the appropriate pop-up menu option or until the correct numerical entry is present, and then press =.
- Page 37 General Navigation Steps To change the settings or enter information into the meter: 10:02 am 2 Feb 08 10:02 am 2 Feb 08 Time Blocks Start bG Test Reminders 5:30 am 12:00 am Bolus Advice Bolus Advice 5:30 am 11:00 am My Data Meter 11:00 am...
- Page 38 Select Save by pressing Time Blocks Time Blocks 5:30 am 12:00 am 5:30 am 12:00 am 5:30 am save changes and return to the previous screen. Target Range Target Range 70 mg/dL 70 mg/dL 140 mg/dL 140 mg/dL Cancel Save Cancel Press Press...
-
Page 39: Testing Your Blood Sugar
Testing Your Blood Sugar 2.1 Overview 2.2 coding Your Meter 2.3 using the Accu-chek Aviva expert System 2.4 Performing a Blood Sugar Test 2.5 Detailed Blood Sugar Results 2.6 Understanding Blood Sugar Test Results 2.7 unusual Test Results 2.8 Symptoms of High or Low Blood Sugar 45702_std.indb 33... -
Page 40: Overview
2.1 Overview It is important to understand how to perform a blood sugar test properly. You can perform a blood sugar test from your fingertip or an alternative site. NOTE: Blood sugar and bG are interchangeable and mean the same thing. 45702_std.indb 34 10/29/09 1:41:57 PM... -
Page 41: Coding Your Meter
2.2 Coding Your Meter ensure the meter is off. Turn over the meter. Remove the old code key (if there is one in the meter) and discard it. 45702_std.indb 35 10/29/09 1:41:58 PM... - Page 42 WARNING: change the code key every time you open a new box of test strips. CAUTION: Do not force the code key into Position the new code key so Leave the code key in the the meter. It is designed to go in that the code number faces meter until you open a new box the meter only one way.
-
Page 43: Using The Accu-Chek Aviva Expert System
2.3 Using the ACCU‑CHEK Aviva Expert System Before You Start Testing Using ACCU‑CHEK Aviva Test Strips • Only use ACCU‑CHEK Aviva test strips. • Change the code key and run a control test every time you open a new box of test strips. - Page 44 WARNINGS: • Certain substances can interfere with the ACCU‑CHEK Aviva Expert blood sugar system and cause falsely high results. For example, peritoneal dialysis solutions containing icodextrin (such as Extraneal) or certain immunoglobulin therapies that contain maltose (such as Octagam 5 %) cause inaccurate results.
-
Page 45: Performing A Blood Sugar Test
• Do not change your treatment because of one blood sugar test result. • NEVER ignore symptoms of high or low blood sugar. NOTE: If you need to perform a control test, only use Accu-chek Aviva control solutions. See chapter 3, “control Testing” for more information about control testing. 45702_std.indb 39... - Page 46 Alternative Site Testing (AST) You have the option of testing other sites on your body besides the fingertip. If blood from an alternative site such as the palm, forearm, upper arm, thigh, or calf, is used, there are certain times when testing is not appropriate (see next page).
- Page 47 WARNINGS: • Do not change your treatment because of just one blood sugar test result. • NEVER ignore symptoms of high or low blood sugar. • If your blood sugar result does not match how you feel, perform a fingertip test to confirm your result. If the fingertip result still does not match how you feel, contact your healthcare professional.
- Page 48 Performing a Fingertip Blood Sugar Test or an AST Prepare > Insert Test Strip > Match Code Number > Test Blood Sample > bG Test Result Wash and dry your hands. Dirty bG Test Match Code to Vial hands could affect results. Prepare the lancing device for Code a fi ngertip test.
- Page 49 bG Test Apply Sample Yellow Release Button The Apply Sample screen Fingerstick: AST: appears. The test strip is ready Perform a fi ngerstick with the Press the lancing device fi rmly for testing. lancing device. against a fl eshy area on the alternative site.
- Page 50 bG Test Apply Sample Fingerstick: AST: Gently squeeze your fi nger to Trigger the lancing device assist the fl ow of blood. This while keeping steady pressure helps you get a blood drop. on the site. Apply pressure to the site with the lancing device to assist the fl ow of Touch the blood drop to the blood.
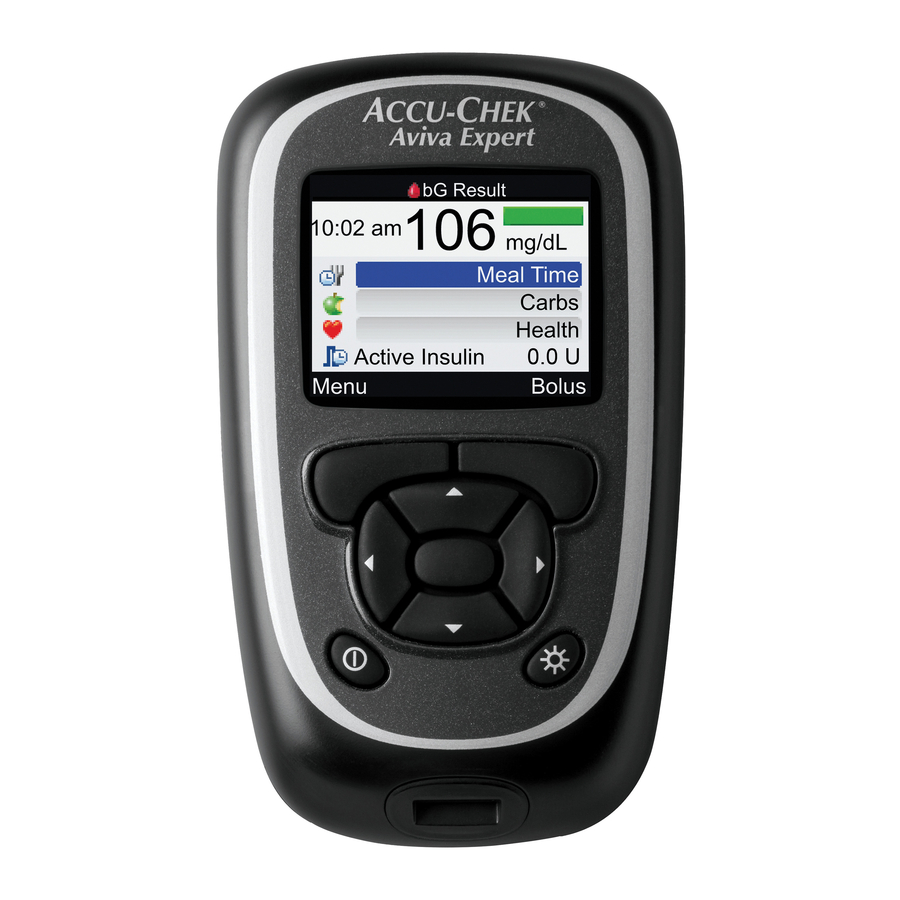
- Page 51 bG Result bG Test bG Result Analyzing 10:02 am 2 Feb 08 10:02 am mg/dL Meal Time Carbs mg/dL Health Active Insulin --- U Menu Bolus When the test strip has enough The result appears on the Approximately three seconds blood, the Analyzing screen display.
- Page 52 NOTES: • If the blood drop is too small, reapply pressure to get a sufficient blood drop. • For important information on alternative site testing, see the previous section. • For more information regarding blood sugar test results, see Section 2.6, “Understanding Blood Sugar Test Results.”...
- Page 53 NOTES: • Other ways to start a blood sugar test: • From the Main Menu, select bG Test and press =. Insert a test strip into the meter. • When a reminder notification or the key lock icon is displayed, insert a test strip into the meter. •...
-
Page 54: Detailed Blood Sugar Results
2.5 Detailed Blood Sugar Results The detailed bG Result screen displays the following information: bG Result Test Time Status Bar 10:02 am Meal Time Blood Sugar Test Result mg/dL Meal Time Unit of Measure Carbohydrates Carbs Health Event Health Active Insulin --- U Active Insulin Menu... - Page 55 Detailed bG Results > Change Meal Time/Carbs/Health Events (Optional) bG Result 10:02 am mg/dL Meal Time Carbs Health Active Insulin --- U Menu Bolus The detailed bG Result screen allows you to view and to add information to a blood sugar test result. 45702_std.indb 49 10/29/09 1:42:07 PM...
- Page 56 How to Add Information to a Blood Sugar Result To Change Meal Time: Active Insulin Display: Bolus Advice is not available Select the Meal Time entry The meter displays the field and press =. calculated amount of Active The blood sugar result is below Select either Pre-Meal, Post- Insulin.
- Page 57 NOTES: • You can add information on the detailed bG Result screen for meal time, carbs, and health events. • Review and, if necessary, update information for meal time, carbs, and health events to receive an accurate bolus recommendation. 45702_std.indb 51 10/29/09 1:42:07 PM...
-
Page 58: Understanding Blood Sugar Test Results
2.6 Understanding Blood Sugar Test Results The bG Result screen displays the following information: bG Result Test Time Test Date 10:02 am 2 Feb 08 Status Bar Blood Sugar Test Result Unit of Measure mg/dL NOTES: • If the dosed test strip is removed from the meter before results or errors are displayed, a blood sugar result will not appear. - Page 59 Status Bar The status bar on the bG Result screen indicates how the result compares to the target blood sugar range for the current time block. The following are status bar descriptions with sample displays: bG Result bG Result bG Result 10:02 am 2 Feb 08 10:02 am...
- Page 60 bG Result bG Result 10:02 am 2 Feb 08 10:02 am 2 Feb 08 Hyper mg/dL mg/dL Light blue indicates the result is Light blue with “hyper” above the target range for the indicates the result is above the current time block. The result hyper warning limit.
- Page 61 LO or HI Display NOTE: bG Result bG Result Blood Sugar Warnings 10:02 am 2 Feb 08 10:02 am 2 Feb 08 If the blood sugar test results are outside the hyper or hypo warning limits, or outside the measurement range of the meter, then a warning is displayed after the bG Test Result screen.
-
Page 62: Unusual Test Results
Repeat the test with a properly stored test strip. cool, dry place. 5. check if you followed the testing steps. Read Chapter 2, “Testing Your Blood Sugar” and test again. If you still have problems, contact Accu-chek customer care Service center at 1-800-688-4578. 45702_std.indb 56 10/29/09 1:42:08 PM... - Page 63 7. If you are still unsure of the problem … Perform a control test and repeat the test with a new test strip. If you still have problems, contact Accu-chek customer care Service center at 1-800-688-4578. After performing a control test and repeating a blood sugar test, if your blood sugar results still do not reflect the way you feel, contact your healthcare professional immediately.
-
Page 64: Symptoms Of High Or Low Blood Sugar
2.8 Symptoms of High or Low Blood Sugar Being aware of the symptoms of high or low blood sugar can help you understand your test results and decide what to do if they seem unusual. here are the most common symptoms: •... - Page 65 Comparing Your Meter Result to a Lab Result A common question is how the blood sugar results on your meter compare to the lab results. Your blood sugar can change quickly, especially after eating, taking medication, or physical activity. If you test yourself in the morning and then go to the healthcare professional’s office for a blood sugar test, your results will probably not match, even if you are fasting.
- Page 66 45702_std.indb 60 10/29/09 1:42:08 PM...
-
Page 67: Control Testing
Control Testing 3.1 Overview 3.2 Why Perform control Tests 3.3 About the control Solutions 3.4 Performing a control Test 3.5 understanding control Test Results 45702_std.indb 61 10/29/09 1:42:09 PM... -
Page 68: Overview
3.1 Overview This chapter describes how and when to perform a control test to ensure the accuracy of your blood sugar meter. It is recommended you complete a control test prior to performing a blood sugar test for the first time. NOTE: Blood sugar and bG are interchangeable and mean the same thing. -
Page 69: Why Perform Control Tests
3.2 Why Perform Control Tests Performing a control test lets you know the meter and test strips are working properly to give reliable blood sugar test results. You should perform a control test when: • You open a new box of test strips. •... -
Page 70: About The Control Solutions
3.3 About the Control Solutions • Only use ACCU‑CHEK Aviva control solutions. • The meter automatically recognizes the control solution. • The control test results are not displayed in the diary. • Write the date you opened the control solution bottle on the bottle label. The solution is good for three months from that date or until the “Use by”... -
Page 71: Performing A Control Test
3.4 Performing a Control Test The control Result screen displays the following information: Control Result Test Time Test Date 10:02 am 2 Feb 08 Control Result Unit of Measure mg/dL Menu Level You need a coded meter, a test strip, and control solution Level 1 or Level 2. The control level is printed on the bottle label. - Page 72 Insert Test Strip > Match Code Number > Test Control Solution > Control Result bG Test bG Test Match Code to Vial Apply Sample Code Insert the golden end of a The Apply Sample screen ensure the code number test strip into the meter in the appears.
- Page 73 Select the control solution you Place the meter on a flat Remove the control bottle cap. want to test. You will enter the surface, like a table. Wipe the tip of the bottle with level later in the test. a tissue. 45702_std.indb 67 10/29/09 1:42:11 PM...
- Page 74 Control Result bG Test bG Test Apply Sample Analyzing 10:02 am 2 Feb 08 mg/dL Menu Level When the test strip has enough The control result appears on control solution, the Analyzing the display. screen appears. Select Level to display the Wipe the tip of the bottle with a control solution level pop-up tissue and then cap the bottle...
- Page 75 Control Result Control Result 10:02 am 10:02 am 2 Feb 08 2 Feb 08 Level 1 No Entry Level 1 Within range mg/dL Level 2 Cancel Menu Select the control solution level Remove and discard the test and press =. strip.
- Page 76 NOTES: • If a test strip error occurs, remove and discard the used test strip and repeat the test with a new test strip. • Be careful not to put any fluids into the test strip slot. • When the Control Level screen is displayed and you select Cancel without selecting a control solution level, then No entry is chosen.
-
Page 77: Understanding Control Test Results
3.5 Understanding Control Test Results The detailed control Result screen displays the following information: Control Result Test Time Test Date 10:02 am 2 Feb 08 Control Result Control Solution Level Level 1 Result Unit of Measure mg/dL Within range Within range or Out of range Menu Press to save... - Page 78 Example Control Results When the control test result is inside the range on the test Control Result strip container, the test strips 10:02 am 2 Feb 08 and the meter are working Example properly. Level 1 Range (mg/dL) Level 1 25-55 Level 2 255-345 mg/dL Within range...
- Page 79 Control Result Control Result Control Result 10:02 am 2 Feb 08 10:02 am 2 Feb 08 10:02 am 2 Feb 08 Level 1 Level 1 Level 1 Out of range mg/dL Menu Menu Menu If the control test result is If “hI”...
- Page 80 Control Result 10:02 am 2 Feb 08 mg/dL Menu If the meter stored No entry for the control solution level, then “---” appears with no indication of in or out of range. 45702_std.indb 74 10/29/09 1:42:14 PM...
- Page 81 6. check if you followed the testing steps. Repeat the control test with a new test strip. If you still have problems, contact Accu-chek customer care Service center at 1-800-688-4578. 45702_std.indb 75 10/29/09 1:42:14 PM...
- Page 82 9. If you are still unsure of the problem … Repeat the control test with a new test strip. If you still have problems, contact Accu-chek customer care Service center at 1-800-688-4578. 45702_std.indb 76 10/29/09 1:42:14 PM...
-
Page 83: Managing Your Data
Managing Your Data 4.1 Overview 4.2 Viewing or Modifying Your Data 4.3 Adding New Data 4.4 Reporting Your Data 4.5 Downloading Your Data to a computer 45702_std.indb 77 10/29/09 1:42:14 PM... -
Page 84: Overview
The reports the meter displays help you get the most from your Accu-chek Aviva expert meter. From the diary records stored in the meter, you are able to view a specific blood sugar test record with its attributes (e.g., meal time, carbs, health event, bolus. - Page 85 Storing Test Results The meter automatically stores up to 1,000 diary records with the time and date. You can review up to 250 diary records on the meter or up to 1,000 diary records using a computer with compatible software. Diary records are stored from the newest to the oldest.
- Page 86 • Do not change your therapy based on one individual record or test result in the diary. • This chapter shows sample screens. The screens may look slightly different from the screens on the meter. If you have any questions about the meter screens, contact Accu-chek customer care Service center at 1-800-688-4578.
-
Page 87: Viewing Or Modifying Your Data
4.2 Viewing or Modifying Your Data The View Data screen displays the following information: Date of Record(s) Carbs Icon View Data 2 Feb 08 8:06 pm Time of Blood Sugar Unit of Measure 5:33 pm Test 4:06 pm Blood Sugar Result 1:52 pm Blood Sugar Test 9:03 am... - Page 88 NOTES: • If data are not available, the No Data Available screen is displayed. • The View Data screen displays the records in the order in which they occurred with the most recent record shown on top. • For the blood sugar result: •...
- Page 89 Refer to the following for icon descriptions: Icon Icon Name Description Basal Insulin Basal insulin entered into the diary record. bG Test Icon is displayed when information exists for this diary record regarding a blood sugar test. Meal Time Icon is displayed when information exists for this diary record regarding meal time.
- Page 90 You can view a diary record with its attributes (blood sugar value, meal time, carbs, health event, bolus, and basal). Main Menu > My Data > View Data 10:02 am 2 Feb 08 10:02 am 2 Feb 08 bG Test View Data Bolus Advice Add Data...
- Page 91 Blood Sugar View: Bolus View: Carbs View: View Data View Data View Data 2 Feb 08 2 Feb 08 2 Feb 08 8:06 pm 8:06 pm 8:06 pm 5:33 pm 5:33 pm 5:33 pm 4:06 pm 4:06 pm 4:06 pm 1:52 pm 1:52 pm 1:52 pm...
- Page 92 NOTES: View Detail Modify Data • To cancel changes or return 10:02 am 2 Feb 08 10:02 am 2 Feb 08 to the View Detail screen, 69 mg/dL bG Value 69 mg/dL Meal Time press ,. Meal Time Carbs 60 g 60 g •...
- Page 93 The following fields cannot be modified with the specified condition: Fields Cannot be modified if the … Bolus Blood sugar result was below the hypo warning limit Meal Time Record has no blood sugar value Meal Time, carbs, health event, Record has been used for bolus advice Bolus, and Basal 45702_std.indb 87...
-
Page 94: Adding New Data
4.3 Adding New Data You can add data to a diary record for carbs, health, bolus, and basal. The Add Data screen displays the following information: Time Entry Field Carbs Entry Field Add Data Date Entry Field Health Entry Field DD MMM Carbs Bolus Entry Field... - Page 95 Main Menu > My Data > Add Data 10:02 am 2 Feb 08 10:02 am 2 Feb 08 Add Data bG Test View Data Bolus Advice Add Data My Data Reports DD MMM Settings Data Transfer Carbs Health Bolus Menu Cancel Save From the Main Menu, select...
- Page 96 NOTES: Make additions to other entry • The meter initially displays the current date and the current time. fields, as needed. You can change the date and time when adding a diary record, To save the changes and although the date and time cannot be set in the future. return to the My Data screen, •...
-
Page 97: Reporting Your Data
4.4 Reporting Your Data Time Range Blood Sugar Standard Last 7 days Deviation Tests Meal Times Overall calculated for the time range Pre Meal Number of Tests Post Meal Bedtime used to calculate the averages Other and standard deviations Back Blood Sugar Average calculated for the time range 45702_std.indb 91... - Page 98 NOTES: • If data are not available to calculate averages, the No Data Available screen is displayed. • Standard deviation measures how much the blood sugar test results are scattered around the blood sugar average. A low standard deviation means the blood sugar test results are tightly clustered around the blood sugar average;...
- Page 99 Reporting Your Blood Sugar Averages The meter displays your blood sugar averages and standard deviations for the time range you choose (7, 14, 30, 60, or 90 days). Main Menu > My Data > Reports > bG Averages 10:02 am 2 Feb 08 Reports 10:02 am...
- Page 100 Last 7 days Tests Overall Pre Meal Post Meal Bedtime Other Back The blood sugar averages are displayed. To display blood sugar averages for another time range (last 7, 14, 30, 60, or 90 days), press either < > to scroll the screen until you reach the time range you need.
- Page 101 Reporting Your Data Trends The meter displays your blood sugar record trends for the time range you choose (last 8 hours, 24 hours, 48 hours, or 7 days). Main Menu > My Data > Reports > Trend 10:02 am 2 Feb 08 Reports 10:02 am 2 Feb 08...
- Page 102 Trend Graph Screen Time Range Bolus Icon Last 7 days Overall Meal Time Selection Bolus Unit of Measure Bolus Amount Indicator Value Blood Sugar Unit of Measure Carbs Amount Indicator Value Blood Sugar Icon Carbs Unit of Measure 26 27 28 29 01 02 03 Back Table Times or Days of...
- Page 103 NOTES: • If data are not available to display the trend graph, the No Data Available screen is displayed. • Trend graphs do not include corrupt results or control results. • If (time change icon) is shown at the bottom of the Trend Graph screen, the time and date of one or more data points in the trend graph may not match the time stamp in My Data because the meter clock has been changed.
- Page 104 Trend Graph To display a trend graph for Press to display the Table Last 7 days Overall another meal time selection (proceed to the next section (Overall, Pre Meal, Post Meal, for more information). Bedtime, or Other), press either to highlight To return to the Reports the meal time selection field screen, press ,.
- Page 105 NOTE: The meter saves the current settings (time range, meal time, and graph view) when you select Back or when the meter powers off. 45702_std.indb 99 10/29/09 1:42:20 PM...
- Page 106 Trend Table Screen Time Range Carbs Icon with Carbs Unit of Last 8 hours Overall Measure Meal Time Selection 2 Feb 08 8:06 pm Bolus Icon with the Bolus Unit Date of Records 5:33 pm of Measure 4:06 pm Blood Sugar Icon with 1:52 pm Blood Sugar Unit of Back...
- Page 107 NOTES: • If data are not available to display the trend table, the No Data Available screen is displayed. • Trend tables do not include corrupt results or control results. • If (time change icon) is shown at the bottom of the Trend Table screen, the time and date of one or more data points in the trend table may not match the time stamp in My Data because the meter clock has been changed.
- Page 108 Trend Table To display a trend table for To display a trend table for Last 8 hours Overall another time range (last 8 another meal time selection 2 Feb 08 hours, 24 hours, 48 hours, or 7 (Overall, Pre Meal, Post Meal, 8:06 pm days), press to highlight the...
- Page 109 NOTE: Press to display the Graph The meter saves the current settings (time range, meal time, and (see previous section for more table view) when you select Back or when the meter powers off. information). To return to the Reports screen, press ,.
- Page 110 Reporting Your Standard Day The meter displays (for a standard day) your blood sugar averages, number of tests, and standard deviations within predetermined time blocks for the time range you choose (last 7, 14, 30, 60, or 90 days). Main Menu > My Data > Reports > Standard Day 10:02 am 2 Feb 08 10:02 am...
- Page 111 Standard Day Graph Screen Time Range Box for Each Time Block Last 7 days Overall • “X” in center of box indicates the Meal Time Selection average of all blood sugar results Blood Sugar Unit of for the selected criteria. Measure •...
- Page 112 NOTES: • If data are not available to display the standard day graph, the No Data Available screen is displayed. • The standard day graph does not include corrupt results, control results, HI values, or LO values. 45702_std.indb 106 10/29/09 1:42:22 PM...
- Page 113 Standard Day Graph To display a standard day Press to display the Table Last 7 days Overall graph for another meal (proceed to the next section for time selection (Overall, Pre more information). Meal, Post Meal, Bedtime, To return to the Reports screen, or Other), press either press ,.
- Page 114 NOTE: The meter saves the current settings (time range, meal time, and graph view) when you select Back or when the meter powers off. 45702_std.indb 108 10/29/09 1:42:22 PM...
- Page 115 Standard Day Table Screen Time Range Standard Deviation (SD) Last 7 days Overall Meal Time Selection Number of Tests Tests 12:00 - 4:00 Time Block 4:00 - 8:00 8:00 - 12:00 Blood Sugar Average 12:00 - 4:00 Back Graph 45702_std.indb 109 10/29/09 1:42:23 PM...
- Page 116 NOTES: • If data are not available to display the standard day table, the No Data Available screen is displayed. • Standard day table calculations do not include corrupt results, control results, or HI and LO results. • For a standard deviation to be displayed for a given time block, there must have been two or more tests recorded during the time block.
- Page 117 Standard Day Table To display a standard day table To display a standard day table Last 7 days Overall for another time range (last 7, for another meal time selection Tests 14, 30, 60, or 90 days), press (Overall, Pre Meal, Post Meal, 12:00 - 4:00 to highlight the time range Bedtime, or Other), press either...
- Page 118 NOTE: Press to display the Graph The meter saves the current settings (time range, meal time, and (see previous section for more table view) when you select Back or when the meter powers off. information). To return to the Reports screen, press ,.
- Page 119 Reporting Your Standard Week The meter displays (for a standard week) your blood sugar averages, number of tests, and standard deviations for each day of the week for the time range you choose (last 7, 14, 30, 60, or 90 days). Main Menu >...
- Page 120 Standard Week Graph Screen Time Range Arrow Last 7 days Overall Indicates blood sugar average is off the top Meal Time Selection of the graph (“X” is not displayed) Blood Sugar Unit of Box for Each Time Block Measure • “X” in center of box indicates the average Blood Sugar Icon of all blood sugar results for the selected Back...
- Page 121 NOTES: • If data are not available to display the standard week graph, the No Data Available screen is displayed. • The standard week graph does not include corrupt results, control results, HI values, or LO values. 45702_std.indb 115 10/29/09 1:42:24 PM...
- Page 122 Standard Week Graph To display a standard week Press to display the Table Last 7 days Overall graph for another meal (proceed to the next section for time selection (Overall, Pre more information). Meal, Post Meal, Bedtime, To return to the Reports or Other), press either screen, press ,.
- Page 123 NOTE: The meter saves the current settings (time range, meal time, and graph view) when you select Back or when the meter powers off. 45702_std.indb 117 10/29/09 1:42:24 PM...
- Page 124 Standard Week Table Screen Time Range Standard Deviation (SD) Last 7 days Overall Meal Time Selection Number of Tests Tests Monday Day of Week Tuesday Wednesday Blood Sugar Average Thursday Back Graph NOTES: • If data are not available to display the standard week table, the No Data Available screen is displayed. •...
- Page 125 Standard Week Table To display a standard week To display a standard week Last 7 days Overall table for another time range graph for another meal Tests (last 7, 14, 30, 60, or 90 days), time selection (Overall, Pre Monday select the time range selection Meal, Post Meal, Bedtime, Tuesday...
- Page 126 NOTE: Press to display the Graph The meter saves the current settings (time range, meal time, and (see previous section for more table view) when you select Back or when the meter powers off. information). To return to the Reports screen, press ,.
- Page 127 Reporting Your Target The meter displays a pie chart illustrating your blood sugar records as “Above,” “Within,” “Below,” and “Hypo” for the time range you choose (last 7, 14, 30, 60, or 90 days). Main Menu > My Data > Reports > Target 10:02 am 2 Feb 08 10:02 am...
- Page 128 Target Graph Screen Time Range Meal Time Selection Last 7 days Overall Legend Pie Chart Above Blood sugar test result Represents the percentages for the Within categories blood sugar test result categories Below Hypo Back Table NOTES: • If data are not available to display the target graph, the No Data Available screen is displayed. •...
- Page 129 Target Graph To display a target graph for Press to display the Table Last 7 days Overall another meal time selection (proceed to the next section for (Overall, Pre Meal, Post Meal, more information). Above Bedtime, or Other), press Within To return to the Reports either to highlight...
- Page 130 NOTE: The meter saves the current settings (time range, meal time, and graph view) when you select Back or when the meter powers off. 45702_std.indb 124 10/29/09 1:42:25 PM...
- Page 131 Target Table Screen Time Range Meal Time Selection Last 7 days Overall Legend Percentage of Occurrence Above Blood sugar test result Within categories Below Hypo Back Graph NOTES: • If results or data are not available for the selected time period and meal time, the No Data Available screen is displayed.
- Page 132 Target Table To display a target table for Press to display the Target Last 7 days Overall another meal time selection Graph (see previous section for (Overall, Pre Meal, Post Meal, more information). Above Bedtime, or Other), press Within To return to the Reports Below either to highlight...
- Page 133 NOTE: The meter saves the current settings (time range, meal time, and table view) when you select Back or when the meter powers off. 45702_std.indb 127 10/29/09 1:42:26 PM...
-
Page 134: Downloading Your Data To A Computer
4.5 Downloading Your Data to a Computer You can transfer your stored results to a computer to track, identify patterns, and print. Install the software according Run the software program and 10:02 am 2 Feb 08 to the instructions. follow the instructions about bG Test Bolus Advice connect the computer cable... - Page 135 Data Transfer 10:02 am 2 Feb 08 Infrared (IR) Window View Data Add Data Reports Data Transfer Data Transfer Transferring Data Transferring Data Menu Select Data Transfer and press Locate the infrared (IR) window Follow the prompts on your on the top of the meter. computer software to start the Locate the IR window on the data transfer.
- Page 136 Data Transfer If the data did not transfer successfully, turn off the meter, turn the meter back on, and try again. If you still have problems, contact Accu-chek customer care Service center at 1-800-688-4578. Complete Once the data transfer is...
-
Page 137: Changing Meter Settings
Changing Meter Settings 5.1 Overview 5.2 Setting bG Test Reminders: After High bG, After Low bG, After Meal 5.3 Setting Alarm Clock Reminders: bG Test, Injection, Other 5.4 Setting Date Reminders: Dr. Visit, Lab Test 5.5 Setting Bolus Advice for the First Time 5.6 Setting Time Blocks, Health Events, Advice Options: Bolus Advice Set Up 5.7 Setting Warning Limits: hyper, hypo 5.8 Turning Key Lock On or Off... -
Page 138: Overview
5.1 Overview You have the flexibility to change the ACCU‑CHEK Aviva Expert meter settings that you initially selected during the Setup Wizard process. You can make adjustments to the meter settings in order to meet changing conditions. consult with your healthcare professional to ensure the appropriate settings are selected. -
Page 139: Setting Bg Test Reminders: After High Bg, After Low Bg, After Meal
5.2 Setting bG Test Reminders: After High bG, After Low bG, After Meal bG Test Reminders: Important Information • At the scheduled time, the meter turns on and displays the reminder (if a test strip has not been inserted). however, if the meter is already on when the reminder is scheduled and no blood sugar test was performed, the reminder is displayed when the meter powers down. - Page 140 Main Menu > Settings > Reminders > bG Test Reminders 10:02 am 2 Feb 08 10:02 am 2 Feb 08 Reminders bG Test Reminders bG Test Reminders Bolus Advice Bolus Advice Alarm Clock Date Reminders My Data Meter Settings Sound/Vibrate Time/Date Time Blocks Menu...
- Page 141 To Change the Remind After bG Test Reminders After High bG After High bG Reminder Time: After Low bG bG Threshold 140 mg/dL Select the Remind After entry After Meal Remind After 2:00 field and press =. HH MM Set the amount of time after a high blood sugar test result you want to be reminded to Back...
- Page 142 After Meal After Low bG To Change the Remind After Reminder Reminder Time: Snack Size 24 g bG Threshold 90 mg/dL Select the Remind After entry 2:00 Remind After 0:15 Remind After field and press =. HH MM HH MM Set the amount of time after a low blood sugar test result you want to be reminded to...
- Page 143 Set the amount of time after Advice Options a meal (carb entry larger than the snack size) you want to be New Snack Size has reminded to retest your blood also been applied to sugar and press =. After Meal Reminder To save the changes, press If you did not change the Snack If you changed the Snack...
- Page 144 NOTES: • Remind After is displayed as “HH:MM” (e.g., 1:30) where “H” is hour and “M” is minute. • When the meter is displaying the Remind After Meal screen for the first time, if bolus advice has not been set up, the default for Snack Size is no entry (“‑‑‑g”). If bolus advice has been set up, the default value is the value set for the Snack Size on the Advice Options screen.
-
Page 145: Setting Alarm Clock Reminders: Bg Test, Injection, Other
5.3 Setting Alarm Clock Reminders: bG Test, Injection, Other Alarm clock reminders are a helpful way to remind you to test your blood sugar, or for any other daily appointment. You can set up to eight reminders per day. Alarm Clock Reminders: Important Information •... - Page 146 • When you perform a blood sugar test, the meter dismisses Alarm Clock bG Test reminders which are pending within the next 30 minutes. • When you enter basal insulin data, the meter dismisses Alarm Clock Injection Reminders which are pending within the next 30 minutes.
- Page 147 Main Menu > Settings > Reminders > Alarm Clock 10:02 am 2 Feb 08 10:02 am 2 Feb 08 Reminders bG Test Reminders bG Test Reminders Bolus Advice Bolus Advice Alarm Clock My Data Meter Date Reminders Settings Sound/Vibrate Time/Date Time Blocks Menu Back...
- Page 148 To Turn Off a Reminder: Alarm Clock Select the type of Reminder HH MM A/P bG Test 9:00 pm entry field (i.e., bG Test, 12:30 pm Other Injection or Other) and press bG Test 3:00 pm 12:00 am Select Off and press =. 12:00 am Repeat the above steps to turn Cancel...
- Page 149 NOTES: • To cancel changes or return to the Reminders screen, press ,. • Time for the Alarm Clock reminders can be set in 15‑minute increments, where “HH” is hour, “MM” is minutes, and with “am” or “pm” for the 12-hour format. •...
-
Page 150: Setting Date Reminders: Dr. Visit, Lab Test
5.4 Setting Date Reminders: Dr. Visit, Lab Test Date reminders are a helpful way to remind you of an upcoming Dr. visit or lab test. Date Reminders: Important Information • Displayed when you turn on the meter and a test strip has not been inserted. •... - Page 151 Main Menu > Settings > Reminders > Date Reminders 10:02 am 2 Feb 08 10:02 am 2 Feb 08 Reminders bG Test Reminders bG Test Reminders Bolus Advice Bolus Advice Alarm Clock Date Reminders My Data Meter Settings Sound/Vibrate Time/Date Time Blocks Menu Back...
- Page 152 To Set the Date: Dr. Visit Date Reminders Reminder Select the Date entry field and Dr. Visit Lab Test press =. Appointment Date/Time Date 2 Feb Set the Day and press =. DD MMM Set the Month and press =. Time 10:00 am Set the Year and press =.
- Page 153 To Set the Time (Optional): Lab Test Reminder Select the Time entry field and press =. Appointment Date/Time Date 2 Feb Set the Time and press =. DD MMM Time 10:00 am To save the changes and HH MM A/P (Optional) return to the Date Reminders Cancel...
- Page 154 NOTES: • Setting a time for a Date Reminder is optional. If you choose not to set a time, ensure the Time entry field value is “‑‑:‑‑” (no entry). • To cancel changes or to return to the Date Reminders screen, press ,. •...
-
Page 155: Setting Bolus Advice For The First Time
5.5 Setting Bolus Advice for the First Time Set Up Bolus Advice If you did not set up bolus advice when you went through the Setup Wizard and have now decided to utilize bolus advice, proceed with this section. Once you do set up bolus advice, you cannot turn it off. It is suggested that you review the information in the Getting Started Guide before continuing. - Page 156 Time Blocks–Bolus Advice Screen Time Block Start Time Time Block End Time Time Blocks 12:00 am 5:30 am Target Range Lower Target Range Upper Value Target Range Value 70 mg/dL 140 mg/dL Carb Ratio–Number of Carbs Carb Ratio Carb Ratio–Number of 10 g Insulin Units Cancel...
- Page 157 Main Menu > Settings > Bolus Advice 10:02 am 2 Feb 08 10:02 am 2 Feb 08 Setup bG Test Reminders Bolus Advice Bolus Advice Would you like to My Data Meter receive bolus advice Settings Sound/Vibrate from your Meter? Time/Date Time Blocks Menu...
- Page 158 Setup Time Blocks Time Blocks Start 12:00 am 5:30 am 12:00 am 5:30 am Target Range Edit at least one time 5:30 am 11:00 am 70 mg/dL 140 mg/dL block by selecting a time 11:00 am 5:00 pm Carb Ratio block and pressing enter 5:00 pm 9:30 pm...
- Page 159 To Change the Target Range: To Change the Insulin Time Blocks Select the entry field for the Sensitivity: lower value of the Target Select the entry field for the Settings copied to all Range and press =. number of Insulin units and Time Blocks.
- Page 160 To Remove a Time Block: Time Blocks Time Blocks Start 9:30 pm 12:00 am Select the Time Block you 12:00 am 5:30 am want to remove and press =. Target Range 5:30 am 11:00 am 70 mg/dL 140 mg/dL 11:00 am 5:00 pm Carb Ratio 5:00 pm...
- Page 161 Health Events Advice Options Time Blocks Meal Rise 100 mg/dL Exercise 1 -10% 12:00 am 5:30 am 24 g Exercise 2 -20% Snack Size Target Range Acting Time Stress 4:00 70 mg/dL 140 mg/dL Offset Time Illness 1:00 Carb Ratio HH MM Premenstrual 10 g...
- Page 162 Set the Acting Time duration Advice Options Bolus Advice and press =. Time Blocks Health Events New Snack Size has To Change the Offset Time: Advice Options also been applied to Select the Offset Time entry After Meal Reminder field and press =. Set the Offset Time duration Back and press =.
- Page 163 Bolus Advice Options Meal Rise, Snack Size, Acting Time, and Offset Time are Bolus Advice Options. Below are detailed descriptions of each of these settings. Meal Rise During or after meals, an increase in blood sugar levels is considered normal within a certain range, even though a meal bolus has been delivered.
-
Page 164: Setting Time Blocks, Health Events, Advice Options: Bolus Advice Set Up
5.6 Setting Time Blocks, Health Events, Advice Options: Bolus Advice Set Up If bolus advice has been set up, use this section for: • Adding or removing time blocks • Changing the time of day when time blocks occur • Changing the values for target range, carb ratio, and insulin sensitivity for any time block •... - Page 165 Setting Time Blocks–Bolus Advice is Set Up Main Menu > Settings > Bolus Advice > Time Blocks 10:02 am 2 Feb 08 10:02 am 2 Feb 08 Bolus Advice bG Test Reminders Time Blocks Bolus Advice Bolus Advice Health Events My Data Meter Advice Options...
- Page 166 To Add a Time Block: Proceed to “To change the Time Blocks Start Select the last time block and Time Blocks.” 12:00 am 5:30 am press =. To Remove a Time Block: 5:30 am 11:00 am Select the Time Block you Time Blocks 11:00 am 5:00 pm...
- Page 167 Set the value and press =. To save the changes and Time Blocks 12:00 am 5:30 am return to the Time Blocks To Change the Carb Ratio: screen, press .. Target Range Select the entry field for the 70 mg/dL 140 mg/dL Proceed to “To change the number of Insulin units and...
- Page 168 Select the entry field for the Time Blocks Start Insulin Sensitivity level and 12:00 am 5:30 am press =. 5:30 am 11:00 am Set the Insulin Sensitivity level 11:00 am 5:00 pm and press =. 5:00 pm 9:30 pm Press .. 9:30 pm 12:00 am Back...
- Page 169 Setting Health Events–Bolus Advice is Set Up Main Menu > Settings > Bolus Advice > Health Events 10:02 am 2 Feb 08 10:02 am 2 Feb 08 Bolus Advice Reminders bG Test Time Blocks Bolus Advice Bolus Advice Health Events My Data Meter Advice Options...
- Page 170 Health Events Exercise 1 -10% Exercise 2 -20% Stress +20% Illness Premenstrual Cancel Save To Change the Health Events: Select the entry field of the health event to be changed and press =. Set the percentage and press Repeat the previous steps to change other health events.
- Page 171 Setting Bolus Advice Options–Bolus Advice is Set Up Main Menu > Settings > Bolus Advice > Advice Options 10:02 am 10:02 am 2 Feb 08 2 Feb 08 Bolus Advice Reminders bG Test Time Blocks Bolus Advice Bolus Advice Health Events My Data Meter Advice Options...
- Page 172 To Change the Snack Size: If you did not change the Snack Advice Options Meal Rise 100 mg/dL Select the Snack Size entry Size, the meter returns to the Snack Size 24 g field and press =. Bolus Advice screen. Acting Time 4:00 Set the Snack Size amount...
-
Page 173: Setting Warning Limits: Hyper, Hypo
5.7 Setting Warning Limits: Hyper, Hypo You can set blood sugar warning limits for hyperglycemia (Hyper) or hypoglycemia (Hypo) conditions. Once these blood sugar limit values have been set, if your test result is above the hyper warning limit, the meter displays the Above Hyper Warning Limit message: “Consider checking for ketones, bG and insulin regularly.”... - Page 174 Main Menu > Settings > Meter > Warning Limits 10:02 am 2 Feb 08 10:02 am 2 Feb 08 Meter bG Test Reminders Warning Limits Key Lock Bolus Advice Bolus Advice My Data Meter Language Units Settings Sound/Vibrate Time/Date Time Blocks Menu Back Select Warning Limits and...
- Page 175 To Change the Hypo Blood Warning Limits 220 mg/dL Sugar Level: Hyper Hypo 60 mg/dL Select the Hypo entry field and press =. Set the Hypo (lower) blood sugar level and press =. Cancel Save To save the changes and return to the Meter Menu To Change the Hyper Blood screen, press ..
-
Page 176: Turning Key Lock On Or Off
5.8 Turning Key Lock On or Off The key lock feature allows you to lock all of the buttons on the meter, except for the power on/off button. This serves as a safety measure against unintentional activation of meter functions. 45702_std.indb 170 10/29/09 1:42:39 PM... - Page 177 Main Menu > Settings > Meter > Key Lock 10:02 am 2 Feb 08 10:02 am 2 Feb 08 Meter bG Test Reminders Warning Limits Key Lock Bolus Advice Bolus Advice My Data Meter Language Units Settings Sound/Vibrate Time/Date Time Blocks Menu Back Select key Lock and press =.
- Page 178 Key Lock: Important Key Lock Key Lock Information When the buttons are locked, When Key Lock is On you can still turn the meter on the keys will be locked and off. You can also adjust the every time the Meter turns off backlight.
-
Page 179: Setting The Language
5.9 Setting the Language You can select a language from the predefined list. 45702_std.indb 173 10/29/09 1:42:40 PM... - Page 180 Main Menu > Settings > Meter > Language 10:02 am 2 Feb 08 10:02 am 2 Feb 08 Meter bG Test Reminders Warning Limits Key Lock Bolus Advice Bolus Advice My Data Meter Language Units Settings Sound/Vibrate Time/Date Time Blocks Menu Back Select Language and press...
- Page 181 Language Language English Cancel Save Press to display the Language options. Select the desired Language and press =. To save the change and return to the Meter Menu screen, press .. 45702_std.indb 175 10/29/09 1:42:41 PM...
-
Page 182: Setting Units: Carbs, Insulin Increment, Max Bolus
5.10 Setting Units: Carbs, Insulin Increment, Max Bolus You can set up the meter for different carbohydrate (carbs) units (Grams, BE, KE, or CC). The insulin increment can be set to either 0.5 or 1u. You can set the max bolus for any whole number between 0 and 50. - Page 183 Main Menu > Settings > Meter > Units 10:02 am 2 Feb 08 10:02 am 2 Feb 08 Meter bG Test Reminders Warning Limits Key Lock Bolus Advice Bolus Advice My Data Meter Language Units Settings Sound/Vibrate Time/Date Time Blocks Menu Back Select units and press =.
- Page 184 NOTE: To Change the Max Bolus: Units For more information on the Carbs Grams Select the Max Bolus entry units for carbohydrates and Insulin Increment field and press =. carbohydrate equivalents, see Set the Max Bolus level and Max Bolus 50 U Appendix B, “Carb Units.”...
-
Page 185: Setting The Beeper, Vibrate, Key Sound
5.11 Setting the Beeper, Vibrate, Key Sound You can set up the meter for sound mode and/or vibration mode. The meter features different sound (beeper) tones. Sounds may occur for: • Button presses • Errors • Warnings • Reminders NOTES: •... - Page 186 Main Menu > Settings > Sound/Vibrate 10:02 am 2 Feb 08 10:02 am 2 Feb 08 Sound/Vibrate bG Test Reminders Beeper Medium Bolus Advice Bolus Advice Vibrate My Data Meter Key Sound Settings Sound/Vibrate Time/Date Time Blocks Menu Cancel Save To Change the Beeper Sound From the Main Menu, select Select Sound/Vibrate and...
- Page 187 To Change the Key Sound: Select the key Sound entry field and press =. Select the key Sound mode (On or Off) and press =. To save the changes and return to the Settings Menu screen, press .. 45702_std.indb 181 10/29/09 1:42:43 PM...
-
Page 188: Setting The Time Format, Time, Date
5.12 Setting the Time Format, Time, Date NOTES: • Changing the date and time will impact the Trend Graph and the Trend Table (see “Reporting Your Data Trends” in Section 4.4, “Reporting Your Data”). • For 12‑hour time format, time is displayed as “HH:MM A/P” (example: 3:53 pm) and for 24‑hour time format, time is displayed as “HH:MM”... - Page 189 Main Menu > Settings > Time/Date 10:02 am 2 Feb 08 10:02 am 2 Feb 08 Time/Date bG Test Reminders Time Format 12 hr Bolus Advice Bolus Advice Time 00 am My Data Meter 2 Feb Date Settings Sound/Vibrate DD MMM Time/Date Time Blocks Menu...
- Page 190 To Change the Time: Select the Time entry field and press =. Set the hour and press =. Set the Minutes and press =. If 12-hour format, select am or pm and press =. To Change the Date: Select the Date entry field and press =.
-
Page 191: Setting Time Blocks: Bolus Advice Not Set Up
5.13 Setting Time Blocks: Bolus Advice Not Set Up This section is for changing, adding, and removing time blocks only if bolus advice has not been set up. For each time block, you can set up different blood sugar target ranges. It is suggested that you review the Getting Started Guide before continuing. - Page 192 Change End Time, Target Range Lower Value, and/or Target Range Upper Value Main Menu > Settings > Time Blocks 10:02 am 2 Feb 08 10:02 am 2 Feb 08 Time Blocks Start bG Test Reminders 12:00 am 5:30 am Bolus Advice Bolus Advice 5:30 am 11:00 am...
- Page 193 To Change the Target Range: Time Blocks Time Blocks Start Select the entry field for the 12:00 am 5:30 am 12:00 am 5:30 am lower value of the Target Target Range 5:30 am 11:00 am Range and press =. 70 mg/dL 140 mg/dL 11:00 am 5:00 pm...
- Page 194 NOTES: • When you set the end time, the meter sets this end time as the start time for the next time block. • The end time can be set in 30‑minute increments. • To cancel changes press ,. 45702_std.indb 188 10/29/09 1:42:45 PM...
- Page 195 Add a Time Block Main Menu > Settings > Time Blocks 10:02 am 2 Feb 08 10:02 am 2 Feb 08 Time Blocks Start Reminders bG Test 12:00 am 5:30 am Bolus Advice Bolus Advice 5:30 am 11:00 am Meter My Data 11:00 am 5:00 pm...
- Page 196 Set the end Time of the update the end Times and Time Blocks 9:30 pm 12:00 am selected Time Block and press Target Ranges for all time =. This will be the start time blocks, as needed. See Target Range of the added time block.
- Page 197 Remove a Time Block Main Menu > Settings > Time Blocks Time Blocks 10:02 am 2 Feb 08 10:02 am 2 Feb 08 Start bG Test Reminders 5:30 am 12:00 am Bolus Advice Bolus Advice 5:30 am 11:00 am My Data Meter 11:00 am 5:00 pm...
- Page 198 update the end Times Time Blocks 12:00 am 5:30 am and Target Ranges for the remaining time blocks, as Target Range needed. See “change end 70 mg/dL 140 mg/dL Time, Target Range Lower Value, and/or Target Range upper Value” in this section. Cancel Save Select the End Time entry field...
-
Page 199: Backlight Settings
5.14 Backlight Settings The backlight on your Accu-chek Aviva expert meter helps you read the information on the meter display under different lighting conditions. You can adjust the backlight level by pressing the backlight button on the front of the meter. The backlight adjusts from low, to medium, to high, and back to low again. - Page 200 NOTES: • When the meter is turned on, the backlight is set to medium. • When the backlight is set to high or medium and no button activity has occurred for approximately 15 seconds, the meter goes to low backlight (to conserve battery life). The meter restores the original backlight setting when you press a button, insert a test strip, or when the meter displays the bG Results screen.
-
Page 201: Icons, Reminders, Warnings, And Errors
Icons, Reminders, Warnings, and Errors 6.1 Overview 6.2 List of Icons 6.3 Confirming a Reminder, Warning, or Error 6.4 List of Reminders 6.5 List of Warnings 6.6 List of errors 45702_std.indb 195 10/29/09 1:42:48 PM... -
Page 202: Overview
6.1 Overview This chapter provides you with detailed listings of all the icons, reminders, warnings, and errors included in the meter. NOTE: Blood sugar and bG are interchangeable and mean the same thing. 45702_std.indb 196 10/29/09 1:42:48 PM... -
Page 203: List Of Icons
6.2 List of Icons The icons and icon names in the meter are: Icon Name Icon Icon Name Icon Add Data control Test Analyzing Date Basal Insulin Download (Data Transfer) Beeper error Blood Sugar Averages health Blood Sugar Test Low Battery Bolus Advice Meal Time Bolus Advice (Settings) - Page 204 Icon Name Icon Icon Name Icon Reminder Time Block (Settings) Time change Reminders (Settings) Time/Date (Settings) Reports Vibrate Settings View Data Sound/Vibrate (Settings) Warning Time 45702_std.indb 198 10/29/09 1:42:49 PM...
-
Page 205: Confirming A Reminder, Warning, Or Error
6.3 Confirming a Reminder, Warning, or Error To confirm (or dismiss) most reminders or warnings, press .. Some error messages require a different confirmation, such as “Retest with new Strip” or “Replace batteries now.” To place some reminders in the snooze mode, press ,. -
Page 206: List Of Reminders
6.4 List of Reminders Reminder Screen Example Reminder Icon Reminder Title Reminder After Meal Retest Snooze Reminder Message Reschedule the reminder. Carbs entry higher than This is not available for all Dismiss Snack Size setting. Retest. reminders. Dismiss Snooze NOTES: •... - Page 207 For instructions on how to set up meter reminders, see chapter 5, “changing Meter Settings.” The reminders available on the meter are: Reminder Title Reminder Message Left Soft Key Right Soft Key Snooze Time After Meal Retest carbs entry higher than Snack Snooze Dismiss 5 minutes...
- Page 208 Reminder Title Reminder Message Left Soft Key Right Soft Key Snooze Time Dr. Visit Tomorrow If the Dr. Visit time has been Dismiss set: You have a Dr. Appointment tomorrow at (Settings Dr. Visit Time)¹ Or, if the Dr. Visit time has not been set: You have a Dr.
- Page 209 Reminder Title Reminder Message Left Soft Key Right Soft Key Snooze Time Lab Test Tomorrow If the lab test time has been Dismiss set: You have a Lab Test tomorrow at (Settings Lab Test Time) Or, if the lab test time has not been set: You have a Lab Test tomorrow Low bG Retest...
- Page 210 Reminders: Important Information • When two or more event reminders occur at the same time, the meter displays the event reminder with the highest priority first: 1. bG Test Reminders (After High bG, After Low bG, and After Meal) 2. Alarm Clock Reminders (bG Test, Injection and Other) 3.
- Page 211 Low bG Retest Reminder • When your blood sugar test result is less than the low blood sugar threshold setting you have set up (see Chapter 5, “Changing Meter Settings”), then the meter schedules a Low bG Retest reminder for the time duration you have set up.
- Page 212 High bG Retest Reminder • When your blood sugar test result is greater than the high blood sugar threshold setting you have set up (see Chapter 5, “Changing Meter Settings”), then the meter schedules a High bG Retest reminder for the time duration you have set up.
- Page 213 After Meal Reminder • When you enter carbohydrates into the diary through one of the following screens and the carbohydrates entered are greater than the Snack Size setting, then the meter schedules an After Meal reminder for the time duration you have set up (see Chapter 5, “Changing Meter Settings”). The meter maintains the duration of this scheduled reminder regardless of meter time and date changes.
- Page 214 Alarm Clock Reminders for bG Test, Injection and Other • At the scheduled time, the meter turns on and displays the reminder (if a test strip has not been inserted). • When the meter displays an Alarm Clock reminder and you do not press any meter buttons, after 30 seconds the meter turns off and displays the reminder again in 2 minutes.
- Page 215 • Injection Alarm Clock Reminder • If the meter is already on when the reminder is scheduled and no basal insulin data was entered, the reminder is displayed when the meter powers down. • Dismiss all active Injection reminders by pressing .. •...
-
Page 216: List Of Warnings
6.5 List of Warnings Warning Screen Example Warning Icon Warning Title Warning Bolus Too High Warning Message Only shown on a few Check bolus entry amount. Yes or OK warning screens Continue? NOTE: The meter beeps when it displays a warning if the beeper setting is on. 45702_std.indb 210 10/29/09 1:42:50 PM... - Page 217 The warnings the meter may display are: Warning Title Warning Message Left Soft Key Right Soft Key Above hyper Warning Consider checking for ketones, bG and Limit insulin regularly Beep/Vibrate Off Beep and Vibrate settings cannot both be turned off at same time Below Hypo Warning Limit Eat fast carbs of at least (number of carbs) Retest bG bG Test Missed...
- Page 218 Warning Title Warning Message Left Soft Key Right Soft Key Bolus Too High check bolus entry amount. continue? Calculation Out of Range No Bolus Advice available carbohydrate Ratio carb Ratio seems unusual. check entries. code key Missing Turn off Meter and insert valid code key corrupt Language choose another language Diary entry used For...
- Page 219 Warning Title Warning Message Left Soft Key Right Soft Key HI bG Warning Consider checking bG, ketones and insulin Insulin Sensitivity Insulin Sensitivity seems unusual. check entries. Invalid Bolus Advice Acting time must be greater than or equal Times to offset time Invalid Date Reenter valid date Invalid hyper Values...
- Page 220 Warning Title Warning Message Left Soft Key Right Soft Key Invalid Target Range Lower target range value above upper target range value Invalid Target Range Range selected conflicts with Hyper and/or hypo Warning Limit settings LO bG Warning Retest bG. Contact your doctor. Meter Battery Low Replace soon.
-
Page 221: List Of Errors
6.6 List of Errors Error Screen Example Error Icon Error Title Error E-55 Code Key Menu Error Message Expired This option is not available Turn Meter off, replace for all errors. Code Key and Strips Menu NOTE: The meter beeps when it displays an error, even if the beeper setting is turned off. 45702_std.indb 215 10/29/09 1:42:51 PM... - Page 222 The errors the meter may display are: Error Title Error Message Left Soft Key Right Soft Key e-51 Reinsert or replace with new Strip Bad Strip Error e-52 Turn Meter off, reinsert or replace code key Menu code key error e-53 Retest with new Strip Bad Test Error...
- Page 223 Error Title Error Message Left Soft Key Right Soft Key e-59 Replace batteries now Battery Empty e-60 correct time/date if necessary Menu Time/Date error “Menu” is only displayed when the meter is in a bG test screen. “OK” is only displayed after the splash screen (ACCU‑CHEK logo screen). If the meter is powering up, then “OK”...
- Page 224 45702_std.indb 218 10/29/09 1:42:51 PM...
-
Page 225: Care And Maintenance
Care and Maintenance 7.1 Overview 7.2 Changing the Batteries 7.3 Power-Saving Tips 7.4 cleaning the Meter 7.5 Maintenance and Testing 45702_std.indb 219 10/29/09 1:42:51 PM... -
Page 226: Overview
7.1 Overview It is important to properly care for and maintain your Accu-chek Aviva expert meter. If you have any questions about the care and maintenance of your meter, contact Accu-chek customer care Service center at 1-800-688-4578. 45702_std.indb 220 10/29/09 1:42:51 PM... -
Page 227: Changing The Batteries
7.2 Changing the Batteries Remove the battery door Remove the old batteries from Put the battery door back in from the back of the meter by the meter. place and snap it closed. pushing the tab in the direction Insert three AAA batteries with of the arrow and pulling up the + and - ends matching the door. - Page 228 CAUTIONS: • Using batteries other than those supplied or recommended for use with the meter may significantly reduce the life of the batteries. Batteries other than those recommended may leak and corrode the battery contacts within the meter. using batteries not supplied or recommended may void the warranty.
- Page 229 NOTES: • Alkaline batteries are recommended for use with the meter. • After you change the batteries, the meter prompts you to confirm the time and date settings. • It is a good idea to have spare, packaged batteries available. •...
-
Page 230: Power-Saving Tips
7.3 Power‑Saving Tips To conserve battery life: • Use the low beeper setting • Only turn on the vibration feature when it is needed • Turn off the meter when you are finished rather than utilizing the auto power off feature 45702_std.indb 224 10/29/09 1:42:52 PM... -
Page 231: Cleaning The Meter
7.4 Cleaning the Meter caring for the meter is easy: just keep it free of dust. If you need to clean it, follow these guidelines carefully to help you get the best performance possible: • Ensure the meter is off •... -
Page 232: Maintenance And Testing
• Perform a control test with each new vial of test strips. • If the meter is not working properly, contact Accu-chek customer care Service center at 1-800-688-4578. 45702_std.indb 226 10/29/09 1:42:52 PM... -
Page 233: Troubleshooting
Troubleshooting 8.1 Overview 8.2 Troubleshooting the Accu-chek Aviva expert Meter 45702_std.indb 227 10/29/09 1:42:52 PM... -
Page 234: Overview
For most problems, the meter displays a message with a short description of the symptom and, along with it, a proposed solution. This chapter goes into more detail by describing the symptom, the possible cause, and the possible solution. If the possible solutions do not fix the problem, contact Accu-chek customer care Service center at 1-800-688-4578. -
Page 235: Troubleshooting The Accu-Chek Aviva Expert Meter
8.2 Troubleshooting the ACCU‑CHEK Aviva Expert Meter Display Shows Possible Cause(s) Possible Solution(s) The display is Batteries are dead. Install new batteries. See chapter 7, “care and blank or the meter Maintenance.” will not turn on. Display is damaged. contact Accu-chek customer care Service center at 1-800-688-4578. - Page 236 Display Shows Possible Cause(s) Possible Solution(s) Beep/Vibrate Off Beep and Vibrate settings Ensure that either the Beep or Vibrate setting is cannot be turned off at the turned on. See chapter 5, “changing Meter same time. Settings.” Below Hypo Your test result is below the Treat your low blood sugar as recommended by Warning Limit hypo warning limit set in the...
- Page 237 Display Shows Possible Cause(s) Possible Solution(s) carbohydrate Ratio carbohydrate ratio is outside check your entries and contact your healthcare of the acceptable meter professional to determine the appropriate settings. range. code key Missing The meter is not coded or the Turn off the meter and recode it.
- Page 238 Verify that the code number printed on the test strip container matches the code number printed on the code key currently inserted in the meter. If the message reappears, contact Accu-chek customer care Service center at 1-800-688-4578. 45702_std.indb 232 10/29/09 1:42:52 PM...
- Page 239 Discard the code key and its accompanying test strips. Insert a new code key into the meter. If this does not fix the problem, contact Accu-chek customer care Service center at 1-800-688-4578. 45702_std.indb 233 10/29/09 1:42:52 PM...
- Page 240 Display Shows Possible Cause(s) Possible Solution(s) E‑53 Bad Test A meter or test strip error has Discard the test strip and repeat the test. error occurred. Your blood sugar may be If this confirms how you feel, contact your extremely high. healthcare professional immediately.
- Page 241 Display Shows Possible Cause(s) Possible Solution(s) e-54 Not enough Not enough blood or control Discard the test strip and repeat the test. Sample solution was drawn into the test strip for measurement or was applied after the test has started. e-55 code key The code key is from an ensure the code key number matches the code...
- Page 242 Turn on the meter and perform a blood sugar or and reinserted. control test. If the problem persists, contact Accu-chek customer care Service center at 1-800-688-4578. e-58 Temp. error The temperature is above or Move the meter to an area within the proper...
- Page 243 Display Shows Possible Cause(s) Possible Solution(s) e-60 Time/Date The time and date settings ensure the time and date are correct and adjust, if error may be incorrect. necessary. See chapter 5, “changing Meter You have changed the Settings.” batteries. HI bG Warning Your blood sugar may be If you are experiencing any of the common higher than the measuring...
- Page 244 Display Shows Possible Cause(s) Possible Solution(s) Invalid Date The date entered is invalid Re-enter date. (dates for reminders cannot be set to occur in the past). Invalid hyper The hyper warning limit value Reset the hyper warning limit or revise the target Values must be greater than all of ranges in time blocks and re-enter the hyper...
- Page 245 Display Shows Possible Cause(s) Possible Solution(s) Invalid Record The time/date entered is Re-enter time/date. Time/Date invalid (Add Data entries cannot be set to occur in the future). Invalid Target The lower target range value Reset the target range values. Range is above the upper target enter the correct lower target range value and range value.
- Page 246 Display Shows Possible Cause(s) Possible Solution(s) LO bG Warning Your blood sugar may be If you are experiencing any of the common lower than the measuring symptoms of low blood sugar, contact your range of the system. healthcare professional immediately. Treat your low blood sugar as recommended by your healthcare professional.
- Page 247 Display Shows Possible Cause(s) Possible Solution(s) Test Strips expiring The test strips expire at the Before the end of the month, insert a new code key end of the current month. from a new box of test strips (dispose of expiring test strips) and ensure the code key number matches the code number on the test strip container.
- Page 248 45702_std.indb 242 10/29/09 1:42:53 PM...
- Page 249 Technical Information 9.1 Overview 9.2 Product Limitations 9.3 Specifications 9.4 Product Safety Information 9.5 Disposing of the Meter, Strips, Lancets, and Batteries 9.6 Warranty 9.7 Additional Supplies 9.8 Information for healthcare Professionals 45702_std.indb 243 10/29/09 1:42:53 PM...
-
Page 250: Overview
9.1 Overview This chapter provides you with important performance information regarding the meter. 45702_std.indb 244 10/29/09 1:42:53 PM... -
Page 251: Product Limitations
9.2 Product Limitations Please read the literature packaged with your test strips to find the latest information on product specifications and limitations. 45702_std.indb 245 10/29/09 1:42:53 PM... -
Page 252: Specifications
9.3 Specifications Blood volume Refer to the test strip package insert. Sample type Fresh whole blood Measuring time Refer to the test strip package insert. Measuring range Refer to the test strip package insert. Test strip storage conditions Refer to the test strip package insert. Meter storage conditions (with -4 °F to 122 °F batteries inserted) - Page 253 Weight Approximately 3.6 oz with batteries inserted construction hand-held Protection class Meter type The Accu-chek Aviva expert meter is suitable for continuous operation. control solution storage conditions 36 °F to 90 °F Interface IR; LeD/IReD – class 1 45702_std.indb 247...
-
Page 254: Product Safety Information
Interference from other electrically driven equipment is not to be anticipated. Performance Analysis The performance data for the Accu-chek Aviva Expert system (ACCU‑CHEK Aviva expert meter with ACCU‑CHEK Aviva test strips) were obtained using capillary blood from diabetic patients (method comparison, accuracy), venous blood (repeatability), and control solution (reproducibility). - Page 255 Measuring Principle Refer to your test strip package insert for more information. WARNINGS: • Strong electromagnetic fields may interfere with the proper operation of the meter. Do not use this meter close to sources of strong electromagnetic radiation. • To avoid electrostatic discharge, do not use the meter in a very dry environment, especially one in which synthetic materials are present.
-
Page 256: Disposing Of The Meter, Strips, Lancets, And Batteries
9.5 Disposing of the Meter, Strips, Lancets, and Batteries WARNINGS: • Any product coming in contact with blood is considered contaminated (potentially infectious).* • During normal testing any blood sugar meter may come in contact with blood. Lancing devices may also be considered sharps. - Page 257 • Consider recycling of the meters and batteries at an appropriate facility. Be aware the meter is potentially hazardous electronics scrap (e‑scrap) and should be disposed of accordingly. The batteries are potentially hazardous also and should be disposed of accordingly. •...
-
Page 258: Warranty
4-year period, the meter does not work properly because of a defect in materials or workmanship, Roche Diagnostics will replace it with a new ACCU‑CHEK Aviva Expert meter or equivalent product free of charge. The warranty on the replacement meter will expire on the date of the original warranty expiration or 90 days after the shipment of a replacement system, whichever period is longer. - Page 259 THE PRECEEDING WARRANTY IS EXCLUSIVE OF ALL OTHER WARRANTIES, AND ROCHE DIAGNOSTICS MAKES NO OTHER WARRANTIES, EXPRESS OR IMPLIED, INCLUDING WITHOUT LIMITATION, THE IMPLIED WARRANTY OF MERCHANTABILITY OR FITNESS FOR A PARTICULAR PURPOSE. IN NO EVENT SHALL ROCHE DIAGNOSTICS BE LIABLE TO THE PURCHASER OR ANY OTHER PERSON FOR ANY INCIDENTAL, CONSEQUENTIAL, INDIRECT, SPECIAL, OR PUNITIVE DAMAGES ARISING FROM OR IN ANY WAY CONNECTED WITH THE PURCHASE OR OPERATION OF THE METER OR ITS PARTS.
- Page 260 Customers experiencing difficulties should review the troubleshooting information in Chapter 8 of this booklet. Further inquiries should be directed to ACCU‑CHEK Customer Care Service Center at 1‑800‑688‑4578. Be sure to fill out and mail the Warranty Card that comes with the ACCU‑CHEK Aviva Expert system. 45702_std.indb 254...
- Page 261 A RESTRICTED LICENSE LIMITS USE OF THE ACCU‑CHEK AVIVA EXPERT SYSTEM—READ CAREFULLY THE LIMITATIONS RECITED BELOW. The ACCU‑CHEK Aviva Expert system (meter, including the code key, and test strips) and its use are protected by u.S. Patent Nos. 6,645,368; 5,366,609; 5,352,351; 5,053,199; 5,122,244; 7,276,146; 7,276,147; and Re.
- Page 262 Accu-chek Aviva test strip packages. If you do not agree to the terms and conditions of the restricted license, you may return, at the place of purchase, the unused Accu-chek Aviva expert system for a full refund.
- Page 263 A RESTRICTED LICENSE LIMITS USE OF THE ACCU‑CHEK MULTICLIX DEVICE (lancet driver and lancets). READ CAREFULLY THE LIMITATIONS RECITED BELOW. The Accu-chek Multiclix device and its use are protected by u.S. Patent Nos. 4,924,879; Re. 35,803; 6,419,661. A license to use the Accu-chek Multiclix device is only granted when Accu-chek Multiclix lancet drums are used with the Accu-chek Multiclix device.
- Page 264 Accu-chek Multiclix device that includes this restricted license, then this restricted license applies regardless of any additional offers found in Accu-chek Multiclix device packages. If you do not agree to the terms and conditions of the restricted license, you may return, at the place of purchase, the unused ACCU‑CHEK Multiclix device for a full refund.
-
Page 265: Additional Supplies
9.7 Additional Supplies The following supplies and accessories are available from your authorized Roche Diabetes healthcare center, pharmacies, or your medical/surgical supply dealer: Test Strips Accu-chek Aviva test strips Control Solutions Accu-chek Aviva control solutions 45702_std.indb 259 10/29/09 1:42:53 PM... -
Page 266: Information For Healthcare Professionals
9.8 Information for Healthcare Professionals WARNING: Healthcare Professionals: Follow the infection control procedures appropriate for your facility. A drop of fresh, whole blood is required to perform a blood sugar test. Refer to the test strip package insert for additional healthcare professional information. 45702_std.indb 260 10/29/09 1:42:53 PM... - Page 267 Recommending Alternative Site Testing to Patients Decisions about whether to recommend alternative site testing (AST) should take into account the motivation and knowledge level of the patient and his or her ability to understand the considerations relative to diabetes and AST. If you are considering recommending AST for your patients, you need to understand that there is a potential for a significant difference between fingertip/palm and alternative site blood sugar test results.
- Page 268 45702_std.indb 262 10/29/09 1:42:53 PM...
- Page 269 Appendices Appendix A: Abbreviations Abbreviation Definition Ante Meridiem (12‑hour clock notation for “before noon”) Alternative Site Testing Bread Equivalent (equal to 12 grams of carbohydrates) Blood Glucose (blood sugar) carbs carbohydrates Carbohydrate Choice (equal to 15 grams of carbohydrates) °F Degrees Fahrenheit Grams hyper...
- Page 270 Abbreviation Definition Infrared International Organization for Standardization Kohlenhydrateinheit (equal to 10 grams of carbohydrates) Liquid Crystal Display mg/dL Milligrams per Deciliter Not Applicable NIST National Institute of Standards and Technology (United States) Post Meridiem (12‑hour clock notation for “after noon”) Standard Deviation Units (basal insulin units) 45702_std.indb 264...
- Page 271 Appendix B: Carb Units For carbohydrates, the following units of measure are available on the meter. Abbreviation Unit of Measurement Gram Equivalent Grams* 1 gram kohlenhydrateinheit 10 grams Bread Equivalent 12 grams carbohydrate choice 15 grams *Standard unit of measure in the U.S. 45702_std.indb 265 10/29/09 1:42:54 PM...
- Page 272 Appendix C: Explanation of Symbols You may encounter the following symbols on the packaging, on the type plate, and in the instructions for the meter, shown here with their meaning. Warning (refer to accompanying documents). Please refer to safety‑related notes in the owner’s booklets accompanying this instrument.
- Page 273 Appendix D: Meter Settings and Range Limits Data Type Unit of Measurement MIN MAX Increments Default Setting Acting Time hours:minutes 1:30 8:00 0:15 4:00 Basal Insulin units Insulin Increment bG Threshold (High) mg/dL hyper Warning Limit bG Threshold (Low) mg/dL hypo Warning Limit Bolus Insulin units...
- Page 274 Data Type Unit of Measurement MIN MAX Increments Default Setting Exercise 1 (health event) Exercise 2 (health event) hyper Warning Limit mg/dL hypo Warning Limit mg/dL Illness (health event) Insulin Increment units Insulin Sensitivity (bG) mg/dL No entry (“‑‑‑mg/dL”) Insulin Sensitivity units (insulin) Max Bolus...
- Page 275 Data Type Unit of Measurement MIN MAX Increments Default Setting Meal Rise (bG) mg/dL Offset Time hours:minutes 0:45 Acting 0:15 1:00 Time Premenstrual (health event) Snack Size (carbs) grams No entry (“‑‑‑ g”) No entry (“‑‑‑ BE”) No entry (“‑‑‑ KE”) No entry (“‑‑‑...
- Page 276 The following are the default settings for bG test reminders. To turn on a bG test reminder, see “Setting Alarm Clock Reminders: bG Test, Other” in Chapter 5, “Changing Meter Settings.” Test Reminder Default Time of Day 7:00 am 9:00 am 11:00 am 12:00 pm 2:00 pm...
- Page 277 The following are the default settings for the time blocks. Talk to your healthcare professional about setting up time blocks to help you manage your diabetes. To adjust the time blocks, see chapter 5, “changing Meter Settings.” Time Block 12‑Hour Format 12:00 am–5:30 am 5:30 am–11:00 am 11:00 am–5:00 pm...
- Page 278 45702_std.indb 272 10/29/09 1:42:54 PM...
- Page 279 Glossary Term Definition 7-day average Includes results generated today and the previous 6 days. Acting Time The period of time from the start of the meal rise or the delivery of a correction bolus until your blood sugar level is expected to return to the target level.
- Page 280 Term Definition Basal A dose of long-acting insulin intended to maintain normal blood sugar levels between meals and at night. bG Test Reminders Reminders to retest your blood sugar after a high blood sugar test result, after a low blood sugar test result, or after a meal. bG Threshold A bG test reminder setting.
- Page 281 Term Definition carb Ratio The amount of insulin necessary to account for a certain number of carbohydrates. Carbohydrates (or Carbs) carbohydrate foods include sugars and starches. carbohydrates can raise blood sugar levels slowly or rapidly. carbohydrates are generally counted to calculate a bolus insulin dose. caution Provides information that, if not followed, could result in material hazards (damage to or destruction of equipment or materials).
- Page 282 Term Definition current Time Refers to the time you set through the menu Settings and then in the Time/Date screen. Period of time starting at 12:00 am and ending at 11:59 pm. end Time The end time of a time block. health events A pop‑up menu selection (fasting, exercise 1, stress, illness, exercise 2, or premenstrual) that allows information to be stored with a blood...
- Page 283 Term Definition hypo hypoglycemia: an abnormally low level of sugar in the blood. hypo Warning Limit When your blood sugar test result is below the hypo warning limit, a warning is displayed. Insulin Increment The meter rounds off the insulin amount to be delivered, which the meter calculates if bolus advice is set up, or when you manually enter bolus and basal insulin data into the diary.
- Page 284 Term Definition The test result is below the meter’s measurement range. Max Bolus The maximum amount of bolus insulin to be delivered at one time. A bolus that is larger than the max bolus amount requires an additional confirmation. This serves as a safety measure against unintended large boluses.
- Page 285 Term Definition Offset Time Offset time takes into account the expected delay for the blood sugar level to actually fall during the acting time of insulin in the body. It describes the first time period within the acting time. Remind After A bG test reminder setting.
- Page 286 Term Definition Standard Deviation As it is used in this owner’s booklet, standard deviation measures how widely spread the bG test results are (e.g., if the bG test results are close to the bG average, then the standard deviation is small). Start Time The start time of a time block.
- Page 287 Index abbreviations, 263–265 backlight, 18, 193–194 acting time, 155–157, button, 13, 15–16 active insulin, 48–50 batteries, advice options, 155–157, 165–166 changing, 221–223 after high bG test reminder, 133–137, 200, 202, low, 28, 179, 204, type, 221, after low bG test reminder, 133–137, 200, BE, 176–178, 203–205 beeper, setting, 28,...
- Page 288 bolus advice options. See advice options data, buttons, 13, 15–17 adding, 49–51, 88–90 downloading to a computer, 21, 128–130 modifying, 81–87 carbohydrates, 48–51, 86, reporting, 91–127 units of measure, 176–178, time change, 96–97, 100–101 carb ratio, 150, 153, 161, trends, 95–103 carbs.
- Page 289 fatigue, icons, listing, 83, 197–198 frequent urination, infrared (IR) window, 13–14, injection reminder. See alarm clock reminder, injection g (grams), 176–178, insulin sensitivity, 150, 153, 161–162, graph, standard day, 105–108 standard week, 114–117 ke, 176–178, target, 122–124 key lock, 17, 19, 170–172 trend, 96–99...
- Page 290 maintenance, meter, rapid heartbeat, meal rise, 155, 157, reminders, meal time, 48–51, 86–87 important information, 204–209 meter, list of, 200–203 settings and range limits, 267–271 priority, summary of features, 13, 18–26 safety information, 248–249 navigation, 27–32 screen, features, 28–30 numbness, scroll bar, snack size, 136–137, 155–157, snooze, 133, 139,...
- Page 291 sweating, troubleshooting, 229–242 symbols, explanation, units of measure. See carbohydrates, units of table, measure standard day, 109–112 unlock keys, 17, 170–172 standard week 118–120 use by date, 37, 56, 64, target, 125–127 trend, 100–103 target range, 150, 153, 161, 185–187, vibrate setting, 28, 179–181 target, reporting,...
- Page 292 45702_std.indb 286 10/29/09 1:42:55 PM...
- Page 293 45702_std.indb 287 10/29/09 1:42:55 PM...
- Page 294 45702_std.indb 288 10/29/09 1:42:55 PM...