Table of Contents
Advertisement
Quick Links
User's Manual
Usage Notice
Introduction
Basic Operations
User Settings
Multi Media Operation
Troubleshooting
Appendices
Read this manual carefully before you use this machine and keep
it handy for future reference. For safe and correct use, be sure to
read the Precautions in this manual before using the machine.
RICOH PJ WXC1210
Advertisement
Table of Contents

Related Manuals for Ricoh PJ WXC1210


Summary of Contents for Ricoh PJ WXC1210
- Page 1 RICOH PJ WXC1210 User's Manual Usage Notice Introduction Basic Operations User Settings Multi Media Operation Troubleshooting Appendices Read this manual carefully before you use this machine and keep it handy for future reference. For safe and correct use, be sure to...
-
Page 3: Table Of Contents
Table of Contents Table of Contents ......1 Setup ............ 42 Advanced ..........44 Usage Notice ........2 Security ..........45 Precautions .........2 Multi Media Operation ....47 Safety Labels of This Machine ..10 Multi-Media Introduction ....47 Regulation & Safety Notices .....11 How to use Multi-Media projection with Other Information ......14 USB and SD-Card ........ -
Page 4: Usage Notice
Usage Notice Precautions Follow all warnings, precautions and maintenance as recommended in this user’s guide to maximize the life of your unit. ■ Indicates a potentially hazardous situation which, if Indicates a potentially hazardous situation which, if Warning- instructions are not followed, could result in death or instructions are not followed, could result in death or serious injury. - Page 5 Usage Notice ■ Warning- Do not use other power cord or AC adapter than supplied with this machine. Doing so could result in fire or electric shock. ■ Warning- Do not use flammable sprays or solvents in the vicinity of this machine. Also, avoid placeing these items in the vicinity of this machine.
- Page 6 Usage Notice ■ Warning- If the machine emits smoke or odours, or if it behaves unusually, you must turn off its power immediately. After turning off the power, be sure to disconnect the power cord plug from the wall outlet. Then contact your service representative and report the problem.
- Page 7 For sales or service representatives: - Use brackets that are strong enough to support the projector. * PJ WXC1210 Series weighs less than 0.5kg. - The projector must be installed in a location that is sturdy enough to support the full weight of the projector and brackets.
- Page 8 Usage Notice weight of the projector (0.5kg). 20mm Temp. LED Menu 20mm ■ Caution- Keep the machine away from humidity and dust. Otherwise a fire or an electric shock might occur. ■ Caution- Do not place any objects on the machine. Doing so may cause the machine to topple over, possibly resulting in injury.
- Page 9 Usage Notice in fire. ■ Caution- Do not place low heat resistant material near the exhaust vents. Hot air may come from the exhaust vents, resulting in damage to the machine or an accident. ■ Caution- Do not obstruct the machine’s vents. Doing so risks fire caused by overheated internal components.
- Page 10 Failing to take these precautions could result in fire or electric shock. ■ Caution- Do not use attachments not recommended by RICOH. Use of an incompatible attachments could cause hazards or damage to the product. ■ Caution-...
- Page 11 Usage Notice REMOTE CONTROL BATTERY Warning • Never throw batteries into a fire. Using the batteries improperly may cause them to explode or leak and may result in serious injury. If battery-leaking fluid contacts skin, wash the fluid off immediately with clean water and consult a doctor.
-
Page 12: Safety Labels Of This Machine
Usage Notice Safety Labels of This Machine Do not look into the lens while the LED lamp is on. The strong light from the LED lamp may cause damage to your eyesight. If you wish to discard this product, please contact your local authorities, the shop where you bought this product, your local dealer or sales/service representatives. -
Page 13: Regulation & Safety Notices
Ricoh Co., Ltd. 3-6 Nakamagome 1-chome, Ohta-ku, Tokyo. 143-8555, Japan Importer: RICOH Europe SCM B.V. Blankenweg 24, 4612 RC Bergen op Zoom, The Netherlands User Information on Electrical and Electronic Equipment Users in the countries where this symbol shown in this section has been specified in national law on collection and treatment of E-waste. - Page 14 Usage Notice Our Products contain high quality components and are designed to facilitate recycling. Our products or product packaging are marked with the symbol below. This product contains substances which are harmful to humans and the environment. Please dispose of this product in accordance with local regulations. The symbol indicates that the product must not be treated as municipal waste.
- Page 15 Usage Notice Notice: Users in the EU Note for the Battery and/or Accumulator Symbol In accordance with the Battery Directive 2006/66/EC Article 20 Information for end-users Annex II, the above symbol is printed on batteries and accumulators. This symbol means that in the European Union, used batteries and accumulators should be disposed of separately from your household waste.
-
Page 16: Other Information
Usage Notice Other Information Copyrights to Images When projecting images using the projector, be careful not to infringe the copyright of protected materials. The following are examples that may infringe the copyright of protected materials. • Broadcasting images or movies for commercial purposes •... -
Page 17: Introduction
Introduction Product Features Outstanding features include: WXGA(1280×800) ■ Single chip DLP technology ■ ® SDTV(480i/576i), EDTV(480p/576p), ■ HDTV(720p/1080i/1080p) compatible LED light source, 20000H life ■ Multi-Auto functions: Auto detection, Auto image and ■ Auto saving the adjustments Full function remote control ■... -
Page 18: Package Overview
Introduction Package Overview This projector comes with all the items shown below. Check to make sure your unit is complete. Contact your dealer immediately if anything is missing. AV Mute Auto Input Enter Due to the difference Menu in applications for each Focus Volume Keystone... -
Page 19: Product Overview
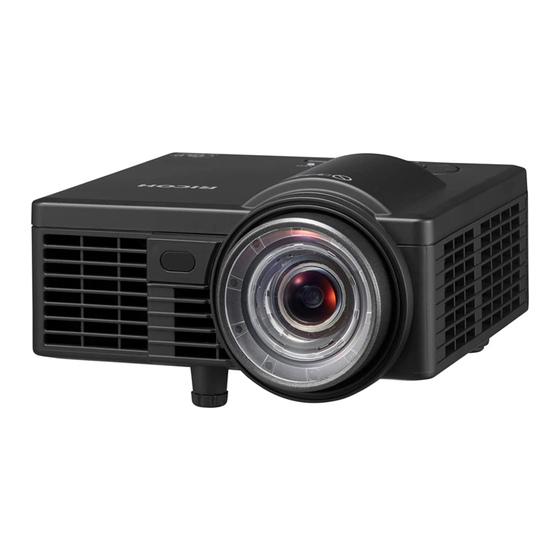
Introduction Product Overview 1. Control panel 5. Adjustable feet 6. Ventilation (inlet) 2. Lens 7. Connection ports 3. Laser sensor for detecting auto focus 8. Ventilation (outlet) 4. Lens cap 9. Infrared remote sensor English English... -
Page 20: Connection Ports
Introduction Connection Ports 1. Anti-theft lock hole 2. Type-C terminal (for AC adapter) 3. Type-C terminal 4. Type-A terminal 5. MicroSD card slot 6. HDMI terminal English... -
Page 21: Control Panel
Introduction Control Panel Temp. LED Menu Power Refer to the “Power On/Off the Projector” section. Please see pages 27~29. LED Indicator Indicate the projector’s LED status. Temp. Indicator Indicate the projector’s temperature status. Menu Press the “Menu” button to launch the Onscreen display (OSD). -
Page 22: Remote Control
Introduction Remote Control AV Mute Auto Input Enter Menu Focus Volume Keystone Type C HDMI Media Picture Aspect Move Magnify AV Mute Mutes/unmutes audio and/or video depending on the chosen mute option in the OSD menu (“Menu” > “Setup” > “Advanced” > “Mute”). Auto Automatically synchronizes the projector to the input source. - Page 23 Introduction Focus Adjusts the lens focus. Keystone Adjusts image distortion caused by tilting the projector. HDMI Selects HDMI terminal. Type C Selects USB Type-C terminal. No function No function. Play/Pause Plays/pauses media file. Rewind Searches backward. Move Enters Moving mode. Power Turns the projector on/off.
-
Page 24: Remote Control Battery Installation
Introduction Remote Control Battery Installation Push the clip to Install new batteries (AAA/ Close the battery cover release the battery R03). Ensure that you have and press it down until it cover. the batteries’ polarity (+/–) clicks into place. Do not mix aligned correctly. -
Page 25: Remote Control Operating Range
Introduction Remote Control Operating Range ■ When pointing the remote control directly toward the projector (Remote control signal receiver), operating range for the remote control is within 3m (9.84 ft). Also, operation range available for four directions (up, down, left, right to the projector) is ± 30° and the operation distance may become short. -
Page 26: 360° Installation
The projector must be installed in a location that is sturdy enough to support the full weight of the projector and brackets. (PJ WXC1210 Series weighs approximately 0.5kg). Ensure that the projector is tightly secured to the brackets. ... -
Page 27: Basic Operations
Basic Operations Connecting the Projector Connect to Computer Make sure that the power plug is fully inserted into all the AC adapter AC inlet, the wall outlet, and projector Type-C connector. Due to the difference in applications for each country, some regions may have different accessories. -
Page 28: Connect To Video
Basic Operations Connect to Video DVD player, Set-top Box HDTV receiver Make sure that the power plug is fully inserted into all the AC adapter AC inlet, the wall outlet, and projector DC jack. (*)Type-C port supports 5V/1.5A output. (**)USB HDD drive is not supported. -
Page 29: Powering On/Off The Projector
Basic Operations Powering On/Off the Projector Powering On the Projector 1. Ensure that the power cord, AC adapter, and signal cable are securely connected. The Power indicator will light amber. 2. Remove the lens cap. If you connect 3. Turn on the projector by pressing power key on the control multiple sources at panel or the remote control. -
Page 30: Powering Off The Projector
Basic Operations Powering Off the Projector 1. Press the power key to turn off the projector, you will see a message as below on the on-screen display. Power Off Power Off? Press power key again. 2. Press the power key again to confirm. 3. -
Page 31: Warning Indicator
Basic Operations Warning Indicator When the “Temp” indicator flashes amber (3 secs on, 1 sec off, ) and the message below displays on-screen, it indicates the air vents might be blocked or ambient temperature may be above 40° C overheated. Ensure that the air vents are not blocked and that the ambient temperature is within operating range. -
Page 32: Adjusting The Projected Image
Basic Operations Adjusting the Projected Image Adjusting the Height of Projector Image The projector is equipped with adjustable feet to raise and lower the image to fill the screen. To raise/lower the image: 1. Use to fine-tune the display angle You can raise the projector front up to 12 degrees by rotating the... -
Page 33: Adjusting The Projector Focus
Basic Operations Adjusting the Projector Focus To focus the image, adjust “Manual Focus” in “OSD” > “Display” menu. Refer to page 41. ■ Warning- Avoid damaging the projector. DO NOT rotate the focus ring by hands. The projector will focus at distances from 2.82 to 5.64 feet ... -
Page 34: Adjusting Projection Image Size
Projection Image Size from 50” to 100” (127.0 to 254.0 cm). Width Screen Screen (H) Side View Offset (Hd) Projection Distance (D) RICOH PJ WXC1210 Screen Size W x H Projection Distance (D) Diagonal length (inch) (inch) size of 16:10 (feet) -
Page 35: User Settings
User Settings On Screen Display (OSD) The Projector has a multilingual On Screen Display that allows you to make image adjustments and change a variety of settings. The projector will automatically detect the source. How to operate To open the OSD, press the “Menu” button on the Control Panel or on the Remote Control. -
Page 36: Menu Tree
User Settings Menu Tree Main Menu 2nd Level 3rd Level Range Default Value HDMI Media Input Source HDMI Type-C Volume 0~10 Bright (Depends on Default Picture Mode sRGB Setting of Color Table) Wide Brightness 0~10 Contrast 0~10 Auto Format Auto 16:9 16:10 50%/75%/... - Page 37 User Settings Main Menu 2nd Level 3rd Level Range Default Value Auto Keystone Keystone -40~+40 Auto keystone on: No reverse Left/Right reverse Auto keystone off: No reverse Projection Left/right reverse Display Up/down reverse Up/down and Left/Right reverse Auto Focus 1. Based on Auto Focus function, manual fine- tune the motor steps.
- Page 38 User Settings Main Menu 2nd Level 3rd Level Range Default Value English Germany French Italian Spanish Portuguese Polish Dutch Language English Russian Swedish 中文 (繁) 中文 (简) Janpanese Korean Turkish Auto HDMI Boot-up Source Auto Setup Media Type-C Direct Power On Auto Sleep Timer Auto...
-
Page 39: Main Menu
User Settings Menu HDMI Input Source Volume Picture Mode Bright Brightness Main Menu Contrast Image Display Setup Select Exit Enter Input Source Set the input source. HDMI: Set HDMI as input source. HDMI HDMI Searching Media: Set Media as input source. ... - Page 40 User Settings Picture Mode There are factory presets optimized for various types of images. Bright: For displaying the maximum brightness from computer input. PC: For computer. sRGB: Based in sRGB. Wide: Widest color gamut. Eco: For displaying in Eco mode. ...
- Page 41 User Settings Image Go to “Image” sub menu. Display Go to “Display” sub menu. Setup Go to “Setup” sub menu. English English...
-
Page 42: Image
User Settings Image Format Auto Zoom Color Temperature Warm Color Space Image Select Exit Enter Format Use this function to choose your desired format. Auto: The projector displays the image by automatically switching the screen sizes between 4:3 and 16:9. 4:3: Input signal is displayed to full screen. -
Page 43: Display
User Settings Display Auto Keystone Keystone Projection Auto Focus Display Manual Focus Select Exit Enter Auto Keystone The “Auto Keystone” Automatically adjust image distortion caused by tilting the function can be only projector. used to adjust the image distortion Keystone vertically. -
Page 44: Setup
User Settings Setup Language English Boot-up Source Auto Direct Power On Sleep Timer Setup Advanced Security Reset Software Ver. Select Exit Enter Language The language used in the On-Screen Menu is available in English, Germany, French, Italian, Spanish, Portuguese, Polish, Dutch, Russian, Swedish, Traditional Chinese, Simplified Chinese, Japanese, Korean, and Turkish. - Page 45 User Settings Security Go to “Security” sub menu. To change the security setting, enter the security code in 6 digits. The default password is .(Enters with 4 directional key) Password is not reset by “Reset” comand. Security If you fotgot the Password, please Enter a password.
-
Page 46: Advanced
User Settings Advanced AV Mute Mute 3D Sync. Invert Advanced Select Exit Enter Mute Select the “Mute” mode between “AV Mute” (mute both audio and video), “Audio” (mute audio only), and “Video” (mute video The function of the only). “Mute” button on the remote control depends on the selected “Mute”... -
Page 47: Security
User Settings Security Security Change Password Security Select Exit Enter Security Select the “Security” mode. Do not foget the On: Use the security verification when turning on the Protector. password. Off: Disable to use security verification. Password is not reset Change Password by “Reset”... - Page 48 User Settings If the confirmed Password doesn not match with the entered Password, Input the new Password again. By entering “Menu” key, you can cancel the “Change Password”menu. English...
-
Page 49: Multi Media Operation
Multi Media Operation Multi-Media Introduction The supported flash memory types and formats are as follows: USB flash drive formatted with FAT32 / NTFS and size up to 64KB. If you want to use a 64GB SDXC card, MicroSD card types: MicroSD, MicroSDHC up to 32GB, ... - Page 50 Multi Media Operation Audio Format File Format (Ext Name) Sample Rate (KHz) Bit Rate (Kbps) 8-48 8-320 8-48 5-320 WAV(ADPCM-WAV) 8-48 32-384 WAV(PCM-WAV) 8-48 128-1536 8-48 8-320 8-48 8-320 Office Viewer Format The application used to view Microsoft Office documents and (*) Row limit, adobe PDF files is compatible application, not native.
-
Page 51: How To Use Multi-Media Projection With Usb And Sd-Card
Multi Media Operation How to use Multi-Media projection with USB and SD-Card Follow these steps to playback the Photo, Video, or Music files from the USB flash disk, and Micro SD-Card. 1. Power on A USB flash disk Turn the projector on. Please see page 27. must be plugged into 2. - Page 52 Multi Media Operation 4. S elect the file type Access the “SD Card”, or “USB”menu. Select the multimedia file(s) in one of the following folders: “Music”, “Photo”, “Video”, or “Office”. To return to the previous page, press the “Up” on the Remote Control or key on the Control Panel.
- Page 53 Multi Media Operation 5. S elect the file 5.1 Photo When “Photo” is selected, the image data and folder with image format data will be displayed. Select the folder you want to display by using the four directional keys and then press “Enter”. If you press , it returns to the upper folder or exits the folder.
- Page 54 Multi Media Operation The image is displayed full screen. Control Command bar icons are displayed at the bottom of the screen. If the Control Panel or Remote Control has not been in use, the Control Command bar will disappear within 3-5 seconds. The Control Command bar will also disappear if you press the “Up”...
- Page 55 Multi Media Operation *Control Slideshow without using the Control Command bar icons If the Control Command icons are not displayed, you can move to the next or previous image by using keys on the Control Panel or keys on the Remote Control. 5.2 Video After “Video”...
- Page 56 Multi Media Operation Choose the Filename and press “Enter”. The video playback begins. The maximum allowed file name length is 28 characters. Control Command bar icons are displayed at bottom of the screen. If the the Control Panel or Remote Control has not been in use, the Control Command bar will disappear within 3-5 seconds.
- Page 57 Multi Media Operation *Volume control When video is played, volume can be changed by using keys on the Control Panel or on the Remote Control. *Control playback without using the Control Command bar icons Video playback can be controlled by using the following buttons on the Remote Control.
- Page 58 Multi Media Operation Choose the Filename and press “Enter”. Then music playback begins. Music Control Command bar icons are displayed at bottom of the screen. Icon are permanently visible as long as the music playback window is opened. *Control the music playback by using the Control Command bar icons. You can choose the icon by using keys on the Control Panel or keys on Remote Control, and press “Enter”.
- Page 59 Multi Media Operation : Pauses the playback : Restarts the playback. : Forwards the playback. : Goes to the next music file. : Set Repeat mode the playback, as Sequence, Single, Off. : Stops playing the music file and goes to file list. *Volume control When video is played, volume can be changed by using keys on...
- Page 60 Multi Media Operation The list of Office files will be displayed on the screen. The application Office used to view Microsoft Office documents and adobe PDF files is compatible application, not native. Depending on the document, unexpected issues may occur during projection, such as missing or garbled characters...
- Page 61 Multi Media Operation Select the Office data or folder you want to open by using keys on the Control Panel or on the Remote Control and then press “Enter”. Office contents will be displayed on the screen. Control Command bar icons are displayed at bottom of the screen. If the Control Panel or Remote Control has not been in use, the Control Command bar will disappear within 3-5 seconds.
- Page 62 Multi Media Operation The following is an overview of Move mode icons. : Returns to the Normal mode (displayed icons will be changed) : Moves the displayed area up. : Moves the displayed area down. : Moves the displayed area to the left. : Moves the displayed area to the right.
- Page 63 Multi Media Operation Displaying Office files can be controlled by using the following buttons on the Control Panel or Remote Control. In Normal mode: : Goes to the previous page. : Goes to the next page. “Enter”: Displays Control Panel. Enter : Magnifies (Enlarges/Reduces) the image.
- Page 64 Multi Media Operation 5.5 About the displayed font This simplified Office Viewer can display files only in Unicode format and all non-Unicode files are converted to Unicode. Therefore, the letter shape, size, and CR position of the displayed content may differ from the original content.
-
Page 65: Troubleshooting
Troubleshooting Troubleshooting If you experience trouble with the projector, refer to the fol- lowing information. If the problem persists, please contact your local dealer or service center. Problem: No image appears on screen Ensure all the cables and power connections are correctly and ... - Page 66 Troubleshooting Problem: Image is unstable or flickering Change the monitor setting from your computer. Check and reconfigure the display mode of your graphic card to make it compatible with the product. Problem: Image is out of focus Adjust the Focus Ring on the projector lens. ...
- Page 67 Troubleshooting Problem: Indicator lighting message POWER TEMP indicator indicator indicator Message (Blue/Amber) (Amber) (Amber) Standby (Input Flashing (Amber) power cord) Normal (Power on) (Blue) Flashing (Amber; Error (Over temp) On: 3 sec, Off: 1 sec) Flashing (Amber; Error (Fan failed) On: 2 sec, Off: 0.5 sec) Error (LED failed)
- Page 68 Troubleshooting Problem: Message Reminders Over temperature - Air vents might be blocked or ambient temperature may be above 40 ºC. Ensure that the air vents are not blocked and that the ambient temperature is within operational range. Warning Over temperature The projector will switch off automatically Please contact a service center for repair Fan failed - one of the system fans is not working.
-
Page 69: Appendices
Appendices List of Compatible Signals HDMI Digital/USB Type-C PC Signal Modes Resolution V.Freq (Hz) H.Freq (Hz) 640 x 480 31.5 640 x 480 ): 2D or 3D (* 640 x 480 37.9 timing for TI DLP 3D 640 x 480 37.5 ): Down-scaling (*... - Page 70 Appendices 1280 x 720 44.8 1280 x 800 49.6 WXGA 1366 x 768 47.7 1440 x 900 55.9 1440 x 900 70.6 WXGA+ 1680 x 1050 65.3 Component Signal 480i 1440 x 480 59.94 15.7 576i 1440 x 576 15.6 640 x 480 59.94 31.5...
-
Page 71: Specifications
Appendices Specifications ■ List of general specifications Item Specification Power Consumption Less than 0.5W (Standby mode) / 85W (Bright mode) Weight 1.2 lbs (0.5 kg) Dimensions (WxHxD) -112.5x43.9x105 mm (excluded protruding parts) -112.5x52.2x105mm (included protruding parts) Environmental Consider- Operational Temperatures : 41° to 104°F (5° to 40°C), ations 20% to 80% humidity (non-condensing) Storage Temperatures : -4°... -
Page 72: Cabinet Dimensions
Appendices Cabinet Dimensions Unit: mm To access the screw holes for ceiling installation, detach rubber tabs from both rear feet and then remove the tilt/adjustment foot in the front. Refer to the image below for the location of the screw holes. INSERT NUT M4 L=27mm(Max) INSERT NUT M3... -
Page 73: Trademarks
Appendices Trademarks • DLP is trademarks of Texas Instruments. • IBM is a trademark or registered trademark of International Business Machines Corporation. • Macintosh, Mac OS X, iMac, and PowerBook are trademarks of Apple Inc., registered in the U.S. and other countries. •... - Page 75 Y0F6-6221...