Table of Contents
Advertisement
Quick Links
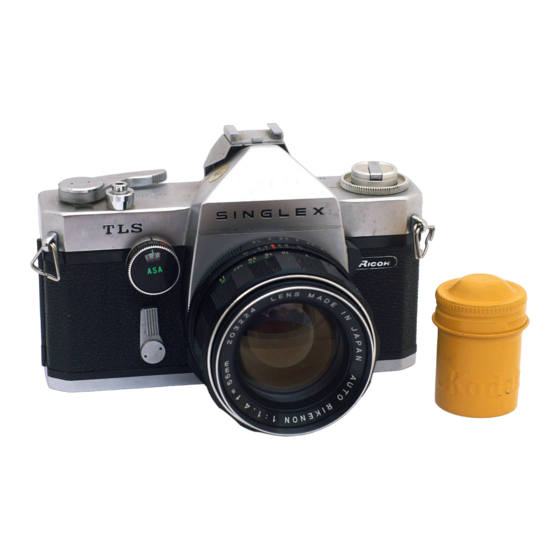
Ricoh Singlex
3-23-2021
This camera manual library is for reference
and historical purposes, all rights reserved.
This page is copyright by
, M. Butkus, NJ.
This page may not be sold or distributed without
the expressed permission of the producer.
I have no connection with any camera company.
On-line camera manual library
Back to main camera manual page
If you find this manual useful, how about a donation of $3 to:
M. Butkus, 29 Lake Ave., High Bridge, NJ 08829-1701
and send your e-mail address so I can thank you.
Most other places would charge you $7.50 for a electronic copy
or $18.00 for a hard to read Xerox copy.
This will help me to continue to host this site,
buy new manuals, and pay their shipping costs.
It'll make you feel better, won't it?
If you use Pay Pal, use the link below.
Use the above address for a check, M.O. or cash.
www.PayPal.me/butkus
Venmo @mike-butkus-camera
Advertisement
Table of Contents

Related Manuals for Ricoh Singlex


Summary of Contents for Ricoh Singlex
- Page 1 Ricoh Singlex 3-23-2021 This camera manual library is for reference and historical purposes, all rights reserved. This page is copyright by , M. Butkus, NJ. This page may not be sold or distributed without the expressed permission of the producer.
-
Page 2: Table Of Contents
(Webmaster: This is a bayonet mount lens, manual does not state which make of bayonet. Lens looks like a typical heavy Nikon lens. The camera has no built in light meter) · CONTENTS · Taking Your Picture ....2 OPERATING INSTRUCTIONS ·... -
Page 3: Taking Your Picture
FURTHER INSTRUCTIONS AND THE USE OF OTHER FEATURES · Ways to Hold Camera in taking Pictures ..12 · " Depth of Field " of Photographic Lenses and their Utilization ..13 · Depth of Field Scale on Lens Barrel .... 14 ·... -
Page 4: Operating Instructions
· OPERATING INSTRUCTIONS Familiarize yourself with your " Singlex ", before loading your first roll of film. Ex. amine your camera carefully and operate its controls as you would be doing when actually taking pictures. A patient study of these instructions will be rewarding. - Page 5 14. Take up spool 15. Eyepiece 16. Syncro sockets 17. Film type reminder 18. Distance scale ring 19. Depth of field scale 20. Aperture distance index diamond mark 21. Shutter speed index dot 22. Shutter speed dial...
-
Page 6: Loading
23. Shutter release and cable release socket 24. Exposure counter 25. Rapid advance lever · LOADING Place camera face down on a table or other solid surface. Release the back cover by pulling up its sliding catch. The back cover will spring part-way open and may be opened fully by hand. - Page 7 Push upward on the slotted rewind shaft situated inside of the chamber, towards the direction of arrow shown in the illustration. Insert the film tongue into the groove of the " take-up " spool as far as it will go. Secure the film on the take-up spool by turning take-up spool once in the direction of the arrow on the spool.
- Page 8 Make sure that the film is secure and that the film perforations are engaged with the sprocket teeth. Locking is automatic. Now, take up the slack of loaded film by rotating the rewind lever clockwise until tension is felt. Advance the "exposed" portion of film by winding the rapid advance lever and tripping the shutter until the counter registers "...
-
Page 9: Advancing Film And Winding Shutter
· ADVANCING FILM AND WINDING SHUTTER 2. Place your thumb to original position to catch returning lever. · SETTING SHUTTER SPEEDS The desired shutter speed is set by rotating the shutter speed dial to the black dot on the camera top cover. -
Page 10: Setting The Lens Aperture
· FOCUSING With your "Singlex", which is a single lens reflex camera, focusing and composing is achieved through the lens, completely eliminating the problem of parallax. The penta-prism system incorporates a bright fresnel lens for clear viewing even to the corners for perfect composition To focus, frame the subject to be photographed in the viewfinder and rotate the focusing ring either to the left or right until the split images merge into one clear image. -
Page 11: Releasing The Shutter To Take Picture
· RELEASING THE SHUTTER TO TAKE PICTURES With the subject in sharp focus and properly framed you are ready to take your picture. Press, gently, the shutter release on top right of camera. Press downward slowly until about half way and then at the precise moment of expression or Of action, press all the way. -
Page 12: Ways To Hold Camera In Taking Pictures
Rewind the exposed film back into its film cartridge by rotating the rewind lever " clockwise" (in direction of arrow on knob) until no tension is felt. The film is now fully rewound. Unlock back cover and pull up the rewind lever. -
Page 13: Depth Of Field " Of Photographic Lenses And Their Utilization
· DEPTH OF PHOTOGRAPHIC LENSES AND THEIR UTILIZATION Photographic lenses are capable off providing sharp focus in front of and behind the subject actually focused on. For instance, you are shooting at F2, if you focus on a subject 10 feet away from your lens objects closer than 7-5/8 inches and further than 8-3/4 inches from your main subject will be in acceptable sharp focus. -
Page 14: Lever For Previewing Depth Of Field
· LEVER FOR PREVIEWING DEPTH OF FIELD Push combined preview-self-timer lever situated on the right front of camera in direction of "M" till it stops. The lens opening of the camera will correspond with that which you have set on the aperture scale. -
Page 15: Changing The Lens
Infrared films This infra-red marking on the depth of field scale ring is used for resetting the distance when using Black and White infra-red film. After obtaining the correct focus, in the usual way, set the distance obtained on the scale to the red dot, instead of the red diamond. -
Page 16: Replacing The Lens
The table on page 20 shows you what shutter speed a certain bulb or an electronic flash will synchronize when using the "Ricoh Singlex". Two Standard sockets recessed into the left hand end wall of the camera and are color coded, M in black and X in red indicating the respective contacts, M in black and X in red. -
Page 17: Film Speed (Asa And Din) Reminder Dial
" ASA " (" DIN ") film speed guide numbers. Setting the " ASA" (" DIN " number of your film to the black dot on the center piece serves as a reminder of the kind of film you have loaded into your " Ricoh Singlex ". The dial is rotated by using the pin on the dial.