GE JCAS745 Owner's Manual And Installation Instructions
Electric coil & radiant ranges
Hide thumbs
Also See for JCAS745:
- Owner's manual and installation instructions (46 pages) ,
- Owner's manual and installation instructions (45 pages)
Table of Contents
Advertisement
Available languages
Available languages
Información de seguridad ......................... 2-6
Instrucciones de operación
Quemadores superiores ...................................... 7, 8
Utensilios .......................................................................... 9
Controles ....................................................................... 10
Horno ....................................................................... 11, 12
Reloj, timer y contacto eléctrico ................ 13, 14
Horneado y rostizado por tiempo .................... 15
Funciones especiales ...................................... 16-18
Funciones Sabat ................................................ 19, 20
Conversión de temperaturas ............................. 20
Termostato .................................................................... 21
Autolimpieza ........................................................ 22, 23
Cuidado y limpieza ................................. 24-30
Instrucciones de instalación ................ 31-39
Solución de problemas .......................... 40-44
Accesorios ...................................................... 45
Servicios al consumidor
Serviplus ......................................................................... 95
Garantía .......................................................................... 96
Anote aquí los números de modelo
y serie
Modelo
Serie
Puede localizarlos en una etiqueta,
por detrás del cajón de
almacenamiento, en el marco del
horno.
Manual de uso y cuidado e
instrucciones de instalación
Modelos de quemadores eléctricos
superiores de espiral y radiantes
Modelos equipados
Modelos equipados
con limpieza
con autolimpieza
estándar
JCAS745
JCAS445
JCAS735
For the English version,
go to page 47.
JCAP750
JCAP760
JCAP765
183D9541P012
1
Advertisement
Chapters
Table of Contents

Related Manuals for GE JCAS745


Summary of Contents for GE JCAS745
-
Page 1: Table Of Contents
Horno ............... 11, 12 con limpieza con autolimpieza Reloj, timer y contacto eléctrico ....13, 14 estándar JCAP750 Horneado y rostizado por tiempo ....15 JCAS745 JCAP760 Funciones especiales ........16-18 JCAS445 JCAP765 Funciones Sabat ..........19, 20 JCAS735 Conversión de temperaturas ......20 Termostato .............. - Page 2 INSTRUCCIONES IMPORTANTES DE SEGURIDAD. LEA TODAS LAS INSTRUCCIONES ANTES DE USAR. ADVERTENCIA: LEA TODAS LAS INSTRUCCIONES DE SEGURIDAD ANTES DE UTILIZAR ESTE PRODUCTO. NO SEGUIR ESTAS INSTRUCCIONES PUEDE GENERAR UN INCENDIO, UNA DESCARGA ELÉCTRICA, LESIONES CORPORALES O LA MUERTE. DISPOSITIVO ANTIVOLCADURAS ADVERTENCIA Riesgo de Volcaduras Un niño o un adulto pueden hacer volcar la estufa y morir.
- Page 3 COCINE COMPLETAMENTE LA CARNE ROJA Y LAS AVES... Cocine completamente la carne roja y las aves: la carne roja hasta una temperatura INTERNA de 160 ºF (72 ºC) por lo menos y las aves hasta una temperatura INTERNA de 180 ºF (83 ºC) por lo menos. El cocinar hasta estas temperaturas usualmente protege de enfermedades causadas por los alimentos.
-
Page 4: Utensilios
INFORMACIÓN IMPORTANTE DE SEGURIDAD LEA TODAS LAS INSTRUCCIONES ANTES DE USAR SU ESTUFA HORNO • Aléjese de la estufa cuando abra la puerta del • El jalar las parrillas hasta el tope de bloqueo horno. El aire caliente o vapor que escapa, es muy cómodo cuando necesita levantar ali- puede causar quemaduras en manos, cara y/ mentos pesados. - Page 5 QUEMADORES DE CUBIERTA, TODOS LOS MODELOS Use el tamaño apropiado de cacerolas que tengan fondos planos lo suficientemente grandes para cubrir el quemador eléctrico. El uso de utensilios más pequeños expondrá una porción del quemador eléctrico a contacto directo lo que podría resultar en el incendio de prendas. La rela- ción apropiada de tamaño de utensilio con tamaño de quemador mejorará...
- Page 6 INFORMACIÓN IMPORTANTE DE SEGURIDAD LEA TODAS LAS INSTRUCCIONES ANTES DE USAR SU ESTUFA ADVERTENCIA QUEMADORES ELÉCTRICOS RADIANTES (en algunos modelos) Tenga cuidado al tocar la cubierta. La superficie de vidrio de la cubierta retendrá calor después de que los controles han sido apagados. •...
-
Page 7: Controles
Usando los quemadores de la cubierta A lo largo de este manual, las características y apariencia pueden variar con respecto a las de su modelo. Controles de los quemadores de la cubierta Los quemadores de la cubierta y sus controles En una cocina silenciosa, usted podría escuchar están diseñados para proporcionarle una varie- unos ligeros clics durante la cocción, que indican... - Page 8 Usando los quemadores de la cubierta A lo largo de este manual, las características y apariencia pueden variar con respecto a las de su modelo. Luces indicadoras (solamente en modelos de quemadores radiantes con cubierta de cristal) La luz indicadora HOT (CALIENTE) se ilumina al encender cualquier quemador eléctrico radiante, y permanece en- cendido hasta que la superficie se enfría lo suficiente como para tocarla.
- Page 9 Seleccionando el tipo de utensilios para cocinar Esta información le ayudará a seleccionar utensilios para cocinar que proporcionan un buen desempeño sobre cubiertas de cristal. Acero Inoxidable: Vitrocerámica: Recomendado. Se puede usar, aunque no es recomendable Bajo desempeño. Puede rayar la superficie. Aluminio: Se recomienda el pesado Barro:...
- Page 10 Usando los controles del horno (algunos modelos) A lo largo de este manual, las funciones y la apariencia pueden variar con respecto a las de su modelo. (Tiempo) (Horno) (Tiempo de (Hora de (Hornear) (Asar Alto/Bajo) cocción) inicio) (Limpieza) (Apagar) (Inicio) (Timer) Funciones y posiciones para el control del horno, reloj y timer...
- Page 11 Usando el horno. Reloj y Timer de cocina (algunos modelos) 1. Botón TIMER Presione este botón para seleccionar la función de timer. 2. Botón RELOJ (CLOCK) Presione este botón antes de ajustar el reloj. 3. Pantalla Muestra la hora del día y el tiempo programado para el timer, el tiempo de cocción o la hora para La apariencia puede variar el inicio de la cocción.
- Page 12 Usando el horno. Cómo programar el horno para hornear o rostizar 1. Presione el botón BAKE (HORNEAR). 2. Presione el botón + ó - para ingresar la tempe- ratura deseada. 3. Presione el botón START (INICIO). 4. Revise los alimentos en el tiempo más corto que indica la receta.
- Page 13 Usando el reloj, el timer y el contacto de conveniencia (algunos modelos) No todas las funciones se incluyen en todos los modelos. Para ajustar el reloj TIMER (TIMER) MINUTERIE El reloj debe ajustarse a la hora correcta del día 3. Presione el botón START/ON (INICIO/ENCEN- para que las funciones automáticas por tiempo DER) hasta que la hora del día sea mostrada del horno funcionen apropiadamente.
- Page 14 Usando el reloj, el timer y el contacto de conveniencia (algunos modelos) No todas las funciones se incluyen en todos los modelos. Para reiniciar el timer Si la pantalla aún muestra el tiempo restante, us- Si el tiempo restante no aparece en pantalla (la ted puede editar el timer presionando el botón pantalla muestra el reloj, inicio retrasado o tiem- TIMER, después los botones + o - hasta que el...
- Page 15 Usando las funciones de horneo y rostizado por tiempo (algunos modelos) NOTA: Los alimentos que se estropean fácilmente, como la leche, huevos, pescado, rellenos, las aves y el puerco no deben dejarse repo- sar más de 1 hora antes o después de cocinarlos. La temperatura ambiente promueve el crecimiento de bacterias nocivas. Asegúrese de que la luz del horno esté...
-
Page 16: Funciones Especiales
Funciones especiales del control del horno El nuevo control Touch Pad cuenta con funciones adicionales que usted puede usar. Las siguientes son las funciones y cómo las puede activar. El modo de funciones especiales puede activarse solamente cuando la pantalla muestra la hora del día. Estas funciones especiales per- manecen en la memoria del control hasta que se repiten los pasos. - Page 17 Funciones especiales del control del horno Tonos al final de un ciclo de cocción controlado por tiempo BROIL (ASAR (HORNEAR) BAKE ALTO/BAJO) HI/LO Al final de un ciclo controlado por tiempo, se es- 2. Presione el botón BROIL HI/LO (ASAR ALTO/ cuchan 3 bips cortos, seguidos de un solo bip BAJO).
- Page 18 Funciones especiales del control del horno Cocinar y esperar BROIL (ASAR (HORNEAR) BAKE ALTO/BAJO) HI/LO El control de su horno nueve viene con la función 2. Presione el botón COOK TIME (TIEMPO DE "cocinar y esperar" que mantiene calientes sus COCCIÓN).
- Page 19 Usando la función Sabat (Diseñada para usarse en las festividades y Sabat judíos) (algunos modelos) La función Sabat puede usarse para hornear o rostizar solamente. No puede usarse para asar, autolimpieza ni retrasar el inicio de una cocción. NOTA: La luz del horno se enciende automáticamente (en algunos modelos) al abrir la puerta, y se apaga al cerrarla. El foco puede remo- verse.
-
Page 20: Conversión De Temperaturas
Usando la función Sabat (Diseñada para usarse en las festividades y Sabat judíos) (algunos modelos) Cómo salir de la función Sabat CLEAR (BORRAR APAGAR) 1. Presione el botón CLEAR/OFF (BORRAR/APA- 5. Presione el botón START (INICIO). GAR). NOTA: Si ocurre un apagón mientras el horno es- 2. - Page 21 Ajuste usted mismo el termostato del horno Quizá su horno nuevo cocine diferente que el que reemplazó. Use su horno nuevo durante unas pocas semanas para familiarizarse con él. Si usted piensa que su horno nuevo trabaja demasiado caliente o demasiado frío, entonces usted mismo puede ajustar el termostato. No use termómetros como los que venden en las tiendas de víveres para revisar la temperatura de su horno.
-
Page 22: Autolimpieza
Usando el horno con autolimpieza (algunos modelos) La puerta del horno debe estar cerrada y todos los controles deben estar en las posiciones correctas para que el ciclo trabaje apropiadamente. Antes de un ciclo de limpieza El horno debe estar frío para poder programar el No use productos abrasivos ni limpiadores para ciclo de autolimpieza. - Page 23 Usando el horno con autolimpieza (algunos modelos) La puerta del horno debe estar cerrada y todos los controles deben estar en las posiciones correctas para que el ciclo trabaje apropiadamente. Cómo retrasar el inicio de una limpieza SELF (AUTOLIMPIEZA) CLEAN 1.
-
Page 24: Cuidado Y Limpieza
Cuidado y limpieza de la estufa Asegúrese de que el horno no esté conectado y de que las superficies se encuentren a temperatura ambiente antes de limpiar cualquier parte de la estufa. ADVERTENCIA Riesgo de Volcaduras Un niño o un adulto pueden hacer volcar la estufa y morir. Verifique que el soporte antivolcaduras se haya instalado y ajustado correctamente. - Page 25 Cuidado y limpieza de la estufa Cubierta abatible Limpie con frecuencia el área bajo la cubierta. La Después de limpiar bajo la cubierta usando agua acumulación de suciedad, especialmente grasa caliente, jabonosa y un trapo limpio, levante un puede incendiarse. poco más la cubierta para regresar la varilla de soporte a su posición de almacenamiento y baje Para facilitar la limpieza, la cubierta puede aba-...
- Page 26 Cuidado y limpieza de la estufa Panel de controles y perillas Es una buena idea limpiar el panel de controles Las perillas de control pueden removerse para después de usar el horno. Use un trapo húmedo facilitar su limpieza. para limpiar o enjuagar. Para limpiar use un ja- Asegúrese de que las perillas estén en la posición bón suave y agua o una solución 50/50 de vina- OFF (APAGADO) y jálelas en línea recta fuera de...
- Page 27 Cuidado y limpieza de la estufa Quemadores eléctricos de espiral (en algunos modelos) Quemador de cubierta Asegúrese de que todos los controles se encuen- Para reinstalar un quemador eléctrico de espi- tren en la posición de APAGADO y los quemado- ral: res estén fríos antes de tratar de removerlos.
- Page 28 Cuidado y limpieza de la estufa Ranuras de ventilación del horno En modelos con cubierta de cristal, el horno se Nunca cubra las aberturas con papel aluminio ventila a través de una abertura que se encuen- ni con ningún otro material. tra en la parte trasera de la cubierta.
- Page 29 Limpiando la cubierta de cristal (algunos modelos) Limpieza normal de uso diario Use ÚNICAMENTE un limpiador para cubiertas 4. Utilice una toalla de papel especial para cu- cerámicas para la cubierta de cristal. Otro tipo de biertas cerámicas, para limpiar toda la super- limpiadores pueden no ser tan efectivos.
- Page 30 Limpiando la cubierta de cristal (algunos modelos) Marcas metálicas y rayones 1. Tenga cuidado de no arrastrar cacerolas y 2. Si se deja que las cacerolas que tienen un re- sartenes sobre la cubierta de cristal. Esto de- cubrimiento delgado de aluminio o cobre jará...
-
Page 31: Instrucciones De Instalación
Instrucciones Estufas eléctricas GE de 24" (61 cm) de instalación ANTES DE QUE USTED COMIENCE POR SU SEGURIDAD: Lea estas instrucciones completa y cuidadosamente. Debe cumplirse con todas las dimensiones de trazos y espacios IMPORTANTE: • Guarde estas instrucciones para ser usa- para obtener un uso seguro de la estufa. - Page 32 Destornillador de punta plana PARTES INCLUIDAS Juego de dispositivo antiladeos RETIRE EL MATERIAL DE EMBARQUE Modelo (recomendada) JCAS735 Retire el material de empaque. El no remover todo el material JCAS745 47” 24 3/8” 2” 41” JCAP750 (119,4 cm) (61,9 cm)
- Page 33 Instrucciones de instalación PREPARE EL SAQUE (JCAS445) CONEXIONES ELÉCTRICAS • Deje un claro de 2" (5 cm) entre la estufa y muros verticales adya- centes por encima de la cubierta de cocción. Deje un claro míni- REQUERIMIENTOS ELÉCTRICOS mo de 30" (76,2 cm) entre los quemadores de la cubierta y la par- te inferior de madera desprotegida o metal de los gabinetes su- PRECAUCIÓN: POR SEGURIDAD PERSONAL, NO periores, y 18"...
- Page 34 Instrucciones de instalación REQUISITOS ELÉCTRICOS ADVERTENCIA: POR SU PROPIA SEGURIDAD, NO Use exclusivamente un cordón eléctrico para estufa, enlistado por UL de 3 hilos ó 4 hilos conductores. Estos cordones pueden USE UNA EXTENSIÓN ELÉCTRICA CON ESTE incluir terminales tipo anillo y un dispositivo para reducir la ten- sión.
- Page 35 Instrucciones de instalación REQUISITOS ELÉCTRICOS (CONT.) INSTALACIÓN DEL CORDÓN ELÉCTRICO Y Solamente para instalaciones con cordón eléctrico (con- sulte el siguiente paso si usa conducto portacables), en- DISPOSITIVO REDUCTOR DE TENSIÓN samble el dispositivo reductor de tensión en el agujero. In- troduzca el cordón eléctrico a través del dispositivo reduc- Retire la cubierta de los cables (parte trasera de la estufa) tor de tensión y apriete.
- Page 36 Instrucciones de instalación REQUISITOS ELÉCTRICOS (CONT.) INSTALACIÓN DE UN CORDÓN ELÉCTRICO INSTALACIÓN DE UN CORDÓN ELÉCTRICO DE 3 CONDUCTORES DE 4 CONDUCTORES ADVERTENCIA: EL CABLE NEUTRAL O DE CO- ADVERTENCIA: EL CABLE NEUTRAL DEL CIRCUI- NEXIÓN A TIERRA DEL CORDÓN ELÉCTRICO TO DE ALIMENTACIÓN DEBE CONECTARSE A LA DEBE CONECTARSE A LA TERMINAL NEUTRAL TERMINAL NEUTRAL UBICADA AL CENTRO DEL...
- Page 37 Instrucciones de instalación REQUISITOS ELÉCTRICOS (CONT.) INSTALACIÓN DE CONDUCTO INSTALACIÓN DE CONDUCTO PORTACABLES (CONDUIT) DE 3 PORTACABLES (CONDUIT) DE 4 CONDUCTORES CONDUCTORES Afloje los tres tornillos inferiores del bloque de terminales. Afloje los tres tornillos inferiores del bloque de terminales. Inserte la punta del cable pelado (Blanco/Neutro) a través Retire el tornillo y placa de conexión a tierra y apártelos.
- Page 38 Instrucciones de instalación INSTALE LA ESTUFA RETIRE EL CAJÓN DE ALMACENAMIENTO INSTALACIÓN DEL DISPOSITIVO ANTIVOLCADURAS Jale el cajón hasta que se detenga. ADVERTENCIA Levante el frente del cajón hasta que los topes libren la guía. Riesgo de Volcaduras Un niño o un adulto pueden hacer volcar la estufa y morir. Verifique que el soporte antivolcaduras se haya instalado y ajustado correctamente.
- Page 39 Instrucciones de instalación LISTA DE VERIFICACIÓN DE LA LISTA DE VERIFICACIÓN DE LA OPERACIÓN INSTALACIÓN • Encienda un quemador de la cubierta para observar que la resistencia brilla dentro de un periodo de 60 segundos. Apa- • Revise para asegurarse de que el disyuntor de circuitos de gue el quemador cuando detecte el brillo.
- Page 40 Antes de que llame para solicitar servicio... Consejos para solucionar problemas Ahorre tiempo y dinero. Revise primero los cuadros en las siguientes páginas y quizá no necesite llamar para pedir un servicio. Problema Causas posibles Qué hacer Quemadores eléctricos radiantes Los quemadores eléctri- Se están usando utensilios inapropia- •...
- Page 41 Antes de que llame para solicitar servicio... Problema Causas posibles Qué hacer Quemadores eléctricos de espiral Los quemadores eléctri- Los quemadores no están bien conec- • Con los controles en la posición de apagado, revise para ase- cos de espiral no trabajan tados.
- Page 42 Antes de que llame para solicitar servicio... Problema Causas posibles Qué hacer Los alimentos no se asan El horno no está programado en la • En modelos que vienen con una perilla de temperatura, asegú- apropiadamente posición para ASAR. rese de que usted giró la perilla hasta la posición BROIL (ASAR). En modelos con botón BROIL (ASAR), asegúrese de que esté...
- Page 43 Antes de que llame para solicitar servicio... Problema Causas posibles Qué hacer Temperatura del horno El termostato del horno requiere ajus- • Consulte la sección "Ajuste usted mismo el termostato del hor- demasiado caliente o fría no". El reloj y el timer no traba- La clavija de la estufa no está...
- Page 44 Antes de que llame para solicitar servicio... Problema Causas posibles Qué hacer Olor a quemado o "aceito- Esto es normal en un horno nuevo y • Para acelerar el proceso, programe un ciclo de autolimpieza so" que proviene de la ra- desaparecerá...
-
Page 45: Accesorios
Raspador ¿Cansado de parrillas de horno decoloradas? ¿Desearía tener parrillas para uso extra-pesado? AHORA DISPONIBLES para su estufa: ¡Las innovadoras parrillas para horno GE, autolimpiables y recubiertas de porcelana! • Uso pesado • Durables • Se pueden limpiar en horno de autolimpieza... - Page 47 Coil Top and Radiant Top Models Cookware ................ 55 Standard Clean Self-Clean Models Controls ................56 Models JCAP750 Oven ................57, 58 JCAS745 JCAP760 Clock, Timer and Convenience Outlet ..59, 60 JCAS445 JCAP765 Timed Baking and Roasting ......... 61 JCAS735 Special Features ..........62-64 Sabbath Features ..........
-
Page 48: Safety Information
IMPORTANT SAFETY INFORMATION. READ ALL INSTRUCTIONS BEFORE USING. WARNING! READ ALL SAFETY INSTRUCTIONS BEFORE USING THE PRODUCT. FAILURE TO FOLLOW THESE INSTRUCTIONS MAY RESULT IN FIRE, ELECTRIC SHOCK SERIOUS IN- JURY OR DEATH. ANTI-TIP DEVICE WARNING Tip-Over Hazard A child or adult can tip the range and be killed. Verify the anti-tip bracket has been properly installed and engaged. - Page 49 COOK MEAT AND POULTRY THOROUGHLY... Cook meat and poultry thoroughly—meat to at least an INTERNAL temperature of 160° F and poultry to at least an INTERNAL temperature of 180°F. Cooking to these temperatures usually protects against foodborne illness. WARNING SAFETY PRECAUTIONS •...
- Page 50 IMPORTANT SAFETY INFORMATION. READ ALL INSTRUCTIONS BEFORE USING. OVEN • Stand away from the range when opening the • Do not use the oven to dry newspapers. If over- oven door. Hot air or steam which escapes can heated, they can catch on fire. cause burns to hands, face and/or eyes.
-
Page 51: Surface Units
SURFACE UNITS-ALL MODELS Use proper pan size-select cookware having flat bottoms large enough to cover the surface unit heating ele- ment. The use of undersized cookware will expose a portion of the surface unit to direct contact and may re- sult ignition of clothing. - Page 52 IMPORTANT SAFETY INFORMATION. READ ALL INSTRUCTIONS BEFORE USING. WARNING! RADIANT SURFACE UNITS (on some models) Use care when touching the cooktop. The glass surface of the cooktop will retain heat after the controls have been turned off. • Avoid scratching the glass cooktop. The cooktop can be •...
- Page 53 Using the surface units. Throughout this manual, features and appearance may vary from your model. Surface Cooking Controls Your surface units and controls are designed to In a quiet kitchen, you may hear slight clicking give you a variety of heat settings for surface sounds during cooking, indicating heat settings unit cooking.
- Page 54 Using the surface units. Throughout this manual, features and appearance may vary from your model. Indicator Lights (on radiant glass models only). A Hot indicator light will glow when any radiant elements is turned on, and will remain on until the surface is cool enough to touch.
- Page 55 Selecting types of cookware. The following information will help you choose cookware will give good performance on glass cooktops. Stainless Steel: Glass-ceramic: recommended usable, but not recommended Poor performance. May scratch the surface. Aluminum: heavy weight recommended. Stoneware: Good conductivity. Aluminum residues some- usable, but not recommended times appear as scratches on the cooktop, but Poor performance.
- Page 56 Using the oven controls. (on some models) Throughout this manual, features and appearance may vary from your model. Oven Control, Clock and Timer Features and Settings 1. BAKE Pad 8. START Pad Touch this pad to select the bake function. Must be touched to start any cooking function.
- Page 57 Using the oven. Clock and Timer (on some models) 1. TIMER Pad 4. SET +/- Pads Touch this pad to select the timer feature. These pads allow you to set the clock and timer. 2. CLOCK Pad Touch this pad before setting the clock. 3.
-
Page 58: Oven
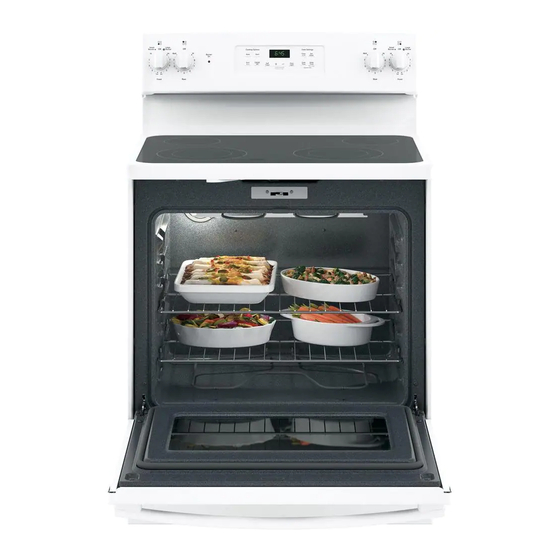
Using the oven. How to Set the Oven for Baking or Roasting 1. Touch the BAKE pad. 2. Touch the + or – pad to set the desired tem- perature. 3. Touch the START pad. 4. Check food for doneness at minimum time on recipe. -
Page 59: Clock, Timer And Convenience Outlet
Using the clock, timer and convenience outlet. (on some models) Not all features are on all models. To Set the Clock TIMER The clock must be set to the correct time of day 3. Touch the START/ON pad until the time of day MINUTERIE for the automatic oven timing functions to work shows in the display. - Page 60 Using the clock, timer and convenience outlet. (on some models) Not all features are on all models. To Reset the Timer If the display is still showing the time remaining, If the remaining time is not in the display (clock, you may change it by touching the TIMER pad, delay start or cooking timer are in the display), then touch the + or –...
- Page 61 Using the timed baking and roasting features, (on some models) NOTE: Foods that spoil easily-such as milk, eggs, fish, stuffings, poultry and pork-should not be allowed to sit for more than 1 hour before or after cooking. Room temperature promotes the growth of harmful bacteria. Be sure that the oven light is off because heat from the bulb will speed harmful bacteria growth.
-
Page 62: Special Features
Special features of your oven control. Your new touch pad control has additional features that you may choose to use. The following are the features and how you may acti- vate them. The special feature modes can only be activated while the display is showing the time of day. They remain in the control's memory until the steps are repeated. - Page 63 Special features of your oven control. Tones at the End of a Timed Cycle BROIL BAKE HI/LO At the end of a timed cycle, 3 short beeps will 2. Touch the BROIL HI/LO pad. The displays sound followed by one beep every 6 seconds un- shows CON BEEP (continuous beep).
- Page 64 Special features of your oven control. Cook and Hold You new control has a cook and hold feature that 3. Touch the START pad to activate the cook and BROIL BAKE HI/LO keeps cooked foods warm for to up to 3 hours af- hold feature and leave the control set in this ter Timed Baking or Roasting is finished.
- Page 65 Using the Sabbath Feature. (Designed for use on the Jewish Sabbath and Holidays) (on some models). The Sabbath feature can be used for baking/roasting only. It cannot be used for broiling, self-cleaning, or Delay Start cooking. NOTE: The oven light comes on automatically (on some models) when the door is opened and goes off when the door is closed. The bulb may be removed.
- Page 66 Using the Sabbath Feature. (Designed for use on the Jewish Sabbath and Holidays) (on some models). How to Exit the Sabbath Feature CLEAR 1. Touch the CLEAR/OFF pad. 5. Touch the START pad. 2. If the oven is cooking, wait for a random delay NOTE: If a power outage occurred while the oven BROIL period of approximately 30 seconds to 1...
- Page 67 Adjust the oven thermostat – Easy to do yourself! You may find that your new oven cooks differently that the one it replaced. Use your new oven for a few weeks to become more familiar with it. If you still think your new oven is too hot or too cold, you can adjust the thermostat yourself. Do not use thermometers, such as those found in grocery stores, to check the temperature setting of your oven.
- Page 68 Using the self-cleaning oven. (on some models) The oven door must be closed and all controls must be set correctly for the cycle to work properly. Before a Clean Cycle The oven must be cool in order to set the self- Make sure the oven light bulb cover (on some clean cycle.
- Page 69 Using the self-cleaning oven. (on some models) The oven door must be closed and all controls must be set correctly for the cycle to work properly. How to Delay the Start of Cleaning. SELF CLEAN 1. Touch the SELF CLEAN pad. The door locks automatically.
-
Page 70: Care And Cleaning
Care and cleaning of the range. Be sure electrical power is off and all surfaces are cool before cleaning any part of the range. WARNING Tip-Over Hazard A child or adult can tip the range and be killed. Verify the anti-tip bracket has been properly installed and engaged. - Page 71 Care and cleaning of the range. Lift-up Cooktop Clean the area under the cooktop often. Builtup After cleaning underneath the cooktop with hot, soil, especially grease, may catch on fire. soapy water and a clean cloth, hold the cooktop up, return the prop rod to its storage position and To make cleaning easier, the cooktop may be lower the cooktop until it snaps into position.
- Page 72 Care and cleaning of the range. Control Panel and Knobs It is a good idea to wipe the control panel after Make sure the knobs are in the OFF positions and each use of the oven. Use a damp cloth to clean pull them straight off the stems for cleaning.
- Page 73 Care and cleaning of the range. Surface Units (on some models) Surface Unit Be sure all the controls are turned to OFF and the To replace a surface unit: surface units are cool before attempting to re- Replace the drip pan into the recess in the cook- move them.
- Page 74 Care and cleaning of the range. Oven Vent On glass cooktop models, the oven is vented Never cover the opening with aluminum foil or through an opening at the rear of the cooktop. any other material. On coil cooktop models, the oven is vented through an opening under the right rear surface unit.
- Page 75 Cleaning the glass cooktop. (on some models) Normal Daily Use Cleaning ONLY use Ceramic Cooktop Cleaner on the glass 4. Use a paper towel for Ceramic Cooktops to cooktop. Other types of cleaners may not be as clean the entire cooktop surface. effective.
- Page 76 Cleaning the glass cooktop. (on some models) Metal Marks and Scratches 1. Be careful not to slide pots and pans across 2. If pots with a thin overlay of aluminum or your cooktop. It will leave metal markings on copper are allowed to boil dry the overlay the cooktop surface.
-
Page 77: Installation Instructions
Installation 24" GE Electric Ranges Instructions BEFORE YOU BEGIN FOR YOUR SAFETY: Read these instructions completely and carefully. All rough-in and spacing dimensions must be met for safe use IMPORTANT • - Save these instructions for local of your range. Electricity to the range can be disconnected at the outlet without moving the range if the outlet is in the pre- inspector's use. - Page 78 13". 1/4” Nut Driver Level Phillips Screwdriver Flat-blade Screwdriver PARTS INCLUDED Anti-Tip Bracket Kit Model (recommended) JCAS735 JCAS745 REMOVE SHIPPING MATERIAL 47” 24 3/8” 2” 41” JCAP750 JCAP760 JCAP765 Remove packaging materials. Failure to remove packaging JCAS445 36”...
- Page 79 Installation Instructions PREPARE THE OPENING (JCAS445) ELECTRICAL CONNECTIONS • Allow 2" spacing from the range to adjacent vertical walls above the cooktop surface. Allow 30" minimum clearance be- ELECTRICAL REQUIREMENTS tween the surface units and the bottom of unprotected wood or metal top cabinet, and 18"...
- Page 80 Installation Instructions ELECTRICAL CONNECTIONS ELECTRICAL REQUIREMENTS Use only a 3-conductor or a 4-conductor UL-listed range cord. These cords may be provided with ring terminals on wire and a WARNING: For personal safety, do not use an strain relief device. extension cord with this appliance. Remove A range cord rated at 40 amps with 125/250 minimum volt range is required.
- Page 81 Installation Instructions ELECTRICAL CONNECTIONS (CONT.) POWER CORD AND STRAIN RELIEF For power cord installations only (see the next step if using conduit), assemble the strain relief in the hole. Insert the INSTALLATION power cord through the strain relief and tighten. Allow enough slack to easily attach the cord terminals to the terminal block.
- Page 82 Installation Instructions ELECTRICAL CONNECTIONS (CONT.) 3-WIRE POWER CORD INSTALLATION 4-WIRE POWER CORD INSTALLATION WARNING: The neutral or ground wire of the WARNING: The neutral wire of the supply cir- power cord must be connected to the neutral cuit must be connected to the neutral terminal terminal located in the center of the terminal located in the center of the terminal block.
- Page 83 Installation Instructions ELECTRICAL CONNECTIONS (CONT.) 3-WIRE CONDUIT INSTALLATION 4-WIRE CONDUIT INSTALLATION Loosen the three lower terminal screws from the terminal Loosen the 3 lower terminal screws from the terminal block. Insert the center bare wire (white/ neutral) tip block. Remove the ground screw and ground plate and re- through the bottom center terminal block opening.
- Page 84 Installation Instructions INSTALL THE RANGE ANTI-TIP DEVICE INSTALLATION REMOVE STORAGE DRAWER Pull the drawer out all the way. WARNING Lift the front of the drawer until the stops clear the guide. Remove the drawer. Lift the front of the drawer until the stops clear the guide. Tip-Over Hazard A child or adult can tip the range and be killed.
- Page 85 Installation Instructions FINAL INSTALLATION CHECKLIST OPERATION CHECKLIST • Check to make sure the circuit breaker is closed (RESET) • Turn on one of the surface to observe that the element or the circuit are replaced. glows within 60 seconds. Turn the unit off when glow is detected.
-
Page 86: Troubleshooting Tips
Before you call for service... Troubleshooting Tips Save time and money! Review the charts on the following pages first and your may not need to call for service. Problem Possible Causes What To Do Radiant Cooktops Surface units will not Improper cookware being used. - Page 87 Before you call for service... Problem Possible Causes What To Do Coil Cooktops Surface units not func- The surface units are not plugged in • With the controls off, check to make sure the surface unit is tioning properly solidly. plugged completely into the receptacle.
- Page 88 Before you call for service... Problem Possible Causes What To Do Food does not broil prop- Oven is not set to BROIL. • On models with a temperature knob, make sure you turn it all erly the way to the BROIL position. On models with a BROIL pad, make sure it is turned on.
- Page 89 Before you call for service... Problem Possible Causes What To Do Oven temperature too hot Oven thermostat needs adjustment. • See the Adjust the oven thermostat-Easy to do yourself! Sec- or too cold tion. Clock and timer do not Plug on range is not completely in- •...
- Page 90 Before you call for service... Problem Possible Causes What To Do "Burning" or "oily" odor This is normal in a new oven and will • To speed the process set a self-clean cycle for a minimum of 3 emitting from the oven disappear in time.
-
Page 91: Accessories
Knobs Cleaner Cleaning Pads Scraper Tired of discolored racks? Wishing you had extra-heavy-duty oven racks? NOW AVAILABLE for your range: GE's innovative, self-cleanable porcelain-coated oven racks! • Heavy Duty • Durable • Able to be cleaned in a self-cleaning oven... - Page 92 Notas/Notes...
- Page 93 Notas/Notes...
- Page 94 Notas/Notes...
- Page 95 Antes de solicitar un servicio de garantía: 1) Asegúrese de haber seguido las indicaciones de instalación, uso y cuidados que menciona el instructivo. 2) Localice y tenga a la mano su garantía debidamente sellada o bien la factura, nota o comprobante de compra. Este documento es indispensable para hacer válida la garantía.
- Page 96 Póliza de garantía Leiser S. de R.L. de C.V. garantiza este producto por 1 año a partir de la fecha de compra, contra cualquier defecto atribuible a la calidad de sus materiales o mano de obra durante su fabricación, bajo las siguientes condiciones: 1.