Elkay EZ Series Installation, Care & Use Manual
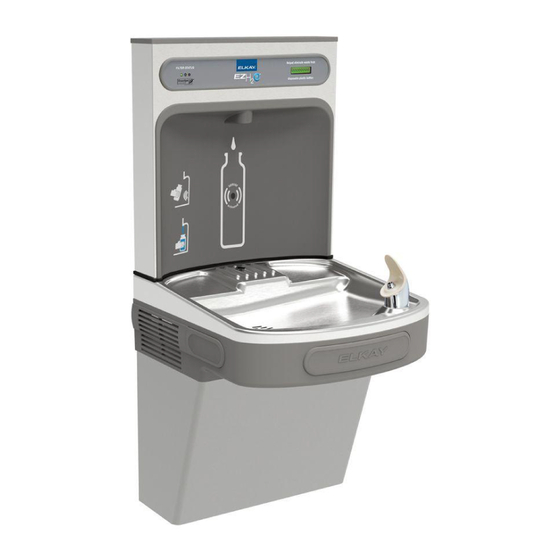
Versatile bottle filling stations & coolers
Hide thumbs
Also See for EZ Series:
- Installation, care & use manual (18 pages) ,
- Installation & use manual (10 pages) ,
- Installation, care & use manual (8 pages)
Advertisement
Quick Links
EZSTLG8WS*1B
LZSTLG8WS*1B
Buy at
| 855-558-9600 | BottleFillingStations.com
INSTALLATION, CARE & USE MANUAL
Manual de Instalación, Cuidado y Utilización
Manuel d'installation/entretien/utilisation
EZ
& LZ™ Series Versatile Bottle Filling Stations & Coolers
™
EZ™ & LZ™ Serie versatil Botella Bombas y Enfriadores
EZ™ & LZ™ Stations versatile de Remplissage de Bouteille Série et Refroidisseurs
*Versatile Cooler Model LZSTLG8WSLK
alternate installations
*Versatile Cooler Model LZSTLG8WSLK
configuration as shippe
*Versatile cooler design allows units to be
installed either left-hand high and right-hand low
or left-low and right high.
Basin change may be required. See desired
rough-in to help determine if the basin change is
necessary.
Page 1
1000001714 (Rev. G - 06/16)
Advertisement

Related Manuals for Elkay EZ Series


Summary of Contents for Elkay EZ Series
- Page 1 EZSTLG8WS*1B LZSTLG8WS*1B Buy at | 855-558-9600 | BottleFillingStations.com INSTALLATION, CARE & USE MANUAL Manual de Instalación, Cuidado y Utilización Manuel d’installation/entretien/utilisation & LZ™ Series Versatile Bottle Filling Stations & Coolers ™ EZ™ & LZ™ Serie versatil Botella Bombas y Enfriadores EZ™...
- Page 2 Buy at | 855-558-9600 | BottleFillingStations.com Note: Danger! Electric shock hazard. Disconnect power before servicing unit. Nota: peligro! Peligro de descarga eléctrica. Desconecte antes de reparar la unidad. Remarque : Danger ! Risque d'électrocution. Débrancher avant de réparer l'appareil. Pictured is unit only without bottle filler. En la foto, la unidad sólo sin relleno botella.
- Page 3 Buy at | 855-558-9600 | BottleFillingStations.com Fig. 2 Page 3 1000001714 (Rev. G - 06/16)
- Page 4 Buy at | 855-558-9600 | BottleFillingStations.com Fig. 3 1000001714 (Rev. G - 06/16) Page 4...
- Page 5 Buy at | 855-558-9600 | BottleFillingStations.com Fig. 4 Page 5 1000001714 (Rev. G - 06/16)
- Page 6 Buy at | 855-558-9600 | BottleFillingStations.com Fig. 5 1000001714 (Rev. G - 06/16) Page 6...
-
Page 7: Entretien
Buy at | 855-558-9600 | BottleFillingStations.com HANGER BRACKETS INSTALLATION INSTALACIÓN DE SOPORTES PARA COLGAR SUPPORTS DE CROCHET DE SUSPENSION INSTALLATION Retire el soporte fijador que se encuentra conectado 1) Remove hanger brackets fastened to back of cooler la parte posterior del enfriador sacando un (1) tornillo. 1) Retirez le support de suspension fixé... - Page 8 Buy at | 855-558-9600 | BottleFillingStations.com Service Instructions Lower and Upper Shroud To access the refrigeration system and plumbing connections, remove four screws from bottom of cooler to remove the lower shroud. To remove the upper shroud for access to the pushbars, regulator, solenoid valve or other components located in the top of the unit, remove lower shroud, disconnect drain, remove four screws from tabs along lower edge of upper shroud, unplug two wires and water tube.
- Page 9 Buy at | 855-558-9600 | BottleFillingStations.com 7/16” BOLT HOLES FOR MOUNTING FASTENING UNIT TO WALL TOP COVER SCREWS UNIT CENTER LINE Fig. 8 Fig. 9 BRACKET, WASHERS, & SCREWS Fig. 10 Fig. 11 Bottle Filler Installation Instructions 1) Remove two (2) mounting screws with 5/32” Allen wrench holding top cover to Bottle Filler (See Fig. 9). Remove top cover. Note do not discard mounting screws, they will be needed to reinstall top cover.
- Page 10 Buy at | 855-558-9600 | BottleFillingStations.com BF11 - BF12 PROGRAM SETTING THE CONTROL BOARD VERIFY CONTROL BOARD SOFTWARE Continued from below: 1) To verify the software program of the control board the unit will 2) When the display changes to “SETTINGS”, depress the button again. need to be shut down and restarted.
- Page 11 Buy at | 855-558-9600 | BottleFillingStations.com INSTRUCTIONS TO MOVE THE BOTTLE FILLER & BASIN TO THE LEFT SIDE (NON-REFRIGERATED) FOR ALTERNATE MOUNTING VERSATILE BI-LEVEL Using a 5/16" socket, remove the (4) screws from the bottom ONLY move the filler panel and j-clip Using a #T20 (6 point star bit), of each cooler to remove the to the refrigerated (right) side...
- Page 12 Buy at | 855-558-9600 | BottleFillingStations.com INSTRUCTIONS CONTINUED..Swap drain parts in shroud: Loosen each hose clamp retaining the drain pieces. Remove each drain piece and swap to other basin. Tighten each hose clamp. Refrigerated Cooler side: Carefully tip the shroud/basin assembly toward the cooler frame.
- Page 13 Buy at | 855-558-9600 | BottleFillingStations.com Versatile Wrapper and Trim Kit Installation Instructions Left Hand Wrapper (High Side) Right Hand Wrapper 1) Remove existing wrapper (Low Side) by removing the (4) screws 1) Remove existing wrapper from bottom. by removing the (4) screws 2) Screw trim piece to wrapper from bottom.
- Page 14 Buy at | 855-558-9600 | BottleFillingStations.com PLUMBING DIAGRAMS VERSATILE BI-LEVEL Barb capped when not used Bottle Filler Drain Bottle Filler Drain Barb capped when not used Bottle Filler Drain Barb capped when not used Bottle Filler Drain Barb capped when not used 1000001714 (Rev.
- Page 15 Buy at | 855-558-9600 | BottleFillingStations.com Page 15 1000001714 (Rev. G - 06/16)
-
Page 16: Cleaning The Strainer
Buy at | 855-558-9600 | BottleFillingStations.com NOTE: When installing replacement bubbler and pedestal, tighten nut only to hold parts snug in position. Do Not Overtighten. NOTA: Al instalar el grifo y pedestal de reemplazo, apriete la tuerca unicamente para mantener las piezas en una Basin posicion adjustada. - Page 17 Buy at | 855-558-9600 | BottleFillingStations.com OPERATION OF QUICK CONNECT FITTINGS OPERATION OF QUICK CONNECT FITTINGS SIMPLY PUSH IN SIMPLY PUSH IN TUBE IS SECURED PUSH IN COLLET TUBE IS SECURED PUSH IN COLLET TUBE TO ATTACH IN POSITION TUBE TO ATTACH IN POSITION TO RELEASE TUBE TO RELEASE TUBE...
- Page 18 POUR OBTENIR DES PIÈCES, CONTACTEZ VOTRE DISTRIBUTEUR LOCAL OU COMPOSEZ LE 1.800.834.4816 PRINTED IN U.S.A. IMPRESO EN LOS E.E.U.U. ELKAY MANUFACTURING COMPANY • 2222 CAMDEN COURT • OAK BROOK, IL 60523 • 630.574.8484 IMPRIMÉ AUX É.-U. 1000001714 (Rev. G - 06/16)