Table of Contents
Advertisement
Quick Links
Advertisement
Table of Contents

Related Manuals for Comtrend Corporation WAP-60AX


Summary of Contents for Comtrend Corporation WAP-60AX
- Page 1 WAP-60AX Wireless Access Point AX4200 User Manual Version V3.0, October 18, 2021...
- Page 2 Preface This manual provides information related to the installation and operation of this device. The individual reading this manual is presumed to have a basic understanding of telecommunications terminology and concepts. If you find the product to be inoperable or malfunctioning, please contact technical support for immediate service by email at INT-support@comtrend.com For product update, new product release, manual revision, or software upgrades,...
- Page 3 WARNING Disconnect the power line from the device before servicing For indoor use only Do NOT open the casing Do NOT use near water Keep away from the fire For use in ventilated environment / space Débranchez l'alimentation électrique avant l'entretien Cet appareil est conçu pour l'usage intérieur seulement N'ouvrez pas le boîtier N'utilisez pas cet appareil près de l'eau...
- Page 4 (e.i.r.p.) is not more than that permitted for successful communication. This device complies with Part 15 of the FCC Rules and Industry Canada licence-exempt RSS standard(s). Operation is subject to the following two conditions: 1. This device may not cause interference, and 2.
- Page 5 Copyright Copyright©2021 Comtrend Corporation. All rights reserved. The information contained herein is proprietary to Comtrend Corporation. No part of this document may be translated, transcribed, reproduced, in any form, or by any means without prior written consent of Comtrend Corporation.
- Page 6 Please send us a written request by email or mail to one of the following addresses: Email: Comtrend support team - opensource@comtrend.com Postal: Comtrend Corporation 3F-1, 10 Lane 609, Chongxin Rd., Section 5, Sanchong Dist, New Taipei City 24159,...
-
Page 7: Table Of Contents
Table of Contents CHAPTER 1 INTRODUCTION ....................7 CHAPTER 2 INSTALLATION ...................... 8 2.1 H ........................8 ARDWARE ETUP 2.1.1 Back Panel ........................9 2.1.2 Bottom Panel ........................11 2.1.3 Front Panel ........................12 CHAPTER 3 WEB USER INTERFACE ..................14 3.1 D ......................... -
Page 8: Chapter 1 Introduction
Chapter 1 Introduction The WAP-60AX is a high performance dual band (IEEE 802.11ax) WiFi 6 access point. The Wi-Fi interface operates 802.11ax 4T4R at 2.4GHz which is backward compatible with 802.11n/g/b and also supports high performance 802.11ax, 5T5R at 5GHz which is backward compatible with 802.11ac/n/a. There is also a 2.5G Ethernet port that can provide high-speed connectivity with local devices. -
Page 9: Chapter 2 Installation
Chapter 2 Installation 2.1 Hardware Setup Non-stackable This device is not stackable – do not place units on top of each other, otherwise damage could occur. Follow the instructions below to complete the hardware setup. -
Page 10: Back Panel
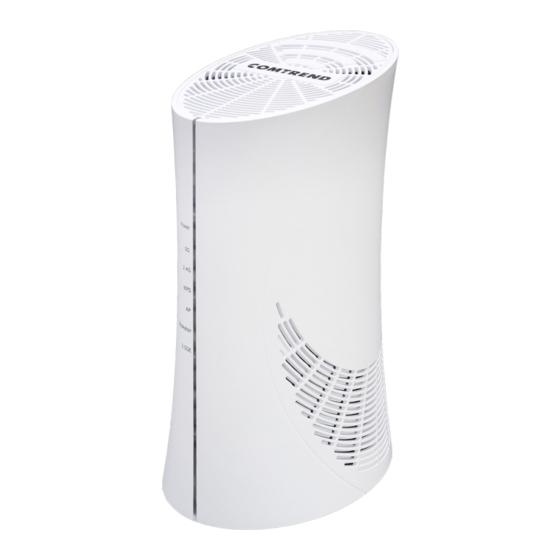
2.1.1 Back Panel The figure below shows the back panel of the device. WPS Button Press the WPS button to trigger the WPS function to connect with a wireless client within 2 minutes. AP/Repeater Switch Push the switch to the up position for AP (Access Point) mode. - Page 11 2.5G ETH Port One Ethernet port supports a link speed up to 2.5G and 1G connection with an RJ-45 cable, or 10/100BASE-T RJ-45 cable for standard network usage. This port is auto-sensing MDI/X; so either straight-through or crossover cable can be used.
-
Page 12: Bottom Panel
2.1.2 Bottom Panel Reset Button Restore the default parameters of the device by pressing the Reset button for 10 seconds. After the device has rebooted successfully, the front panel should display as expected (see section 2.1.3 Front Panel for details). -
Page 13: Front Panel
2.1.3 Front Panel The front panel LED indicators are shown below and explained in the following table. This information can be used to check the status of the device and its connections. Color Mode Description The device is powered up GREEN The device is powered down POST (Power On Self Test) failure (not bootable) or... - Page 14 (2.4GHz+5GHz) WPS connection successful No WPS association process ongoing GREEN Blink (2.4GHz+5GHz)WPS connection in progress Working in AP mode GREEN Not in AP mode Working in Repeater mode REPEATER GREEN Not in Repeater mode 2.5 Giga Ethernet connected 2.5GE GREEN 2.5 Giga Ethernet not connected Blink 2.5 Giga Ethernet is transmitting/receiving...
-
Page 15: Chapter 3 Web User Interface
Chapter 3 Web User Interface This section describes how to access the device via the web user interface (WUI) using an Internet browser such as Internet Explorer (version 5.0 and later). 3.1 Default Settings The factory default settings of this device are summarized below. •... -
Page 16: Ip Configuration
3.2 IP Configuration STATIC IP MODE In static IP mode, you assign IP settings to your PC manually. Follow these steps to configure your PC IP address to use subnet 192.168.1.x. NOTE: The following procedure assumes you are running Windows. However, the general steps involved are similar for most operating systems (OS). -
Page 17: Login Procedure
3.3 Login Procedure Perform the following steps to login to the web user interface. NOTE: The default settings can be found in section 3.1 Default Settings. STEP 1: Start the Internet browser and enter the default IP address for the device in the Web address field. - Page 18 STEP 3: After successfully logging in for the first time, you will reach this screen.
-
Page 19: Chapter 4 Access Point Mode
Chapter 4 Access Point Mode The web user interface window is divided into two frames, the main menu (on the left) and the display screen (on the right). The main menu has several options and selecting each of these options opens a submenu with more selections. -
Page 20: Wireless (Ap)
4.2 Wireless (AP) Click the wireless tab to access the wireless page. Click the button to save your settings. Item Description SSID Sets the Service Set Identifier (also known as the network name) of this network Broadcast Check the checkbox to enable Priority Select the priority (0-3) from the drop-down menu Encryption... - Page 21 Passphrase Enter the security key for wireless encryption. The length must be greater than eight characters. Stands for Protected Management Frame. This setting must be enabled if security is WPA3. For devices that support WPA2, it is recommended to disable this setting. Click the button to display the following.
- Page 22 Click the button to display the following. Item Description The Index of the associated station Station MAC address of the associated station RSSI The received signal strength indicator Rx Bytes Number of Bytes received Tx Bytes Number of Bytes transmitted Operating Bandwidth of the associated station Click the icon to delete a wireless interface.
-
Page 23: Radio (Ap)
4.3 Radio (AP) Click the radio tab to access the radio page. Radio 5G Click the button to save your settings. Item Description Radio Mode Select Repeater or Access Point from the drop-down menu Wireless Band Select the wireless band from the drop-down menu Bandwidth Select the bandwidth (20-160MHz) from the... - Page 24 Radio 2.4G Item Description Radio Mode Select the radio mode (Repeater or Access Point) from the drop-down menu. Wireless Band Select the wireless band from the drop-down menu. Bandwidth Select the bandwidth from the drop-down menu. Channel Select the channel from the drop-down menu. DTIM Period Set the DTIM period of wireless radio.
-
Page 25: System (Ap)
Click the System tab to access the system page. Once on the System page, click on the Reboot tab to display the reboot page. If you are sure that you want to reboot your WAP-60AX, click the button. The reboot process is shown here for your reference. -
Page 26: Logout (Ap)
4.5 Logout (AP) Click on the tab to logout from your WAP-60AX. -
Page 27: Chapter 5 Repeater Mode
Chapter 5 Repeater Mode The web user interface window is divided into two frames, the main menu (on the left) and the display screen (on the right). The main menu has several options and selecting each of these options opens a submenu with more selections. -
Page 28: Wireless (Repeater)
5.2 Wireless (Repeater) Click the wireless tab to access the wireless page. Click the button to save your settings. Item Description SSID Sets the Service Set Identifier (also known as the network name) of this network... - Page 29 Broadcast Check the checkbox to enable Priority Select the priority (0-3) from the drop-down menu Encryption Select the encryption method from the drop-down menu Passphrase Enter the security key for wireless encryption. The length must be greater than eight characters. Stands for Protected Management Frame.
- Page 30 Item Description Status Shows where the access point is open or encrypted SSID Displays the Service Set Identifier (also known as the network name) of this network BSSID Basic service set identifiers Channel Displays the channel number RSSI The received signal strength indicator Click the button to display the following.
- Page 31 Click the button to add virtual access points (guest SSID interfaces). Click the button to add an entry. Click the button to save the entry. Item Description WPS Configured State Select from the drop-down menu WPS PBC This is the software WPS (WiFi Protected Setup) PBB Push Button Configuration button) WPS PIN...
- Page 32 Click the button to display the following. Click the icon to delete a wireless interface. The following window will pop Click the button to confirm or the button to close the window.
-
Page 33: Radio (Repeater)
5.3 Radio (Repeater) Click the radio tab to access the radio page. Radio 5G Click the button to save your settings. Item Description Radio Mode Select the radio mode (Repeater or Access Point) from the drop-down menu Wireless Band Select the wireless band from the drop-down menu Bandwidth Select the bandwidth bandwidth (20-160MHz) from the drop-down menu... - Page 34 Radio 2.4G Item Description Radio Mode Select the radio mode (Repeater or Access Point) from the drop-down menu. Wireless Band Select the wireless band from the drop-down menu. Bandwidth Select the bandwidth from the drop-down menu. Channel Select the channel from the drop-down menu.
-
Page 35: System (Repeater)
Click the System tab to access the system page. Once on the System page, click on the Reboot tab to display the reboot page. If you are sure that you want to reboot your WAP-60AX, click the button. The reboot process is shown below for your reference. -
Page 36: Logout (Repeater)
5.5 Logout (Repeater) Click on the tab to logout from your WAP-60AX. -
Page 37: Appendix A - Pin Assignments
Appendix A - Pin Assignments Giga ETHERNET Port (RJ45) Name Description BI_DA+ Bi-directional pair A + BI_DA- Bi-directional pair A - BI_DB+ Bi-directional pair B + BI_DC+ Bi-directional pair C + BI_DC- Bi-directional pair C - BI_DB- Bi-directional pair B - BI_DD+ Bi-directional pair D + BI_DD-... -
Page 38: Appendix B - Specifications
Environment .Operating Temperature: 0°C ~40°C (32°F ~104°F) .Operating Humidity: 10%~90% non-condensing .Storage Temperature: -25°C ~65°C (-23°F ~149°F) .Storage Humidity: 5%~90% non-condensing Kit Weight (1* WAP-60AX, 1*RJ45 cable, 1*power adapter) = 0.8 kg NOTE: Specifications are subject to change without notice.