Table of Contents
Advertisement
Quick Links
Advertisement
Table of Contents

Related Manuals for Ricoh M040


Summary of Contents for Ricoh M040
- Page 1 MD-P1b / M040 / C311N MD-P1c / M041 / C312DN M040/M041 Service Training Product Overview MD-P1b / MD-P1c C311N / C312DN Version - 1.0 Slide 1 Most recently updated November 6th, 2008 Presentation edited/compiled by: Ron Faxon ron.faxon@nts.ricoh.co.jp...
- Page 2 MD-P1b / M040 / C311N MD-P1c / M041 / C312DN Training Material Outline - 1/2 This training material consists of the following: Product Overview » Basic introduction to this machine, including Target User information and Product Positioning information. Installation » Installation procedures are gone over. Note that this and every...
- Page 3 MD-P1b / M040 / C311N MD-P1c / M041 / C312DN Training Material Outline - 2/2 Machine Overview » Specifications, Optional Equipment, various mechanical procedures covered. Laser Exposure » Laser unit parts, optical path, etc. covered. AIO (All-In-One) Cartridge » Detailed explanation of how the AIO cartridge works.
- Page 4 MD-P1b / M040 / C311N MD-P1c / M041 / C312DN Target User High G-P2 Ar-P2 MD-P1 Unit price High SMA (Super Major Account): Mixture of G-P2, MD-P1, and PE-P1 MA (Major Account) - MD-P1: Replaces old four-pass CLP (Color Laser Printer) with higher spec design Replaces compact 16-25ppm B&W printer with compact and economical CLP.
-
Page 5: Product Positioning
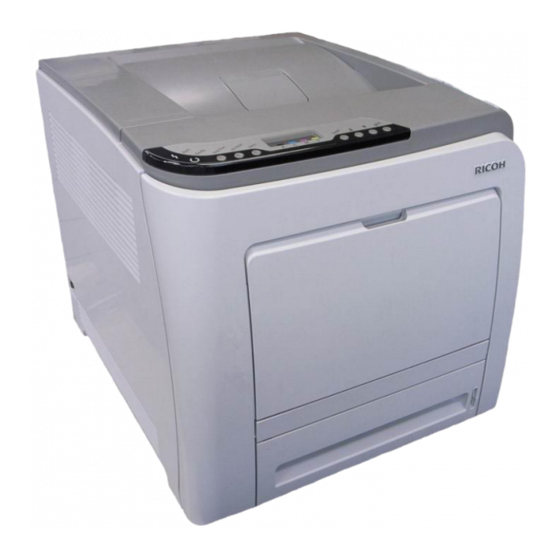
MD-P1b / M040 / C311N MD-P1c / M041 / C312DN Product Positioning Price The MD-P1 falls between the AR-P2 and the G-P2 Performance The MD-P1 falls between the AR-P2 and the G-P2 MD-P1 Sales Points: Machine compactness Reasonably low TCO... - Page 6 MD-P1b / M040 / C311N MD-P1c / M041 / C312DN The Machine This is how There is also an the machine optional Paper Tray looks. which goes under the machine (not shown here). Slide 6 More on the Machine The picture shows the machine without the optional paper tray units attached.
-
Page 7: Operation Panel
MD-P1b / M040 / C311N MD-P1c / M041 / C312DN Operation Panel Go to the machine and have a look at the operation panel and familiarize yourself with the various keys. Slide 7 The recommended 70 cm front space is to allow sufficient space for the paper tray to be pulled out. -
Page 8: Service Training
MD-P1b / M040 / C311N MD-P1c / M041 / C312DN M040/M041 Service Training Installation Slide 8... - Page 9 MD-P1b / M040 / C311N MD-P1c / M041 / C312DN Space Requirements Slide 9...
- Page 10 MD-P1b / M040 / C311N MD-P1c / M041 / C312DN Removing Tape from Cartridges As shown in the illustrations, be sure to carefully remove all strips of tape from each of the four AIO cartridges. Move each AIO cartridge from side-to-side to evenly distribute toner before reinserting in machine.
-
Page 11: Setting Paper Guides
MD-P1b / M040 / C311N MD-P1c / M041 / C312DN Setting Paper Guides - 1/2 As shown in the illustrations, push the bottom of the paper tray down until it locks flat, then insert paper and correctly set each of the paper guides. - Page 12 MD-P1b / M040 / C311N MD-P1c / M041 / C312DN Setting Paper Guides - 2/2 The above set of illustrations are on the inside of the paper drawer. Slide 12...
-
Page 13: Tray Set Sensor
MD-P1b / M040 / C311N MD-P1c / M041 / C312DN Tray Set Sensor - 1/2 Tray Set Sensor New to this version of the machine, the Tray Set Sensor detects when the paper drawer is inserted into the machine. Slide 13... - Page 14 MD-P1b / M040 / C311N MD-P1c / M041 / C312DN Tray Set Sensor - 2/2 Tray Tab The Tray Tab interacts with the Tray Set Sensor for Paper Tray detection. Slide 14...
-
Page 15: Optional Paper Tray
MD-P1b / M040 / C311N MD-P1c / M041 / C312DN Optional Paper Tray When installing the optional paper tray, carefully line up the pins (as shown in the above illustration). Slide 15... -
Page 16: Hardware Installation Procedure
MD-P1c / M041 / C312DN Hardware Installation Procedure This is a customer-installed machine. However, please install the machines, and see what types of errors the customers could make. See: » OI manuals and previous slides » M040/M041 Printers: Quick Installation Guide Slide 16... -
Page 17: Installing The Options
MD-P1b / M040 / C311N MD-P1c / M041 / C312DN Installing the Options The customer installs the options. Paper tray unit Memory Install the optional memory and paper tray unit: M040/M041 Printers: Hardware Guide. Installing the Printer and Options – Installing the Options... - Page 18 MD-P1b / M040 / C311N MD-P1c / M041 / C312DN Software Installation Procedure Printer Now you must do the following: Install Smart Organization Monitor (SOM) Specify an IP address Install the printer driver The customer normally does this. However, please install the software, and see what types of errors the customers could make.
-
Page 19: Software Installation Procedure
MD-P1b / M040 / C311N MD-P1c / M041 / C312DN Software Installation Procedure Now you must install the drivers and software. Software Guide The customer normally does this, but it's a good idea to practice installing the software, in order to see possible errors that the customers might make. - Page 20 MD-P1b / M040 / C311N MD-P1c / M041 / C312DN M040/M041 Service Training Service Mode Slide 20...
- Page 21 MD-P1b / M040 / C311N MD-P1c / M041 / C312DN Overview Printer Model To use service mode, you must connect a PC to the printer. » USB » Ethernet (use a normal Ethernet cable if connecting through a network, or use a crossover Ethernet cable if connecting directly to the printer).
- Page 22 MD-P1b / M040 / C311N MD-P1c / M041 / C312DN Printer Model - SOM (1/3) Start SOM on your PC. You will see the above screen. In the User Tools tab, click Printer Configuration. Slide 22...
- Page 23 MD-P1b / M040 / C311N MD-P1c / M041 / C312DN Printer Model - SOM (2/3) Input Admin074 and click OK. Slide 23 Admin074 gets access to the SP modes. The default password of ‘Admin’ is for the customer’s administrator. This password does not give access to SP modes.
- Page 24 MD-P1b / M040 / C311N MD-P1c / M041 / C312DN Printer Model - SOM (3/3) There are two tabs of SP modes. Slide 24...
-
Page 25: Entering Sp Mode
MD-P1b / M040 / C311N MD-P1c / M041 / C312DN Entering SP Mode The machine has the following two SP Modes. SP Mode (Service Program Mode): The SP Mode includes the programs that are necessary for standard maintenance work. SSP Mode (Special SP Mode): The SSP Mode includes SP Mode programs and some special programs. - Page 26 MD-P1b / M040 / C311N MD-P1c / M041 / C312DN Service Program with Operation Panel Some service programs can be accessed via the LCD- equipped operation panel of this machine, in addition to the SOM. Start Service Program (via Operation Panel): Press both the Start/Stop key and Escape key together.
- Page 27 MD-P1b / M040 / C311N MD-P1c / M041 / C312DN M040/M041 Service Training Updating the Firmware Slide 27...
- Page 28 MD-P1b / M040 / C311N MD-P1c / M041 / C312DN Procedures Printer Model: Start SOM and follow the procedures in the manual. You must connect a PC to the printer to use SOM. » USB » Ethernet (use a normal Ethernet cable if connecting through a network, or use a crossover Ethernet cable if connecting directly to the printer).
- Page 29 MD-P1b / M040 / C311N MD-P1c / M041 / C312DN Cautions - 1/2 Do not turn off the main power of the machine during firmware updating. If you switch the power off, the engine board and/or controller board may be damaged.
- Page 30 MD-P1b / M040 / C311N MD-P1c / M041 / C312DN Cautions - 2/2 The machine displays a message to indicate that download is complete. This message appears on the SOM on the connected PC, as well as on the machine’s operation panel.
-
Page 31: Download The Firmware
MD-P1b / M040 / C311N MD-P1c / M041 / C312DN Download the Firmware Do the procedures in the service manual: Service Manual – Service Tables – Firmware Updating – Printer Model » Controller Firmware » Engine Firmware Follow all notes and cautions in the manual. - Page 32 MD-P1b / M040 / C311N MD-P1c / M041 / C312DN M040/M041 Service Training Maintenance Slide 32...
- Page 33 MD-P1b / M040 / C311N MD-P1c / M041 / C312DN Procedures The following maintenance procedures are done by the user. Replacing the Print Cartridges » There are two types of print cartridges: Short Life & Long Life Replacing the Waste Toner Tank »...
- Page 34 MD-P1b / M040 / C311N MD-P1c / M041 / C312DN Study the Procedures Hardware Guide: Replacing Consumables Slide 34...
- Page 35 MD-P1b / M040 / C311N MD-P1c / M041 / C312DN M040/M041 Service Training Machine Overview Slide 35...
-
Page 36: Main Specifications
Without 256 MB of extra memory, 2400 x 600 dpi duplex LG size cannot be printed. Other specs: Printer Language M040/M041: PJL, PCL 5c/6, PostScript Level 3 M041 only: PictBridge Paper sizes, paper types, paper weights: See the Operating Instructions (Hardware Guide - 4. Paper and Other Media) -
Page 37: Optional Equipment
MD-P1b / M040 / C311N MD-P1c / M041 / C312DN Optional Equipment Memory Unit Type F 256MB G891 TK1010 Paper Feed Unit G849 Both of these options are in common with model PE-P1 Slide 37... - Page 38 MD-P1b / M040 / C311N MD-P1c / M041 / C312DN View of Machine - Front Door Open Transfer Unit Fusing Unit Waste Toner Tank Image Transfer Belt The Transfer Unit, Fusing Unit, Image Transfer Belt, and Waste Toner Tank are all easily removed from the front of the machine - as illustrated in the following slides.
-
Page 39: Print Cartridges
MD-P1b / M040 / C311N MD-P1c / M041 / C312DN Print Cartridges The four AIO (All In One) toner cartridges are shown above. Slide 39... - Page 40 MD-P1b / M040 / C311N MD-P1c / M041 / C312DN Removal & Installation of Transfer Unit The Transfer Unit is easy to remove and to install - as shown in the above illustrations. When reinstalling the Transfer Unit, carefully align with guide marks, as...
- Page 41 MD-P1b / M040 / C311N MD-P1c / M041 / C312DN Removing and Opening the Transfer Unit The Transfer Unit can be opened by pushing buttons on both sides of the unit (as shown above). Slide 41...
- Page 42 MD-P1b / M040 / C311N MD-P1c / M041 / C312DN Waste Toner Tank Removal Waste Toner Tank Removal When removing (and also installing) Waste Toner Tank, be careful not to let it come into contact with Image Transfer Belt, which could damage the belt.
- Page 43 MD-P1b / M040 / C311N MD-P1c / M041 / C312DN Removal & Replacement of Image Transfer Belt Unit Image Transfer Belt Unit Screws Remove two screws and then pull the Image Transfer Unit straight out. First remove the cover of the new unit before reinstalling (as shown below).
-
Page 44: Fusing Unit Removal
MD-P1b / M040 / C311N MD-P1c / M041 / C312DN Fusing Unit Removal Lock Levers Fusing Unit Removal of the Fusing Unit is easy and straightforward. Pull the Lock Levers down with thumbs (as shown in illustration), and then pull straight back. - Page 45 MD-P1b / M040 / C311N MD-P1c / M041 / C312DN Left Side of Machine (Cover Off) Slide 45 Note that there is one less motor than the previous machine. The same functionality is achieved via a solenoid and gearing.
- Page 46 MD-P1b / M040 / C311N MD-P1c / M041 / C312DN Rear & Right Sides (Cover Off) View of the inside of the machine (rear & right sides) For view of left side of machine with the cover off, see previous slide.
-
Page 47: Circuit Boards
MD-P1b / M040 / C311N MD-P1c / M041 / C312DN Circuit Boards Slide 47... -
Page 48: Power Supply Board
MD-P1b / M040 / C311N MD-P1c / M041 / C312DN Power Supply Board View of power supply after removal from machine. Slide 48... -
Page 49: Laser Unit
MD-P1b / M040 / C311N MD-P1c / M041 / C312DN Laser Unit Bottom (Cover Removed) Laser Unit - upper view, bottom view, and upper view with cover removed. Slide 49... -
Page 50: Removal Of Rear Cover
MD-P1b / M040 / C311N MD-P1c / M041 / C312DN Removal of Rear Cover Pull Here Rear Cover Tabs Push up on lower edge of cover, and - starting with the left upper cover - carefully pull the tabs out of the metal slots. - Page 51 MD-P1b / M040 / C311N MD-P1c / M041 / C312DN Interior of Machine AIO Cartridges Waste Toner Tank Transfer Roller Slide 51 1. AIO Print Cartridges: Load from the machine rear, in the order of cyan (C), magenta (M), yellow (Y), and black (K). Messages appear on the screen on the operation panel when print cartridges need to be replaced.
- Page 52 MD-P1b / M040 / C311N MD-P1c / M041 / C312DN Optical Paths Polygon Mirror Waste Toner Tank View of light path for laser unit. (This design facilitates speed.) Slide 52 Optical Path: - The laser beams for magenta and yellow are sent to the upper part of the polygon mirror.
-
Page 53: Paper Paths
MD-P1b / M040 / C311N MD-P1c / M041 / C312DN Paper Paths By-pass Tray Waste Toner Tank Optional Paper Tray View of paper paths Slide 53... - Page 54 MD-P1b / M040 / C311N MD-P1c / M041 / C312DN Drive Layout - 1/3 Laser Unit Color C-AIO M-AIO Y-AIO K-AIO Motor Black Motor Color AIO (All-In-One cartridge) Motor: Drives the components in the three color AIOs (C, M, & Y) Black AIO Motor: Drives the components in the Black (K) AIO.
- Page 55 MD-P1b / M040 / C311N MD-P1c / M041 / C312DN Drive Layout - 2/3 Fusing Unit Laser Unit Transport/ Fusing/ Duplex Motor C-AIO M-AIO Y-AIO K-AIO Transport/Fusing/Duplex Motor: Drives the paper feed/registration rollers and the fusing unit, as well as the paper exit roller & gears (duplex and non-duplex models).
- Page 56 MD-P1b / M040 / C311N MD-P1c / M041 / C312DN Drive Layout - 3/3 Fusing Unit Laser Unit Transport/ Fusing/ Duplex Color Motor C-AIO M-AIO Y-AIO K-AIO Motor Black Motor ITB Motor Agitator Motor Duplex Clutch Paper Feed Registration Clutch...
- Page 57 MD-P1b / M040 / C311N MD-P1c / M041 / C312DN Clutch Assembly Unit Front & Rear views of Clutch Assembly Unit. (Right) - Four clutches removed from Clutch Assembly Unit. Slide 57...
- Page 58 MD-P1b / M040 / C311N MD-P1c / M041 / C312DN Clutch Clips Clip When removing plastic clips to remove clutches, use caution not to misplace. Slide 58...
-
Page 59: Electrical Component Defects
MD-P1b / M040 / C311N MD-P1c / M041 / C312DN Electrical Component Defects Examine the following electrical component defects. (See Service Manual for details.) Sensors Switches Blown Fuses Slide 59... -
Page 60: Printing Process
MD-P1b / M040 / C311N MD-P1c / M041 / C312DN Printing Process - 1 The charge roller gives the drum a negative charge. The laser beam writes the latent image on the Charge Laser drum. Roller Beam Drum Slide 60... - Page 61 MD-P1b / M040 / C311N MD-P1c / M041 / C312DN Printing Process - 2 The development roller applies toner to the latent image on the drum. The image transfer Development roller pulls the Roller developed toner image onto the image transfer belt.
- Page 62 MD-P1b / M040 / C311N MD-P1c / M041 / C312DN Printing Process - 3 The paper transfer roller pulls the developed toner image from the image transfer belt onto the paper. Image Transfer Belt Paper Transfer Roller Slide 62...
- Page 63 MD-P1b / M040 / C311N MD-P1c / M041 / C312DN TM Sensors The central TM sensor is used for process control. The other two TM sensors are used for MUSIC and other internal adjustments. Slide 63 For more about process control, read this section of the manual.
- Page 64 MD-P1b / M040 / C311N MD-P1c / M041 / C312DN Process Control Summary What is done? The machine calibrates the TM sensors The machine makes a 9-grade pattern on the belt, and the central TM sensor scans these patterns. The machine can then calculate the correct development bias and laser diode power.
- Page 65 MD-P1b / M040 / C311N MD-P1c / M041 / C312DN Boards The engine board (also referred to as the "EGB") controls the engine. This is the machine’s main board. Controller: Controls the interface with the operation panel, and controls applications ID Chip Board: Relays data about the AIOs to/from the engine board.
-
Page 66: Replacing Boards
MD-P1b / M040 / C311N MD-P1c / M041 / C312DN Replacing Boards The EEPROM on the controller cannot be removed. However, the EEPROM on the engine board can be removed. When replacing the engine board, take the EEPROM from the old board and install it on the new one. -
Page 67: Replacing The Eeprom
MD-P1b / M040 / C311N MD-P1c / M041 / C312DN Replacing the EEPROM After you replace the EEPROM, do the procedure in the service manual. What does Transfer Belt Adjust do? A new transfer belt may not be exactly same length as old one. -
Page 68: Power Supply Unit (Psu)
MD-P1b / M040 / C311N MD-P1c / M041 / C312DN Power Supply Unit (PSU) The PSU contains a fuse. This fuse can be replaced. Always use the correct type of fuse, or the machine could be damaged. See the service manual for the correct type of fuse to install. -
Page 69: Error Codes
MD-P1b / M040 / C311N MD-P1c / M041 / C312DN Error Codes Error codes can be seen with SOM (printer models) or on the operation panel (MF models). Fusing related SCs: To prevent damage, the machine cannot be operated until the SC has been reset by a technician. -
Page 70: Image Problems
MD-P1b / M040 / C311N MD-P1c / M041 / C312DN Image Problems 24-mm intervals: Image Paper transfer belt unit Feed 38-mm intervals: AIO cartridge (Development roller) Problems at 60-mm intervals: Transfer Regular roller Intervals 75-mm intervals: AIO cartridge (OPC drum) - Page 71 MD-P1b / M040 / C311N MD-P1c / M041 / C312DN Removals - Covers Practice removing the following according to Service Manual procedures. Rear Cover Operation Panel Right Cover Left Cover Front Cover Unit Laser Optics Housing Unit Slide 71...
-
Page 72: Transfer Unit
MD-P1b / M040 / C311N MD-P1c / M041 / C312DN Transfer Unit Non-Duplex Model Duplex Model Duplex Belt Drive (for Duplex model) Note that Transfer Unit for duplex model has a belt drive (for reverse direction) not on non-duplex model. -
Page 73: Memory Slot
MD-P1b / M040 / C311N MD-P1c / M041 / C312DN Memory Slot The machine has one memory expansion slot, accessed from the rear of the machine, as shown above (illustration) and below (photo). Built-in Memory Chips (128MB) Slide 73... -
Page 74: Service Training
MD-P1b / M040 / C311N MD-P1c / M041 / C312DN M040/M041 Service Training Laser Exposure Slide 74 Most recently updated October 2008... - Page 75 MD-P1b / M040 / C311N MD-P1c / M041 / C312DN Laser Unit Glass Mirrors LD Unit - C/M LSD - (Laser Synchronizing Detector) Polygon Mirrors Lenses LD Unit - K/Y Glass Mirrors Slide 75...
- Page 76 MD-P1b / M040 / C311N MD-P1c / M041 / C312DN Overview LD Unit - C/M LD Unit - K/Y Polygon Mirrors Two LD units, two hexagonal mirrors One laser synchronizing detector board (LSD) Slide 76 Laser exposure for magenta and cyan starts from the left side of the drum, but for yellow and black it starts from the right side of the drum.
-
Page 77: Optical Path
MD-P1b / M040 / C311N MD-P1c / M041 / C312DN Optical Path Polygon Mirrors Drums The laser beams for magenta and yellow are sent to the upper part of the polygon mirror. The laser beams for cyan and black are sent to the lower part of the polygon mirror. -
Page 78: Safety Switches
MD-P1b / M040 / C311N MD-P1c / M041 / C312DN Safety Switches A safety switch disconnects power to the laser diodes when the front cover or the top cover is opened. Slide 78... -
Page 79: General Caution
MD-P1b / M040 / C311N MD-P1c / M041 / C312DN General Caution Turn off the main power switch and unplug the printer before you start to work on the laser unit. Laser beams can cause serious eye injury. Slide 79... -
Page 80: Laser Optics Housing Unit
MD-P1b / M040 / C311N MD-P1c / M041 / C312DN Laser Optics Housing Unit Always use two hands when carrying the laser optics housing unit, exercising care not to drop it. Slide 80... - Page 81 MD-P1b / M040 / C311N MD-P1c / M041 / C312DN After Replacing Laser Optics Housing Unit Important: First, open the front cover and turn on the machine. Then, input the setting values for the laser optics housing unit with "LSU Adjustment".
- Page 82 MD-P1b / M040 / C311N MD-P1c / M041 / C312DN Replacement Do the procedures in these sections of the service manual. Replacement and Adjustment – Laser Optics Follow all notes and cautions in the manual. Slide 82...
- Page 83 MD-P1b / M040 / C311N MD-P1c / M041 / C312DN M040/M041 Service Training AIO Cartridge Slide 83...
- Page 84 MD-P1b / M040 / C311N MD-P1c / M041 / C312DN Overview Waste Toner Area The AIO cartridge contains the OPC (Organic Photoconductor) drum, development unit, cleaning unit, charge roller, and waste toner disposal area. The toner is mono-component Charge (no carrier).
- Page 85 MD-P1b / M040 / C311N MD-P1c / M041 / C312DN Drive Gear The black AIO is driven by the black AIO motor. The three color AIOs are driven by the color AIO motor. A gear transmits drive from the motor to the other gears and rollers in the AIO.
- Page 86 MD-P1b / M040 / C311N MD-P1c / M041 / C312DN Charge Charge roller Drum The charge roller gives the drum a negative charge. Slide 86...
- Page 87 MD-P1b / M040 / C311N MD-P1c / M041 / C312DN Cleaning The drum and the Charge roller charge roller both cleaning blades have cleaning blades. Waste toner from cleaning goes to the toner collection coil. The toner collection coil moves the toner...
-
Page 88: Waste Toner Collection
MD-P1b / M040 / C311N MD-P1c / M041 / C312DN Waste Toner Collection - 1 Waste Toner Collection Roller Waste Toner Transport Belt Transport Belt Shaft Waste Toner Collection Coil The waste toner collection coil moves waste toner from the OPC to the right side of the AIO. - Page 89 MD-P1b / M040 / C311N MD-P1c / M041 / C312DN Waste Toner Collection - 2 Waste Toner Transport Tank Belt Shaft Waste Toner Collection Roller Flexible Sheet A flexible sheet separates the unused toner area from the waste toner area.
- Page 90 MD-P1b / M040 / C311N MD-P1c / M041 / C312DN Toner Mixing Upper Mixing Toner Roller Agitator Lower Mixing Roller Development Roller The toner agitator mixes the toner so that it is transported evenly to the mixing rollers. The upper mixing roller moves toner to the center, then the lower mixing roller moves toner to the right and left sides.
- Page 91 MD-P1b / M040 / C311N MD-P1c / M041 / C312DN Development Development Blade Toner Supply Roller Development Roller The toner supply roller supplies toner to the development roller. Electrostatic attraction generated by the friction between these two rollers moves toner to the development roller The development blade gives the layer of toner on the development roller an even thickness.
- Page 92 MD-P1b / M040 / C311N MD-P1c / M041 / C312DN Development Roller Discharge Development Roller Discharge Sheet The discharge sheet removes charge from the development roller after it has turned past the drum. Slide 92 This system is used instead of a quenching lamp.
-
Page 93: Toner Near-End & End Detection
MD-P1b / M040 / C311N MD-P1c / M041 / C312DN Toner Near-end & End Detection The machine uses the following to detect toner near-end and end: Pixel count since the new toner was installed. AIO rotation distance (machine copy speed x... - Page 94 MD-P1b / M040 / C311N MD-P1c / M041 / C312DN New AIO Detection There is a new unit detection mechanism for the AIO. It uses an ID chip that is built into each AIO. There are also new detection mechanisms for:...
- Page 95 MD-P1b / M040 / C311N MD-P1c / M041 / C312DN Replacement Do the procedures in these sections of the service manual. Replacement and Adjustment – AIO Cartridge Follow all notes and cautions in the manual. Slide 95...
-
Page 96: Service Training
MD-P1b / M040 / C311N MD-P1c / M041 / C312DN M040/M041 Service Training Paper Feed Slide 96... - Page 97 MD-P1b / M040 / C311N MD-P1c / M041 / C312DN Overview Registration Rollers Paper Feed Paper End Roller Sensor Pick-up Roller Friction Pad This machine uses a friction pad and feed roller system. The tray can hold 500 sheets. The bypass can hold 100 sheets.
- Page 98 MD-P1b / M040 / C311N MD-P1c / M041 / C312DN Drive Registration Roller Paper Feed Roller Transport/Fusing Motor The transport/fusing motor controls the paper feed roller and registration roller with the paper feed clutch, registration clutch and gears. The transport/fusing motor also controls the fusing unit and paper exit roller.
- Page 99 MD-P1b / M040 / C311N MD-P1c / M041 / C312DN Registration Registration Roller Paper Feed Roller Transport/Fusing Motor When the registration sensor detects paper, the machine makes paper buckle at the registration roller to correct paper skew. Then, the registration clutch turns on, and then the registration roller transports a sheet of paper to the transfer roller unit.
-
Page 100: Paper End Detection
MD-P1b / M040 / C311N MD-P1c / M041 / C312DN Paper End Detection Paper End Sensor Feeler When the paper is finished, the feeler falls through a cutout in the bottom of the tray, and the sensor detects paper end. - Page 101 MD-P1b / M040 / C311N MD-P1c / M041 / C312DN Tray Lift Springs lift the bottom plate when the tray is installed in the machine. There is no mechanism to lower the tray. You must push the bottom plate down.
-
Page 102: Bypass Tray
MD-P1b / M040 / C311N MD-P1c / M041 / C312DN By-pass Tray - 1/3 Idle Gear (at tray-1) By-pass Bottom Spring Plate Gear By-pass Solenoid Lever When not feeding paper from the by-pass tray, the By-pass Solenoid Lever holds the By-pass Bottom Plate Gear inactive, with the toothless flat section of the By-pass Bottom Plate Gear next to the (continually rotating) Idle Gear. - Page 103 MD-P1b / M040 / C311N MD-P1c / M041 / C312DN By-pass Tray - 2/3 By-pass Bottom Idle Gear Plate Drive Gear By-pass Solenoid By-pass Bottom By-pass Plate Gear Step By-pass Solenoid Bottom Lever Flat Section of Gear Plate By-pass Solenoid Lever The rotating By-pass Bottom Plate Gear turns two cams (one on each side) which raise (and lower) the By-pass Bottom Plate.
- Page 104 MD-P1b / M040 / C311N MD-P1c / M041 / C312DN By-pass Tray - 3/3 Paper Tray By-pass Tray View of the paper tray and the by-pass tray. Slide 104...
- Page 105 MD-P1b / M040 / C311N MD-P1c / M041 / C312DN One-sided Output One-sided (printing output) paper path is as illustrated above. Slide 105...
-
Page 106: Duplex Printing
MD-P1b / M040 / C311N MD-P1c / M041 / C312DN Duplex Printing - 1 First stage of duplex printing: As bottom edge of paper triggers sensor... (see next slide) Slide 106... - Page 107 MD-P1b / M040 / C311N MD-P1c / M041 / C312DN Duplex Printing - 2 Solenoid Second stage of duplex printing: Paper is fed back into the machine to print second side (via solenoid-activated gear change). Slide 107...
- Page 108 MD-P1b / M040 / C311N MD-P1c / M041 / C312DN One-sided Output Solenoid Transport/Fusing/Duplex Motor rotates in the same direction for both one-sided and duplex output. Slide 108...
- Page 109 MD-P1b / M040 / C311N MD-P1c / M041 / C312DN Duplex Output Transport/Fusing/Duplex Motor always rotates in the same direction. Gear change (via solenoid) determines paper direction. Slide 109...
-
Page 110: Replacing The Separation Pad
MD-P1b / M040 / C311N MD-P1c / M041 / C312DN Replacing the Separation Pad Mylar Correct Incorrect When reinstalling the separation pad, make sure that the mylar is not placed under the separation pad. Slide 110... -
Page 111: Service Training
MD-P1b / M040 / C311N MD-P1c / M041 / C312DN M040/M041 Service Training Image Transfer Slide 111... - Page 112 MD-P1b / M040 / C311N MD-P1c / M041 / C312DN Overview OPC Drum Image Transfer Rollers Transfer Belt Paper Transfer Roller The toner is moved from the four OPC (Organic Photoconductor) drums to the transfer belt. For a full color print, all four colors are moved from the OPCs to the transfer belt at the same time.
- Page 113 MD-P1b / M040 / C311N MD-P1c / M041 / C312DN Drive Belt Tension Roller Transfer Belt Drive Roller Black AIO Motor The black AIO motor controls the transfer belt drive roller. The belt tension roller adds tension to the transfer belt to help to turn this belt.
-
Page 114: Transfer Voltage
MD-P1b / M040 / C311N MD-P1c / M041 / C312DN Transfer Voltage Image Transfer Rollers The image transfer rollers move the toner from the OPCs to the image transfer belt. Slide 114... -
Page 115: Transfer Belt Contact
MD-P1b / M040 / C311N MD-P1c / M041 / C312DN Transfer Belt Contact - 1 YMC Image Sliders Transfer Rollers Transfer Belt YMC Contact Contact Camshaft Motor The transfer belt does not touch the color OPCs (yellow, magenta and cyan) when the machine makes a black and white print. - Page 116 MD-P1b / M040 / C311N MD-P1c / M041 / C312DN Transfer Belt Contact - 2 Contact Sensor The ITB contact sensor detects if the transfer roller unit for each OPC (YMC) touches the transfer belt. If it does not touch the transfer belt during color printing, the machine stops and shows SC 445, 446, or 447.
-
Page 117: Itb Cleaning Unit
MD-P1b / M040 / C311N MD-P1c / M041 / C312DN ITB Cleaning Unit Toner Collection Coil Cleaning Blade The toner collection coil moves waste toner from the ITB to the waste toner tank. A shutter in the ITB cleaning unit closes when the ITB unit is removed. - Page 118 MD-P1b / M040 / C311N MD-P1c / M041 / C312DN Paper Transfer Roller The transfer roller is Paper Transfer Transfer always pressed against Belt Roller the image transfer belt by pressure from a spring. The transfer roller moves the toner image from the transfer belt to the paper.
-
Page 119: Paper Transfer And Discharge
MD-P1b / M040 / C311N MD-P1c / M041 / C312DN Paper Transfer and Discharge 100M ohm resistance The transfer roller receives a Discharge positive charge from high Plate voltage power supply. The discharge plate removes charge that was applied to paper during paper transfer. - Page 120 MD-P1b / M040 / C311N MD-P1c / M041 / C312DN New Detection Mechanism for Image Transfer Belt Unit New unit incorporates fuse Mina body Image transfer belt unit type register. When machine detects low resistance, it is +24V interpreted as a new unit.
-
Page 121: Waste Toner Collection
MD-P1b / M040 / C311N MD-P1c / M041 / C312DN Waste Toner Collection - 1 Waste Toner Collection Coil Agitator Plate Agitator Motor Entrance The waste toner collection coil moves waste toner from the transfer belt to the entrance of the waste toner tank. - Page 122 MD-P1b / M040 / C311N MD-P1c / M041 / C312DN Waste Toner Collection - 2 Waste Toner Waste Toner Tank Overflow Sensor Set Sensor The waste toner tank set sensor detects whether the waste toner tank is set. The waste toner overflow sensor detects whether the waste toner tank is full.
- Page 123 MD-P1b / M040 / C311N MD-P1c / M041 / C312DN Installing the Registration Roller Spring Make sure that you hook the spring correctly. Slide 123...
-
Page 124: Other Notes
MD-P1b / M040 / C311N MD-P1c / M041 / C312DN Other Notes The ITB (Image Transfer Belt) cleaning unit contains waste toner. When you remove the ITB cleaning unit, put it on a sheet of paper. A shutter mechanism inside the unit should prevent toner from falling out. -
Page 125: Service Training
MD-P1b / M040 / C311N MD-P1c / M041 / C312DN M040/M041 Service Training Fusing Slide 125... -
Page 126: Fusing Unit
MD-P1b / M040 / C311N MD-P1c / M041 / C312DN Fusing Unit Top of unit Paper Jam Release Lever Release Lever Release Lever Paper Jam Release Lever View of Fusing Unit as it appears when pulled out from the rear of the machine. - Page 127 MD-P1b / M040 / C311N MD-P1c / M041 / C312DN Fusing Unit - Cross Section Cleaning Roller Fusing Tension Roller Fusing Lamp Heating Roller Pressure Roller Roller Slide 127 This design, utilizing a belt between the Heating Roller and the Hot Roller, enables quick heating with the Fusing Lamp in the aluminum Heating roller, and a wider nip with the sponge Hot Roller.
- Page 128 MD-P1b / M040 / C311N MD-P1c / M041 / C312DN Fusing Unit - Electrical Components Thermistor (Right) Thermostat Thermistor (Center) Fusing Lamp Pressure Roller Fusing Tension Roller Locations of Hot Roller Thermistors (2), Heating Thermostat, and Roller Fusing Lamp Note: The Fusing Lamp is within the Heating Roller, not the Hot Roller...
- Page 129 MD-P1b / M040 / C311N MD-P1c / M041 / C312DN Fusing Unit - 1/7 Heating Roller (with Fusing Lamp) Thermistor Thermistor Thermostat (Center) (Right) View of Fusing Unit with covers removed. Slide 129...
- Page 130 MD-P1b / M040 / C311N MD-P1c / M041 / C312DN Fusing Unit - 2/7 Thermistor Thermostat (Center) Heating Roller (with Fusing Lamp) Close-up view of thermostat and central thermistor, mounted near the Heating Roller. Slide 130...
- Page 131 MD-P1b / M040 / C311N MD-P1c / M041 / C312DN Fusing Unit - 3/7 Halogen heating element is inside Cleaning Heating Roller. Roller Heat is transferred from the Heating Roller to the Hot Roller Tension via the Fusing Belt. Roller...
- Page 132 MD-P1b / M040 / C311N MD-P1c / M041 / C312DN Heating Roller (with Fusing Lamp) Cleaning Roller Fusing Unit - 4/7 Fusing Tension Roller Fusing Belt Hot Roller Heating Roller (with Fusing Lamp) Slide 132...
- Page 133 MD-P1b / M040 / C311N MD-P1c / M041 / C312DN Fusing Unit - 5/7 Fusing Tension Roller Cleaning Roller Pressure Roller Hot Roller Heating Roller (with Fusing Lamp) The five rollers within the Fusing Unit. Slide 133...
- Page 134 MD-P1b / M040 / C311N MD-P1c / M041 / C312DN Fusing Unit - 6/7 Sponge Roller flattens to create increased fusing nip. Aluminum Heating Roller Fusing Belt Slide 134...
- Page 135 MD-P1b / M040 / C311N MD-P1c / M041 / C312DN Fusing Unit - 7/7 New Detection Mechanism (Maintenance Kit) Thermostat Thermostat Thermostat Thermostat Fusing Fusing Fusing Fusing Thermo fuse in the new control control control control Circuit Circuit Circuit Circuit...
-
Page 136: Fusing Temperature Control
MD-P1b / M040 / C311N MD-P1c / M041 / C312DN Fusing Temperature Control - 1/2 P ri nt O rder Rotation( till 5 No rotation sec after R otati on( ti l l 5 sec No rotatiion printing) rotati on after ready 160℃... - Page 137 MD-P1b / M040 / C311N MD-P1c / M041 / C312DN Fusing Temperature Control - 2/2 Paper, fusing speed, and fusing printing temperature Paper Speed Temp. Thinner 157 ℃ Thin 160 ℃ Plain 1 170 ℃ Recycled 170 ℃ Plain & Recycled 170 ℃...
-
Page 138: Fusing Unit Scs
MD-P1b / M040 / C311N MD-P1c / M041 / C312DN Fusing Unit SCs SC541, 542, 543, 544, and 545 To prevent damage to the machine, the machine cannot be operated until the fusing related SC has been reset by a technician. - Page 139 MD-P1b / M040 / C311N MD-P1c / M041 / C312DN Humid Environments To reduce paper curl in high temperature and humidity environments, the fusing unit does idle rotation before a job, if the customer enables this function in the user mode.
- Page 140 MD-P1b / M040 / C311N MD-P1c / M041 / C312DN Replacement Do the procedures in these sections of the service manual. Replacement and Adjustment – Image Fusing Follow all notes and cautions in the manual. Make sure that the fusing unit is cool before you touch it.
-
Page 141: Fusing Unit Jams
MD-P1b / M040 / C311N MD-P1c / M041 / C312DN Fusing Unit Jams Normally, the user will remove fusing unit jams. But, if the service program ‘Fuser SC Detect’ is changed to ‘on’, the machine stops if a jam occurs in the fusing unit for three consecutive paper feeds. -
Page 142: Service Training
MD-P1b / M040 / C311N MD-P1c / M041 / C312DN M040/M041 Service Training Optional Paper Tray Unit (G849) Slide 142... - Page 143 MD-P1b / M040 / C311N MD-P1c / M041 / C312DN Overview Feed Roller Capacity: 500 sheets Feed roller and friction pad Slide 143...
- Page 144 MD-P1b / M040 / C311N MD-P1c / M041 / C312DN Feed Relay Clutch Gear Paper Feed Clutch The transport/fusing motor in the main machine drives the gear. The clutches transfer drive to the rollers at the correct times. Slide 144...
-
Page 145: Paper Lift
MD-P1b / M040 / C311N MD-P1c / M041 / C312DN Paper Lift - 1 Lock Levers Tabs The spring pushes the bottom plate up. So, you must press the bottom plate down before you put the tray in the machine. - Page 146 MD-P1b / M040 / C311N MD-P1c / M041 / C312DN Paper Lift - 2 Guides When you put the tray in the machine, the guides in the main body of the paper tray unit push the lock levers, and the lock levers release the tabs.
- Page 147 MD-P1b / M040 / C311N MD-P1c / M041 / C312DN Paper End Detection Feeler Feeler Sensor Cutout When there is no paper in the tray, a feeler drops through a cutout in the bottom plate, and the actuator attached to the feeler enters the paper end sensor.
- Page 148 MD-P1b / M040 / C311N MD-P1c / M041 / C312DN Reinstalling the Friction Pad Friction Pad Mylar When re-installing the friction pad, make sure that the Mylar does not go under the friction pad. Slide 148...
- Page 149 MD-P1b / M040 / C311N MD-P1c / M041 / C312DN Replacement Do the procedures in this section of the M040/M041 service manual. Replacement and Adjustment Follow all notes and cautions in the manual. Slide 149...
-
Page 150: Before You Start
MD-P1b / M040 / C311N MD-P1c / M041 / C312DN Before You Start See the Service Manual for installation requirements before you install the machine. You can find this information in the Service Manual. Environment Space requirements Power requirements Slide 150... - Page 151 MD-P1b / M040 / C311N MD-P1c / M041 / C312DN M040/M041 Service Training Trouble-Shooting Slide 151...
- Page 152 MD-P1b / M040 / C311N MD-P1c / M041 / C312DN Familiarization Examine how to access user tools and settings - noting the options and adjustments possible with this machine. Practice making some of these changes if you are not already familiar with them. (See User’s...
-
Page 153: General Troubleshooting
MD-P1b / M040 / C311N MD-P1c / M041 / C312DN General Troubleshooting Read the following in the Service Manual for general Troubleshooting guidelines: Poor image quality Poor print quality Unusual noises Slide 153... - Page 154 MD-P1b / M040 / C311N MD-P1c / M041 / C312DN M040/M041 Service Training Specifications Slide 154...
-
Page 155: Specifications
MD-P1b / M040 / C311N MD-P1c / M041 / C312DN Specifications - 1/3 Technology Laser beam scanning & electro-photographic printing Mono-component toner development Four-drum tandem method Resolution (dpi, bit/pixel) 600 x 600 dpi (Speed Mode) 1200 x 600 dpi equivalent (Standard Mode) - Page 156 MD-P1b / M040 / C311N MD-P1c / M041 / C312DN Specifications - 2/3 Weight: 28.0 kg (61.73 lb) or less (Including consumables) Interface Ethernet 10/100 T USB 2.0 PictBridge (model-c) Power Consumption Maximum: 1300 W or less Energy Saver: 15 W or less...
- Page 157 MD-P1b / M040 / C311N MD-P1c / M041 / C312DN Specifications - 3/3 Paper handling Standard tray - 500 sheets Bypass tray - 100 sheets Built-in duplex » Model-b: manual » Model-c: auto Options Optional paper tray 500-sheet tray » (One optional tray can be attached)
- Page 158 MD-P1b / M040 / C311N MD-P1c / M041 / C312DN End of Course Slide 158...