
Related Manuals for THOMSON 500014


Summary of Contents for THOMSON 500014
- Page 1 30Nm drive kit for rolling shutters and blinds ref. 500014 www.thomsonbox.eu...
-
Page 2: Table Of Contents
30Nm drive kit for rolliNg shutters aNd bliNds TABLE OF CONTENTS A - SAFETy iNSTruCTiONS 1 - operating precautions 2 - maintenance and cleaning 3 - recycling B - prOduCT dESCripTiON 1 - contents of the kit 2 - motor 3 - management module 4 - remote control C - ABOuT THE THOMBOX CONCEpT... - Page 3 5 - remoVing all deVices from a remote control channel 6 - clearing feature 7 - using the group selector 8 - replacing the remote control Battery 9 - motor safety features G - FAQ H - TECHNiCAL ANd LEGAL iNFOrMATiON 1 - technical characteristics 2 - Warranty 3 - help and adVice...
-
Page 5: A - Safety Instructions
30Nm drive kit for rolliNg shutters aNd bliNds A - SAFETy iNSTruCTiONS 1 - OPERATING PRECAUTIONS 3 - RECYCLING • Do not allow children to operate the product. Disposing of used batteries in the • This product's control module is designed household waste is strictly forbidden. exclusively for indoor use. Batteries/accumulators containing harmful • The product is designed to motorise a blind substances are marked with symbols... -
Page 6: B - Product Description
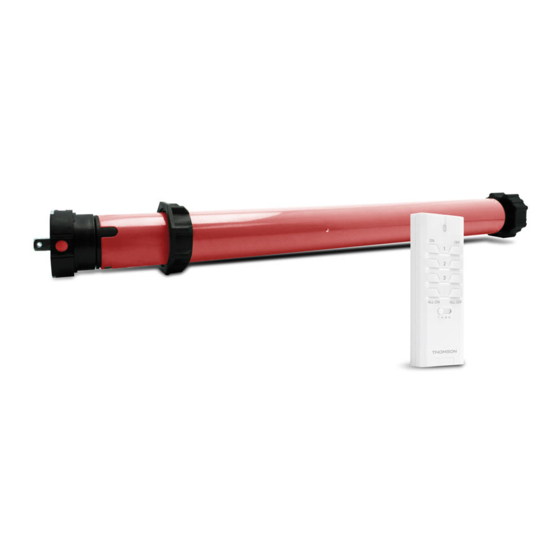
30Nm drive kit for rolliNg shutters aNd bliNds B - prOduCT dESCripTiON 1 - CONTENTS OF THE KIT 1 Motor anchor plate. 5 Snap ring. 2 Tubular motor. 6 Pin. 3 Shutter tube connector ring. 7 Management module. 4 Head adaptor. 8 Remote control. 2 - MOTOR 1 End stop configuration button. 2 Shutter tube connector ring location. 3 Output shaft (only driven part in the whole motor). -
Page 7: Management Module
30Nm drive kit for rolliNg shutters aNd bliNds B - prOduCT dESCripTiON 3 - MANAGEMENT MODULE 4 - REMOTE CONTROL front front 1 System on indicator light. 2 Pairing button rear 1 System on indicator light. 2 Channel 1, 2, 3 on buttons. 3 Channel 1, 2, 3 off buttons. 4 3-channel on button. 5 3-channel off button. Group selector (1, 2, 3 or 4). Battery compartment. 1 Terminal blocks for connecting to the motor and the mains supply. -
Page 8: C - About The Thombox Concept
30Nm drive kit for rolliNg shutters aNd bliNds C - ABOuT THE THOMBOX CONCEpT The Thombox is a home automation unit which connects to your ADSL modem (Freebox, Livebox, etc.) and enables you to manage your home security from any location as if you were using the actual alarm control unit at home or remotely. The system also allows you to control your comfort accessories (lighting, etc.), openers (shutter motors, garage doors, etc.) and manage your energy use (heating and electricity consumption) with just a few clicks on a computer, touchscreen tablet or smartphone, from... -
Page 9: D - Installation
30Nm drive kit for rolliNg shutters aNd bliNds d - iNSTALLATiON 1 - INSTALLING THE TUBULAR MOTOR Remove the rolling shutter cover. - Page 10 30Nm drive kit for rolliNg shutters aNd bliNds d - iNSTALLATiON Remove one of the two pivots at the end of the octagonal tube around which the shutter rolls. Remove any control device or manual lock such as straps, handles, locks, etc. from the shutter. The motor anchor plate will be placed inside the shutter housing drive plate. Remove all obstacles so that there is a flat surface. Strengthen if required. Note the axis of the axle that the motor will replace, then place the motor anchor plate, aligning the axis. Remove the side plate if required, then mark and drill the holes. Take care not to damage any components when drilling. 47mm Ø 6mm Ø 8mm Ø 6mm Ø 8mm 58mm...
- Page 11 30Nm drive kit for rolliNg shutters aNd bliNds d - iNSTALLATiON Align the slots on the ring with the motor collar. Attach the head adaptor.
- Page 12 30Nm drive kit for rolliNg shutters aNd bliNds d - iNSTALLATiON Your shutter's octagonal tube must not present any obstacle which prevents the motor being inserted or rotating (e.g. screw attaching the shutter to the tube). If necessary, remove any obstacles from the tube. Insert the motor as far as possible into the tube. The ring should be at the far end of the tube (i.e. inserted first).
- Page 13 30Nm drive kit for rolliNg shutters aNd bliNds d - iNSTALLATiON Attach the anchor plate...
- Page 14 30Nm drive kit for rolliNg shutters aNd bliNds d - iNSTALLATiON Ensure that the end stop setting button located at the end of the motor remains accessible. Where possible, reattach the shutter in an intermediate position (neither completely open nor completely shut). Attach the anchor plate to the shutter housing.
- Page 15 30Nm drive kit for rolliNg shutters aNd bliNds d - iNSTALLATiON Thread the power supply cable as shown. Ensure that it cannot become trapped in any moving parts.
-
Page 16: Installing The Management Module
30Nm drive kit for rolliNg shutters aNd bliNds d - iNSTALLATiON 2 - INSTALLING THE MANAGEMENT MODULE The management module can be placed in a suitable recess-mount housing or junction box, or in the shutter housing if there is sufficient space. Ensure that the module cannot become trapped in any moving parts. 3 - CONNECTING THE MANAGEMENT MODULE WARNING: all wiring must take place when the system is isolated (circuit breaker set to 'OFF'). Earth Raising phase Lowering phase... -
Page 17: Remote Control
30Nm drive kit for rolliNg shutters aNd bliNds d - iNSTALLATiON 4 - REMOTE CONTROL Remove the tab on the back of the remote control to connect the battery. -
Page 18: E - Configuration
30Nm drive kit for rolliNg shutters aNd bliNds E - CONFiGurATiON WARNING: Do not let the shutter move freely WARNING: when the end stops have not been correctly set. • During this step, the shutter may not stop by itself when it is fully open or closed. Read the 1 - PROGRAMMING following instructions carefully before adjusting the settings. To pair the management module and the remote • To set the motor end stops, you will need to control: press the motor button. If this button is difficult • On the remote control, press and hold the 'on'... -
Page 19: Programming With Other Accessories
30Nm drive kit for rolliNg shutters aNd bliNds E - CONFiGurATiON To set the upper end stop (opening), follow the To pair the management module and the motor same steps: with another control device, refer to the user guide • Open the shutter using the 'ON' button on of the device you want to pair with your product. your remote control. During pairing, you will be asked to put the • Stop the movement by pressing briefly and management module into pairing mode: releasing the shutter button. • When asked to put the management module • Then hold the button as long as required until into pairing mode, press and hold the pairing the shutter is completely open. button on the front of the receiver module for • Then record the shutter's current position by at least 3 seconds. pressing the 'OFF' button on your remote control. 3 - PROGRAMMING WITH OTHER ACCESSORIES Any element can be paired with other devices from the range: wall remote control, remote control light... -
Page 20: F - Using The Product
30Nm drive kit for rolliNg shutters aNd bliNds F - uSiNG THE prOduCT 1 - USING THE PRODUCT WITH THE REMOTE 4 - DELETING A DEVICE FROM THE REMOTE CONTROL CONTROL MEMORY • You can raise and lower the controlled shutter To remove one of the devices controlled using using the buttons for the channel used during a channel on the remote control, repeat the pairing. Pressing the 'ON' button opens the programming steps in this guide with the relevant shutter. Pressing the 'OFF' button closes the channel. By programming a device twice on the shutter. -
Page 21: Using The Group Selector
30Nm drive kit for rolliNg shutters aNd bliNds F - uSiNG THE prOduCT 7 - USING THE GROUP SELECTOR The thermal safety mechanism is designed to prevent the electric shutter motor from damage Your remote control can manage 4 groups of (when the motor is overworked). This thermal safety 3 channels each. Move the group selector to mechanism is triggered if the shutter operates for positions I, II, III, or IV to choose which group to over 4 minutes, or at intervals which are too close choose which group of devices to control. -
Page 22: G - Faq
30Nm drive kit for rolliNg shutters aNd bliNds G - FAQ If your problem is not covered below, please contact our technical support department. Common problems and solutions Symptoms Possible causes Solutions Invert raising/lowering on the Press briefly on the pairing button The shutter raises when it management module. on the management module. should lower. • The end stops are not • Reconfigure the end stops. correctly configured. • Check the wiring between the The shutter only moves in one • The wiring from the motor to motor and the management direction. -
Page 23: H - Technical And Legal Information
30Nm drive kit for rolliNg shutters aNd bliNds H - TECHNiCAL ANd LEGAL iNFOrMATiON 1 - TECHNICAL CHARACTERISTICS Remote control ARW 868.3MHz protocol Radio frequency Radio range Up to 150m in open air* Power supply 3V DC via a CR2032 battery 4 groups of 3 channels Number of channels Number of devices per channel Operating temperature 0°C to 40°C, indoor use only Management module ARW 868.3MHz protocol... -
Page 24: Warranty
• If you encounter operating problems during Complies with the R&TTE 1999/5/CE directive and the installation or a few days afterwards, that its conformity has been assessed pursuant to it is essential that you are in front of your the applicable standards in force: installation when contacting us, so that one EN62479:2010 of our technicians can diagnose the source of EN60669-1:1999+A1:2002+A2:2008 the problem, as it will probably be the result EN60669-2-1:2004 of a setting that is incorrect or an installation EN60335-1:2002+A1+A11+A12+A2+A13+A14 that is not to specification. If the problem is EN60335-2-97:2006+A11+A2 caused by the product itself, the technician EN301489-1 V1.9.2 will give you an RMA number so that you can EN301489-3 V1.4.1 return the unit to the shop. Without this RMA EN300220-2 V2.4.1 number, the shop may refuse to exchange your product. Signed at Chambray les Tours on 25/11/2014 Alexandre Chaverot, CEO Visit our website to find out more about our Thomson range at www.thomsonbox.eu... - Page 28 is a TECHNICOLOR S.A. brand used under licence by: Avidsen France S.A.S.- 32, rue Augustin Fresnel 37170 Chambray les Tours - France...