
Related Manuals for Comtrend Corporation GCA-7000


Summary of Contents for Comtrend Corporation GCA-7000
- Page 1 GCA-7000 User Manual Version A1.0. June 17, 2021 Version A1.0, June 17, 2021 261072-050...
- Page 2 Preface This manual provides information related to the installation and operation of this device. The individual reading this manual is presumed to have a basic understanding of telecommunications terminology and concepts. If you find the product to be inoperable or malfunctioning, please contact technical support for immediate service by email at INT-support@comtrend.com For product update, new product release, manual revision, or software upgrades, please visit our website...
- Page 3 Comtrend Corporation. No part of this document may be translated, transcribed, reproduced, in any form, or by any means without prior written consent of Comtrend Corporation. This program is free software: you can redistribute it and/or modify it under the terms of the GNU General Public License as published by the Free Software Foundation, either version 3 of the License, or (at your option) any later version.
-
Page 4: Table Of Contents
Table of Contents Chapter 1 Product Information ..........................4 1.1 Front Panel ..............................4 1.2 Front Panel Buttons ............................5 Chapter 2 G.hn/Coax Setup ........................... 6 2.1 Logging In ..............................6 Chapter 3 G.hn Interface ............................7 3.1 Basic Configuration ............................7 3.2 NDIM Configuration ............................. -
Page 5: Chapter 1 Product Information
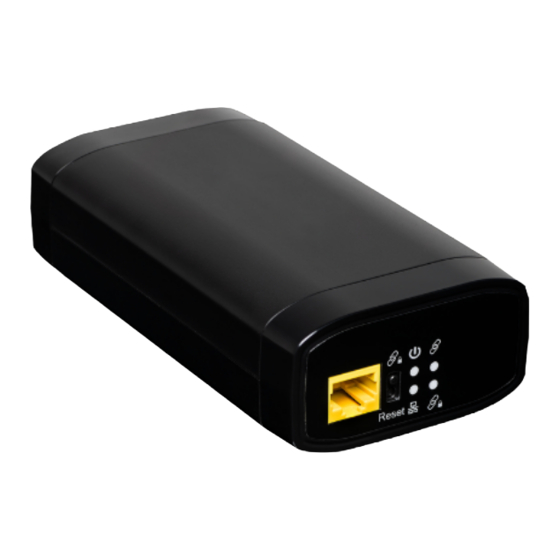
Chapter 1 Product Information Front Panel LED Indicators COLOR MODE Description Power Green The G.hn Coaxial Adapter is powered on The G.hn Coaxial Adapter is powered off or faulty Green The current connection (line rate) is more than 40Mbps Connection The current connection (line rate) is between 5Mbps Orange and 40Mbps... -
Page 6: Front Panel Buttons
1.2 Front Panel Buttons Press for more than 2 seconds for enabling data encryption Security in GCA-7000’s. Please refer to GCA-7000_QIG.pdf for details. Reset Press for less than 10 seconds to reset the device. Press for more than 10 seconds to restore factory defaults. -
Page 7: Chapter 2 G.hn/Coax Setup
Chapter 2 G.hn/Coax Setup 2.1 Logging In Perform the following steps to login to the web user interface. STEP 1: Start the Internet browser and input the default IP address for the device in the Web address field. For example, if the default IP address is 192.168.0.5, type http://192.168.0.5 STEP 2: A dialog box will appear, such as the one shown below. -
Page 8: Chapter 3 G.hn Interface
Chapter 3 G.hn Interface 3.1 Basic Configuration MAC Address Displays the MAC address of the device. • Device ID Device ID of this node. • Domain Name string of all nodes in the network. • Force node Type force the modem to have a particular role (END POINT or DOMAIN MASTER or •... -
Page 9: Ndim Configuration
3.2 NDIM Configuration NDIM mode set to Automatic for enabling automatic DOD selection functionality and set to Manual • for manual configuration of DOD. Domain ID (DOD) manually set the DOD number from 1 to 15 to use a different preamble seed than •... -
Page 10: Chapter 4 Ip Interface
Chapter 4 IP Interface 4.1 IP config In the IP configuration tab of one G.hn node, the IPv4 and IPv6 settings can be read and changed. IPv4 subsection: • DHCPv4 enabled: in the case of choosing ”NO" IP configuration in the following parameters, the IPv4 Address, Subnet Mask, Default Gateway and DNS should be configured;... - Page 11 • IPv4 address/netmask: IPv4 address / netmask of this device. • Default Gateway: IPv4 gateway to connect the device to other LAN segments. • DNS: Domain Name Server IP (IPV4). • Additional address #1/2: additional fixed IPv4 addresses that will always be configured at boot time. IPv6 subsection: •...
-
Page 12: Chapter 5 Ethernet Interface
Chapter 5 Ethernet Interface The Ethernet table shows the status & Info of the Ethernet interface; including Interface, Speed, Duplex, Interface Type, Mode, and Internal PHY & Link. Powersaving Ethernet powersaving can be disabled, enabled by Ethernet link or enabled by Ethernet activity; idle timer can be configured as well. -
Page 13: Chapter 6 Device Interface
Chapter 6 Device Interface 6.1 Hardware information In this tab, basic information such as MAC Address and Serial Number of the selected node is shown. 6.2 Software information Shows the FW version and system uptime. -
Page 14: Security
6.3 Security The nodes in the network: to change the configuration password string from the default ("admin") to another; decided by the user. 6.4 SW update Current loaded firmware version is shown. Any flash section can be upgraded; the first flash section should be selected and after clicking on the "OK"... -
Page 15: Chapter 7 Multicast Interface
Chapter 7 Multicast Interface 7.1 MCAST Configuration In the MCAST Configuration tab of "My Network", IGMP snooping and MLD features can be enabled or disabled. Also, IGMP multicast IP addresses ranges which the G.hn PLC network will sniff; can be configured. IGMP Snooping: Enable or Disable. - Page 16 Filter unknown multicast traffic: • Enables the Multicast Filtering feature. If enabled, all the unsolicited multicast traffic will be blocked. In IPv4 multicast traffic, only the traffic between the IP ranges defined in the MCAST.GENERAL.IGMP_IP_RANGES_DEF and the packets are unsolicited, these packets will be dropped.
-
Page 17: Chapter 8 Qos Menu
Chapter 8 QoS Menu... -
Page 18: Qos Configuration
8.1 QoS Configuration In the QoS configuration tab, the packet classifier can be managed to define a QoS rule for incoming Ethernet traffic, and assign a priority to be used in the G.hn network. Press the “Ok" button to load the newly configured settings: QoS CRITERION: a general criterion can be chosen among "None"... - Page 19 5 (second) Voice, < 10 ms latency and jitter 6 (highest) Internetwork Control 7 (highest) Network Control In summary, the sequence of priority queue, (7,6) > (5,4) > (3,0) > (2,1)
-
Page 20: Chapter 9 G.hn Spectrum Interface
Chapter 9 G.hn spectrum Interface 9.1 Notches In this tab a table with all configured Notches of selected node will be shown. The table is composed of next columns for every notch: Notch Number, Type of notch, Start Frequency (KHz), Stop Frequency (KHz), Depth (in dB). - Page 21 To add new notches the user should fill the "Add a new User Notch" fields, setting Start and Stop frequencies in KHz and depth in dB of notch and then press the "Ok" button. They will be added in first User free position from number 0 to 9.
-
Page 22: Chapter 10 Log File Interface
Chapter 10 Log file Interface 10.1 Log File In the Log File configuration the following settings can be read, and changed by clicking on the corresponding "OK" button for the selected node: Enable Log File: set to YES for enabling Log File functionality in the node and set to NO for disabling it. •... -
Page 23: Chapter 11 Tr069
Chapter 11 TR069 TR069 Configuration • ACS url: URL for the CPE to connect to the ACS using the CPE WAN Management Protocol. This parameter MUST be in the form of a valid HTTP or HTTPS URL. An HTTPS URL indicates that the ACS supports SSL. - Page 24 • Conn Req Username: Username used to authenticate an ACS making a Connection Request to the modem. • Conn Req Password: Password used to authenticate an ACS making a Connection Request to the modem. STUN Configuration • STUNEnable: Enables(YES) or disables(NO) the use of STUN. This applies only to the use of STUN in association with the ACS to allow UDP Connection Requests.
-
Page 25: Chapter 12 Advanced Interface
Chapter 12 Advanced Interface Hardware Reset: Click on this button to perform a reboot in the node. Factory Reset: Input the password: betera and click the OK button to perform a factory reset. The current configuration will be lost.