Table of Contents
Advertisement
Available languages
Available languages
True Wireless Headphones
Écouteurs True Wireless
True Wireless Kopfhörer
WEAR 7701
G Operating Instructions F Mode d'emploi D Bedienungsanleitung E Instrucciones de uso
I Istruzioni Per L'uso O Manual de instruções R Руководство по эксплуатации
N Gebruiksaanwijzing P Instrukcja obsług H Használati útmutató i J Οδηγίες χρήσης
C Návod k použití Q Návod na použitie T Kullanma kılavuzu
S Bruksanvisning L Käyttöohje M Manual de utilizare
Advertisement
Table of Contents

Related Manuals for THOMSON WEAR7701


Summary of Contents for THOMSON WEAR7701
- Page 1 True Wireless Headphones Écouteurs True Wireless True Wireless Kopfhörer WEAR 7701 G Operating Instructions F Mode d‘emploi D Bedienungsanleitung E Instrucciones de uso I Istruzioni per l‘uso O Manual de instruções R Руководство по эксплуатации N Gebruiksaanwijzing P Instrukcja obsług H Használati útmutató i J Οδηγίες χρήσης C Návod k použití...
- Page 2 G Operating Instructions F Mode d‘emploi D Bedienungsanleitung E Instrucciones de uso I Istruzioni per l‘uso O Manual de instruções N Gebruiksaanwijzing P Instrukcja obs ug H Használati útmutató i C Návod k použití Q Návod na použitie T Kullanma k lavuzu S Bruksanvisning L Käyttöohje M Manual de utilizare...
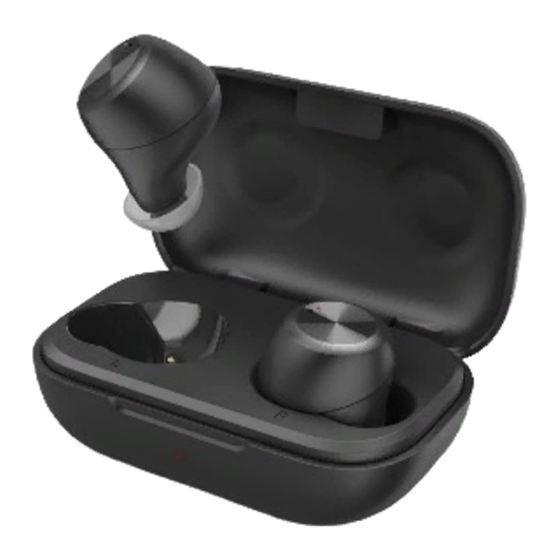
- Page 3 G Operating Instructions Thank you for choosing a Thomson product Controls and displays Take your time and read the following instructions 1 Charging box and information completely Please keep these 2 Charging box status LED instructions in a safe place for future reference If...
- Page 4 3. Safety instructions • Do not tamper with or damage/heat/disassemble the batteries/rechargeable batteries • The product is intended for private, non- • Do not use the product during the charging commercial use only process! • Use the product only for the intended purpose Warning –...
- Page 5 4. Switching on/off Remove the two headphones simultaneously from the charging box Both earphones switch on automatically and start the pairing process Alternative: Press the multi-function touch sensor (4) on the left and right earphones for approx 2-3 seconds until you hear a signal sound To switch them off, simply place the earphones back in charging box Ensure that the earphones are inserted into the correct sides, using the L/R markings as a guide Alternative:...
- Page 6 5. Charging Fully charge the earphones and the charging box once before using them for the rst time Insert the earphones and connect the charging box Place the earphones in the charging box Ensure that the earphones are inserted into the correct sides, using the L/R markings as a guide Connect the USB charging cable included to the charging socket (7) on the charging box Connect the free plug on the micro-USB charging cable to a suitable USB charger To do this,...
- Page 7 6. Bluetooth pairing ® Note - Pairing • Make sure that your Bluetooth -capable device is switched on and that Bluetooth is activated ® ® • For more information, please refer to the operating instructions of your device The earphones and the device should not be more than 1 metre apart The shorter the distance, the better Ensure that the earphones are switched on *beep*...
- Page 8 Search using your device for the earphones (only required on the first connection) Open the Bluetooth settings on your device and wait until the list of found Bluetooth devices ® ® shows WEAR 7701 Select WEAR 7701 and wait until the earphones are shown as connected in the Bluetooth ®...
- Page 9 7. Controls Note • Please be aware that your terminal device must support some functions if they are to be used • For more information, please refer to the operating instructions of your device 7.1 Voice assistant function Tap the multi-function touch sensor (4) on the left or Siri / right earphone three times to initiate communication Google...
- Page 10 7.3 Audio playback Start playback on your device. Play / Pause Tap the multi-function touch sensor (4) on the left or right earphone once to start or stop audio playback Next track Tap the multi-function touch sensor (4) on the right earphone twice to skip to the next track Previous track Tap the multi-function touch sensor (4) on the left...
- Page 11 8. Technical data Bluetooth earphones ® Bluetooth technology Bluetooth v5 0 ® Pro les supported A2DP 1 3 / AVRCP 1 6 / HFP 1 7 / SPP 1 2 Frequency for Bluetooth ® 2402 – 2480 MHz transmissions Range <...
- Page 12 9. Care and Maintenance Only clean this product with a slightly damp, lint-free cloth and do not use aggressive cleaning agents 10. Warranty Disclaimer Hama GmbH & Co KG assumes no liability and provides no warranty for damage resulting from improper installation/mounting, improper use of the product or from failure to observe the operating instructions and/or safety notes 11.
- Page 13 F Mode d‘emploi Nous vous remercions d’avoir choisi un produit Éléments de commande et d’affichage Thomson ! Veuillez prendre le temps de lire l’ensemble 1 Boîtier de charge des remarques et consignes suivantes Veuillez 2 Voyant d’état LED du boîtier de charge conserver ce mode d’emploi à...
- Page 14 3. Consignes de sécurité • Ne modi ez pas et/ou ne déformez/chauffez/ démontez pas les batteries/piles • Ce produit est destiné à une utilisation • N’utilisez pas le produit pendant le processus de domestique non commerciale charge ! • L’emploi du produit est exclusivement réservé à sa Avertissement - Batterie fonction prévue •...
- Page 15 4. Mise en marche/arrêt Retirez les deux écouteurs simultanément du boîtier de charge Les deux écouteurs s’allument automatiquement et le processus de couplage commence Sinon, appuyez sur le détecteur tactile multifonctions au niveau des écouteurs gauche (L) et droit (R) (4) pendant environ 2 à...
- Page 16 5. Chargement Chargez complètement les écouteurs et le boîtier de charge une fois avant leur première utilisation Mise en place des écouteurs et raccordement du boîtier Placez les écouteurs dans le boîtier de charge Veillez à faire attention au sens d’insertion en respectant le marquage L/R Raccordez le câble de charge USB fourni au port de charge (7) du boîtier de charge Branchez la che libre du câble de charge micro-USB à...
- Page 17 6. Connexion Bluetooth (couplage) ® Remarque – Couplage • Assurez-vous que votre appareil compatible Bluetooth est allumé et que le Bluetooth est activé ® ® • Veuillez consulter le mode d’emploi de votre appareil à ce sujet Les écouteurs et l’appareil nal ne doivent pas se trouver à plus de 1 mètre les uns des autres Plus la distance est réduite, mieux c’est Assurez-vous que les écouteurs sont en marche *beep*...
- Page 18 Recherchez les écouteurs avec votre appareil (uniquement nécessaire lors de la première connexion) Ouvrez le menu des paramètres Bluetooth sur votre appareil et attendez que les écouteurs WEAR ® 7701 apparaissent dans la liste des appareils Bluetooth détectés ® Sélectionnez WEAR 7701, puis patientez jusqu’à ce que les écouteurs apparaissent comme étant connectés dans les réglages Bluetooth de votre appareil Vous entendrez alors un bref signal ®...
- Page 19 7. Éléments de commande Remarque • Veuillez noter que la compatibilité de chaque fonction dépend de votre appareil • Veuillez consulter le mode d’emploi de votre appareil à ce sujet 7.1 Fonction d’assistant vocal Appuyez trois fois sur le détecteur tactile multifonctions Siri/ (4) au niveau de l’écouteur gauche ou droit a n de Google...
- Page 20 7.3 Lecture audio Lancez la lecture sur votre appareil nal. Lecture/pause Appuyez une fois sur le détecteur tactile multifonctions (4) au niveau de l’écouteur gauche ou droit a n de commencer ou d’arrêter la lecture audio Titre suivant Appuyez deux fois sur le détecteur tactile multifonctions (4) au niveau de l’écouteur droit a n de passer au titre suivant Titre précédent...
- Page 21 8. Caractéristiques techniques Écouteurs Bluetooth ® Technologie Bluetooth Bluetooth v5 0 ® Pro ls pris en charge A2DP 1 3/AVRCP 1 6/HFP 1 7/SPP 1 2 Fréquence pour le Bluetooth 2 402 – 2 480 MHz ® Transmissions Portée < 10 m Batterie Type de batterie 3,7 V lithium-polymère...
- Page 22 9. Soins et entretien Nettoyez le produit uniquement à l’aide d’un chiffon non pelucheux légèrement humide ; évitez tout détergent agressif 10. Exclusion de garantie La société Hama GmbH & Co KG décline toute responsabilité en cas de dommages provoqués par une installation, un montage ou une utilisation non conformes du produit ou encore provoqués par le non- respect des consignes du mode d’emploi et/ou des consignes de sécurité...
- Page 23 D Bedienungsanleitung Vielen Dank, dass Sie sich für ein Thomson Produkt Bedienelemente und Anzeigen entschieden haben! 1 Ladebox Nehmen Sie sich Zeit und lesen Sie die folgenden 2 Status-LED Ladebox Anweisungen und Hinweise zunächst ganz 3 Status-LED Ohrhörer durch Bewahren Sie diese Bedienungsanleitung 4 Multifunktions-Touch-Sensor anschließend an einem sicheren Ort auf, um...
- Page 24 3. Sicherheitshinweise • Verändern und/oder deformieren/erhitzen/zerlegen Sie Akkus/Batterien nicht • Das Produkt ist für den privaten, nicht- • Verwenden Sie das Produkt nicht während des gewerblichen Haushaltsgebrauch vorgesehen Ladevorgangs! • Verwenden Sie das Produkt ausschließlich für den Warnung – Akku dazu vorgesehenen Zweck •...
- Page 25 4. Ein-/ Ausschalten Entnehmen Sie die beiden Ohrhörer gleichzeitig aus der Ladebox Beide Ohrhörer schalten sich automatisch ein und starten den Pairing Vorgang Alternativ: Drücken Sie am linken und rechten Ohrhörer den Multifunktions-Touch-Sensor (4) für ca 2-3 Sekunden, bis Sie einen Signalton hören Zum Ausschalten legen Sie die Ohrhörer einfach zurück in die Ladebox Beachten Sie dabei das seitenrichtige Einlegen der Ohrhörer gemäß...
- Page 26 5. Laden Laden Sie vor dem ersten Gebrauch die Ohrhörer sowie die Ladebox einmal vollständig auf Ohrhörer einlegen und Ladebox anschließen Legen Sie die Ohrhörer in die Ladebox ein Beachten Sie dabei das seitenrichtige Einlegen der Ohrhörer gemäß der Markierung L/R Schließen Sie das beiliegende USB-Ladekabel an die Ladebuchse (7) der Ladebox an Schließen Sie den freien Stecker des Micro-USB Ladekabels an einem geeigneten USB Ladegerät an Beachten Sie hierzu die Bedienungsanleitung des verwendeten USB Ladegeräts...
- Page 27 6. Bluetooth Verbindung (Pairing) ® Hinweis – Pairing • Stellen Sie sicher, dass Ihr Bluetooth -fähiges Endgerät eingeschaltet ist und dass Bluetooth aktiviert ® ® • Beachten Sie hierzu die Bedienungsanleitung Ihres Endgerätes Die Ohrhörer und das Endgerät sollten nicht weiter als 1 Meter voneinander entfernt sein Je geringer der Abstand, desto besser Stellen Sie sicher, dass die Ohrhörer eingeschaltet sind *beep*...
- Page 28 Suchen Sie mit Ihrem Endgerät nach den Ohrhörern (nur bei Erstverbindung notwendig) Öffnen Sie auf Ihrem Endgerät die Bluetooth -Einstellungen und warten Sie, bis in der Liste der ® gefundene Bluetooth -Geräte WEAR 7701 angezeigt wird ® Wählen Sie WEAR 7701 aus und warten Sie, bis die Ohrhörer als verbunden in den Bluetooth ®...
- Page 29 7. Bedienelemente Hinweis • Beachten Sie, dass die Unterstützung einiger Funktionen von Ihrem Endgerät abhängig ist • Beachten Sie hierzu die Bedienungsanleitung Ihres Endgerätes 7.1 Voice Assistant Funktion Tippen Sie dreimal den Multifunktions-Touch-Sensor Siri / (4) am linken oder rechten Ohrhörer, um eine Google Kommunikation mit Ihrem Siri oder Google Assistant zu starten...
- Page 30 7.3 Audiowiedergabe Starten Sie die Wiedergabe auf Ihrem Endgerät. Play / Pause Tippen Sie einmal den Multifunktions-Touch-Sensor (4) am linken oder rechten Ohrhörer, um die Audiowiedergabe zu starten oder zu stoppen Nächster Titel Tippen Sie zweimal den Multifunktions-Touch-Sensor (4) am rechten Ohrhörer, um zum nächsten Titel zu wechseln Vorheriger Titel Tippen Sie zweimal den Multifunktions-Touch-Sensor...
- Page 31 8. Technische Daten Bluetooth Ohrhörer ® Bluetooth Technologie Bluetooth v5 0 ® Unterstützte Pro le A2DP 1 3 / AVRCP 1 6 / HFP 1 7 / SPP 1 2 Frequenz für die Bluetooth ® 2402 – 2480 MHz Übertragungen Reichweite <...
- Page 32 9. Wartung und Pflege Reinigen Sie dieses Produkt nur mit einem fusselfreien, leicht feuchten Tuch und verwenden Sie keine aggressiven Reiniger 10. Haftungsausschluss Die Hama GmbH & Co KG übernimmt keinerlei Haftung oder Gewährleistung für Schäden, die aus unsachgemäßer Installation, Montage und unsachgemäßem Gebrauch des Produktes oder einer Nichtbeachtung der Bedienungsanleitung und/oder der Sicherheitshinweise resultieren 11.
- Page 33 E Instrucciones de uso Le agradecemos que se haya decidido por un Elementos de control e indicadores producto Thomson 1 Estación de carga Tómese tiempo y lea primero las siguientes 2 Led de estado de la estación de carga instrucciones e indicaciones Después, guarde...
- Page 34 3. Indicaciones de seguridad • No modi que ni deforme/caliente/desensamble las pilas recargables/baterías • Este producto está previsto para usarlo en el • No use el producto durante el proceso de carga ámbito privado y no comercial del hogar Aviso: batería •...
- Page 35 4. Encendido/ apagado Retire los dos auriculares de la estación de carga de carga al mismo tiempo Ambos auriculares se encienden automáticamente y comienzan el proceso de emparejamiento De manera alternativa: presione el sensor táctil multifunción (4) de los auriculares izquierdo y derecho durante unos 2-3 segundos hasta que oiga una señal Para apagarlo, simplemente vuelva a colocar los auriculares en la estación de carga Asegúrese de que los auriculares estén colocados en el lado correcto según la indicación L/R (izquierda/...
- Page 36 5. Carga Cargue los auriculares por completo antes de utilizarlos por primera vez Insertar los auriculares y conectar la estación de carga Coloque los auriculares en la estación de carga Asegúrese de que los auriculares estén colocados en el lado correcto según la indicación L/R (izquierda/derecha) Conecte el cable USB suministrado a la toma de carga (7) de la estación de carga Conecte el otro conector del cable micro-USB a un cargador USB apropiado Tenga en cuenta las instrucciones de uso del cargador USB utilizado...
- Page 37 6. Conexión Bluetooth (emparejamiento) ® Nota – Emparejamiento • Asegúrese de que su terminal compatible con Bluetooth está encendido y de que se ha activado el ® modo Bluetooth ® • Observe también las instrucciones de uso de su terminal Los auriculares y el terminal no deben estar a más de 1 metro de distancia Cuanto menor sea la distancia, mejor funcionamiento Asegúrese de que los auriculares están encendidos...
- Page 38 Busque los auriculares con su dispositivo terminal (sólo necesario para la conexión inicial) En el terminal, abra la con guración Bluetooth y espere hasta que se muestre WEAR 7701 en la lista de los dispositivos Bluetooth encontrados Seleccione WEAR 7701 y espere hasta que los auriculares se muestren como conectados en la con guración Bluetooth de su terminal Escuchará...
- Page 39 7. Controles Nota • Tenga en cuenta que el soporte de algunas funciones depende de su dispositivo terminal • Observe también las instrucciones de uso de su terminal 7.1 Función de asistente de voz Toque tres veces el sensor táctil multifunción (4) Siri / del auricular izquierdo o derecho para iniciar una Google...
- Page 40 7.3 Reproducción de audio Inicie la reproducción desde su terminal. Reproducción/Pausa Toque una vez el sensor táctil multifunción (4) del auricular izquierdo o derecho para iniciar o detener la reproducción de audio Siguiente pista Toque dos veces el sensor táctil multifunción (4) del auricular derecho para pasar a la siguiente pista Pista anterior Pulse dos veces el sensor táctil multifunción (4) del...
- Page 41 8. Datos técnicos Auriculares Bluetooth ® Tecnología Bluetooth Bluetooth v5 0 ® Per les soportados A2DP 1 3 / AVRCP 1 6 / HFP 1 7 / SPP 1 2 Frecuencia para Bluetooth ® 2402 – 2480 MHz Transferencia Alcance <...
- Page 42 9. Mantenimiento y cuidado Limpie este producto solo con un paño ligeramente humedecido que no deje pelusas y no utilice detergentes agresivos 10. Exclusión de responsabilidad La empresa Hama GmbH & Co KG no se responsabiliza ni concede garantía alguna por los daños que se deriven de una instalación, montaje o manejo incorrectos del producto o por la inobservancia de las instrucciones de uso o de las indicaciones de seguridad 11.
- Page 43 I Istruzioni per l‘uso Grazie per avere acquistato un prodotto Thomson! Elementi di comando e indicatori Prima di iniziare a utilizzare il prodotto, si prega 1 Caricabatteria di prendersi il tempo necessario per leggere le 2 LED di stato del caricabatteria...
- Page 44 3. Istruzioni di sicurezza • Non modi care e/o deformare/riscaldare/ scomporre le batterie/pile • Il prodotto è previsto per uso personale, non • Non utilizzare il prodotto quando è sotto carica! commerciale Nota – batteria • Utilizzare il prodotto soltanto per gli scopi previsti •...
- Page 45 4. Accendere / Spegnere Togliere contemporaneamente entrambi gli auricolari dal caricabatteria Essi si accendono automaticamente e avviano il processo di pairing In alternativa: premere il sensore touch multifunzione (4) dell’auricolare destro e sinistro per circa 2-3 secondi, no all’emissione di un segnale acustico Per spegnerle, riporre semplicemente le cu e nel caricabatteria Riporre le cu e sul lato corretto facendo riferimento alle lettere L/R In alternativa:...
- Page 46 5. Caricare le cuffie Caricare completamente le cu e e il caricabatteria prima della messa in funzione iniziale Riporre le cuffie e collegare il caricabatteria Riporre le cu e nel caricabatteria Riporre le cu e sul lato corretto facendo riferimento alle lettere Collegare il cavo di carica USB in dotazione alla presa (7) del caricabatteria Collegare il connettore libero del cavo di ricarica micro-USB a un caricabatteria USB compatibile Seguire le istruzioni d’uso del caricabatteria USB utilizzato...
- Page 47 6. Connessione Bluetooth (Pairing) ® Nota – Pairing • Assicurarsi che il dispositivo compatibile Bluetooth sia acceso e che la funzione Bluetooth ® ® attivata • Seguire a questo proposito le istruzioni d’uso del dispositivo La distanza tra le cu e e il dispositivo non deve essere superiore a 1 metro Più è ridotta e meglio è Assicurarsi che le cu e siano accese *beep* Controllare il LED di stato (3)
- Page 48 Cercare le cuffie con il proprio dispositivo (necessario soltanto alla prima connessione) Aprire le impostazioni Bluetooth del dispositivo e attendere che l’elenco dei dispositivi Bluetooth ® ® visualizzi WEAR 7701 Selezionare WEAR 7701 e attendere che le cu e risultino connesse nelle impostazioni Bluetooth ®...
- Page 49 7. Elementi di comando Nota • Il supporto di alcune funzioni varia a seconda del proprio dispositivo • Seguire a questo proposito le istruzioni d’uso del dispositivo 7.1 Funzione Assistente vocale Premere tre volte il sensore touch multifunzione Siri / (4) dell’auricolare destro e sinistro per avviare la Google comunicazione con il proprio Siri o Assistente Google...
- Page 50 7.3 Riproduzione audio Avviare la riproduzione audio dal dispositivo. Play / Pausa Per avviare o arrestare la riproduzione audio, premere una volta il sensore touch multifunzione (4) dell’auricolare sinistro o destro Brano successivo Per passare al brano successivo, premere due volte il sensore touch multifunzione (4) dell’auricolare destro Brano precedente Per tornare al brano precedente, premere due volte il...
- Page 51 8. Dati tecnici Cu e Bluetooth ® Tecnologia bluetooth Bluetooth v5 0 ® Pro li supportati A2DP 1 3 / AVRCP 1 6 / HFP 1 7 / SPP 1 2 Frequenza per il Bluetooth ® 2402 – 2480 MHz Trasmissioni Raggio d’azione <...
- Page 52 9. Cura e manutenzione Pulire il presente prodotto servendosi di un panno anti-pelucchi leggermente umido, senza utilizzare detergenti aggressivi 10. Esclusione di garanzia Hama GmbH & Co KG declina ogni responsabilità per danni dovuti al montaggio o all’utilizzo scorretto del prodotto, nonché alla mancata osservanza delle istruzioni d’uso e/o di sicurezza 11.
- Page 53 O Manual de instruções Muito obrigado por se ter decidido por um Elementos de comando e indicações produto Thomson! 1 Caixa carregadora Antes de utilizar o produto, leia atentamente 2 LED de estado da caixa carregadora todas as indicações e observações deste manual...
- Page 54 3. Indicações de segurança • Não altere nem deforme/aqueça/desmonte os acumuladores/as baterias • O produto está previsto apenas para utilização • Não utilize o produto enquanto estiver a ser privada e não comercial carregado! • Utilize o produto exclusivamente para o m a que Aviso –...
- Page 55 4. Ligar/desligar Retire os dois auriculares ao mesmo tempo da caixa carregadora Ambos os auriculares se ligam automaticamente, dando início ao processo de emparelhamento Alternativa: Prima o Touch-Sensor multifunções (4) dos auriculares esquerdo e direito durante cerca de 2 a 3 segundos, até...
- Page 56 5. Carregamento Antes de utilizar os auriculares pela primeira vez, carregue-os, e à caixa carregadora, uma vez com a carga total Colocar os auriculares na caixa carregadora e fechá-la Coloque os auriculares na caixa carregadora Ao fazê-lo, certi que-se de que coloca cada auricular do lado certo, tal como indicado pela marcação L/R (esquerdo/direito) Ligue o cabo de carregamento USB fornecido juntamente à...
- Page 57 6. Ligação por Bluetooth (emparelhamento) ® Observação - Emparelhamento • Certi que-se de que o seu equipamento terminal compatível com Bluetooth esteja ligado e de que o ® Bluetooth esteja ativado ® • Consulte o manual de instruções do seu equipamento terminal para obter mais informações sobre este assunto Os auriculares e o equipamento terminal não devem distar mais de 1 metro uns dos outros Quanto menor for a distância, melhor...
- Page 58 Procure os auriculares com o seu equipamento terminal (só no caso do primeiro emparelhamento) Abra o menu de de nições Bluetooth do seu equipamento terminal e aguarde até ver WEAR ® 7701 na lista dos dispositivos Bluetooth encontrados ® Selecione WEAR 7701 e aguarde até os auriculares serem apresentados como estando ligados nas de nições Bluetooth do seu equipamento terminal Ouvirá...
- Page 59 7. Elementos de comando Observação • Tenha em atenção que o suporte de determinadas funções depende do seu equipamento terminal • Consulte o manual de instruções do seu equipamento terminal para obter mais informações sobre este assunto 7.1 Função Voice Assistant Prima três vezes o Touch-Sensor multifunções (4) num Siri/ dos auriculares esquerdo ou direito para iniciar uma...
- Page 60 7.3 Reprodução de áudio Inicie a reprodução no seu equipamento terminal. Reproduzir/Pausa Prima uma vez o Touch-Sensor multifunções (4) num dos auriculares esquerdo ou direito para iniciar ou parar a reprodução áudio Faixa seguinte Prima duas vezes o Touch-Sensor multifunções (4) no auricular direito para saltar para a faixa seguinte Faixa anterior Prima duas vezes o Touch-Sensor multifunções (4) no...
- Page 61 8. Dados técnicos Auriculares Bluetooth ® Tecnologia Bluetooth Bluetooth v5 0 ® Per s suportados A2DP 1 3/AVRCP 1 6/HFP 1 7/SPP 1 2 Frequência para as 2402 – 2480 MHz transmissões Bluetooth ® Alcance < 10 m Acumulador Tipo de bateria 3,7 V Li-Polímero Capacidade mínima 43 mAh/390 mAh...
- Page 62 9. Manutenção e conservação Limpe o produto apenas com um pano sem pelos ligeiramente humedecido e não utilize produtos de limpeza agressivos 10. Exclusão de responsabilidade A Hama GmbH & Co KG declina toda e qualquer responsabilidade ou garantia por danos decorrentes da instalação, da montagem ou do manuseamento incorretos do produto e/ou do incumprimento das instruções de utilização e/ou das informações de segurança 11.
- Page 63 Thomson! Micro-USB True Wireless Headphones True Wireless Bluetooth WEAR 7701 ® Écouteurs True Wireless Б БББББББББББ ББББББББ True Wireless WEAR 7701 USB- (S/M/L)
- Page 64 • • — • • • USB- • • USB- • • • • • • • — • • • • • • • — • • • • • • • • • • • •...
- Page 65 2–3 L/R ( 30min STANDBY —...
- Page 66 L/R ( USB- Micro-USB USB- USB- micro-USB CHARGING CHARGED (< 10 %) 15–30 (2/3)
- Page 67 Bluetooth ® — • Bluetooth ® Bluetooth ® • *beep* green / red Bluetooth ® Bluetooth ® green...
- Page 68 Bluetooth ® Bluetooth WEAR 7701 ® WEAR 7701 Bluetooth ® Bluetooth Password 0000 WEAR 7701 — Bluetooth ® Bluetooth ® • 0000...
- Page 69 • • Siri / Google Siri Google Assistant — Siri Siri iOS 5 ( iPhone — Google Assistant • Google Assistant Android 5.0 Google Play Services, > 1,5 • Google Assistant (7 1)
- Page 70 (7 1)
- Page 71 Bluetooth ® Bluetooth Bluetooth v5 0 ® A2DP 1 3 / AVRCP 1 6 / HFP 1 7 / SPP 1 2 Bluetooth ® 2402–2480 < 10 43 A /390 A ~ 2,5 ~ 3,5 ~ 150...
- Page 72 Hama GmbH & Co KG Hama : +49 9091 502-0 ( www hama com 2012/19/ 2006/66/ Hama GmbH & Co KG [00132568, 00132569] 2014/53/ www hama com -> 00132568, 00132569 -> Downloads 2402–2480...
- Page 73 N Gebruiksaanwijzing Hartelijk dank dat u voor een product van Bedieningselementen en weergaven/ indicaties Thomson hebt gekozen Neem de tijd om de volgende aanwijzingen 1 Oplaadbox en instructies volledig door te lezen Berg deze 2 Status-led oplaadbox gebruiksaanwijzing vervolgens op een goede plek...
- Page 74 3. Veiligheidsinstructies • U mag de accu‘s/batterijen niet wijzigen en/of vervormen/verhitten/demonteren • Het product is bedoeld voor huishoudelijk, niet- • Gebruik het product niet terwijl het wordt commercieel gebruik opgeladen! • Gebruik het product alleen voor het beoogde doel Waarschuwing – Accu •...
- Page 75 4. In-/uitschakelen Verwijder de beide oortelefoons tegelijkertijd uit de oplaadbox Beide oortelefoons worden nu automatisch ingeschakeld en starten het koppelingsproces Alternatief: Houd de multifunctionele touch-sensor (4) op de linker en rechter oortelefoon ca 2-3 seconden ingedrukt tot u een signaaltoon hoort Om uit te schakelen, plaatst u de oortelefoons gewoon terug in de oplaadbox Zorg ervoor dat de oortelefoons op de juiste manier worden geplaatst op basis van de L/R-markeringen Alternatief:...
- Page 76 5. Opladen Laad de oortelefoons en de oplaadbox een keer volledig op voordat u ze voor de eerste keer gebruikt Oortelefoons plaatsen en de oplaadbox sluiten Plaats de oortelefoons in de oplaadbox Zorg ervoor dat de oortelefoons op de juiste manier worden geplaatst op basis van de L/R-markeringen Sluit de meegeleverde USB-oplaadkabel aan op de oplaadaansluiting (7) van de oplaadbox Sluit de vrije stekker van de micro-USB-oplaadkabel op een geschikte USB-oplader aan Raadpleeg...
- Page 77 6. Bluetooth -verbinding (pairing) ® Aanwijzing – pairing • Controleer of uw eindapparaat met Bluetooth®-functie is ingeschakeld en of de Bluetooth®-functie is geactiveerd • Raadpleeg hiervoor de gebruiksaanwijzing van uw eindapparaat De oortelefoons en het eindapparaat mogen niet meer dan 1 meter van elkaar verwijderd zijn Hoe kleiner de afstand, hoe beter Zorg ervoor dat de oortelefoons zijn ingeschakeld *beep*...
- Page 78 Zoek de oortelefoons met uw eindapparaat (alleen nodig voor de eerste verbinding) Open op uw eindapparaat de Bluetooth -instellingen en wacht tot in de lijst van gevonden ® Bluetooth -apparaten WEAR 7701 wordt weergegeven ® Selecteer WEAR 7701 en wacht tot de oortelefoons als "verbonden" worden weergegeven in de Bluetooth-instellingen van uw eindapparaat U hoort een korte signaaltoon Bluetooth Password...
- Page 79 7. Bedieningselementen Aanwijzing • Houd er rekening mee dat de ondersteuning van sommige functies afhankelijk is van uw apparaat • Raadpleeg hiervoor de gebruiksaanwijzing van uw eindapparaat 7.1 Voice Assistant-functie Tik drie keer op de multifunctionele touch-sensor (4) op Siri / de linker of rechter oortelefoon om de communicatie Google met uw Siri of Google Assistant te starten...
- Page 80 7.3 Audioweergave Start de audioweergave op uw eindapparaat. Weergave / pauze Tik eenmaal op de multifunctionele touch-sensor (4) op de linker of rechter oortelefoon om de audioweergave te starten of te stoppen Volgend nummer Tik twee keer op de multifunctionele touch-sensor (4) op de rechter oortelefoon om naar het volgende nummer te gaan Vorig nummer...
- Page 81 8. Technische gegevens Bluetooth -oortelefoons ® Bluetooth-technologie Bluetooth v5 0 ® Ondersteunde pro elen A2DP 1 3 / AVRCP 1 6 / HFP 1 7 / SPP 1 2 Frequentie voor de Bluetooth 2402 – 2480 MHz ® overdracht Reikwijdte <...
- Page 82 9. Onderhoud en verzorging Reinig dit product uitsluitend met een pluisvrije, licht vochtige doek en gebruik geen agressieve reinigingsmiddelen 10. Uitsluiting aansprakelijkheid Hama GmbH & Co KG is niet aansprakelijk voor en verleent geen garantie op schade die het gevolg is van ondeskundige installatie, montage en ondeskundig gebruik van het product of het niet in acht nemen van de handleiding en/of veiligheidsinstructies 11.
- Page 83 P Instrukcja obs ug Dzi kujemy za zakup produktu rmy Thomson! Elementy obs ugowe i wska niki Prosimy po wi ci czas na przeczytanie niniejszej 1 Stacja adowania instrukcji i podanych informacji w ca o ci 2 Dioda LED stanu stacji adowania...
- Page 84 3. Uwagi dotycz ce bezpiecze stwa • Nie mody kowa /deformowa /podgrzewa / rozmontowywa akumulatorów/baterii • Produkt jest przeznaczony do prywatnego, • Nie nale y u ywa produktu podczas adowania! niekomercyjnego u ytku domowego Ostrze enie – akumulator • Produktu nale y u ywa wy cznie zgodnie z przeznaczeniem •...
- Page 85 4. W czanie/wy czanie Wyj jednocze nie dwie s uchawki ze stacji adowania Obie s uchawki w czaj si automatycznie i rozpoczynaj proces parowania Alternatywnie: Naciska wielofunkcyjny czujnik dotykowy (4) na lewej i prawej s uchawce przez oko o 2–3 sekundy, a s yszalny b dzie sygna d wi kowy Aby wy czy , wystarczy w o y s uchawki z powrotem do stacji adowania Upewni si , e s uchawki s w o one po w a ciwej stronie, zgodnie z oznaczeniem L/R...
- Page 86 5. adowanie Przed pierwszym u yciem nale y raz w pe ni na adowa s uchawki i stacj adowania Wk adanie s uchawek i pod czanie stacji adowania W o y s uchawki do stacji adowania Upewni si , e s uchawki s w o one po w a ciwej stronie, zgodnie z oznaczeniem L/R Pod czy dostarczony w zestawie kabel do adowania USB do gniazda adowania (7) stacji adowania Pod czy woln wtyczk przewodu micro USB do adowania do odpowiedniej adowarki USB...
- Page 87 6. Pierwsze czenie Bluetooth (parowanie) ® Wskazówka – parowanie • Upewni si , e urz dzenie ko cowe obs uguj ce technologi Bluetooth jest w czone, a funkcja ® Bluetooth jest aktywowana ® • Uwzgl dni instrukcj obs ugi urz dzenia ko cowego S uchawki i urz dzenie ko cowe nie powinny znajdowa si w odleg o ci wi kszej ni 1 metr od siebie Im mniejsza odleg o , tym lepiej Upewni si , e s uchawki s w czone...
- Page 88 Wyszukiwanie s uchawek za pomoc urz dzenia ko cowego (konieczne tylko przy pierwszym po czeniu) Otworzy na urz dzeniu ko cowym ustawienia Bluetooth i poczeka , a w li cie znalezionych ® urz dze Bluetooth pojawi si napis WEAR 7701 ®...
- Page 89 7. Elementy obs ugowe Wskazówka • Nale y pami ta , e obs uga niektórych funkcji zale y od urz dzenia ko cowego • Uwzgl dni instrukcj obs ugi urz dzenia ko cowego 7.1 Funkcja Voice Assistant Dotkn trzy razy wielofunkcyjnego czujnika dotykowego Siri / (4) na lewej lub prawej s uchawce, aby rozpocz Google...
- Page 90 7.3 Odtwarzanie audio Uruchamianie odtwarzania audio na urz dzeniu ko cowym. Odtwarzaj / Wstrzymaj Dotkn raz wielofunkcyjnego czujnika dotykowego 1 × (4) na lewej lub prawej s uchawce, aby rozpocz lub zatrzyma odtwarzanie d wi ku Nast pny tytu Dotkn dwukrotnie wielofunkcyjnego czujnika 2 ×...
- Page 91 8. Dane techniczne S uchawki Bluetooth ® Technologia Bluetooth Bluetooth v5 0 ® Obs ugiwane pro le A2DP 1 3 / AVRCP 1 6 / HFP 1 7 / SPP 1 2 Cz stotliwo dla transmisji 2 402–2 480 MHz Bluetooth ®...
- Page 92 9. Obs uga i konserwacja Czy ci produkt wy cznie niestrz pi c si , lekko wilgotn ciereczk Nie u ywa agresywnych rodków czyszcz cych 10. Wy czenie odpowiedzialno ci z tytu u gwarancji Hama GmbH & Co KG nie ponosi odpowiedzialno ci i nie udziela adnej gwarancji z tytu u szkód wynikaj cych z niew a ciwego monta u, instalacji, niew a ciwego u ytkowania urz dzenia ani z tytu u szkód wynikaj cych z post powania niezgodnie z instrukcj obs ugi i wskazówkami bezpiecze stwa 11.
- Page 93 H Használati útmutató i Köszönjük, hogy Thomson terméket választott! Kezel elemek és kijelz k Szánjon rá id t, és el ször olvassa végig az alábbi 1 Tölt doboz útmutatót és megjegyzéseket A kés bbiekben 2 A tölt doboz állapotjelz LED-je tartsa biztonságos helyen ezt az útmutatót, hogy...
- Page 94 3. Biztonsági utasítások • Ne módosítsa és/vagy deformálja/hevítse/szedje szét az akkumulátorokat/elemeket • A termék magánjelleg , nem üzleti célú • Ne használja a terméket a töltési folyamat alatt! alkalmazásra készült Figyelmeztetés – akkumulátor • A terméket kizárólag a rendeltetési céljára használja •...
- Page 95 4. Be-/kikapcsolás Vegye ki mindkét fülhallgatót egyidej leg a tölt dobozból Mindkét fülhallgató automatikusan bekapcsol, és megkezdi a párosítási folyamatot Alternatív megoldásként: Tartsa nyomva a (4) többfunkciós érintésérzékel t a bal és jobb fülhallgatón kb 2–3 másodpercig, amíg hangjelzést nem hall A kikapcsoláshoz egyszer en helyezze vissza a fülhallgatókat a tölt dobozba Ennek során gyeljen a fülhallgatók megfelel oldali behelyezésére az L/R (bal/jobb) jelölés szerint Alternatív megoldásként:...
- Page 96 5. Töltés Az els használat el tt töltse fel egyszer teljesen a fülhallgatókat és a tölt dobozt A fülhallgatók behelyezése és a tölt doboz csatlakoztatása Helyezze be a fülhallgatókat a tölt dobozba Ennek során gyeljen a fülhallgatók megfelel oldali behelyezésére az L/R (bal/jobb) jelölés szerint Csatlakoztassa a mellékelt USB-tölt kábelt a tölt doboz (7) tölt hüvelyéhez Csatlakoztassa a micro-USB-tölt kábel szabad csatlakozóját egy megfelel USB-tölt készülékhez Ehhez vegye gyelembe a használt USB-tölt készülék kezelési útmutatóját...
- Page 97 6. Bluetooth -kapcsolat (párosítás) ® Megjegyzés – párosítás • Gy z djön meg arról, hogy a Bluetooth -képes eszköz be van kapcsolva, és a Bluetooth aktív ® ® • Ehhez vegye gyelembe az eszköz használati útmutatóját A fülhallgatók és az eszköz ne legyenek 1 méternél nagyobb távolságra egymástól Minél kisebb a távolság, annál jobb Gy z djön meg arról, hogy a fülhallgatók be vannak kapcsolva *beep*...
- Page 98 Keresse eszközével a fülhallgatókat (csak az els kapcsolódásnál szükséges) Nyissa meg eszközén a Bluetooth -beállításokat, és várjon, míg a talált Bluetooth -készülékek ® ® listájában megjelenik a WEAR 7701 Válassza ki a WEAR 7701-et, és várjon, míg a fülhallgatók csatlakozottként jelennek meg eszköze Bluetooth -beállításaiban Rövid hangjelzést hall ®...
- Page 99 7. Kezel elemek Megjegyzés • Vegye gyelembe, hogy egyes funkciók támogatása az eszközt l függ • Ehhez vegye gyelembe az eszköz használati útmutatóját 7.1. Hangvezérlés funkció Koppintson háromszor a bal vagy jobb fülhallgatón lév Siri/ (4) többfunkciós érintésérzékel re, hogy kommunikációt Google indítson a Siri vagy a Google Assistant asszisztenssel Megjegyzés –...
- Page 100 7.3. Hanglejátszás Indítsa el a lejátszást az eszközön. Lejátszás/Szünet A hanglejátszás elindításához vagy megállításához 1 db koppintson egyszer a bal vagy jobb fülhallgatón lév (4) többfunkciós érintésérzékel re Következ szám A következ számra ugráshoz koppintson 2 db kétszer a jobb fülhallgatón lév (4) többfunkciós érintésérzékel re El z szám Az el z számra ugráshoz koppintson kétszer a bal...
- Page 101 8. M szaki adatok Bluetooth fülhallgatók ® Bluetooth-technológia Bluetooth v5 0 ® Támogatott pro lok A2DP 1 3/AVRCP 1 6/HFP 1 7/SPP 1 2 A Bluetooth -átvitelek ® 2402–2480 MHz frekvenciája Hatótávolság < 10 m Akkumulátor Akkumulátortípus 3,7 V Li-polimer Min.
- Page 102 9. Karbantartás és ápolás Ezt a terméket csak szöszmentes, kissé benedvesített kend vel tisztítsa, és ne használjon agresszív tisztítószert 10. Szavatosság kizárása A Hama GmbH & Co KG semmilyen felel sséget vagy szavatosságot nem vállal a termék szakszer tlen telepítéséb l, szereléséb l és szakszer tlen használatából, vagy a használati útmutató és/vagy a biztonsági utasítások be nem tartásából ered károkért 11.
- Page 103 Thomson! touch Micro-USB True Wireless Bluetooth WEAR 7701 ® True Wireless Headphones Écouteurs True Wireless БББББББББ True Wireless WEAR 7701 (S/M/L)
- Page 104 • • • • – • • • • • • • • • • • • – • • • • • • • – • • • • • • • • • •...
- Page 105 touch 2–3 touch 30min STANDBY –...
- Page 106 Micro USB micro USB LED (3) ) 3,5 CHARGING CHARGED...
- Page 107 (< 10%), LED (2) LED (3) LED (2/3) 15–30 Bluetooth ® – • Bluetooth Bluetooth ® ® • *beep*...
- Page 108 LED (3) LED (3) green / red Bluetooth ® LED (3) green Bluetooth ® Bluetooth ® Bluetooth WEAR 7701 ® WEAR 7701 Bluetooth ® Bluetooth Password 0000 WEAR 7701 – Bluetooth ® Bluetooth ® • 0000,...
- Page 109 • • Voice Assistant touch Siri / Google Siri Google Assistant – Siri Siri iOS 5 (iPhone 4s – Google Assistant • Google Assistant Android 5.0 Google Play, > 1,5 GB 720P • Google Assistant hands-free handsfree touch touch touch Voice Assistant (7 1),...
- Page 110 touch touch touch Voice Assistant (7 1) smartphone...
- Page 111 Bluetooth ® Bluetooth Bluetooth v5 0 ® A2DP 1 3 / AVRCP 1 6 / HFP 1 7 / SPP 1 2 Bluetooth ® 2402–2480 MHz < 10 m 3,7 V 43 mAh / 390 mAh 200 mA ~ 2,5 ~ 3,5 ~ 150 41 g...
- Page 112 Hama GmbH & Co KG Hama : +49 9091 502-0 ( www hama com 2012/19/EU 2006/66/EE ’ Hama GmbH & Co KG [00132568, 00132569] 2014/53/ www hama com -> 00132568, 00132569 -> Downloads 2402–2480 MHz 4 dBm...
- Page 113 C Návod k použití D kujeme, že jste si vybrali výrobek Thomson Ovládací prvky a indikace Najd te si as a p e t te si prosím nejprve 1 Nabíjecí stanice následující pokyny a upozorn ní Uchovejte tento 2 Stavová LED Nabíjecí stanice návod k obsluze v dosahu na bezpe ném míst ,...
- Page 114 3. Bezpe nostní pokyny • Na akumulátorech/bateriích neprovád jte zm ny a/nebo je nedeformujte/nezah ívejte/nerozebírejte • Výrobek je ur en pro soukromé a nepr myslové • Produkt nepoužívejte b hem procesu nabíjení! použití Výstraha – Akumulátor • Výrobek používejte výlu n k ú elu, ke kterému byl stanoven •...
- Page 115 4. Zapnutí/vypnutí Ob sluchátka do uší odebírejte z nabíjecí stanice sou asn Ob sluchátka do uší se automaticky zapnou a spustí proces párování Alternativn : Na levém a pravém sluchátku do uší stiskn te multifunk ní dotykový senzor (4) na cca 2–3 sekundy, dokud neuslyšíte signální...
- Page 116 5. Nabíjení P ed prvním použitím sluchátka do uší, jakož i nabíjecí stanici jednou zcela nabijte Vložte sluchátka a p ipojte nabíjecí stanici Vložte sluchátka do nabíjecího boxu Respektujte p itom vložení sluchátek správnou stranou podle ozna ení L/R P iložený nabíjecí kabel USB p ipojte ke zdí ce nabíjení (7) nabíjecí stanice Volný...
- Page 117 6. Spojení Bluetooth (párování) ® Upozorn ní – Párování • Zajist te, že je za ízení s podporou technologie Bluetooth zapnuté a že je aktivována funkce ® Bluetooth ® • Dodržujte pokyny uvedené v návodu k obsluze koncového za ízení Sluchátka do uší...
- Page 118 Hledejte se svým koncovým za ízením sluchátka do uší (toto je zapot ebí pouze p i prvním spojení) Na svém koncovém za ízení otev ete nastavení Bluetooth a vy kejte, dokud se nezobrazí WEAR ® 7701 v seznamu nalezených p ístroj Bluetooth ®...
- Page 119 7. Obslužné prvky Upozorn ní • Respektujte, že podpora n kterých funkcí je závislá na vašem koncovém za ízení • Dodržujte pokyny uvedené v návodu k obsluze koncového za ízení 7.1 Funkce hlasového asistenta Stiskn te t ikrát multifunk ní dotykový senzor (4) na Siri / levém nebo pravém sluchátku, abyste spustili komunikaci Google...
- Page 120 7.3 P ehrávání audia Spus te p ehrávání audia na svém koncovém za ízení. P ehrát/Pauza Stiskn te jednou multifunk ní dotykový senzor (4) na levém nebo pravém sluchátku, abyste spustili nebo zastavili p ehrávání audia Další skladba Stiskn te dvakrát multifunk ní dotykový senzor (4) na pravém sluchátku, abyste p ešli k další...
- Page 121 8. Technické údaje Sluchátka do uší Bluetooth ® Bluetooth technologie Bluetooth v5 0 ® Podporované pro ly A2DP 1 3 / AVRCP 1 6 / HFP 1 7 / SPP 1 2 Frekvence pro Bluetooth ® 2 402–2 480 MHz P enosy Dosah <...
- Page 122 9. Údržba a išt ní Tento výrobek ist te pouze mírn navlh eným had íkem nepoušt jícím vlákna a nepoužívejte agresivní isticí prost edky 10. Vylou ení záruky Spole nost Hama GmbH & Co KG nep ebírá žádnou odpov dnost nebo záruku za škody vzniklé neodbornou instalací, montáží...
- Page 123 Q Návod na použitie akujeme, že ste sa rozhodli pre výrobok Ovládacie prvky a ukazovatele Thomson! 1 Nabíjací box Vyhra te si as na úplné pre ítanie všetkých 2 Indika ná LED dióda nabíjacieho boxu nasledujúcich pokynov a upozornení Uchovajte 3 Indika ná...
- Page 124 3. Bezpe nostné upozornenia • Na akumulátorových batériách/batériách nerobte žiadne zmeny a/ani ich nedeformujte/ • Výrobok je ur ený na súkromné, nekomer né nezahrievajte/nerozoberajte domáce používanie • Výrobok nepoužívajte po as procesu nabíjania! • Výrobok používajte iba na ú el, pre ktorý je Výstraha –...
- Page 125 4. Zapnutie / Vypnutie Obidve slúchadlá do uší vyberte z nabíjacieho boxu sú asne Obidve slúchadlá sa zapnú automaticky a spustia proces párovania Alternatívne: Stla te multifunk ný dotykový senzor (4) na avom a pravom slúchadle asi na 2 – 3 sekundy, až kým nebudete po u signaliza ný...
- Page 126 5. Nabíjanie Pred prvým použitím nabite slúchadlá do uší, ako aj nabíjací box jedenkrát naplno Vloženie slúchadiel a napojenie nabíjacieho boxu Vložte slúchadlá do nabíjacieho boxu Dbajte pritom na to, aby boli slúchadlá vložené správne pod a ozna enia strán L/R Pripojte dodaný...
- Page 127 6. Bluetooth pripojenie (párovanie) ® Upozornenie – párovanie • Uistite sa, že vaše koncové zariadenie s funkciou Bluetooth je zapnuté, a že je funkcia Bluetooth ® ® aktivovaná • K tomu si pre ítajte návod na obsluhu vášho koncového zariadenia Slúchadlá...
- Page 128 Vaším koncovým zariadením vyh adajte slúchadlá do uší (potrebné je to iba pri prvom pripojení) Otvorte nastavenia Bluetooth na vašom koncovom zariadení a po kajte, kým sa v zozname ® nájdených zariadení Bluetooth zobrazí WEAR 7701 ® Zvo te WEAR 7701 a po kajte, kým sa slúchadlá nezobrazia ako pripojené v nastaveniach Bluetooth vášho koncového zariadenia Budete po u krátky signaliza ný...
- Page 129 7. Ovládacie prvky Upozornenie • Upozor ujeme, že podpora niektorých funkcií závisí od vášho koncového zariadenia • K tomu si pre ítajte návod na obsluhu vášho koncového zariadenia 7.1 Funkcia hlasového asistenta Klepnite trikrát na multifunk ný dotykový senzor (4) Siri / na avom alebo pravom slúchadle, aby sa spustila Google...
- Page 130 7.3 Audio prehrávanie Spustite prehrávanie na vašom koncovom zariadení. Play / Pause Klepnite raz na multifunk ný dotykový senzor (4) na avom alebo pravom slúchadle, aby ste mohli spusti alebo zastavi audio prehrávanie Nasledujúci titul Klepnite dvakrát na multifunk ný dotykový senzor (4) na pravom slúchadle, aby ste prešli na nasledujúci titul Predchádzajúci titul Klepnite dvakrát na multifunk ný...
- Page 131 8. Technické údaje Bluetooth slúchadlá do uší ® Technológia Bluetooth Bluetooth v5 0 ® Podporované pro ly A2DP 1 3 / AVRCP 1 6 / HFP 1 7 / SPP 1 2 Frekvencia pre Bluetooth ® 2 402 – 2 480 MHz Prenosy Dosah <...
- Page 132 9. Údržba a starostlivos Na istenie tohto výrobku používajte len navlh enú utierku, ktorá nepúš a vlákna a nepoužívajte žiadne agresívne istiace prostriedky 10. Vylú enie zodpovednosti Hama GmbH & Co KG nepreberá žiadnu zodpovednos a neposkytuje záruky za škody vyplývajúce z neodbornej inštalácie, montáže alebo neodborného používania výrobku alebo z nerešpektovania návodu na obsluhu a/alebo bezpe nostných upozornení...
- Page 133 T Kullanma k lavuzu Bir Thomson ürününü tercih etti iniz için çok Kumanda elemanlar ve göstergeler te ekkür ederiz! arj kutusu Biraz zaman ay r p a a daki talimat ve arj kutusu durum LED'i aç klamalar tamamen okuyun Gerekti inde tekrar 3 Kulakl k durum LED'i ba vurmak için bu kullan m k lavuzunu daha...
- Page 134 3. Güvenlik aç klamalar • Bataryalar /pilleri de i tirmeyin/deforme etmeyin/ s tmay n/parçalamay n • Ürün, ticari olmayan özel ev kullan m için • Ürünü, arj i lemi s ras nda kullanmay n! öngörülmü tür Uyar - Batarya • Ürünü sadece öngörülen amaç için kullan n •...
- Page 135 4. Açma/kapatma Her iki kulakl da arj kutusundan ayn anda al n Her iki kulakl k da otomatik olarak devreye girecek ve e le me i lemini ba latacakt r Alternatif: Sol ve sa kulakl kta çok fonksiyonlu dokunmatik sensöre (4), bir sinyal sesi duyana kadar yakl 2-3 boyunca bas n Kapatmak için kulakl sadece arj kutusuna geri koyun Bu s rada kulakl klar L/R i aretine...
- Page 136 5. arj lk kullan mdan önce kulakl klar ve ayr ca arj kutusunu bir kez tam olarak arj edin Kulakl klar koyun ve arj kutusunu kapat n Kulakl klar arj kutusuna koyun Bu s rada kulakl klar L/R i aretine göre do ru tarafa koydu unuzdan emin olun Birlikte verilen USB arj kablosunu arj kutusundaki arj soketine (7) ba lay n Mikro USB arj kablosunun bo ta duran ini uygun bir USB arj cihaz na tak n Bunun için...
- Page 137 6. Bluetooth ba lant s (e le tirme) ® Bilgi – e le tirme • Bluetooth özellikli nihai cihaz n z n ve Bluetooth'un aç k oldu undan emin olun ® • Bunun için nihai cihaz n z n kullanma k lavuzunu dikkate al n Kulakl k ve nihai cihaz birbirinden 1 metreden fazla uzakta olmamal d r Mesafe ne kadar dü...
- Page 138 Nihai cihaz n z ile kulakl klar aray n (sadece ilk ba lant da gereklidir) Nihai cihaz n zda Bluetooth ayarlar n aç n ve bulunan Bluetooth cihazlar listesinde WEAR 7701 ® ® gösterilene kadar bekleyin WEAR 7701 seçimini yap n ve kulakl klar nihai cihaz n z n Bluetooth ayarlar nda ba land olarak ®...
- Page 139 7. Kumanda elemanlar Aç klama • Baz fonksiyonlar n desteklenmesinin nihai cihaz n za ba l oldu unu dikkate al n • Bunun için nihai cihaz n z n kullanma k lavuzunu dikkate al n 7.1 Ses asistan fonksiyonu Siri veya Google Assistant’ n z ile ileti im kurmak Siri / için üç...
- Page 140 7.3 Ses oynatma Nihai cihaz n z üzerinde oynatmay ba lat n. Oynat / Duraklat Ses oynatmay ba latmak veya durdurmak için sol veya sa kulakl ktaki çok fonksiyonlu dokunmatik sensöre (4) dokunun Sonraki ark Sonraki ark ya geçi yapmak için sol veya sa kulakl ktaki çok fonksiyonlu dokunmatik sensöre (4) iki defa dokunun Önceki ark...
- Page 141 8. Teknik veriler Bluetooth kulakl k ® Bluetooth teknolojisi Bluetooth v5 0 ® Desteklenen pro ller A2DP 1 3 / AVRCP 1 6 / HFP 1 7 / SPP 1 2 Bluetooth frekans ® 2402 – 2480 MHz Aktar mlar Eri im mesafesi <...
- Page 142 9. Bak m ve koruma Bu ürünü sadece tüy b rakmayan, ha f nemli bir bezle temizleyin ve sert temizlik maddeleri kullanmay n 10. Sorumluluktan muafiyet Hama GmbH & Co KG, ürünün yanl kurulumu, montaj ve yanl kullan m ya da kullan m k lavuzunun ve/veya güvenlik aç...
- Page 143 S Bruksanvisning Tack för att du valt att köpa en Thomsonprodukt! Manöverelement och indikeringar Ta dig tid och läs först igenom de följande 1 Laddningsbox anvisningarna och informationen helt och hållet 2 Statuslysdiod Laddningsbox Förvara sedan den här bruksanvisningen på 3 Statuslysdiod Hörlur en säker plats för att kunna titta i den när det 4 Peksensor med era funktioner...
- Page 144 3. Säkerhetsanvisningar • Förändra och/eller deformera inte uppladdningsbara/vanliga batterier och värm inte • Produkten är avsedd för privat hemanvändning, upp dem eller plocka isär dem inte yrkesmässig användning • Använd inte produkten när den laddas! • Använd endast produkten för det avsedda Varning –...
- Page 145 4. Till-/ frånkoppling Ta ut båda hörlurarna samtidigt ur laddningsboxen Båda hörlurarna kopplas in automatiskt och startar parkopplingen Eller: Håll peksensorn (4) på den vänstra och högra hörluren intryckt i ca 2–3 sekunder tills en signal hörs För att stänga av hörlurarna lägger du helt enkelt tillbaka dem i laddboxen Observera att vänster och höger hörlur ska ligga på...
- Page 146 5. Laddning Ladda hörlurarna och laddningsboxen fullständigt innan de tas i bruk första gången Lägg i hörlurarna och anslut laddningsboxen. Lägg i hörlurarna i laddningsboxen Observera att vänster och höger hörlur ska ligga på rätt sida enligt markeringen L = vänster och R = höger Anslut den medföljande USB-laddningskabeln till laddningsboxens laddningsuttag (7) Anslut micro-USB-laddningskabelns fria kontakt till en lämplig USB-laddare Se bruksanvisningen för den USB-laddare som används...
- Page 147 6. Bluetooth -anslutning (parkoppling) ® Information – parkoppling • Kontrollera att den Bluetooth -kompatibla slutenheten är påslagen och att Bluetooth är aktiverat ® ® • Se bruksanvisningen för din slutenhet Hörluren och slutenheten bör inte vara på längre avstånd än 1 meter från varandra Ju kortare avstånd desto bättre Kontrollera att hörlurarna är inkopplade *beep*...
- Page 148 Sök efter hörlurarna med din slutenhet (behövs endast vid den första anslutningen). Öppna Bluetooth -inställningarna på din slutenhet och vänta tills WEAR 7701 visas i listan med ® hittade Bluetooth -enheter ® Välj WEAR 7701 och vänta tills hörlurarna visas som anslutna i Bluetooth -inställningarna i din ®...
- Page 149 7. Manöverelement Information • Observera att vissa funktioner är beroende av att din slutenhet stödjer dem • Se bruksanvisningen för din slutenhet 7.1 Röstassistentfunktion Klicka tre gånger på peksensorn (4) på den vänstra eller Siri / högra hörluren för att starta en kommunikation med din Google Siri eller Google Assistant Information –...
- Page 150 7.3 Ljudåtergivning Starta ljudåtergivningen i din slutenhet. Spela/pausa Klicka en gång på peksensorn (4) på den vänstra eller högra hörluren för att starta eller stoppa ljudåtergivningen Nästa spår Klicka två gånger på peksensorn (4) på den högra hörluren för att växla till nästa spår Föregående spår Klicka två...
- Page 151 8. Tekniska data Bluetooth -hörlur ® Bluetooth-teknik Bluetooth v5 0 ® Pro ler som stöds A2DP 1 3 / AVRCP 1 6 / HFP 1 7 / SPP 1 2 Frekvens för 2 402–2 480 MHz Bluetooth -överföring ® Räckvidd <...
- Page 152 9. Service och skötsel Använd bara en luddfri, lätt fuktad trasa för att rengöra produkten och använd inga aggressiva rengöringsmedel 10. Garantifriskrivning Hama GmbH & Co KG övertar ingen form av ansvar eller garanti för skador som beror på olämplig installation, montering och olämplig produktanvändning eller på...
- Page 153 L Käyttöohje Suurkiitos, että valitsit Thomson-tuotteen Käyttöelementit ja näytöt Varaa aikaa ja lue seuraavat ohjeet ensin 1 Latauskotelo kokonaan läpi Säilytä sen jälkeen tämä 2 Latauskotelon tila-LED käyttöohje varmassa paikassa, jotta voit 3 Kuulokkeiden tila-LED tarvittaessa tarkistaa siitä eri asioita Jos luovut 4 Monitoiminen kosketusanturi laitteesta, anna tämä...
- Page 154 3. Turvallisuusohjeet • Älä tee akkuihin/paristoihin muutoksia ja/tai väännä/kuumenna/pura niitä • Tuote on tarkoitettu yksityiseen, ei-kaupalliseen • Älä käytä tuotetta latauksen aikana! kotikäyttöön Varoitus akusta • Käytä tuotetta vain sen käyttötarkoitukseen • Lapsia on valvottava, jotta voidaan varmistaa, että • Käytä lataamiseen ainoastaan sopivia latureita he eivät leiki tuotteella tai USB-liitäntöjä...
- Page 155 4. Kytkeminen päälle / pois päältä Ota molemmat kuulokkeet samanaikaisesti latauskotelosta Kuulokkeet kytkeytyvät automaattisesti päälle ja käynnistävät pariliitoksen muodostamisen Vaihtoehtoisesti: Paina vasemman tai oikean kuulokkeen monitoimista kosketusanturia (4) n 2–3 sekuntia, kunnes kuulet äänimerkin Kytke kuulokkeet pois päältä asettamalla ne latauskoteloon Huomioi kuulokkeiden oikea sijoittaminen L ja R merkintöjen mukaan Vaihtoehtoisesti: Pidä...
- Page 156 5. Lataaminen Lataa kuulokkeet ja latauskotelo täyteen ennen ensimmäistä käyttöä Kuulokkeiden sisäänasettaminen ja latauskotelon liittäminen Aseta kuulokkeet latauskoteloon Huomioi kuulokkeiden oikea sijoittaminen L ja R merkintöjen mukaan Kytke USB-latausjohto latauskotelon latausliittimeen (7) Kytke mikro-USB-latausjohdon vapaa pistoke sopivaan USB-laturiin Noudata tässä käytettävän USB-laturin käyttöohjetta micro USB Latauskotelon ja kuulokkeiden lataaminen...
- Page 157 6. Bluetooth -yhteys (parinmuodostus) ® Huomautus parinmuodostuksesta • Varmista, että Bluetooth -kykyinen päätelaite on päällekytketty ja että Bluetooth on aktivoitu ® ® • Tutustu päätelaitteen käyttöohjeeseen Kuulokkeiden ja päätelaitteen tulisi sijaita korkeintaan 1 metrin etäisyydellä toisistaan Mitä lyhyempi etäisyys, sen parempi Varmista, että...
- Page 158 Hae kuulokkeet päätelaitteella (mahdollista vain ensimmäistä kertaa yhdistettäessä) Avaa päätelaitteen Bluetooth -asetukset ja odota, kunnes löydettyjen Bluetooth -laitteiden listassa ® ® näkyy WEAR 7701 Valitse WEAR 7701 ja odota, kunnes kuulokkeet näkyvät yhdistettyinä päätelaitteen Bluetooth ® asetuksissa Kuulet lyhyen äänimerkin Bluetooth Password 0000...
- Page 159 7. Käyttöpainikkeet Huomautus • Huomioi, että joidenkin toimintojen tukeminen on päätelaitteesta riippuvainen • Tutustu päätelaitteen käyttöohjeeseen 7.1 Puheohjaustoiminto Aloita viestintä Sirillä tai Google Assistantilla Siri / napauttamalla kolme kertaa vasemman tai oikean Google kuulokkeen monitoimista kosketusanturia (4) Huomautus Siristä Siri on käytettävissä vain soveltuvissa päätelaitteissa, joissa on iOS 5 (alkaen iPhone 4s) tai uudempi käyttöjärjestelmä...
- Page 160 7.3 Äänentoisto Käynnistä äänentoisto päätelaitteesta. Toisto/tauko Aloita tai lopeta äänentoisto napauttamalla kerran vasemman tai oikean kuulokkeen monitoimista kosketusanturia (4) Seuraava kappale Siirry seuraavaan kappaleeseen napauttamalla kaksi kertaa oikean kuulokkeen monitoimista kosketusanturia (4) Edellinen kappale Siirry edelliseen kappaleeseen napauttamalla kaksi kertaa vasemman kuulokkeen monitoimista kosketusanturia (4) 7.4 Äänenvoimakkuuden säätö...
- Page 161 8. Tekniset tiedot Bluetooth -kuulokkeet ® Bluetooth-teknologia Bluetooth v5 0 ® Tuetut pro ilit A2DP 1 3 / AVRCP 1 6 / HFP 1 7 / SPP 1 2 Taajuus Bluetooth ® 2402–2480 MHz siirtoihin Kantama < 10 m Akku Akkutyyppi Litiumpolymeeri 3,7 V Vähimmäiskapasiteetti...
- Page 162 9. Hoito ja huolto Puhdista tuote ainoastaan nukattomalla, kevyesti kostutetulla liinalla; älä käytä voimakkaita puhdistusaineita 10. Vastuuvapauslauseke Hama GmbH & Co KG ei vastaa millään tavalla vahingoista, jotka johtuvat epäasianmukaisesta asennuksesta ja tuotteen käytöstä tai käyttöohjeen ja/tai turvallisuusohjeiden vastaisesta toiminnasta 11.
- Page 163 M Manual de utilizare V mul umim pentru faptul c v-a i decis în Elementele de operare i afi aje favoarea unui produs Thomson! 1 Caseta de înc rcare V rug m s v lua i timpul necesar pentru a citi 2 LED stare caset de înc rcare...
- Page 164 3. Indica ii de securitate • Nu modi ca i, deforma i, înc lzi i sau dezmembra bateriile/acumulatoarele • Produsul este conceput pentru utilizarea casnic , • Nu utiliza i produsul pe parcursul procesului de necomercial înc rcare! • Utiliza i produsul numai pentru scopul prev zut Avertizare –...
- Page 165 4. Pornirea/oprirea Extrage i ambele c ti simultan din caseta de înc rcare Ambele c ti pornesc automat i declan eaz procesul de împerechere Alternativ: Ap sa i pe senzorul tactil multifunc ional (4) de pe casca din stânga i din dreapta timp de cca 2–3 secunde, pân ce se aude sunetul de semnalizare Pentru deconectare, introduce i c tile pur i simplu înapoi în caseta de înc rcare Acorda i în acest context aten ie introducerii c tilor conform marcajelor L/R...
- Page 166 5. Înc rcare Înainte de prima utilizare, înc rca i c tile i caseta de înc rcare o dat complet Introduce i c tile i conecta i caseta de înc rcare Introduce i c tile în caseta de înc rcare Acorda i în acest context aten ie introducerii c tilor conform marcajelor L/R Conecta i cablul USB al turat la mufa de înc rcare (7) a casetei de înc rcare Conecta i tec rul liber al cablului de înc rcare micro-USB la un înc rc tor USB adecvat Acorda i...
- Page 167 6. Prima conectare Bluetooth (Pairing) ® Indica ie – Conectarea (Pairing) • Asigura i-v c terminalul dvs Bluetooth este conectat i func ia Bluetooth este activat ® ® • Acorda i în acest sens aten ie instruc iunilor de utilizare ale terminalului dvs Nu men ine i c tile i terminalul la mai mult de 1 metru unele de altele Cu cât este distan a mai mic , cu atât mai bine Asigura i-v c sunt pornite c tile...
- Page 168 C utarea c tilor prin intermediul terminalului (necesar numai la prima conectare) Deschide i set rile Bluetooth de pe terminalul dvs i a tepta i pân ce în lista aparatelor dvs ® Bluetooth este a at WEAR 7701 ® Selecta i WEAR 7701 i a tepta i pân ce c tile dvs apar ca ind conectate în set rile Bluetooth ®...
- Page 169 7. Elementele de operare Indica ie • Ave i în vedere faptul c suportarea anumitor func ii depinde de terminalul dvs • Acorda i în acest sens aten ie instruc iunilor de utilizare ale terminalului dvs 7.1 Func ia de asistent vocal Ap sa i de trei ori pe senzor tactil multifunc ional (4) Siri / de pe casca din stânga sau din dreapta, pentru a ini ia...
- Page 170 7.3 Redarea audio Începe i redarea pe terminalul dvs. Redare/Pauz Ap sa i senzorul tactil multifunc ional (4) de pe casca din stânga i din dreapta, pentru a porni sau opri redarea audio Urm toarea pies Ap sa i senzorul tactil multifunc ional (4) de pe casca din dreapta de dou ori, pentru a trece la piesa urm toare Piesa anterioar...
- Page 171 8. Date tehnice C tile Bluetooth ® Tehnologie Bluetooth Bluetooth v5 0 ® Pro le suportate A2DP 1 3 / AVRCP 1 6 / HFP 1 7 / SPP 1 2 Frecven a pentru Bluetooth ® 2 402–2 480 MHz Transferuri Raza de ac iune <...
- Page 172 9. Între inerea i îngrijirea Cur a i produsul numai cu o lavet ce nu las scame, u or umezit i nu utiliza i detergen i agresivi 10. Excluderea r spunderii Hama GmbH & Co KG nu î i asum nicio r spundere sau garan ie pentru daunele, ce rezult din instalarea, montajul, utilizarea inadecvat a produsului sau nerespectarea instruc iunilor de utilizare i/ sau a indica iilor de securitate 11.