Table of Contents
Advertisement
Quick Links
FCC Notice
This equipment has been tested and found to comply with the limits for a Class B digital
device, pursuant to part 15 of the FCC Rules. These limits are designed to provide
reasonable protection against harmful interference in residential installation. This
equipment generates, uses and can radiate radio frequency energy and if not installed
and used in accordance with the instructions, may cause harmful interference to radio
communications. However, there is no guarantee that interference will not occur in a
particular installation. If this equipment does cause harmful interference to radio or
television reception, detectable by turning the equipment in question off and on, the
user is encouraged to try to correct the interference by one or more of the following
measures:
Reorient or relocate the receiving antenna
Increase the distance between the equipment and the receiver
Connect the equipment to an outlet on a different circuit than that which the receiver
is connected to
Or consult the dealer or an experienced radio/TV technician for help.
This device complies with Part 15 of the FCC Rules. Operation is subject to following
two conditions:
1. This device may not cause harmful interference, and
2. This device must accept any interference that may cause undesired operation.
English
EN-1
Advertisement
Table of Contents

Summary of Contents for MAGINON DLP 1400S
- Page 1 English FCC Notice This equipment has been tested and found to comply with the limits for a Class B digital device, pursuant to part 15 of the FCC Rules. These limits are designed to provide reasonable protection against harmful interference in residential installation. This equipment generates, uses and can radiate radio frequency energy and if not installed and used in accordance with the instructions, may cause harmful interference to radio communications.
- Page 2 Safety Instructions Read all of these instructions before you operate your projector and save for future reference. 1. Check that the operating voltage of your unit is identical with the voltage of your local power supply. 2. Should any liquid or solid object fall into the cabinet, unplug the unit and have it checked by the qualified personnel before operating it further.
- Page 3 English 13. For ventilation reasons, the fan continues to operate after the projector has been powered off. Please do not unplug the power cord until the fan stops. 14. The projector is equipped with ventilation holes (intake) and ventilation holes (exhaust).
- Page 4 Notes on AC Power Cord AC Power Cord must meet requirement of country where you use a projector. Confirm an AC plug type with graphics below and proper AC Power Cord must be used. If supplied AC Power Cord does not match your AC outlet, contact your sales dealer. This projector is equipped with a grounding type AC line plug.
-
Page 5: Table Of Contents
English CONTENTS Product Introduction ....................6 Projector Features ..................... 6 Package Contents ..................... 7 Getting to Know the Projector .................. 8 Projector Components ..................8 Remote Control Components ................11 Installation ......................12 Connecting the Projector ................. 12 Powering On/Off the Projector ................ 16 Adjusting the Projected Image ................ -
Page 6: Product Introduction
Product Introduction Projector Features The projector integrates high-performance optical engine projection and a user-friendly design to deliver high reliability and ease of use. The projector offers the following features: Single chip 0.55" Texas Instruments DLP™ technology SVGA (800 x 600 pixels) Compact size, light weight for portability 1.2x manual zoom lens Auto image re-sizing (Auto-Sync.) to 800 x 600 full screen with scaling compression... -
Page 7: Package Contents
English Package Contents When you unpack the projector, make sure you have all these components: Projector with Lens Cap AC Power Cord VGA Cable (D-SUB to D-SUB) S-Video Cable Composite Video Cable Audio Cable Battery for Projector Remote Control Remote Control (IR) Carrying Case User’s Manual Optional Accessory:... -
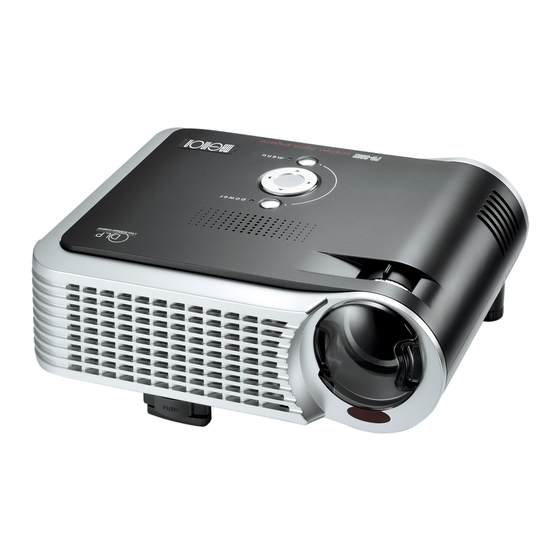
Page 8: Getting To Know The Projector
Getting to Know the Projector Projector Components Front View 1. Lens cap 7. Focus ring 2. Lens cap strap 8. Control panel 3. Front IR remote control sensor 9. Speaker 4. Lens 10. Ventilation holes (exhaust) 5. Ventilation holes (intake) 11. - Page 9 English Rear View 1. Interface connector 2. Rear IR remote control sensor 3. Security lock receptacle 4. AC power socket 5. Ventilation holes (intake) 6. Tilt-adjustment foot Bottom View 1. Lamp cover EN-9...
- Page 10 Control Panel (power) 2. Power LED indicator 3. Keystone 4. Auto 5. Menu 6. Four direction buttons 7. Lamp LED indicator 8. Source Interface Connector 1. USB connector This connector is used for engineering purpose. 2. AUDIO input connector Connect an audio output from video equipment to this jack. 3.
-
Page 11: Remote Control Components
English Remote Control Components (power) button 2. Four direction buttons 3. Menu button 4. Enter button 5. Keystone buttons 6. Volume buttons 7. Source button 8. Mute button 9. Blank button 10. 4:3/16:9 button 11. Auto button EN-11... -
Page 12: Installation
Installation Connecting the Projector A. Connecting to a computer 1 AC Power Cord 2 VGA Cable (D-SUB to D-SUB) Desktop type Laptop type EN-12... - Page 13 English B. Connecting to a Video Source 1.Connecting with S-Video Cable 1 AC Power Cord 2 S-Video Cable 3 Audio Cable EN-13...
- Page 14 2.Connecting with Composite Video Cable 1 AC Power Cord 2 Composite Video Cable 3 Audio Cable EN-14...
- Page 15 English 3.Connecting with HDTV Cable 1 AC Power Cord 2 D-SUB to HDTV Cable 3 Audio Cable When connecting cable, power cords of both a projector and external equipment should be disconnected from AC outlet. EN-15...
-
Page 16: Powering On/Off The Projector
Powering On/Off the Projector Powering On the Projector: 1. Remove the projector lens cap. 2. Complete the AC power cord and peripheral signal cable(s) connections. 3. Press the button on the Projector Control Panel or the button on the Remote Control to turn on the power. -
Page 17: Adjusting The Projected Image
English Adjusting the Projected Image Adjusting the Projector Height The projector is equipped with an elevator foot to adjust the image height. To raise or lower the image: 1. Turn the projector over and locate the elevator foot. Press the elevator button to extend the foot so it may be adjusted. -
Page 18: Adjusting The Projector Zoom And Focus
Adjusting the Projector Zoom and Focus Focus Ring Zoom Ring 1. Adjust the image size by rotating the zoom ring. Rotate to the right to reduce the image. Rotate to the left to enlarge the image. 2. Focus the image by rotating the focus ring. A still image is recommended for focusing. - Page 19 English Projection 4 : 3 Screen Size –Diagonal 16 : 9 Screen Size-Diagonal Distance (inch) (inch) Wide Tele Wide Tele 33.0 27.5 30.2 25.2 41.2 34.3 37.8 31.5 55.0 45.8 50.4 42.0 60.5 50.4 55.5 46.2 82.5 68.7 75.7 63.1 110.0 91.6 100.9...
-
Page 20: Using The Projector
Using the Projector Control Panel Refer to “Powering On/Off the Projector”. 2. Power LED indicator Refer to “Indicator Messages”. 3. Keystone Adjusts image distortion caused by tilting the projector. 4. Auto Automatically adjusts frequency and phase. This function is available for computer mode only. -
Page 21: Remote Control
English Remote Control Refer to “Powering On/Off the Projector”. 2. Four direction buttons The four direction buttons / / / can be used to scroll through OSD (On- Screen Display) menus and make adjustments. 3. Menu Displays or exits the on-screen display menus. - Page 22 Battery Replacement 1. Push and slide the battery compartment lid in the direction shown. 2. Install a battery as indicated by the diagram inside the compartment. 3. Position the lid over the compartment and snap it back into place. Keep the battery out of the reach of children. There is a danger of death by accidentally swallowing the battery.
- Page 23 English Remote Control Operation Point the remote control at the infrared remote sensor and press a button. A. Straight Distance: within about 7 meters from the front of the remote sensor. B. Direction: Angle: within about 20 degrees of the remote sensor in every direction.
-
Page 24: Menu Options
Menu Options The projector has multi-language OSD (On-Screen Display) menus that can only be displayed when an input source is present. The menus can be accessed using either the Projector Control Panel or the Remote Control. The OSD (On-Screen Display) menus allow you to make image adjustments and change a variety of settings. -
Page 25: Color (Computer/Video Mode)
English Color (Computer/Video Mode) Option Actions/Descriptions Brightness Adjusts the brightness of the image. Press the button to darken the image. Press the button to lighten the image. Contrast The contrast controls the degree of difference between the lightest and darkest parts of the picture. Adjusting the contrast changes the amount of black and white in the image. - Page 26 Option Actions/Descriptions Saturation Adjusts a video image from black and white to fully saturated color. Press the button to decrease the amount of color in the image. Press the button to increase the amount of color in the image. Tint Adjusts the color balance of red and green.
-
Page 27: Image (Computer Mode)
English Image (Computer Mode) Option Actions/Descriptions Keystone Adjusts image distortion caused by tilting projection. (+15 degrees) Aspect Ratio Selects this function to fit Auto, 16:9, 4:3 aspect ratio. In order to use the Auto aspect ratio, the input must be a computer signal (through VGA cable) of resolution less than SVGA (800 x 600). -
Page 28: Image (Video Mode)
Image (Video Mode) Option Actions/Descriptions Keystone Adjusts image distortion caused by tilting projection. (+15 degrees) Aspect Ratio Select this function to fit Auto, 16:9, 4:3 aspect ratio. In order to use the Auto aspect ratio, the input must be a computer signal (through VGA cable) of resolution less than SVGA (800 x 600). -
Page 29: Management (Computer/Video Mode)
English Management (Computer/Video Mode) Option Actions/Descriptions ECO Mode Choose “On” to dim the projector lamp which will lower power consumption, extend the lamp life and reduce noise. Choose “Off” to return normal mode. Menu Location Choose the Menu location on the display screen. Project Ceiling Choose “On”... -
Page 30: Audio (Computer/Video Mode)
Audio (Computer/Video Mode) Option Actions/Descriptions Volume Press the button to decrease the volume. Press the button to increase the volume. Mute Choose “On” to turn mute on. Choose “Off” to turn mute off. EN-30... -
Page 31: Language
English Language Option Actions/Descriptions Language Choose the multilingual OSD menu. Use the buttons to select your preferred language. Press Menu button either on the Projector Control Panel or the Remote Control to confirm the selection. EN-31... -
Page 32: Maintenance
Maintenance The projector needs proper maintenance. You should keep the lens clean as dust, dirt or spots will project on the screen and diminish image quality. If any other parts need replacing, contact your dealer or qualified service personnel. When cleaning any part of the projector, always switch off and unplug the projector first. -
Page 33: Replacing The Lamp
English Replacing the Lamp Projector lamps have a finite life. Replace the lamp when: The image becomes darker and hues become weaker after a lamp has been for a long period of time. The projector lamp LED indicator turns into red. Refer to section titled “Indicator Messages”... - Page 34 1. Turn off the projector and unplug the AC power cord. 2. Place a protective sheet (cloth) beneath the projector. Turn the projector over so you can access the lamp cover. 3. Remove the access panel screws and open the panel. 4.
-
Page 35: Technical Specifications
English Technical Specifications Projection System Single panel 0.55” DLP projector Native resolution 480,000 dot x1 (800 x 600 x1) Image Brightness 1400 ANSI Lumens Uniformity 85 % Lens Manual Zoom (1.2X) Focal Length 20.2 - 24.2 mm Contrast Ratio 2000 : 1(Full on/off) Aspect Ratio Auto, 16:9, 4:3 Screen Size... -
Page 36: Appendix
Appendix Indicator Messages LED Type Color Status Meaning Power LED Green Flashing The projector is powered and ready. The projector system has some problems with its Power LED Amber Solid fan, so the projector cannot start up. The projector is in good condition on working. Power LED Green Solid The lamp is in good condition and is projecting at... -
Page 37: Preset Signals
English Preset Signals Preset signal fH (kHz) fV (Hz) Sync Size 640 x 480 VGA mode 3 31.469 59.940 H(-), V(-) VGA VESA 72 Hz 37.861 72.809 H(-), V(-) VGA VESA 75 Hz 37.500 75.000 H(-), V(-) VGA VESA 85 Hz 43.269 85.008 H(-), V(-) - Page 38 HDTV Preset Signals Preset Signals Horizontal Frequency (kHz) Vertical Frequency (Hz) 480i 15.8 kHz 60 Hz 480p 31.5 kHz 60 Hz 576i 15.6 kHz 50 Hz 576p 31.3 kHz 50 Hz 720p 45.0 kHz 60 Hz 720p 37.5 kHz 50 Hz 1080i 33.8 kHz 60 Hz...
-
Page 39: Troubleshooting
English Troubleshooting Refer to the symptoms and measures listed below before sending the projector for repairs. If the problem persists, contact your local reseller or service center. Please refer to “Indicator Messages” as well. Symptom Cause Measure No power. Plug in the AC power cord. The AC power cord is not plugged in. - Page 40 Wipe clean with a soft, dry Picture blurred. The lens is dirty. Part of picture cloth or lens paper. Adjust the focus with the out of focus. The lens focus is not adjusted optimally. focus ring. Place the projector within the The projection distance is not supported range.