
Related Manuals for SolarEdge StorEdge Interface SESTI-S4


Summary of Contents for SolarEdge StorEdge Interface SESTI-S4
- Page 1 Installation Guide StorEdge Interface For the Single Phase Inverter with HD- Wave Technology and SetApp Configuration and LG Chem Batteries Version 1.1...
-
Page 2: Table Of Contents
Contents Disclaimers Important Notice Emission Compliance Revision History HANDLING AND SAFETY INSTRUCTIONS Safety Symbols Information IMPORTANT SAFETY INSTRUCTIONS Chapter 1: Overview The StorEdge Solution Components Additional References Installation Workflow Installation Equipment List Chapter 2: Connecting the Energy Meter Chapter 3: StorEdge Interface Installation Unpacking and Identifying the Product Mounting the StorEdge Interface Connecting the StorEdge Interface... -
Page 3: Disclaimers
You may refer to the SolarEdge web site (www.solaredge.com) for the most updated version. All company and brand products and service names are trademarks or registered trademarks of their respective holders. - Page 4 Emission Compliance Connect the equipment into an outlet on a circuit different from that to which the receiver is connected. Consult the dealer or an experienced radio/TV technician for help. Changes or modifications not expressly approved by the party responsible for compliance may void the user’s authority to operate the equipment.
-
Page 5: Revision History
Revision History 4 Revision History Version 1.1 (September 2019) Added Running a Battery Self-test on page 21. Version 1.0 (July 2019) First version of this guide StorEdge Interface Installation Guide MAN-01-00621-1.1... -
Page 6: Handling And Safety Instructions
IMPORTANT SAFETY FEATURE Denotes information about safety issues. Disposal requirements under the Waste Electrical and Electronic Equipment (WEEE) regulations: NOTE Discard this product according to local regulations or send it back to SolarEdge. IMPORTANT SAFETY INSTRUCTIONS SAVE THESE INSTRUCTIONS WARNING! The inverter cover must be opened only after shutting off the inverter ON/OFF switch located at the bottom of the inverter. - Page 7 The StorEdge Interface is IP65 rated. Unused connectors and glands should be sealed with the provided seals. NOTE symbol appears at grounding points on the SolarEdge equipment. This symbol may also be used in this manual. StorEdge Interface Installation Guide MAN-01-00621-1.1...
-
Page 8: Chapter 1: Overview
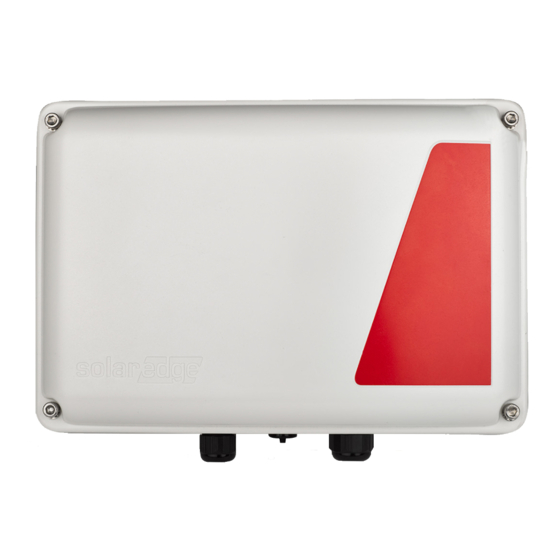
The StorEdge Interface - The StorEdge Interface connects the battery to the inverter through fuses, and supplies control and monitoring signals to the battery for operation. One battery - a DC-coupled battery designed to work with the SolarEdge system. StorEdge Interface Installation Guide MAN-01-00621-1.1... -
Page 9: Additional References
Chapter 1: Overview 8 Figure 1: StorEdge system components NOTE Additional SolarEdge inverters (without batteries) can be connected over RS485. The inverters will participate in export limitation and Smart Energy Management. PV modules connected to power optimizers are not mandatory for charge/ discharge profile programming. -
Page 10: Installation Workflow
Activating the inverter- as described in the Commissioning chapter of the SolarEdge Installation Guide , using the activation card supplied with the inverter. Pairing the system - as described in the Commissioning chapter of the SolarEdge StorEdge Interface Installation Guide MAN-01-00621-1.1... -
Page 11: Installation Equipment List
20. Installation Equipment List Standard tools can be used during the installation of the SolarEdge system. The following is a recommendation of the equipment needed for installation: Allen screwdriver for 5mm screw type for the inverter enclosure screws. - Page 12 Installation Equipment List For installing the communication options, you may also need the following: For Ethernet: CAT5/6 twisted pair Ethernet cable with RJ45 connector If using a CAT5/6 cable spool: RJ45 plug and RJ45 crimper For RS485 and battery: Four- or six-wire shielded twisted pair cable Watchmaker precision screwdriver set StorEdge Interface Installation Guide MAN-01-00621-1.1...
-
Page 13: Chapter 2: Connecting The Energy Meter
For Smart Energy Management applications, such as export limitation and maximizing self-consumption, the StorEdge solution requires an Energy Meter. To install the Energy Meter, refer to the installation guide supplied with it: http://www.solaredge.com/files/pdfs/solaredge-meter-installation- guide.pdf. For communication, the Energy Meter and the StorEdge Interface use the same RS485-1 port on the inverter's communication board. -
Page 14: Chapter 3: Storedge Interface Installation
Check the equipment for damage before starting installation: There are no loose parts. All parts are either mounted or located in the accessory kit. If any damage is found, document the damage and contact SolarEdge. Mounting the StorEdge Interface 1. Determine the StorEdge Interface mounting location, on a wall or pole, as follows: Maximum total distance between the battery and the inverter, including StorEdge Interface: 100 m (330 ft). -
Page 15: Connecting The Storedge Interface
Chapter 3: StorEdge Interface Installation 14 2. Install the bracket. Verify that the bracket is firmly attached to the mounting surface. Figure 5: Mounting the StorEdge Interface 3. Attach the StorEdge interface back brackets to the mounting bracket using the four supplied bolts. - Page 16 Connecting the StorEdge Interface Use a communication cable with the following specifications: Cable type: Min. 3-wire shielded twisted pair (a shielded Ethernet cable (CAT5/5e STP) may be used) Wire cross-section area: 0.2- 1 mm²/ 24-18 AWG (a CAT5 cable may be used) To connect to the inverter DC: 1.
- Page 17 Chapter 3: StorEdge Interface Installation 16 board: a. Open the inverter cover as described in its manual. b. Remove the seal from one of the openings in the communication gland and insert the wire through the opening. c. Remove the 6-pin connector from the RS485-1 port on the communication board.
- Page 18 Connecting the StorEdge Interface 4. Insert the wire ends into the AC terminal block (L, N, G). Use a screwdriver to release the wire clamps on the terminal block. Figure 8: AC connection Connecting the StorEdge Interface to the Battery WARNING! The battery must be powered off before and during wiring.
- Page 19 Connect all the wires to the battery connection panel. Connect to the StorEdge Interface . Tie and wrap the cables to avoid pulling them out during mounting. For additional information, refer to http://www.solaredge.com/sites/default/files/storedge_interface_wiring_ quick_guide_and_on_site_checklist_for_lg_batteries.pdf. To connect the battery and the StorEdge Interface: 1.
- Page 20 Connecting the StorEdge Interface WARNING! Make sure to connect the power cables at correct polarity. Connecting the power cables at reverse polarity may result in damage to the inverter or battery. Figure 10: DC cable connection - LG Chem Battery to StorEdge Interface 3.
-
Page 21: Chapter 4: System Configuration
1. Power on the system, as explained in "Connecting and Powering Systems with a DC Disconnect Switch" on page 25. 2. Access SetApp and select Commissioning èCommunication. Communication › Server › DHCP › RS485-1 None › SolarEdge RS485-2 Master › ZigBee › Wi-Fi › Cellular PCL › GPIO RRCR ›... -
Page 22: Configuring Storedge Applications
Configuring StorEdge Applications To set up communication with the Energy Meter: If you are setting up communication with the meter before the battery, first perform Steps 1-3 on page 20. After that, proceed with the steps below. 1. In the RS485-1 screen, select Add Modbus Device è Meter. 2. - Page 23 Chapter 4: System Configuration 22 Test Results Solution Check that the power and communication cables Charge failed between the battery and inverter are properly connected. Check that the power and communication cables Discharge failed between the battery and inverter are properly connected.
-
Page 24: Appendix A: Troubleshooting
Appendix A: Troubleshooting Appendix A: Troubleshooting This appendix describes how to troubleshoot StorEdge-related errors. StorEdge Interface LEDs LED location Functionality Troubleshooting Power is supplied to the main board Check that the AC cable is connected to the power supply unit (PSU). Left main board LED OFF - No power to the main board... -
Page 25: Appendix B: Powering The Lg Chem Battery Off And On
Appendix B: Powering the LG Chem Battery Off and On 24 Appendix B: Powering the LG Chem Battery Off and On The LG Chem battery must be powered off and on at different stages of the inverter installation. LG Chem batteries are available with either of the following two types of powering mechanism design: With the disconnect switch (requires Firmware version 3.24xx or later): Figure 12: LG Chem battery - disconnect switch... -
Page 26: Appendix C: Connecting And Powering Systems With A Dc Disconnect Switch
Appendix C: Connecting and Powering Systems with a DC Disconnect Switch Appendix C: Connecting and Powering Systems with a DC Disconnect Switch To power off/on a StorEdge system that includes a Single Phase Inverter with HD-Wave Technology and a DC disconnect switch (external or integrated), do the following: To power off: 1. - Page 27 The switch must be able to handle the maximum currents specified in the inverter and StorEdge Interface specifications. Maintain the maximum distance between the StorEdge Interface and inverter prescribed by the local regulations or the SolarEdge specifications - the shortest distance of the two. ...
-
Page 28: Storedge Interface Technical Specifications
StorEdge Interface Technical Specifications StorEdge Interface Technical Specifications SESTI-S4 Unit BATTERY DC INPUT Number of Batteries per Interface Compatible Batteries LG Chem RESU7H, LG Chem RESU10H Compatible Inverters Single Phase Inverters with HD-Wave Technology Max Input Voltage 1000 Max Input Current 17.5... - Page 29 StorEdge Interface Technical Specifications 28 Figure 15: StorEdge Interface dimensions StorEdge Interface Installation Guide MAN-01-00621-1.1...
-
Page 30: Support Contact Information
System configuration information, including the type and number of modules connected and the number and length of strings. The communication method to the SolarEdge server, if the site is connected. The product's software version as it appears in the status screen.