SolarEdge StorEdge Installation Manual
For smart energy management using the hd-wave inverter and lg chem batteries
Hide thumbs
Also See for StorEdge:
- Installation manual (120 pages) ,
- Installation manual (95 pages) ,
- Installation manual (69 pages)
Table of Contents
Advertisement
Quick Links
Download this manual
See also:
Installation Manual
Advertisement
Table of Contents
Troubleshooting

Related Manuals for SolarEdge StorEdge


Summary of Contents for SolarEdge StorEdge
- Page 1 SolarEdge StorEdge Interface Installation Guide For Smart Energy Management using the HD-Wave inverter and LG Chem batteries For Europe, APAC, Australia & South Africa Version 1.1...
-
Page 2: Disclaimers
The material furnished in this document is believed to be accurate and reliable. However, SolarEdge assumes no responsibility for the use of this material. SolarEdge reserves the right to make changes to the material at any time and without notice. You may refer to the SolarEdge web site (www.solaredge.com) for the most updated version. All company and brand products and service names are trademarks or registered trademarks of their respective holders. Patent marking notice: see http://www.solaredge.com/patent The general terms and conditions of delivery of SolarEdge shall apply. The content of these documents is continually reviewed and amended, where necessary. However, discrepancies cannot be excluded. No guarantee is made for the completeness of these documents. The images contained in this document are for illustrative purposes only and may vary depending on product models. Emission Compliance This equipment has been tested and found to comply with the limits applied by the local regulations. These limits are designed to provide reasonable protection against harmful interference in a residential installation. This equipment generates, uses and can radiate radio frequency energy and, if not installed and used in accordance with the instructions, may cause harmful interference to radio communications. However, there is no guarantee that interference will not occur in a particular installation. If this equipment does cause harmful interference to radio or television reception, which can be determined by turning the equipment off and on, you are encouraged to try to correct the interference by one or more of the following measures: Reorient or relocate the receiving antenna. Increase the separation between the equipment and the receiver. Connect the equipment into an outlet on a circuit different from that to which the receiver is connected. Consult the dealer or an experienced radio/TV technician for help. Changes or modifications not expressly approved by the party responsible for compliance may void the user’s authority to operate the equipment. -StorEdge Interface Installation Guide MAN-01-00380-1.1... -
Page 3: Table Of Contents
DIP Switch Setup Chapter 4: System Configuration Upgrading the Inverter Firmware Version Configuring the RS485 Bus for Battery and Meter Connection Configuring StorEdge Applications Maximize Self-consumption (MSC) Profile Programming (for time-of-use arbitrage) Starting-up the System Appendix A: Troubleshooting Communication T roubleshooting Device type, number and protocol are displayed incorrectly Troubleshooting Ethernet Communication Meter T roubleshooting <OK> is not displayed An error message is displayed Power [Wh] Import value is not advancing Battery T roubleshooting StorEdge Interface LEDs Appendix B: StorEdge Interface Technical Specifications StorEdge Interface Installation Guide MAN-01-00380-1.1... -
Page 4: Handling And Safety Instructions
Otherwise, there is a risk of electric shock from energy stored in the capacitors. WARNING! Do not remove the StorEdge Interface cover before five minutes have elapsed after disconnecting all sources of power, and shutting OFF the inverter and the StorEdge Interface. - Page 5 NOTE For battery decommissioning and disposal, follow the manufacturer requirements and instructions. NOTE The StorEdge Interface is IP65 rated. Unused connectors and glands should be sealed with the provided seals. NOTE symbol appears at grounding points on the SolarEdge equipment. This symbol may also be used in this manual.
-
Page 6: Chapter 1: Overview
One battery - d esigned to work with the SolarEdge system. Figure 1: StorEdge system components NOTE Additional SolarEdge inverters (without batteries) can be connected with RS485. The inverters will participate in export limitation and Smart Energy Management. Connecting multiple inverters with RS485 master-slave connection may require an RS485 Expansion Kit (available from SolarEdge). -
Page 7: Installation Workflow
Step 2 - Electricity Meter installation (required for Smart Energy Management). Refer to Meter Installation on page 8. Step 3 - StorEdge Interface installation and connection as described in StorEdge Interface Installation on page 10. Step 4 - Connect the battery to the StorEdge Interface and mount the battery. Refer to the installation information in the manufacturer documentation, and to Connecting the StorEdge Interface to the Battery Pack on page 14. Step 5 - Configuring the communication between the inverter and the other devices (meter, battery, ... -
Page 8: Installation Equipment List
Installation Equipment List Standard tools can be used during the installation of the SolarEdge system. The following is a recommendation of the equipment needed for installation: Standard flat-head screwdrivers set Non-contact voltage detector Appropriate mounting hardware ( for example: stainless bolts, nuts, and washers) for attaching: the mounting bracket to the mounting surface the power optimizer to the racking (not required for smart modules) Wire cutters Wire strippers Voltmeter For installing the communication options, you may also need the following: For Ethernet: CAT5/6 twisted pair Ethernet cable with RJ45 connector. If using a CAT5/6 cable spool: RJ45 plug and RJ45 crimper For RS485: Four- or six-wire shielded twisted pair cable. Watchmaker precision screwdriver set -StorEdge Interface Installation Guide MAN-01-00380-1.1... -
Page 9: Chapter 2: Meter Installation
Wire cross-section area: 0.2-1 mm²/ 24-18 AWG (a CAT5 cable may be used) NOTE The inverter RS485 bus should be connected to the battery (via the StorEdge interface) and meter. Connecting multiple inverters (or an external logger) with RS485 master-slave connection may require an RS485 Expansion Kit (available form SolarEdge; Refer to http://www.solaredge.com/files/pdfs/RS485_expansion_... - Page 10 Chapter 2: Meter Installation 3. Connect the wires as illustrated below: Figure 5: Meter RS485 connections 4. Terminate the last device in the RS485 chain ( see also DIP Switch Setup on page 17): If the inverter is at the end of the RS485 bus, switch a termination DIP-switch inside the inverter to ON (top position). The switch is located on the communication board a s follows: Figure 6: RS485 termination switch If the meter is at the end of the R S485 chain and has a termination switch, it should be terminated using its DIP switches (see also DIP Switch Setup on page 17). -StorEdge Interface Installation Guide MAN-01-00380-1.1...
-
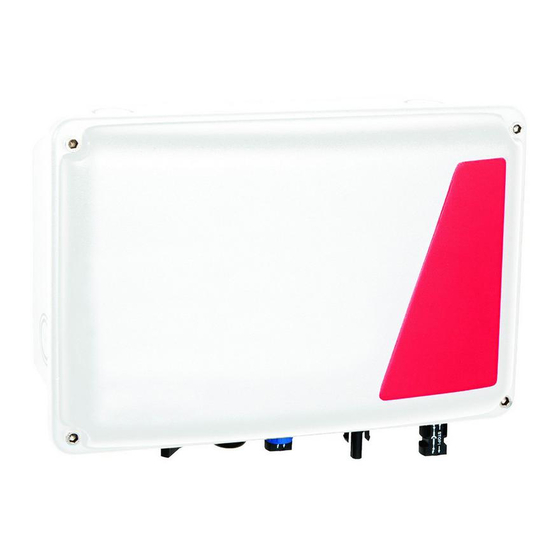
Page 11: Chapter 3: Storedge Interface Installation
Chapter 3: StorEdge Interface Installation Chapter 3: StorEdge Interface Installation Unpacking and Identifying the Product An identification label with product specifications is attached to each device. Check the equipment for damage before starting installation: There are no loose parts. All parts are either mounted or located in the accessory kit. If any damage is found, document the damage, and contact SolarEdge. Mounting the StorEdge Interface 1. Determine the StorEdge Interface mounting location, on a wall or pole, as follows: Maximum distance from the battery: 5m (15 ft) Maximum distance f rom the inverter: 100m (328 ft) Maintain a minimum 20 cm (8”) clearance between the S torEdge Interface and other objects. Figure 7: StorEdge Interface clearance 2. ... -
Page 12: Connecting The Storedge Interface
OUT. NOTE If all the inverter DC inputs are connected to PV strings, use a branch cable (available from SolarEdge) to connect the StorEdge Interface to the inverter DC input. To connect RS485 communication between the inverter and StorEdge Interface: RS485 wiring specifications:... - Page 13 2. Connect the other end of the communication cable to the inverter communication board: NOTE The wires from the meter and from the StorEdge Interface are inserted into the same pins in the inverter RS485 terminal block. Make sure that the meter wires are not disconnected when inserting the Interface wires.
- Page 14 Chapter 3: StorEdge Interface Installation d. Loosen the screws of pins A(+), B(-), and G on the left of the RS485 terminal block. e. Insert the wire ends into the G, A and B pins. Figure 14: Connections to the inverter and meter 3. Check that the wires are fully inserted and cannot be pulled out easily. -StorEdge Interface Installation Guide MAN-01-00380-1.1...
-
Page 15: Connecting The Storedge Interface To Ac
To connect to AC: 1. Turn OFF the AC power source to be connected to the interface. 2. Remove the interface AC sealing gland. 3. Strip off 5/16" (8mm) of the AC cable insulation and expose two line wires and one grounding wire. 4. Insert the wire ends into the AC terminals (L, N), and the grounding terminal according to the labels. Figure 15: AC and grounding connections Connecting the StorEdge Interface to the Battery Pack WARNING! The battery should be powered OFF before and during wiring. Turn OFF: The auxiliary power supply switch The circuit breaker switch Before installing the battery pack according to the instructions p rovided by the battery manufacturer, ... - Page 16 Chapter 3: StorEdge Interface Installation Follow these guidelines: For easy access to battery connectors, it is recommended to connect the cables to the battery and to set all the battery DIP switches to their correct positions while the battery is still on the ground, before mounting the battery according to the manufacturer instructions). The following procedure is recommended: a. Connect all the wires to the battery connection panel b. Mount the battery c. Connect to the StorEdge Interface. Measure the necessary length between the StorEdge Interface and the battery for all cables. Tie and wrap the cables t o avoid pulling them out during mounting. Be sure to adhere to all safety cautions and information in the battery documentation. The following table, Figure 20 detail cable types and connections of the StorEdge Interface one with 2 DIP switches to one battery (LG-chem RESU7H/RESU10H). For additional information, refer to http://www.solaredge.com/sites/default/files/storedge_interface_wiring_quick_guide_ and_on_site_checklist_for_lg_batteries.pdf. -StorEdge Interface Installation Guide MAN-01-00380-1.1...
- Page 17 Connecting the StorEdge Interface to the Battery Pack To connect the battery pack and the StorEdge Interface: 1. Prepare cables and connect as described in the following table; Pay attention to the wire colors (see Figure 20): Recommended LG Chem Connection cable type RESU7H/RESU10H StorEdge Interface method in connection StorEdge (min-max cross battery section) connection (Figure 16...
-
Page 18: Dip Switch Setup
(Figure 19) No meter installed: Up - terminated Meter is installed: Down - Not terminated Figure 17: StorEdge Interface Communication DIP switches 1 For installing an external 120 Ohm termination plug, contact SolarEdge Support . -StorEdge Interface Installation Guide MAN-01-00380-1.1... - Page 19 DIP Switch Setup Figure 18: SolarEdge Meter DIP Switches Figure 19: RS485 termination switch on the inverter communication board StorEdge Interface Installation Guide MAN-01-00380-1.1...
- Page 20 DIP Switch Setup Figure 20: StorEdge Interface connections with HD-Wave inverter and LG Chem RESU7H / RESU10 battery -StorEdge Interface Installation Guide MAN-01-00380-1.1...
-
Page 21: Chapter 4: System Configuration
WARNING! ELECTRICAL SHOCK HAZARD. Do not touch uninsulated wires when the cover is removed. 6. Turn ON AC to the inverter. WARNING! ELECTRICAL SHOCK HAZARD. Do not touch uninsulated wires when the cover is removed. 7. The upgrade starts automatically. Wait for the message Done to be displayed on the LCD. 8. Remove the card from the inverter. StorEdge Interface Installation Guide MAN-01-00380-1.1... -
Page 22: Configuring The Rs485 Bus For Battery And Meter Connection
Chapter 4: System Configuration Configuring the RS485 Bus for Battery and Meter Connection This section describes how to set up the RS485 communication between the i nverter, meter, StorEdge Interface, and one battery. To configure the RS485 bus: 1. Turn the inverter ON/OFF switch to OFF. 2. Select Communication è RS485-1 Conf è Device Type è Multi Devices. A list of devices is displayed. D e v i c e T y p e <... - Page 23 < X X X X X X > N a m e p l a t e [ k W H ] : N / A V e r . < X X X X X > Make sure to have the battery serial number and firmware version at hand whenever contacting support. StorEdge Interface Installation Guide MAN-01-00380-1.1...
- Page 24 W W W W P W R : T o t a l : < x > W h S t a t e : C h a r g i n g If Comm. Error appears, refer to Troubleshooting on page 26. -StorEdge Interface Installation Guide MAN-01-00380-1.1...
-
Page 25: Configuring Storedge Applications
M a x S e l f - c o n s u m e T i m e U s e D i s a b l e Max Self-consume (MSC): Maximize Self-consumption Time of Use (TOU): Charge/Discharge Profile Programming Disable: No energy control, that is, the battery is not used StorEdge Interface Installation Guide MAN-01-00380-1.1... -
Page 26: Profile Programming (For Time-Of-Use Arbitrage)
O F F c. Select one of the options: Select Always OFF to avoid battery usage entirely (for example during winter) Set Start Time and End Time to set battery usage in specific hours and avoid usage during specific hours throughout the month (for example at night). This sets the periods during which the battery will be in the OFF state. Select Always ON to use battery at all times for charging/ discharging. Profile Programming (for time-of-use arbitrage) In this mode, the StorEdge system operates according to a configured charge/ discharge profile. T his a pplication is covered in a separate application note available at https://www.solaredge.com/sites/default/files/storedge_applications_connection_ and_configuration_guide.pdf. Starting-up the System Upon installation and configuration completion, the power optimizers should be paired to the inverter.Close the inverter cover and perform pairing as described in the installation guide provided with your inverter. -StorEdge Interface Installation Guide MAN-01-00380-1.1... -
Page 27: Appendix A: Troubleshooting
Check that the link LED at the router /switch is lit (indicating Gateway Ping Failed phy-link). If OK - contact your network IT, otherwise replace the cable or change it from cross to straight connection. StorEdge Interface Installation Guide MAN-01-00380-1.1... -
Page 28: Meter Troubleshooting
If internet G Server Ping Failed access is unavailable, contact your IT admin or your internet provider. Ping or connection to SolarEdge server failed. Check the SolarEdge server address, under LAN Conf submenu: Server x Ping Failed Address: prod.solaredge.com... -
Page 29: Battery Troubleshooting
I n t e r n a l F a u l t < # > ( I D : 1 5 ) < x x x x > < x x x x > Fault # - according to battery ID - The Modbus ID of the battery <xxx> - text StorEdge Interface Installation Guide MAN-01-00380-1.1... -
Page 30: Storedge Interface Leds
12V OUT (right of the main Not in use board) ON - PSU output is OK Green LED on the power Check the AC cable connection supply unit (PSU) OFF - no power Figure 23: LED locations -StorEdge Interface Installation Guide MAN-01-00380-1.1... -
Page 31: Appendix B: Storedge Interface Technical Specifications
Min - Max Operating Temperature -20 to +50 °C Humidity (non-condensing) < 95% Protection Rating IP65 Installation Wall mounted 1 Fuse replacement kits are available from SolarEdge or you can use other fuses with identical ratings. StorEdge Interface Installation Guide MAN-01-00380-1.1... - Page 32 Appendix B: StorEdge Interface Technical Specifications Figure 24: StorEdge Interface dimensions -StorEdge Interface Installation Guide MAN-01-00380-1.1...