
Related Manuals for THOMSON Thomson Lyra EM2600


Summary of Contents for THOMSON Thomson Lyra EM2600
- Page 1 u s e r m a n u a l EM2600 EM2601 It is important to read this instruction book prior to using your new product for the first time.
-
Page 2: Safety Information
Safety Information IMPORTANT NOTE: To reduce the risk of fire or shock hazard, do not expose this player to rain or moisture. CAUTION RISK OF ELECTRIC SHOCK DO NOT OPEN ATTENTION RISQUE DE CHOC ELECTRIQUE NE PAS OUVRIR TO REDUCE THE RISK OF ELECTRIC SHOCK, DO NOT REMOVE THE COVER (OR BACK). -
Page 3: End User License Agreement
End User License Agreement IMPORTANT-READ CAREFULLY: This End User License Agreement ("Agreement") is a legal agreement between you and Thomson Inc. ("Thomson") for the Thomson Lyra device application/driver software program and associated documentation, if any ("Program"). ACKNOWLEDGMENT BY INSTALLING THE SOFTWARE OR CLICKING ON THE ACCEPTANCE BUTTON OF THE SOFTWARE, COPYING OR OTHERWISE USING THE PROGRAM, YOU ACKNOWLEDGE AND AGREE THAT YOU... - Page 4 End User License Agreement WARRANTY DISCLAIMER THE PROGRAM IS PROVIDED "AS IS" WITHOUT WARRANTY OF ANY KIND, EITHER EXPRESSED OR IMPLIED, INCLUDING, BUT NOT LIMITED TO THE IMPLIED WARRANTIES OF MERCHANTABILITY, FITNESS FOR A PARTICULAR PURPOSE, TITLE OR NON-INFRINGEMENT. THE ENTIRE RISK AS TO THE QUALITY AND PERFORMANCE OF THE PROGRAM IS WITH YOU.
- Page 5 End User License Agreement GRANT OF LICENSE. The WMA Software is only licensed to you as follows: You may use this version of the Lyra Player containing the WMA Software only with the Portable Audio Device player. You may not reverse engineer, decompile, or disassemble the WMA Software, except and only to the extent that such activity is expressly permitted by applicable law in spite of this...
-
Page 6: Table Of Contents
Table of Contents Safety Information End User License Agreement Table of Contents ...1 Before You Begin ...2 Connecting to Computer ..5 Charging the Battery . -
Page 7: Before You Begin
Before You Begin Dear Thomson Customer, Thank you for purchasing the Thomson Digital Audio Player. This product will play open mp3 and Windows Media™ audio (WMA) content as well as content purchased from most online music download services. After purchasing and downloading music to your PC, you are now ready to move content to your player. -
Page 8: Caution While Driving
Before You Begin Warning: Use of this product is for your personal use only. Unauthorized recording or duplication of copyrighted material may infringe upon the rights of third parties and may be contrary to copyright laws. Precautions for the Unit •... - Page 9 Before You Begin Important Battery Information • Charge the unit for at least 2 hours before first use. • Charge the unit for at least 2 hours after putting away the unit for a long time. • The battery used in this device may present a risk of fire or chemical burn if mistreated.
-
Page 10: Connecting To Computer
Connecting to Computer Charging the Battery The player’s battery can only be charged through the USB port of a computer. 1. Open the cover of the USB jack and connect the smaller end of the USB extension cable to the USB jack on the player. -
Page 11: General Controls
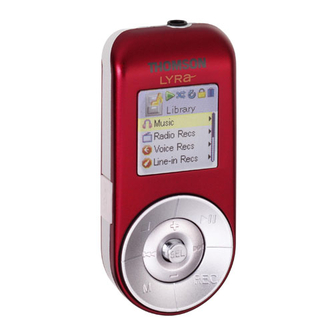
General Controls : headphone jack, input jack for line-in cable. : USB jack. : 1) press once to switch on the player; 2) starts and pauses playback. 4. Slide SEL to to : 1) skip and search backward or forward a file; 2) go back or in a menu level in menu navigation;... -
Page 12: File Menu
File Menu How Files are Organized? The files transferred to the player will be sorted automatically so that you can easily find and play them. They are sorted as below in the library mode: • Music* (contains music files) • Radio Recs (contains radio recording) •... -
Page 13: Player Menu
Player Menu Player Menu The player menu lets you access more features of the player. Depending on the mode you are in (e.g. music playback, radio recording etc.), the items available in the player menu may vary. Follow the steps below to access the player menu: •... -
Page 14: Audio Playback
Audio Playback Switching On and Off Player • Press once to turn on the unit. • To turn off the player completely, press and hold Playing / Pausing • Press to begin playback. • Press once to pause playback, press again to resume playback. -
Page 15: Repeat Playback
Audio Playback Repeat Playback 1. Press M once or twice to access to player menu (refer to page 8 for more details). 2. Slide to + / – to highlight “Repeat”. 3. Press SEL repeatedly to select a repeat mode (Repeat One , Repeat All and Repeat Off). -
Page 16: Radio
Radio Listening to Radio 1. Press M once or twice to access to player menu (refer to page 8 for more details). 2. While “Go to” is highlighted in the menu, slide to submenu. Go to Shuffle Repeat 3. While “Radio” is highlighted, press to switch on the radio. -
Page 17: Saving Preset Stations
Radio Saving Preset Stations 1. Tune to a station to be saved as a preset station (refer to manual tuning). 2. Press M. 3. Slide to + / – to highlight “Save to Preset” and press 4. Slide to to select a preset number. -
Page 18: Radio Recording
Radio Recording Radio programs can be recorded as mp3 files. 1. Tune to the station to be recorded. 2. Press REC to start recording. Press REC to pause recording and again to resume. 3. Press to stop recording. Recording Duration 1. -
Page 19: Voice Recording
Voice Recording Voice can be recorded through the microphone as wav files. 1. Press M once or twice to access to player menu (refer to page 8 for more details). 2. While “Go to” is highlighted in the menu, slide to to enter into the submenu. -
Page 20: Line-In Recording
Line-in Recording Recording as mp3 files can be made through a line-in cable connected to the headphone jack. 1. Press M once or twice to access to player menu (refer to page 8 for more details). 2. While “Go to” is highlighted in the menu, slide to submenu. -
Page 21: Picture Playback
Picture Playback Viewing Pictures 1. In the file menu, slide to + / – to highlight "Pictures". 2. Slide to to view picture files and then slide to + / – to highlight a desired one. 3. Press or slide to to play the highlighted picture. -
Page 22: Video Playback
Video Playback Converting Video Your video has to be converted to optimum size before transferring to this player for playback. To do so, you need to install the Thomson Video Converter in your computer (Windows 2000 and XP only). 1. Load the music management CD included with this player in your computer. -
Page 23: Viewing Video
Video Playback Tips: Refer to the software user manual for transferring picture or video clip files to the player. Attention: Picture and converted video clip files must be copied to root directory on the player for viewing. Before transferring video files to your portable device, you must use the video transcoder software to convert the video to a format suitable for playing in... -
Page 24: Setting The Player
Setting the Player Settings 1. Press M once or twice to access to player menu (refer to page 8 for more details) 2. Slide to + / – to highlight “Settings”. 3. Slide to to enter the setting menu. The following items are available. Slide to + / –... -
Page 25: More Information
More Information Troubleshooting Tips The player does not turn on when the PLAY button is pressed? • Battery may be empty. • Press the reset button to reset the player. Skipping tracks or bad sound quality? • Repeat, random or program function may be activated. -
Page 26: Check For Updates
More Information The player does not work after reformat. • In case you need to reformat the player, it must be in FAT or FAT32 format. The player does not work in NTFS format. My computer does not boot-up if the player is connected prior to turning on the PC. - Page 27 THOMSON 46, quai Alphonse Le Gallo 92648 Boulogne Cedex FRANCE www.thomson.net TOCOM (v2.0)
-
Page 28: Music Transfer
u s e r m a n u a l Computer Connection & Music Transfer It is important to read this instruction book prior to using your new product for the first time. - Page 29 End User License Agreement IMPORTANT-READ CAREFULLY: This End User License Agreement ("Agreement") is a legal agreement between you and Thomson Inc. ("Thomson") for the Thomson Lyra device application/driver software program and associated documentation, if any ("Program"). ACKNOWLEDGMENT BY INSTALLING THE SOFTWARE OR CLICKING ON THE ACCEPTANCE BUTTON OF THE SOFTWARE, COPYING OR OTHERWISE USING THE PROGRAM, YOU ACKNOWLEDGE AND AGREE THAT YOU...
- Page 30 End User License Agreement WARRANTY DISCLAIMER THE PROGRAM IS PROVIDED "AS IS" WITHOUT WARRANTY OF ANY KIND, EITHER EXPRESSED OR IMPLIED, INCLUDING, BUT NOT LIMITED TO THE IMPLIED WARRANTIES OF MERCHANTABILITY, FITNESS FOR A PARTICULAR PURPOSE, TITLE OR NON-INFRINGEMENT. THE ENTIRE RISK AS TO THE QUALITY AND PERFORMANCE OF THE PROGRAM IS WITH YOU.
- Page 31 End User License Agreement The WMA Software is protected by copyright and other intellectual property laws. This protection also extends to documentation for the WMA Software, whether in written or electronic form. GRANT OF LICENSE. The WMA Software is only licensed to you as follows: You may use this version of the Lyra Player containing the WMA Software only with the...
- Page 32 Table of Contents End User License Agreement Table of Contents Before You Begin ...1 Computer System Requirements . . .1 What’s so special about this mp3 player? ......2 Getting Started .
-
Page 33: Before You Begin
Before You Begin Dear THOMSON Customer, Thank you for purchasing the Thomson Digital Audio Player. Our products will play open mp3 and Windows Media™ audio (WMA) content and for certain models, content purchased from most online music download services. After purchasing and downloading music to your PC, you are now ready to move content to your player. -
Page 34: What's So Special About This Mp3
Before You Begin What’s so special about this mp3 player? This player is meant to play mp3 and Windows Media audio files recorded in the built-in flash memory. To do so, you need the use of a Windows computer with USB port , extension cable (included) and music management software (MusicMatch Jukebox). -
Page 35: Getting Started
Getting Started Inserting the Included CD- ROM into CD-ROM Drive 1. Turn on your computer and place the Music Management CD that comes with your digital audio player into your computer. Note: Don’t connect the USB device to the PC or digital audio player before or during the CD-ROM installation. -
Page 36: Connecting To The Computer
Connecting to the Computer Connecting the Player to the Computer Connect the Digital Audio Player to your computer. If a USB connection cable is provided, connect it to the player first before the computer. The larger end of the cable should be connected to the computer while the smaller end to the player. -
Page 37: Transferring Music
Transferring Music Transferring Files to a Digital Audio Player Depending on the availability of software on your Music Management CD specific to your digital audio player, you can transfer files to your Digital Audio Player via 1) MusicMatch Jukebox, 2) Windows Media Player or 3) Windows Explorer (requires no software installation). -
Page 38: Launch The Musicmatch Jukebox
Transferring Music Launch the MusicMatch Jukebox software The MusicMatch software converts audio files to the mp3 and WMA formats so you can play them on your Lyra Digital Audio Player. 1. Remove the Music Management CD from your computer. 2. Start the MusicMatch Jukebox software (double click on the MusicMatch icon in your system tray or on your desktop). -
Page 39: Musicmatch Jukebox
Transferring Music Transferring Files via MusicMatch Jukebox 1. Drag and drop desired tracks from the Music Library to the Playlist display and save the playlist. Note Be sure to save the playlist or it will not be displayed on the playlist window of the Portable Device Manager screen. -
Page 40: Windows Media Player
Transferring Music Transferring Files via Windows Media Player If you want to take your music collection with you, you can easily synchronize items in your library to your digital audio player. The Sync feature in the latest version of Windows Media Player and allows you to synchronize files in categories and playlists in your library to your digital audio player. -
Page 41: Transferring Files Via Windows Explorer
Transferring Music Transferring Files via Windows Explorer (Drag and Drop) From Windows Explorer, highlight all the files/folders you want to transfer to your Digital Audio Player and drag them to the drive letter that is associated with it. Attention Make sure all data are transferred to the Digital Audio Player before unplugging the USB connection. -
Page 42: Profiling (Model Dependent)
Transferring Music If your player is in MTP mode: • Device name instead of drive letter will show on the computer. • If computer installed Windows Media Player 10, MTP device will show 2 folders – Data and Media - on top level. mp3 and WMA files could be copied only to Media folder, other types of files could be copied only to Data folder. -
Page 43: Disconnecting The Player
Disconnecting the Player Disconnecting Your Player from the Computer For Windows XP, from the System Tray, double click the left mouse button on the icon and select Safely Remove Hardware. Select the drive corresponding to your player and click STOP. The Stop a Hardware device screen appears. -
Page 44: The Computer
Troubleshooting Tips After connecting the player to computer, "USB connected" does not appear on the display. • Make sure the device is powered on. Some players do not automatically come on when plugged into the computer. • Make sure that the USB connections to the computer and device are securely Cannot access the player via Windows 2000 computer. - Page 45 THOMSON 46, quai Alphonse Le Gallo 92648 Boulogne Cedex FRANCE www.thomson.net TOCOM (v1.0) MMJB (XP2K)