
Related Manuals for THOMSON DPL4911


Summary of Contents for THOMSON DPL4911
- Page 1 THOMSON 46, quai Alphonse Le Gallo 92648 Boulogne Cedex FRANCE www.thomson.net 55963860...
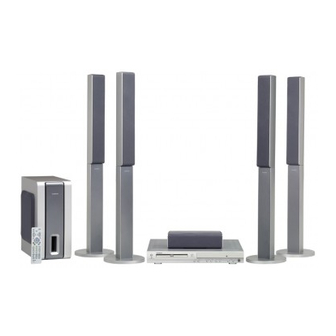
- Page 2 DPL4911 DPL911VD It is important to read this instruction book prior to using your new product for the first time.
-
Page 3: Safety Information
Safety Information Thomson Information CAUTION! Invisible laser radiation when open. Avoid exposure to beam. Class 1 laser product. This system must be opened only by qualified technicians to prevent accidents caused by the laser beam. LASER λ = 780nm, P max=5 mW Rating Information : At the bottom of the unit. -
Page 4: Table Of Contents
Table of Content Table of Contents General Information Features ... 2 DVD region codes ... 2 Disc can be played ... 2 Glossary of disc term ... 2 Conventions about this manual ... 2 Notes on disc ... 3 Accessory ... 3 Inserting batteries into the remote control .. -
Page 5: General Information
General Information Features • DVD player built-in Dolby Digital • Digital amplifier. • Tuner (AM/FM) receiver. • Conforming DVD, SVCD, VCD1.1, VCD2.0, MP3, CDR, CDRW and CD-DA discs. • DVD navigation and SVCD, VCD 2.0 PBC controlling functions. • VFD front panel display and OSD menu display. •... -
Page 6: Notes On Disc
Notes on disc Disc handling precautions • To keep the disc clean, handle the disc by its edge. Do not touch the surface. • Do not stick paper or tape on the disc. If there is glue (or a similar substance) on the disc, remove the glue completely before using the disc. -
Page 7: Function Overview
Display 1. Speaker Icons Indicates which of the six speakers is operating. 2. Status Bar Shows the operating information. 3. Frequency Unit Indicator In AM mode, “KHz” lights up. In FM mode, “MHz” lights 4. VCD indicator Shows when VCD is playing. 5. -
Page 8: Remote Control
Function Overview Remote Control Please be sure you have inserted the batteries into the remote control (see relevant section on page 3.) You can test it by pressing any button. 1. ON-OFF • To turn on or turn off the receiver and other auxiliary components. 2. -
Page 9: Connections
REAR SPEAKERS Blue / grey stripped Green / grey stripped CENTRE SPEAKER DPL4911 Connecting to AM / FM antenna • Connect the supplied AM loop antenna to the AM jack. Position the loop antenna to receive the clearest sound. • Connect the supplied FM antenna to the FM jack. Move the antenna in various direction until the clearest signal is received. -
Page 10: Connecting To Tv And Additional Components
Connections Connecting to TV and additional components • Use the supplied audio cables to connect AUDIO IN jacks to the corresponding audio output jacks on the TV, VCR or other audio/visual components. • Use the audio cables to connect AUDIO OUT jacks to the corresponding audio in jacks on the TV, CD or TAPE recorder. -
Page 11: Basic Setup
Setting up the Digital Home Theater system You must connect all the speakers and setup the system properly in order to enjoy the Cinema experience at home. You will have the feeling of being in the middle of the action, because sound is coming from everywhere around you. -
Page 12: Audio Setup
Basic Setup Audio Setup Downmix This function can process a multi-channel audio source to a two channel stereo signal. The options are Stereo and Off. Speaker setup 1. Distance setup In order to make the surround sound more effective and suit the acoustic conditions in your listening room, you may need to delay the signal coming from some of the speaker by setting the distance between the speakers and the lis-... -
Page 13: Preferences Setup
Play mode setup Setting the Program You can use this function to play follow the program list you edit. • Use keys to select the Title / Chapter. • Select Add to add new chapter to the program list. • Select Delete to delete chapter from the program list. •... -
Page 14: Setting The Language
Basic Setup Setting the language This is to select the audio language, subtitle language and the language used on TV screen menus or DVD menus that will always be used for every disc to be played. The default setting is ENGLISH. •... -
Page 15: Playing Discs
General operation 1 When you complete all the connections, plug the AC power cord of the player and subwoofer. 2 Press STANDBY/ON to switch on the main power. 3 Press SOURCE to select the input source. 4 Press OPEN/CLOSE to open the disc tray, press again to close the disc tray. -
Page 16: Picture Zooming
Playing Discs Subtitles Icon (DVD Info Display) By default, subtitles are off. To turn subtitles on: 1 While a disc is playing, press INFO (the Info Display appears). 2 Use the button to scroll to the Subtitle icon. 3 To change the subtitle language, press the repeatedly to see what subtitle languages are available (the subtitle language options appear in the box at the bottom of the Info Display). -
Page 17: Playing Mp3 Music Files And Displaying Jpeg Files
Playing mp3 music files and displaying JPEG files This unit is able to play mp3 files and view JPEG image files. Please read the following for detailed procedures. 1 Open the tray by pressing OPEN•CLOSE. 2 Place the disc with the printed side facing up. 3 If the AutoPlay option in the Play Mode menu is enabled, the disc’s contents are displayed, otherwise press PLAY to display them. -
Page 18: Using The Menu For Vcd
Playing Discs Using the VCD menu 1 Press INFO while playing a VCD. The VCD menu appears on the TV screen. The contents of the menu vary from disc to disc. 2 Use the buttons to select the item you want to change. - Page 19 Using the CD menu 1 Press INFO while playing a CD. The CD menu appears on the TV screen. The contents of the menu vary from disc to disc. 2 Use the buttons to select the item you want to change.
-
Page 20: Other Function
Other Function Tuning to radio stations 1 Press POWER to switch on the system. 2 Press SOURCE repeatedly until “FM” or “AM” appears on the front panel display. You can press TUNER to select FM or AM directly. The last received station is tuned in. 3 Press and hold TUNER - ( ) or TUNER+ ( ) on the remote control or TUNING UP/DOWN on the front panel until the frequency indication starts to change. -
Page 21: Troubleshooting
If you experience any of the following difficulties while using the system, use this troubleshooting guide to help you remedy the problem. Should any problem persist, consult your nearest service center. No power • Is the power cord firmly plugged into the power outlet? •... -
Page 22: Specifications
Specifications Tuner section Tuning range ... FM 87.5 - 108 MHz (0.0.5MHz steps) ... AM 522 - 1620 kHz ( 9 kHz steps) Amplifier section Output power ... 5 x 50 W / each channel Total harmonic distortion ... 10% at rated power (1 kHz) Stereo power ... -
Page 23: Cares And Maintenance
Disconnect the audio system from the power source before performing any maintenance. Cleaning Clean the exterior of the system using a soft dust cloth. The player CAUTION! This system operates with a laser. It must only be opened by a qualified technician. •...