Table of Contents
Advertisement
Some points to check before you connect..................2
Accessories provided ....................................................2
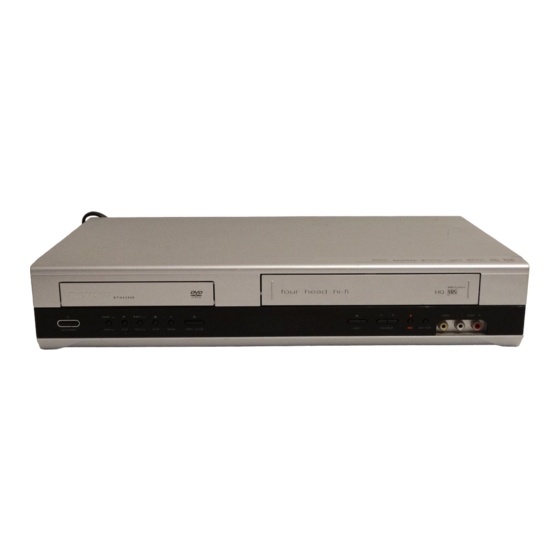
Front panel controls ......................................................3
Front panel display ........................................................3
The remote control ......................................................4
Basic connections (DVD/VCR + TV) ............................6
cable receiver) ..............................................................6
Other connection options ............................................6
Tuning in a video channel on your TV..........................9
Tuning in TV channels ................................................10
VCR mode
Description of the VCR main menu ..........................12
Playback........................................................................12
Stopping playback........................................................12
Accelerated play ..........................................................12
Fast forward / Rewind ................................................13
Variable playback ........................................................13
Still image ....................................................................13
Frame Advance............................................................13
Ejecting the tape..........................................................13
Recording options........................................................14
Instant recording ........................................................14
Instant timer recording ..............................................14
Ending a recording ......................................................14
Programming a recording ..........................................15
Copying from DVD to VCR ........................................15
Language selection ......................................................18
Auto tracking ..............................................................18
Setting the clock..........................................................18
Colour standards ........................................................18
Video doctor ................................................................19
Sound settings..............................................................19
On screen display ........................................................19
Format..........................................................................20
Decoder ........................................................................20
OPR ..............................................................................20
NICAM ........................................................................20
Resetting the tape counter ........................................21
Child lock......................................................................21
Playing NTSC tapes ....................................................21
Table of Contents
DVD mode
Compatible discs ........................................................22
Compatible formats ....................................................22
Regional coding............................................................22
Operating the DVD player..........................................22
Using the menus..........................................................22
Playback........................................................................22
Accelerated play ..........................................................23
Still image ....................................................................23
Frame advance ............................................................23
Variable slow motion ..................................................23
Changing chapter / track ............................................23
Zoom ............................................................................23
Scene replay ................................................................24
Play modes ..................................................................24
Program playback........................................................24
Screen fit ......................................................................24
Using the Info menu....................................................25
Title/Chapter / Track ..................................................26
Direct access ................................................................26
Audio ............................................................................26
Subtitles........................................................................27
Camera angle ..............................................................27
Sound ............................................................................27
Playing an audio, mp3 or WMA CD ..........................28
Displaying JPEG files....................................................29
Playing DivX files....................................................................30
Using the player menus ..............................................31
The Language menu....................................................31
The Display menu........................................................32
The Audio menu ..........................................................33
The Lock menu............................................................34
The Others menu ........................................................35
VCR and DVD modes
Troubleshooting ..........................................................36
Precautions ..................................................................37
Guarantee ....................................................................38
Technical data ..............................................................39
Discs you can play........................................................39
1
EN
Advertisement
Table of Contents

Related Manuals for THOMSON DVD Player + TV Set + VCR


Summary of Contents for THOMSON DVD Player + TV Set + VCR
-
Page 1: Table Of Contents
Connections and Setup Some points to check before you connect...2 Accessories provided ...2 Front panel controls ...3 Front panel display ...3 The remote control ...4 Basic connections (DVD/VCR + TV) ...6 Basic connections (DVD/VCR + TV + satellite or cable receiver) ...6 Other connection options ...6 Tuning in a video channel on your TV...9 Tuning in TV channels ...10... -
Page 2: Connections And Setup
Some points to check before you connect • Ensure that the mains supply in your house complies with that indicated on the identification sticker located on the back of your appliance. • Install your appliance horizontally, away from any source of heat (fireplace) or appliances creating strong magnetic or electric fields.The components of this appliance are sensitive to heat.The maximum ambient temperature should not exceed 35°... -
Page 3: Front Panel Controls
Front panel controls (buttons appear left to right below) ON/STANDBY- Switch the appliance on and off. PREV/ - Directly access the previous chapter or track; start fast reverse search; rewind the tape. PLAY - Start playing a disc or a cassette. NEXT/ - Directly access the next chapter or track;... -
Page 4: The Remote Control
Connections and Setup The remote control Navigating through menus Use the direction buttons to navigate through the menus. Press the on the remote control to confirm any selection you make. General functions Switch the appliance on and off. Select the DVD player. Select the video recorder. -
Page 5: Functions In Vcr Mode
Functions in VCR mode Change channel. PR+ / PR- Set the counter to zero. CLEAR Access the VCR main menu. Exit a menu. (green) Display the TIMER Select a channel, enter numbers. Select the devices connected to the Audio/Video sockets (AV1,AV2, ...). Watch one TV channel whilst recording another one. -
Page 6: Basic Connections (Dvd/Vcr + Tv)
Connections and Setup DVD/VCR Basic connections (DVD/VCR + TV) Disconnect the aerial cable from your television set and reconnect it to the AERIAL socket of the DVD/VCR. Using the coaxial cable supplied, connect the RF OUT socket of the DVD/VCR to the aerial socket of the television set. - Page 7 DVD/VCR AUDIO R DVD EXCLUSIVE AUDIO R and L and L sockets sockets Audio cables (red and white) Coaxial cable Coaxial digital audio output Optical cable Optical digital audio output Video cable DVD/VCR VIDEO OUT socket Connections and Setup Back panel audio sockets DVD/VCR AUDIO OUT L (left) and R (right) sockets - DVD EXCLUSIVE AUDIO OUT L (left) and R (right) sockets These are analogue audio output sockets.The AUDIO L...
- Page 8 Connections and Setup COMPONENT/ Component cable PROGRESSIVE SCAN VIDEO OUT S-VIDEO OUT S-Video cable Audio/video cable AUDIO IN L and R DVD EXCLUSIVE COMPONENT/PROGRESSIVE SCAN VIDEO OUT socket The Y, Pb, Pr sockets provide optimum picture quality because the video signal is separated into three parts.To ensure maximum picture quality, use three video-grade cables (yellow) for the connection.You can also buy bundled component video cables that are colour-coded...
-
Page 9: Tuning In A Video Channel On Your Tv
Tuning in a video channel on your TV If your television is not fitted with a Scart socket, you were unable to connect it to the AV1 socket of the DVD/VCR using a Scart cable as shown on page 6, step 3. In this case, you must make below settings before you start the automatic channel set-up (page 10). -
Page 10: Tuning In Tv Channels
Connections and Setup Tuning in TV channels The first time you use the DVD/VCR, you will see the ACMS (Automatic Channel Memory System) displayed on the screen.This system automatically tunes and stores TV channels. If you want to return to ACMS after your initial set-up, access it via the menu (ACMS Automatic channel search Switch the television set on. - Page 11 Manual installation To complete the set-up of your video recorder when the automatic channel set-up has not stored all the channels or when you wish to store a new channel. Turn on your television and your DVD/VCR. Select the AV channel on your television, press button and then press to access the main menu.
-
Page 12: Basic Playback Operations
Description of the VCR main menu Turn on your television and your DVD/VCR. Select the AV channel on your television, press button and then press to access the main menu. The VCR main menu includes the following options: :Timer recording settings (see page 16) PR SET : Manual installation (see page 11) P SET... -
Page 13: Fast Forward / Rewind
Fast Forward / Rewind Press then press either STOP Whilst you are rewinding or fast forwarding you can view the section you are passing. Press and hold (for a few seconds) either to normal rewind or fast forward operation. Variable playback Use the buttons to adjust playback speed during playback or for freeze frame. -
Page 14: Recording
Recording options Recording from an AV socket If you wish to record from the AV2 socket located on the back panel of the DVD/VCR or from the AV3 sockets located on the front panel, press the mode (AV2 or AV3). SP (Standard Play) /LP (Long Play) The video recorder includes the Long Play (LP) feature.This means you can record twice the amount of information on each recordable video tape. -
Page 15: Programming A Recording
Programming a recording Programming a recording can be done up to one month in advance with up to seven recordings being pre-programmed. Ensure the television channels have been tuned and stored correctly and that the clock is set to the correct time. Programming a recording using the S Each television broadcast has its own S magazine.To programme the recording of a broadcast, all that is required is for you to enter this... - Page 16 Recording Press the button to store your settings. If the message PLEASE CHECK appears, you have entered a wrong data. Please correct the data. Press the button to exit the menu. Put the DVD/VCR into standby mode by pressing the appears on the front display to show that the video recorder is set to record.
-
Page 17: Copying From Dvd To Vcr
Changing or deleting timer events To change a recording event: Press to access the main menu. to select REC Press Press to select the timer slot that you wish to change. Press to delete an entry. Press to edit that entry. Use the change and the buttons to change those sections. -
Page 18: Advanced Functions
Language selection To change the language of the VCR menus, please refer to the Language menu of the DVD player on page 31. Auto tracking The video recorder automatically adjusts the tracking to provide the best picture quality.The message A.TRACKING is displayed when this function is in operation. If the quality of the recording is poor, repeatedly press the control to manually adjust the tracking until all distortions have been removed. -
Page 19: Video Doctor
Video Doctor The video doctor will show the status of various features of the video recorder. Press to access the main menu. Select Dr. with the Press Use the buttons to check the following features: VIDEO DOCTOR HEAD STATUS TAPE STATUS NO. -
Page 20: Format
Advanced functions Select fOSD ON OFF Select OFF using the Format For 16:9 screen playback the video recorder must be connected to your television using a SCART cable. Press to enter the main menu. AUTO 16:9 Press to save your settings. Decoder Press to access the main menu. -
Page 21: Resetting The Tape Counter
BIL NICAM: Both audio channels are recorded on the Hi-Fi stereo tracks.The primary language channel (left) is recorded on the mono track of the video tape. MONO:The sound is recorded on the Hi-Fi tracks and the mono track of the video tape without any separation. -
Page 22: Basic Playback Operations
Compatible discs • • DVD-R, DVD+R, DVD-RW, DVD+RW • • CD-R, CD-RW Note: Do not try to play irregularly-shaped CDs (e.g. heart-shaped or octagonal). Compatible formats • DVD,VCD (Video Compact Disc), SVCD (Super Video Compact Disc), JPEG, Kodak Picture CDs. •... -
Page 23: Accelerated Play
OPEN . CLOSE Press again to close the disc tray. • Play starts automatically, or • The disc menu appears. One of its options can be selected to start playing the disc. Select it and press , or else • Press the button. -
Page 24: Scene Replay
Basic playback operations Scene replay (DVD) While the disc is playing, press the onds of the film or sequence shown. Play modes While the disc is playing, press the DVD play modes: Chapter, Title, Off, karaoke DVD play modes: Title, Off, Random, Normal, VCD play modes: Random, Normal, Track repeat, Repeat all. -
Page 25: Info Menu
Using the Info menu You can display information about the disc during playback using the Info menu. It will also allow you to access certain functions. To display the menu, press PLAY remote control. Select the various options using the which appear on the screen and use the the options, or the numeric buttons if appropriate, or the Press the... -
Page 26: Title/Chapter / Track
Info menu Left Down Title/Chapter (DVD) / Track (VCD and DivX) 1 / 3 Title/Track To directly access a title or a chapter (DVD), a track (VCD and DivX), press and then choose a number using the 1 / 12 directly with the numeric buttons. -
Page 27: Subtitles
Subtitles (DVD and DivX) 1 ENG Subtitles are disabled by default.To enable the subtitle function while the disc Subtitle is playing: press the INFO buttons. Select a language using the press the Note:When you change the language of the subtitles using the Info menu your choice of language only applies for the disc currently being played.When you eject the disc and switch off the player, the subtitles will be displayed again in the subtitle language you selected in the Language menu (see page 31). -
Page 28: Audio Cds, Mp3,Wma, Divx And Jpeg Discs
Audio CDs, mp3, WMA, DivX and JPEG discs Playing an audio, mp3 or WMA CD mp3 is an audio file format which compresses recorded music. It was developed in collaboration with .The main advantage of the mp3 format is that it means CD-quality music tracks can be stored on a personal computer in user-friendly compressed files. -
Page 29: Displaying Jpeg Files
Audio CDs, mp3, WMA, DivX and JPEG discs Accelerated play While the disc is playing, press the and direction of the accelerated play. Press to resume normal playback. PLAY Program playback With this option, you choose and program the playback order. You can store up to 30 tracks. AUDIO CD 0:00:00 1 / 12... -
Page 30: Playing Jpeg And Mp3 Or Wma Files At The Same Time
Audio CDs, mp3, WMA, DivX and JPEG discs To choose a projection speed, select the then select one of the available options using the and Slow (>). Press Press to display the selected file or select the PLAY slide show starts from the selected file. Notes: During the slide show, you can use the magnify the picture, the... -
Page 31: Player Menus
Using the player menus Press the button to display the player’s main menu.When a disc is playing, press the MENU button first. STOP Select a menu option using the submenu.The submenu shows the current setting and the alternate setting(s). Select a submenu option using the submenu. -
Page 32: The Display Menu
Player Menus The Display menu DISPLAY TV Aspect Display Mode Progressive Scan TV Output TV Aspect (DVD) Select a format using the connected to the player. Press to confirm. Display mode (DVD) Note:This option is available only when the TV Aspect mode is set to 4:3. Select a display mode using the Letterbox: displays a wide picture with horizontal bands on the upper and lower portions of... -
Page 33: The Audio Menu
The Audio menu AUDIO Dolby Digital Bitstream Bitstream MPEG Sample Freq. 48KHz Vocal Move Dolby Digital / DTS / MPEG (DVD and DivX) Select an option using the Bitstream: PCM (for Dolby Digital / MPEG): Off (for DTS): Notes: DTS is a digital sound compression technique developed by Digital Theater Sound Systems for digital multichannel audio signals.“DTS”... -
Page 34: The Lock Menu
Player Menus The Lock menu LOCK Rating Password Country Code Note:To access the Rating, Password and Country code submenus, you must input a four-digit password. If you have not chosen one yet, you are prompted to do so when you try to access these submenus. Rating (DVD) The disc publisher is responsible for coding scenes according to the rating limits. -
Page 35: The Others Menu
The Others menu OTHERS Auto Play Move PBC (PlayBack Control) (VCD) The PlayBack Control function offers scenes and information which can be selected interactively via a menu. It can also be used to display high-resolution pictures, if the disc contains any. Press the buttons to enable or disable this function and press Note:This option may not be available on all VCDs. -
Page 36: Additional Information
Troubleshooting The appliance does not switch on. • Make sure it is plugged into a mains socket. • Press the button on the remote control or the ON/STANDBY the front of the appliance. The remote control does not work or works only intermittently. -
Page 37: Precautions
• Check that channels are tuned on the video recorder. • Check the protection tab of the tape is not broken. • Check the quality of the signal received by the television. It is impossible to insert a tape. • Check a cassette is not already inserted in the video recorder. -
Page 38: Guarantee
Additional information Handling and caring for discs • Handle your discs with care. Hold the disc with your fingers at the edges or through the hole. • Insert the disc with the label facing up (for a single-sided disc). • Place the disc properly into the tray in the allotted holder. -
Page 39: Technical Data
Technical data General Power requirements:AC 200-240V, 50 Hz - Power consumption: 19W - Dimensions (approx.): 430 x 78.5 x 270 mm (w/h/d) - Mass (approx.): 4.2 kg - Operating temperature: 5˚C to 35˚C (41˚F to 95˚F) - Operating humidity: 5 % to 90 % System Laser: Semiconductor laser, wavelength 650 nm... - Page 40 Additional information DivX files DivX is the name of a revolutionary new video codec which is based on the new MPEG-4 compression standard for video. The correct playback of DivX files on this player depends on the preparation and production of the audio and video files, the codec used, the type of recording equipment used and the parameters of your computer.