
Related Manuals for Ricoh SR3150

Summary of Contents for Ricoh SR3150
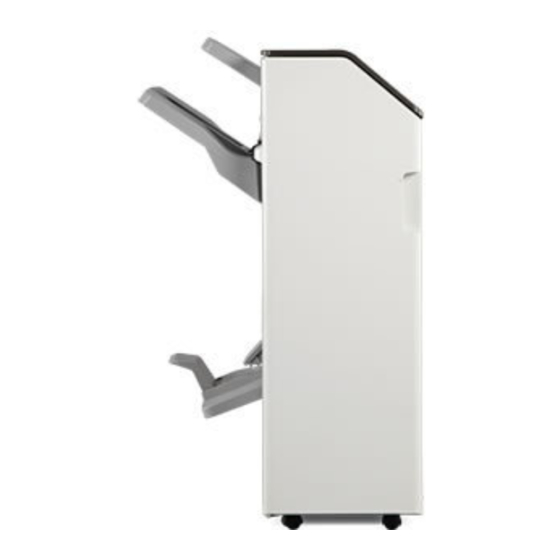
- Page 1 Booklet Finisher SR3150 / Finisher SR3140 Machine Code: D686/D687 Field Service Manual July, 2014 Subject to change...
-
Page 3: Revision Lists
Revision Lists Version Details 1.00 Initial release of this document Read This First > Safety and 1.10 Changed some icons. Symbols... -
Page 4: Safety And Symbols
Safety and Symbols This manual uses several symbols and abbreviations. The meaning of those symbols and abbreviations are as follows: Clip ring Screw Connector Clamp Short Edge Feed Long Edge Feed [A] Short Edge Feed (SEF) [B] Long Edge Feed (LEF) Trademarks ®... -
Page 5: The Aim Of Anti-Tip Components And Precautions
The Aim of Anti-tip Components and Precautions The anti-tip components are necessary for meeting the requirements of IEC60950-1, the international standard for safety. The aim of these components is to prevent the products, which are heavy in weight, from toppling as a result of people running into or leaning onto the products, which can lead to serious accidents such as persons becoming trapped under the product. -
Page 6: Table Of Contents
TABLE OF CONTENTS Revision Lists................................1 Safety and Symbols............................2 Trademarks..............................2 The Aim of Anti-tip Components and Precautions..................3 1. Replacement and Adjustment Exterior Parts...............................7 Front Cover..............................7 Inner Cover..............................7 Rear Cover..............................9 Front Left Cover............................10 Upper Cover..............................10 Upper Front Cover............................11 Upper Rear Cover............................12 Proof Tray..............................13 Shift Tray...............................14 Booklet Tray..............................15 Upper Left Cover............................15... - Page 7 Paper Eject Transport Motor........................26 Paper Bundle Transport Upper Motor.......................26 Stapler Tray..............................29 Stapler Tray Paper Detection Sensor......................31 Paper Bundle Transport Upper Pressure Release HP sensor..............32 Release Claw HP Sensor..........................33 Jogger HP Sensor............................33 Jogger Motor...............................34 Paper Bundle Transport Upper Pressure Release Motor................34 Release Claw Motor............................35 Boards................................37 Main Control Board............................37...
-
Page 9: Replacement And Adjustment
1. Replacement and Adjustment Exterior Parts Front Cover Open the front cover [A]. Front cover ( ×1) Inner Cover Open the front cover (page... - Page 10 1. Replacement and Adjustment Remove the three knobs (hook×1 for each). • Use a flathead screwdriver to release the hooks of the knobs if the knobs have the hooks to lock. Remove the three screws on the inner cover [A] ( ×3).
-
Page 11: Rear Cover
Exterior Parts Inner cover [B] ( ×1) Rear Cover Rear cover [A] ( ×2) -
Page 12: Front Left Cover
1. Replacement and Adjustment Front Left Cover Front cover (page Inner cover (page Front left cover [A] ( ×2) Upper Cover Open the upper cover [A]. -
Page 13: Upper Front Cover
Exterior Parts Upper cover [A] ( ×2, hook x 1) • When reattaching the upper cover, attach the clips so that their tabs face forward. Upper Front Cover Front left cover (page Upper cover (page... -
Page 14: Upper Rear Cover
1. Replacement and Adjustment Upper front cover [A] ( ×3) Upper Rear Cover Rear cover (page Upper cover (page... -
Page 15: Proof Tray
Exterior Parts Upper rear cover [A] ( ×3) Proof Tray Upper front cover (page Upper rear cover (page... -
Page 16: Shift Tray
1. Replacement and Adjustment Proof tray [A] ( ×2) Shift Tray Shift tray [A] ( ×1) -
Page 17: Booklet Tray
Exterior Parts Booklet Tray Booklet tray [A] Upper Left Cover Upper left cover [A] ( ×2) Left Center Cover Front cover (page Rear cover (page Shift tray (page Shift tray front bracket [B] ( ×2) -
Page 18: Left Lower Cover
1. Replacement and Adjustment Shift tray bracket [A] with the shift tray rear bracket [C] Left center cover [A] ( ×2) Left Lower Cover Front cover (page Rear cover (page Booklet tray (page... - Page 19 Exterior Parts Left lower cover [A] ( ×2)
-
Page 20: Main Unit
1. Replacement and Adjustment Main Unit Paper Eject Cover Open/Close Motor Proof tray (page Paper eject cover open/close motor [A] ( ×2, ×1) Paper Guide Plate Open/Close HP Sensor Proof tray (page Paper eject cover HP sensor [A] ( ×1,... -
Page 21: Proof Tray Full Sensor
Main Unit Proof Tray Full Sensor Proof tray (page Proof tray full sensor [A] ( ×1, ×1) Proof Tray Paper Eject Sensor Proof tray (page Proof transport bracket [A] ( ×4) -
Page 22: Entrance Sensor
1. Replacement and Adjustment Proof paper eject sensor [A] ( ×1, ×1) Entrance Sensor Entrance sensor [A] ( ×1, ×1, ×1) Intermediate Transport Sensor Right Open the upper cover (page 10). - Page 23 Main Unit Remove the clip of the upper cover [A]. • When reattaching the upper cover, attach the clips so that their tabs face the inside of the unit. Intermediate transport sensor right [A] ( ×1, ×1,)
-
Page 24: Intermediate Transport Sensor Left
1. Replacement and Adjustment Intermediate Transport Sensor Left Proof tray (page Intermediate transport sensor left [A] ( ×1, ×1, ×1) Shift Tray Paper Surface Sensor Left center cover (page... -
Page 25: Shift Tray Upper Limit Switch
Main Unit Bracket [A] ( ×4) Shift tray paper surface sensor [A] ( ×1, Shift Tray Upper Limit Switch Bracket of the shift tray (page... -
Page 26: Shift Tray Paper Eject Sensor
1. Replacement and Adjustment Shift tray upper limit switch [A] ( x2, hook × 1) Shift Tray Paper Eject Sensor Left center cover (page Shift tray paper eject sensor [A] (hook ×1, ×1) Proof Transport Motor Rear cover (page... -
Page 27: Positioning Roller Motor
Main Unit Proof transport motor [A] ( ×2, ×1) Positioning Roller Motor Rear cover (page Positioning roller motor [A] ( ×2, ×1) Shift Motor Rear cover (page... -
Page 28: Paper Eject Transport Motor
1. Replacement and Adjustment Shift motor [A] ( ×2, Paper Eject Transport Motor Rear cover (page Paper eject transport motor [A] ( ×2, ×1) Paper Bundle Transport Upper Motor Rear cover (page... - Page 29 Main Unit Filler [A] ( ×1)
- Page 30 1. Replacement and Adjustment Control board bracket [A] ( ×5, ×21, ×17, ground plate×1)
-
Page 31: Stapler Tray
Main Unit Paper bundle transport upper motor [A] ( ×2, ×1) Stapler Tray Inner cover (page Front left cover (page Booklet stapler unit (Booklet Stapler Unit) - Page 32 1. Replacement and Adjustment Paper eject transport motor bracket [A] ( ×2, ×1) Approach roller (front) [A], approach roller (rear) [B] • Be careful not to damage the shape of the claw enclosed by the blue circle when removing the approach rollers.
-
Page 33: Stapler Tray Paper Detection Sensor
Main Unit Stapler tray [A] ( ×7, ×2, ×1) Stapler Tray Paper Detection Sensor Stapler tray (page... -
Page 34: Paper Bundle Transport Upper Pressure Release Hp Sensor
1. Replacement and Adjustment Stapler tray paper detection sensor bracket [A] ( ×1) Stapler tray paper detection sensor [A] ( Paper Bundle Transport Upper Pressure Release HP sensor Stapler tray (page... -
Page 35: Release Claw Hp Sensor
Main Unit Paper bundle transport upper pressure release HP sensor [A] ( ×1) Release Claw HP Sensor Stapler tray (page Release claw HP sensor [A] ( ×1) Jogger HP Sensor Stapler tray (page... -
Page 36: Jogger Motor
1. Replacement and Adjustment Separate the jogger fence [A] from the jogger HP sensor [B]. Jogger HP sensor ( ×1) • Release and remove the claw with a small driver, etc. Jogger Motor Stapler tray (page Jogger motor [A] ( ×2, ×1) Paper Bundle Transport Upper Pressure Release Motor... -
Page 37: Release Claw Motor
Main Unit Paper bundle transport upper pressure release motor [A] ( ×2, ×1) Release Claw Motor Stapler tray (page Release claw motor bracket [A] ( ×2, ×1, ×2) - Page 38 1. Replacement and Adjustment Release claw motor [A] ( ×2)
-
Page 39: Boards
Boards Boards Main Control Board • An EEPROM is installed in the control board to record the drive frequency and number of sheets. • When the control board is replaced, take the EEPROM off the old board and install it on the new one. -
Page 40: Booklet Stapler Unit
1. Replacement and Adjustment Booklet Stapler Unit Stapler Unit Open the front cover, and then remove two knobs ( x1 for each) Booklet stitch unit cover (... - Page 41 Booklet Stapler Unit Pull out the booklet stitch unit, and then disconnect three connectors and release four clamps on the stapler unit. Bracket [A] ( ×4, ×3, ×1)
- Page 42 1. Replacement and Adjustment Bring the stapler unit [A] near the center. Guide plate [A] ( ×2) Stapler cartridge [A]...
- Page 43 Booklet Stapler Unit Cover [A] ( ×2) Stapler unit (clincher side) [A] ( ×3, ×2)
- Page 44 1. Replacement and Adjustment Disconnect three connectors and release four clamps on the stapler unit (driver side). Stapler unit (driver side) [A] ( ×3, ×4) Attach the special tool to the stapler unit to adjust the staple position of the stapler unit. Check that four pins ([A] and [B]) on the special tool are fixed in the slots [C] on the stapler unit as shown below.
- Page 45 Booklet Stapler Unit Tighten the wing screw [A] on the special tool to secure the stapler and special tool.
- Page 46 1. Replacement and Adjustment Tighten the screws completely to secure the clincher side [A] of the stapler ( ×3). Loosen the wing screw to remove the special tool. Reattach all the removed parts. • Make sure that the harnesses [B] are routed behind the resin part [A]. Otherwise, the harnesses block the route of the stapler, which causes a stapler transfer motor error.
-
Page 47: Booklet Stapler Unit
Booklet Stapler Unit Check that the stapler works properly. • All staple patterns must be checked. • If there are any problems with the clincher, adjust the staple position with the special tool again. Booklet Stapler Unit Rear cover (page Remove connectors ( ×9, ×2, ground plate×1) -
Page 48: Center-Folding Unit
1. Replacement and Adjustment Booklet stapler unit ( ×2) • When you remove the booklet stapler unit from the main frame, be careful not to catch the cable on the frame. Center-Folding Unit Booklet stapler unit (page Knobs [A] ( ×2) - Page 49 Booklet Stapler Unit Booklet stapler unit cover [A] ( ×4, ×1) Remove connectors ( ×1, ×4, ×4, ground plate×1)
-
Page 50: Center-Folding Tray Paper Eject Sensor
1. Replacement and Adjustment Bracket [A] ( ×1, ×3, ×1) Center-folding unit [A] ( ×5) Center-Folding Tray Paper Eject Sensor Center-folding unit (page... -
Page 51: Trailing Edge Stopper Transport Sensor
Booklet Stapler Unit Center-folding tray paper eject sensor bracket [A] ( ×1, ×1) Center-folding tray paper eject sensor [A] Trailing Edge Stopper Transport Sensor Center-folding unit (page... -
Page 52: Trailing Edge Stopper Hp Sensor
1. Replacement and Adjustment Trailing edge stopper transport sensor bracket [A] ( ×2, ×1, ×4) Trailing edge stopper paper surface sensor [A] ( ×1) Trailing Edge Stopper HP Sensor Center-folding unit (page... -
Page 53: Center-Folding Blade Hp Sensor
Booklet Stapler Unit Trailing edge stopper HP sensor [A] ( ×1) Center-Folding Blade HP Sensor Center-folding unit (page Center-folding blade HP sensor [A] ( ×1) Center-Folding Cam HP Sensor Center-folding unit (page... -
Page 54: Trailing Edge Stopper Motor
1. Replacement and Adjustment Center-folding cam HP sensor bracket [A] ( ×1, ×2) Center-folding cam HP sensor [A] ( ×1) Trailing Edge Stopper Motor Center-folding unit (page... -
Page 55: Folding Blade Motor
Booklet Stapler Unit Trailing edge stopper motor [A] ( ×2, Folding Blade Motor Center-folding unit (page Folding blade motor [A] ( ×2) Folding Transport Motor Center-folding unit (page... -
Page 56: Center-Folding Tray Full Sensors 1, 2
1. Replacement and Adjustment Folding transport motor [A] ( ×2) Center-Folding Tray Full Sensors 1, 2 Pull out the booklet stitch unit (page Center-folding tray full sensor bracket [A] ( ×2, ×2, ×2) -
Page 57: Stapler Transfer Motor (Middle)
Booklet Stapler Unit Center-folding tray full sensor 1 [A], 2 [B] Stapler Transfer Motor (Middle) Control board bracket (page Stapler transfer motor (Mid.) [A] ( ×2, ×1) -
Page 58: Paper Bundle Transport Lower Pressure Release Hp Sensor
1. Replacement and Adjustment Paper Bundle Transport Lower Pressure Release HP Sensor Control board bracket (page Paper bundle transport lower pressure release HP sensor bracket [A] ( ×1, ×1) Paper bundle transport lower pressure release HP sensor [A]...