Table of Contents
Advertisement
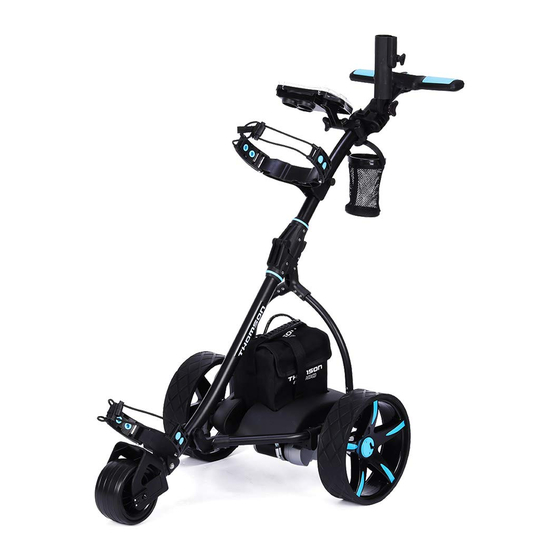
Colours may vary
Electric Golf Buggy - E5000
User Manual
[Revision 4.0 April 2019]
READ THIS MANUAL CAREFULLY BEFORE USE – FAILURE TO DO SO MAY RESULT IN INJURY, PROPERTY
DAMAGE AND MAY VOID WARRANTY. • KEEP THIS MANUAL FOR FUTURE REFERENCE. • Products covered by
this manual may vary in appearance, assembly, inclusions, specifications, description and packaging.
THE BATTERY MAY HAVE SOME CHARGE ON ARRIVAL, IT IS IMPORTANT
HOWEVER THAT THE BATTERY IS CHARGED PRIOR TO USE.
E&OE
© 2019 Thomson
Advertisement
Table of Contents

Summary of Contents for THOMSON E5000
- Page 1 Colours may vary Electric Golf Buggy - E5000 User Manual [Revision 4.0 April 2019] READ THIS MANUAL CAREFULLY BEFORE USE – FAILURE TO DO SO MAY RESULT IN INJURY, PROPERTY DAMAGE AND MAY VOID WARRANTY. • KEEP THIS MANUAL FOR FUTURE REFERENCE. • Products covered by this manual may vary in appearance, assembly, inclusions, specifications, description and packaging.
-
Page 2: Safety
Electric Golf Buggy - E5000 Safety Safety messages are designed to alert you to possible dangers or hazards that could cause death, injury or equipment or property damage if not understood or followed. Safety messages have the following symbols: You WILL be KILLED or... - Page 3 Electric Golf Buggy - E5000 General Electrical Safety General Electrical Safety General Service Information • Inspect electrical equipment, extension • Electrically grounded equipment must • The equipment must be serviced or cords, power bars, and electrical fittings have an approved cord and plug and repaired at authorised service centres for damage or wear before each use.
-
Page 4: Safety Symbols
Electric Golf Buggy - E5000 Safety Symbols The product may have safety warning labels attached to it, explained below. Understand the symbols on your product and their meanings. If any stickers become unreadable, unattached etc, replace them. Flammable Material Hazard... - Page 5 Electric Golf Buggy - E5000 Carbon-Monoxide Hazard Pull Hazard Slope / Fall Injury Hazard "Slam Dunk" Warning Do not use the product in Be aware that the product Be aware that using the Do NOT attempt "slam dunk" confined areas or without...
-
Page 6: Table Of Contents
Electric Golf Buggy - E5000 Table of Contents Safety ..............................2 Safety Symbols ............................4 Parts Identification ..........................7 Assembly and Set-Up ........................8 Attaching the Wheels ........................9 Operation ............................10 Control Panel ............................10 Timer and Distance Functions ......................10 Cruising and Braking Functions ...................... -
Page 7: Parts Identification
Electric Golf Buggy - E5000 Parts Identification Name Name Handle Wheel rubber Upper holder Battery tray Upper holder belt Lower holder Battery Front wheel Rear wheel Folding section Wheel cap Charger E&OE © 2019 Thomson... -
Page 8: Assembly And Set-Up
Electric Golf Buggy - E5000 Assembly and Set-Up Unfolding and Folding the Golf Buggy 1. Fold the support arm (A) back. 2. Raise the main frame (B) so the support arm (A) can be locked into place on the main frame. -
Page 9: Attaching The Wheels
Electric Golf Buggy - E5000 Attaching the Wheels 1. Identify the Left and Right wheels by locating the L and R sticker on the inside of the wheels. To identify which side to place the wheels, stand behind the buggy, the right wheel is needs to be installed on your right and the left on your left. -
Page 10: Operation
Electric Golf Buggy - E5000 Operation Control Panel Display panel Speed control knob Timer and Distance Functions Press once and the display panel will show ‘A’ • The golf buggy will automatically move forward by 10m and will stop by itself afterwards. -
Page 11: Speed Control Knob
Electric Golf Buggy - E5000 Speed Control Knob Scrolling the speed Control Knob lets you choose your preferred speed to suit your pace perfectly, and the display panel will show the preferred speed. You can choose speed levels from 1 (slowest) to 7 (fastest). -
Page 12: Lead-Acid Battery Care And Maintenance
Electric Golf Buggy - E5000 Lead-Acid Battery Care and Maintenance Top 2 Battery Care Requirements 1. Charge battery before first use. The battery may arrive with some charge, regardless of this the battery must be charged for 12 hours on the initial charge and 5 – 12 for each subsequent charge. -
Page 13: Maintenance
Electric Golf Buggy - E5000 Maintenance The steps below will ensure that you get a prolonged and reliable life out of your golf buggy. • The golf buggy has been designed so that the user can concentrate on playing golf, while the golf buggy does the work of carrying your bag. -
Page 14: Troubleshooting
Electric Golf Buggy - E5000 Troubleshooting Symptoms Resolutions Check the fuse in the battery case. Check all wiring connections and plugs. Golf buggy does not have any power. Check if the battery has any charge left. Check if wheels & clutches are in order. -
Page 15: Specifications
Electric Golf Buggy - E5000 Specifications Model E5000 Material Aluminum alloy Motor power 500W Max speed 8km/h Max load capacity 30kg Distance per charge 20 km Batter 12V, 33Ah Charger 240V AC (input), DC 12V Power Plug Australian Standard Note: Assembly Required E&OE... - Page 16 ©2019 Thomson. All rights reserved. No part of this document, including descriptive content, concepts, ideas, diagrams or images may be reproduced or transmitted in any form or by any means, electronic or mechanical, including photocopying, scanning or recording, or any information storage and retrieval system,...