
Related Manuals for MAGINON WLR-753AC

Summary of Contents for MAGINON WLR-753AC
- Page 1 User Manual Manual del usuario WIFI RANGE EXTENDER AMPLIFICADOR WIFI English ....01 Español ..... 49...
-
Page 3: Table Of Contents
Contents Contents Overview ....................3 Device parts .................... 4 Product contents/device parts ............. 5 Getting started ..................6 Initial setup ...................... 7 Set up your WiFi range extender wirelessly ..........8 Wired setup ......................11 Getting to know your dual-band WiFi range extender ......12 System requirements .................. - Page 4 Contents The range extender is having trouble connecting to your wireless network ......................33 Storing ....................34 Cleaning ....................34 Technical specification ................ 36 Safety .....................37 Correct use ......................37 Safety information ..................38 After sales support ................43 FCC compliance statement..............43 Disposal ....................
-
Page 5: Overview
Overview Overview... -
Page 6: Device Parts
Device parts Device parts... -
Page 7: Product Contents/Device Parts
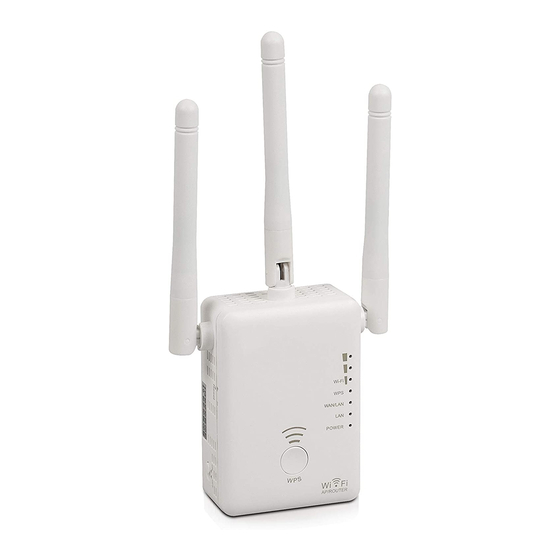
Product contents/device parts Product contents/device parts WiFi Range Extender WPS-LED Ethernet cable WAN/LAN LED Reset button LAN LED On/Off switch Power-LED WPS button Mode switch WiFi LEDs 2x Ethernet ports VI.1.0.us... -
Page 8: Getting Started
Getting started Getting started This WiFi Range Extender quickly and effectively helps to eliminate dead spots in your existing WiFi-Network. The WiFi Range Extender extends your 2.4 and 5.0 GHz networks. It supports WLAN standards 802.11 b/g/n in the 2.4 GHz- range and WLAN standards 802.11 a/n in the 5.0 GHz range. -
Page 9: Initial Setup
Getting started Initial setup To get started you will need: − Your wireless router, the network name of your WiFi Network and the password. − A personal computer with any web browser. -
Page 10: Set Up Your Wifi Range Extender Wirelessly
Getting started Set up your WiFi range extender wirelessly 1. Use an outlet near the edge of the coverage area of your network. 2. Plug in the WiFi Range Extender. Make sure that the power switch is on “ON” and the Mode Selector is on “Repeater”. - Page 11 Getting started 3. Use a WiFi device like a laptop, tablet or mobile phone. Connect your WiFi device to the WiFi-Network “WiFi-Extender”. WiFi-Extender Connect Test Cisco 4. Open your browser and enter “http://192.168.10.1”. The Setup- interface of the WiFi Range Extender appears. Enter the password “admin”...
- Page 12 Getting started http://Maginon.extender When your computer is connected to the WiFi Range Extender for the first time, the Installation Wizard appears on your screen after you logged into the Web Interface. Please follow the On-Screen instructions to set up the WiFi Range...
-
Page 13: Wired Setup
Getting started Wired setup 1. Connect the WiFi Range Extender to your laptop or personal computer using the included ethernet cable. 2. Plug the WiFi Range extender into a wall socket. 3. Turn off the WiFi-function on your computer. 4. Open a browser and enter “http://192.168.10.1”. The Login password is “admin”. -
Page 14: Getting To Know Your Dual-Band Wifi Range Extender
Getting started Getting to know your dual-band WiFi range extender WiFi-LEDs : Flashing Green light - The Wifi Range Extender is not connected to the Wifi-Network. WPS-LED : Flashing green light - The WiFi Range Extender is listening for a WPS enabled computer or other device. - Page 15 Getting started WAN/LAN LED : Solid green light - The WiFi Range Extender is connected to a broadband modem with the included Ethernet cable. LAN LED : Solid green light - The WiFi Range Extender is connected to a Computer with the included ethernet cable. Power LED : Off - The WiFi Range Extender is switched off or not plugged into a power source.
- Page 16 Getting started Reset Button : To reset the WiFi Range Extender to the default settings if you change your router´s network name or password. WPS Button : Establishes secure connection between your WiFi Range Extender and a WPC enabled WiFi device, such as a router or computer.
-
Page 17: System Requirements
Getting started LAN & WAN/LAN Connector : To connect a device like a Computer, TV, Gaming Console or other wired devices using the included Ethernet cable you can use both connectors. To connect the WiFi Range Extender to a broadband modem when the WiFi Range Extender is used as a router, use the WAN/LAN connector. -
Page 18: Install The Range Extender Using The Installation Wizard
Install the range extender using the installation wizard Install the range extender using the installation wizard When entering the Web-Interface wirelessly or wired the first time, the Installation Wizard appears on your screen. Select the desired option to install the WiFi Range Extender as an “AP” (Access point) to convert a wired network into a wireless network or as an “Extender”... - Page 19 Install the range extender using the installation wizard...
- Page 20 Install the range extender using the installation wizard Enter the data for the Access Point: • WIFI SSID: Enter a name for your WiFI Network • Security type: Enter encryption type • Static IP: Chose if the Range Extender should obtain a static IP address Click on “Apply”...
- Page 21 Install the range extender using the installation wizard Select the network which should be extended and click “Next”.
- Page 22 Install the range extender using the installation wizard...
- Page 23 Install the range extender using the installation wizard Enter the password of the selected network to join this network. You can edit the SSID “WIFI-Extender” to a desired network name. Select “Connect” to transmit the entered data to the WiFi Range Extender. After the restart of the WiFi Range Extender you need to connect your computer to the network of the WiFi Range Extender again.
-
Page 24: Connecting To The Web Interface Of The Range Extender
When you connect to the WiFi Range Extender you can access the Web-Interface with your Internet browser. Enter the address “http:// Maginon.extender” in your browser and press enter. Login to the Web-Interface and select the option “Advanced settings” in the bottom line of the interface. - Page 25 Install the range extender using the installation wizard...
- Page 26 Install the range extender using the installation wizard Internet settings • Set a static or dynamic IP address LAN settings • Set the DHCP settings Time settings • Synchronize the time settings LED on/off • Switch the LEDs On or Off Login password •...
- Page 27 Install the range extender using the installation wizard Upgrade firmware • Upgrade the Firmware Version of your Range Extender. If there is a new Firmware available we will announce this on our homepage. Device status • See the actual status of your Range Extender Device reboot •...
-
Page 28: Installation Via App
The below instructions refer to an installation using the Android App. The display on the iOS App can differ from the shown screen shots. 1. Install the free App “Maginon WIFI Extender” on your Smartphone. 2. Plug the WiFi Range Extender into a socket close to the router. - Page 29 Installation via app (Fig.1) (Fig.2)
- Page 30 Installation via app 4. Connect your Smartphone to the open WiFi network of the WiFi Range Extender. Select option “WiFi settings” (Fig. 2). It can take a few seconds to establish the connection. Then return to the App and confirm connection by selecting 5.
- Page 31 Installation via app 6. Next enter a name (SSID) for the network which will be generated by your extender after installation for amplification (Fig. 4). Also enter the WiFi key of your home network to be amplified by the extender. Ensure that you enter the WiFi key correctly.
- Page 32 Installation via app 7. Confirm input by clicking . (Fig.5) 8. Your entry is transmitted to the extender. (Fig.6) 9. The extender now connects to the Home network. Please wait until the extender has carried out a restart. (Fig.7) (Fig.6)
- Page 33 Installation via app 10. Open the WiFi settings of your Smartphone and connect to the WiFi network created in section 5. Check that you can access the Internet from your mobile phone using the new WiFi connection. 11. If no Internet reception is available, please use the reset button of the extender and restart the installation.
-
Page 34: Set Up Using The Wps Button
Set up using the WPS button Set up using the WPS button If your router contains a “Push Button Configuration” or WPS button (PBC/WPS) it is possible to carry out a quick configuration for new devices in the network and to also connect the WiFi Range Extender to the WLAN. -
Page 35: Troubleshooting
Troubleshooting Troubleshooting I cannot log into the web interface Please make sure the WiFi Range Extender is switched on and plugged into a power outlet. Reset the device with the Reset button and connect your WiFi device like a laptop, tablet or mobile phone with the network of the extender again. -
Page 36: Storing
Storing Storing When not in use please disconnect the WiFi Range Extender from the power supply and store it in a clean and dry place outside of the reach of children. Cleaning − Let the WiFi Range Extender cool down completely before cleaning. −... - Page 37 Cleaning − Never place the WiFi Range Extender in a dishwasher. This would destroy the device. 1. Prior to cleaning, switch off the WiFi Range Extender and pull the plug out of the socket. 2. Let the WiFi Range Extender cool down completely! 3.
-
Page 38: Technical Specification
Technical specification Technical specification Model: MAGINON WLR-753 AC Connection: Wireless & Network cable Data transmission rate: Up to 733 Mbps Wireless standard: IEEE 802.11 ac/a/b/g/n Operating modes: Access point extender and router Encoding: WEP (64/152 Bit), WPA-PSK, WPA2-PSK and WPA/WPA2 mixed... -
Page 39: Safety
Safety Safety Correct use The WiFi Range Extender is designed to only be used as WiFi Range Extender. The WiFi Range Extender is only suitable for private and not for commercial use. Only use the WiFi Range Extender as described in the operating instructions. -
Page 40: Safety Information
Safety Safety information This equipment complies with FCC radiation exposure limits set forth for an uncontrolled environment. This equipment should be installed and operated with minimum distance of 7.9 inches (20cm) between the radiator and your body. This transmitter must not be co-located or operating in conjunction with any other antenna or transmitter −... - Page 41 Safety − Ensure adequate ventilation and do not cover the WiFi Range Extender to prevent overheating. − Do not open housing and have repairs carried out by an expert. Contact a specialist workshop. All liability and warranty claims shall be void in case of repairs carried out by users, incorrect connection or improper use.
- Page 42 Safety − Install the LAN cable in such a way that it does not become a trip hazard. − Do not kink the LAN cable and do not install it over sharp edges. − Keep the WiFi Range Extender away from open flames and hot surfaces.
- Page 43 Safety − When not using or cleaning the WiFi Range Extender or in case of a fault, always switch off the WiFi Range Extender and pull the connector out of the socket. − Do not use the WiFi Range Extender if plastic or metal parts of the device show cracks or tears or are deformed.
- Page 44 Safety − Keep packaging foil away from children. There is a suffocotion risk. − When cleaning the WiFi Range Extender, never immerse in water and do not use a steam cleaner. The WiFi Range Extender could otherwise be damaged. − Please handle the WiFi Range Extender with care to avoid damages.
-
Page 45: After Sales Support
Hegele Logistic, 1001 Mittel Drive, Wood Dale, IL 60191, USA Phone: 1 800 270 5071 E-mail: maginon@protel-service.com FCC compliance statement This device complies with Part 15 of the FCC Rules. Operation is subject to the following two conditions: (1)This device may not... - Page 46 FCC compliance statement user’s authority to operate the equipment. NOTE: This equipment has been tested and found to comply with the limits for a Class B digital device, pursuant to Part 15 of the FCC Rules. These limits are designed to provide reasonable protection against harmful interference in a residential installation.
-
Page 47: Disposal
Disposal − Increase the separation between the equipment and receiver. − Connect the equipment into an outlet on a circuit different from that to which the receiver is connected. − Consult the dealer or an experienced radio/TV technician for help. Disposal Dispose of packaging For disposal, separate packaging into different... - Page 48 Disposal Disposal of used device Do not dispose of used devices in household waste! If the device can no longer be used each consumer is legally obliged to dispose of used head sets separately from domestic waste, e.g. at a collecting point of the municipality/district.
-
Page 49: License And Sourcecode Information
Foto-Elektronik-Vertriebs-GmbH Denisstrasse 28A, 67663 Kaiserslautern, Germany (or by e-mail to: maginon@protel-service.com) Subject: “Source code, Maginon WLR-753 AC”... - Page 50 License and Sourcecode information To the extent the product includes proprietary software components, which stem from us and are linked with a library under the GNU Reader or Library General Public License, we allow the reengineering of these proprietary software components for debugging of changes and for making changes for your own use.