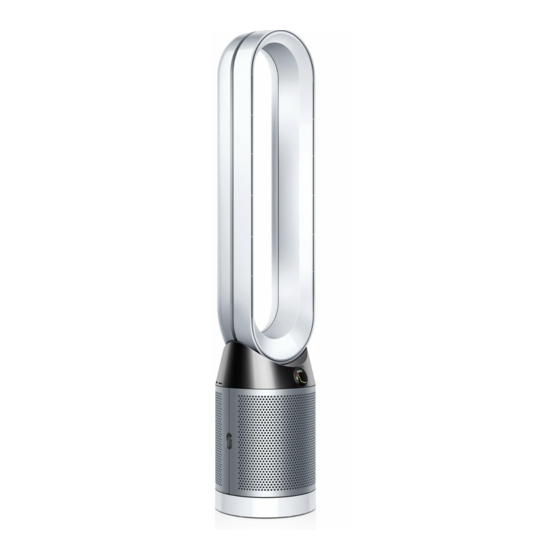
Dyson Pure Cool Operating Manual
Hide thumbs
Also See for Pure Cool:
- Operating instructions manual (100 pages) ,
- Operating manual (56 pages) ,
- User manual (36 pages)

Related Manuals for Dyson Pure Cool


Summary of Contents for Dyson Pure Cool
- Page 1 Operating manual TP04 06.07.2018 11:40 - C93644_TP04_OPMAN_ANZ_X438-OPMAN-93644.indd_15_4c0s...
-
Page 2: Table Of Contents
Maintenance Registration Changing the glass HEPA filters Important safety instructions Changing the carbon filters Assembly Cleaning Controls Additional functions Connecting to the Dyson Link app Important information Information menu Auto mode Airflow Troubleshooting Oscillation Additional information Night mode 06.07.2018 11:40 - C93644_TP04_OPMAN_ANZ_X438-OPMAN-93644.indd_15_4c0s... - Page 3 AU: www.dyson.com.au/support AU: 1800 239 766 Dyson Link app NZ: www.dyson.co.nz/support NZ: 0800 397 667 The Dyson Link app allows you to AU: aucustomercare@dyson.com control, monitor, customise and get NZ: nzcustomercare@dyson.com automatic setting upgrades for your appliance on your mobile device.
-
Page 4: Registration
Registration After registering your 2 year guarantee, your Dyson Note your serial number for future reference. appliance will be covered for parts and labour (excluding filters) for 2 years from the date of purchase, subject to the terms of the Dyson guarantee. - Page 5 2 year guarantee Register by mail Register with your smartphone Register online Register by phone Download the Dyson Link app Visit our website to register your Call our dedicated Helpline. Complete and return the form to Dyson in the envelope supplied.
-
Page 6: Important Safety Instructions
6. Use only as described in this Dyson Operating away from the remote control and the top of Manual. Do not carry out any maintenance other the appliance. -
Page 7: Maintenance
If the supply cable is damaged carry it by the loop amplifier. 17. Turn off all controls before unplugging. Unplug it must be replaced by Dyson, its service agent or similarly qualified person in order to avoid from socket when not in use for extended periods. - Page 8 21. This appliance is only to be used with the power supply unit provided with it. READ AND SAVE THESE INSTRUCTIONS THIS DYSON APPLIANCE IS INTENDED FOR HOUSEHOLD USE ONLY Do not pull on the cable. Do not store near...
-
Page 9: Assembly
Assembly clik clik click Position the shrouds onto the base Take the carbon filters out Remove the glass HEPA Use both hands to lift the and push gently until they click of the box and remove the filters from their protective appliance out of the box, taking securely into place. -
Page 10: Controls
Controls Information Standby ON/OFF menu Auto mode Airflow speed Airflow direction Oscillation Night ON/OFF mode Standby ON/OFF 06.07.2018 11:40 - C93644_TP04_OPMAN_ANZ_X438-OPMAN-93644.indd_15_4c0s... -
Page 11: Additional Functions
• Collect extensive environmental information (see the "Information menu" section). • Allow historical air quality information to be displayed on the screen and in the Dyson Link app. To enable/disable continuous monitoring, press and hold the Auto mode button for 5 secs. -
Page 12: Connecting To The Dyson Link App
Dyson The Bluetooth word mark and logos are ® registered trade marks owned by the Bluetooth Link app. SIG, Inc. and any use of such marks by Dyson is under license. 06.07.2018 11:40 - C93644_TP04_OPMAN_ANZ_X438-OPMAN-93644.indd_15_4c0s... - Page 13 06.07.2018 11:40 - C93644_TP04_OPMAN_ANZ_X438-OPMAN-93644.indd_15_4c0s...
-
Page 14: Information Menu
Information menu Scroll through the options to monitor the performance of your appliance. The menu will also allow you to access information about the pollutants in the air and the temperature and humidity levels. When a particular type of pollutant causes air quality to decrease, the symbol for that pollutant will show in the display. - Page 15 Indoor air quality - 12 seconds Particulate matter (PM2.5) Particulate matter (PM10) Nitrogen dioxide and other Monitor the current air quality with a Microscopic particles up to 2.5 Larger microscopic particles up to oxidising gases graph showing the last 12 seconds These potentially harmful gases are microns in size, suspended in the air 10 microns in size, suspended in the...
-
Page 16: Auto Mode
Auto mode When Auto mode is selected the on-board sensors will intelligently adjust the settings of the appliance according to the quality of air. The appliance will pause once the sensors detect that the target air quality level has been reached. The sensors will continue to monitor the air quality, switching the appliance back on when air quality... -
Page 17: Airflow
Airflow Air will be purified continuously, whether the air is set to flow from the front or the back. For purification and cool airflow, select the airflow direction to 1-10 the front. For purification without cool airflow from the front, select the airflow direction to the back. -
Page 18: Night Mode
Night mode Night mode will dim the display and the appliance will run more quietly, making it ideal for use while sleeping. If Auto mode has been set, AUTO mode Night mode will reduce airflow speeds to range from 1 to 4. 1-10 You can manually change the airflow from 1-10. - Page 19 Oscillation Press the Oscillation button to scroll through the options from 0° to 350°. Customise your oscillation settings in the Dyson Link app. Small details may vary slightly from those shown. 06.07.2018 11:40 - C93644_TP04_OPMAN_ANZ_X438-OPMAN-93644.indd_15_4c0s...
-
Page 20: Changing The Glass Hepa Filters
Changing the glass HEPA filters Important: Always unplug the The shrouds will release Unplug the appliance from Empty the glass HEPA filters appliance before changing filters. with the glass HEPA directly into the bin by pushing the mains electricity supply. The remaining filter life is shown in filters attached. - Page 21 Important clik click Push the new glass HEPA filters Plug the appliance in to the mains Push the shrouds until they click back Press and hold the Night mode into the shrouds until secure. into position in the base. electricity supply and switch on. button on the remote control.
-
Page 22: Changing The Carbon Filters
Changing the carbon filters The shrouds will release with the Important: Always unplug the Unplug the appliance from To remove the carbon filters: appliance before changing filters. glass HEPA filters attached. pull the tabs on both sides of the mains electricity supply. The remaining filter life is shown in the filters. - Page 23 Important clik clik Plug the appliance in to the mains Push the shrouds until they click Press and hold the Oscillation button Push the new carbon filters onto electricity supply and switch on. the base until secure. back into position in the base. on the remote control.
-
Page 24: Cleaning
clik clik clik Cleaning To ensure that your appliance works Dust may accumulate on the surface Look for blockages in the air inlet Do not use detergents or polishes to efficiently, it is important to clean of the machine. Wipe dust from the holes on the filter and the small clean the appliance. -
Page 25: Troubleshooting
Online: have not been changed when Remove the filter shrouds and appliance and plugging it AU: www.dyson.com.au/support prompted, blockages may occur. look for blockages in the air in again. NZ: www.dyson.co.nz/support inlet holes under the filters. -
Page 26: Additional Information
*Please note that not all parts are recyclable. Recycling of parts is subject to the • The Dyson Link app requires an iOS device with at least iOS version 10* or an Android capabilities of 3rd party suppliers. Available in Australia only. - Page 27 Consumer Law. You are entitled to a replacement or refund for a major failure and for • This Dyson guarantee will only be valid if the appliance is used in the country in which it compensation for any other reasonably foreseeable loss or damage. You are also entitled was sold.
- Page 28 06.07.2018 11:40 - C93644_TP04_OPMAN_ANZ_X438-OPMAN-93644.indd_15_4c0s...
- Page 29 06.07.2018 11:40 - C93644_TP04_OPMAN_ANZ_X438-OPMAN-93644.indd_15_4c0s...
- Page 30 06.07.2018 11:40 - C93644_TP04_OPMAN_ANZ_X438-OPMAN-93644.indd_15_4c0s...
- Page 31 Dyson, and the privacy complaints handling process Note: If you do not provide consent, then Dyson may not be able to fulfil of Dyson. the Purposes.
- Page 32 Guarantee form Date of purchase Country of purchase Australia New Zealand Serial number Title Surname First name Address Postcode 06.07.2018 11:40 - C93644_TP04_OPMAN_ANZ_X438-OPMAN-93644.indd_15_4c0s...