
Related Manuals for Comtrend Corporation PG-9142S


Summary of Contents for Comtrend Corporation PG-9142S
- Page 1 Quick Installation Guide PG-9142s Powerline Ethernet Adapter with WiFi Copyright © 2014 Page 1...
-
Page 2: Initial Setup
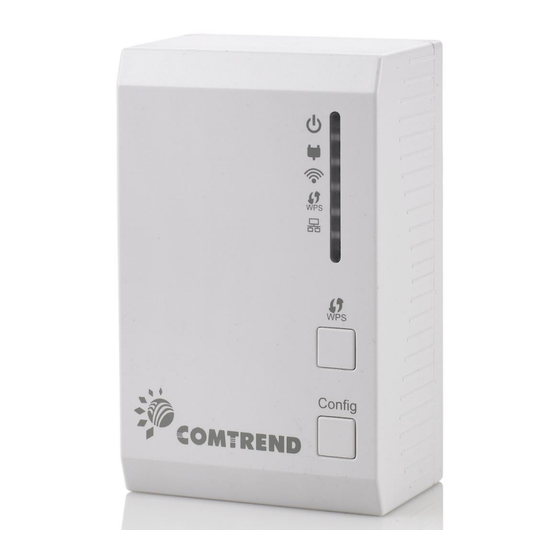
Introduction NOTE: An additional PowerGrid 9142s (or PG-9141s or PG- 9141s-PoE unit) and Ethernet cable are required for each additional device (e.g. PC, Camera, Access Point) that you wish to connect to the network, with a minimum of 2 units required for setup. -
Page 3: Device Connection
B. Device Connection These steps show how to connect a PowerGrid 9142s to a network device. Below we use an Ethernet camera as a network device. 1. Plug a PowerGrid 9142s unit into the power outlet closest to the camera or other device. The Power LED on the PowerGrid 9142s should light up GREEN. -
Page 4: Powergrid 9142S Wifi Setup
D. PowerGrid 9142s WiFi setup 1. To connect your WiFi device (e.g. computer, tablet, smartphone) to the PowerGrid 9142s WiFi adapter, go to your device’s WiFi settings to search for -and select- the SSID that is located on your PowerGrid 9142s device label. -
Page 5: Troubleshooting
2. Within two minutes, press the WPS button (often the WPS/Reset button) on your client to activate WPS. Note: Please check the instructions for your wireless client for how long you need to hold down its WPS button to activate WPS. 3. - Page 6 2. ETHERNET LED is OFF: If the ETHERNET LED fails to light up, check that the LAN port of the PowerGrid unit is connected firmly to the LAN port of the other device. To check the condition of the Ethernet cable, use another cable to test the same connection. 3.
- Page 7 Page 7...