
Related Manuals for THOMSON 300 Series


Summary of Contents for THOMSON 300 Series
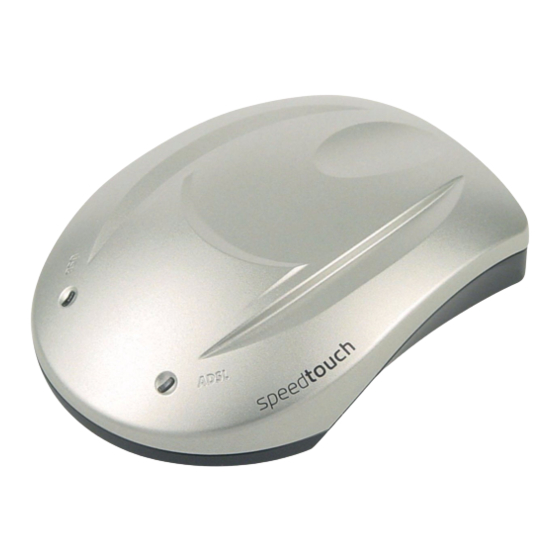
- Page 1 SpeedTouch™ USB/330 ADSL USB Modems Setup and User’s Guide Release R3.0.1 SERIES...
- Page 3 SpeedTouch™ USB/330 Setup and User’s Guide Release R3.0.1...
- Page 4 Status v4.0 Change Note PeckelbeenS Short Title STUSB/330 Setup and User’s Guide R3.0.1 (en) Copyright © 2004 THOMSON. All rights reserved. Passing on, and copying of this document, use and communication of its contents is not permitted without written authorization from THOMSON.
-
Page 5: Table Of Contents
Contents 1 SpeedTouch™ Introduction ... 5 Getting Acquainted with the SpeedTouch™... 6 SpeedTouch™ Support ... 7 2 SpeedTouch™ Installation ... 9 Installation for MS Windows Operating Systems ... 10 2.1.1 SpeedTouch™ Installation... 11 2.1.2 Dr SpeedTouch™ ... 15 Installation for Mac Operating Systems ... 18 2.2.1 Installation for Mac OS 8.6/9.x ... - Page 6 4 SpeedTouch™ Diagnostics... 43 The SpeedTouch™ Status Icon ... 44 The Diagnostics Application ... 45 4.2.1 The Diagnostics Application for MS Windows... 46 4.2.2 The Diagnostics Application for Mac OS 8.6/9.x ... 49 4.2.3 The Diagnostics Application for Mac OS X ... 51 5 Troubleshooting ...
-
Page 7: Speedtouch™ Introduction
1 SpeedTouch™ Introduction 1 SpeedTouch™ Introduction Introduction Thank you for purchasing the SpeedTouch™USB/330 ADSL USB modem! With the award-winning SpeedTouch™ Asymmetric Digital Subscriber Line (ADSL) modem surfing the Internet will become a whole new experience. In this Setup and User’s This Setup and User’s Guide will assist you in getting acquainted with the Speed- Guide Touch™USB/330 ADSL USB modem and in getting connected quickly to the Internet. -
Page 8: Getting Acquainted With The Speedtouch
1 SpeedTouch™ Introduction 1.1 Getting Acquainted with the SpeedTouch™ Delivery check Check your SpeedTouch™ package for the following items: • • • In the event of damaged or missing items, contact your product dealer for further instructions. Other materials Your SpeedTouch™ shipping carton may also include release notes, safety and confor- mity declarations and other materials. -
Page 9: Speedtouch™ Support
1.2 SpeedTouch™ Support Supported Operating This User’s Guide describes the installation and use of the SpeedTouch™ under the Systems following Operating Systems (OSs): • • The SpeedTouch™ also supports Linux platforms. Refer to the SpeedTouch™ Support pages for more information. E-SIT-CTC-20030702-0003 v4.0 Microsoft Windows OSs •... - Page 10 1 SpeedTouch™ Introduction E-SIT-CTC-20030702-0003 v4.0...
-
Page 11: Speedtouch™ Installation
2 SpeedTouch™ Installation Connection methods The SpeedTouch™ supports the following connection methods: • • Note You must select the appropriate service profile and the corresponding local setting during the installation process. This information should be provided by your Service Provider. What you need from You might need a user account with an Internet Service Provider (ISP) for Internet your ISP... -
Page 12: Installation For Ms Windows Operating Systems
2 SpeedTouch™ Installation 2.1 Installation for MS Windows Operating Systems Introduction This section will assist you in installing the SpeedTouch™ and preparing your PC for your Internet connectivity. Supported Operating One of the following OSs must be readily installed on your PC: Systems •... -
Page 13: Speedtouch™ Installation
2.1.1 SpeedTouch™ Installation Previous SpeedTouch™ If a previous SpeedTouch™ installation resides on your computer, you are able to installations perform an upgrade of the existing SpeedTouch™ installation. The SpeedTouch™ The SpeedTouch™ Setup procedure consists of two major parts: Setup wizard •... - Page 14 2 SpeedTouch™ Installation The following window appears: Click either Install PPP USB Software or Install RFC1483 USB Software depending on your Service Provider’s specifications. The following window asks you to select your local setting. Select the appropriate setting as specified by your Service Provider. The Welcome to SpeedTouch™...
- Page 15 E-SIT-CTC-20030702-0003 v4.0 The following windows ask you to select a destination and a program folder. In most cases the proposed folders are best suited for the SpeedTouch™ driver soft- ware. Follow the instructions and click Next whenever requested. The SpeedTouch™ USB Setup wizard copies SpeedTouch™ driver software to your local disk: At the end of the procedure the following window appears: Click Finish to complete the installation.
- Page 16 2 SpeedTouch™ Installation The hardware Proceed as follows: installation procedure The installation of the SpeedTouch™ is now finished. The SpeedTouch™ is now prepared to connect to the Internet (See page Use the ADSL cable provided to wire the SpeedTouch™ ADSL port to your tele- phone wall outlet or distributed filter.
-
Page 17: Dr Speedtouch
2.1.2 Dr SpeedTouch™ Introduction The Dr SpeedTouch™ application allows you to diagnose and troubleshoot your Speed- Touch™. With the Dr SpeedTouch™ application you can do the following: • • • Supported Operating Installing and using Dr SpeedTouch™ is only supported for following MS Windows Systems Operating Systems: •... - Page 18 2 SpeedTouch™ Installation Using Dr SpeedTouch™ By default Dr SpeedTouch™ is started automatically at boot of your system and runs in the background, i.e. minimized in the status area. To show Dr SpeedTouch™: Dr SpeedTouch™ The Dr SpeedTouch™ application consists of two sections: features •...
- Page 19 • For more information on Dr SpeedTouch™ click Help in the application or press F1 for context sensitive help. E-SIT-CTC-20030702-0003 v4.0 Select the Performance tab to monitor the downstream and upstream perfor- mance. of your DSL connection: 2 SpeedTouch™ Installation...
-
Page 20: Installation For Mac Operating Systems
2 SpeedTouch™ Installation 2.2 Installation for Mac Operating Systems Introduction This section will assist you in installing the SpeedTouch™ and preparing your computer for your Internet connectivity. Installation The installation procedure to follow depends on the Mac OS you are running. In case your computer runs: •... -
Page 21: Installation For Mac Os 8.6/9.X
2.2.1 Installation for Mac OS 8.6/9.x Supported Operating One of the following OSs must be readily installed on your computer: Systems • • • Minimum system requirements The SpeedTouch™ The SpeedTouch™ installation consists of two major parts: installation • • The driver installation Proceed as follows: procedure... - Page 22 2 SpeedTouch™ Installation The hardware After restarting your computer, proceed as follows: installation procedure The installer copies the necessary files to your computer. The following screen appears: Click OK to proceed. At the end of the procedure, the following window appears: Click Restart to finish the installation and restart your computer.
- Page 23 As a result your SpeedTouch™ connection is installed and ready for use. The Speed- Touch™ is now prepared for connecting you to the Internet (See Internet Connectivity” on page E-SIT-CTC-20030702-0003 v4.0 Close the Modem control panel. A dialog box appears asking whether you want to save the changes you made: Click Save to save your changes to the configuration.
-
Page 24: Installation For Mac Os X
2 SpeedTouch™ Installation 2.2.2 Installation for Mac OS X Supported Operating The following OS must be readily installed on your computer: Systems • Note Minimum system For Mac OS X v10.1: requirements • For Mac OS X v10.2 and v10.3: •... - Page 25 E-SIT-CTC-20030702-0003 v4.0 The installation window appears: Click Continue. The Software License Agreement screen appears: When you click Continue, you are prompted to agree to the terms of the software license agreement. Click Agree to continue. The following screen allows you to select a destination volume to install the SpeedTouch™: The installation wizard automatically highlights your OS X partition.
- Page 26 2 SpeedTouch™ Installation The hardware After restarting your computer, proceed as follows: installation procedure At the end of the procedure, the following window appears: Click Restart to quit the installer. Use the ADSL cable provided to wire the SpeedTouch™ ADSL port to your tele- phone wall outlet or distributed filter.
- Page 27 If you want to connect to the Internet via: • • PPP configuration If you are installing a PPP connection some additional configuration is required. Proceed as follows: E-SIT-CTC-20030702-0003 v4.0 An RFC1483 connection your connection is installed and ready for use. The SpeedTouch™...
- Page 28 2 SpeedTouch™ Installation As a result your SpeedTouch™ connection is installed and ready for use. The Speed- Touch™ is now prepared for connecting you to the Internet (See Internet Connectivity” on page Click the Modem tab. This panel shows the modem configuration: Select SpeedTouch™...
-
Page 29: Speedtouch™ Internet Connectivity
3 SpeedTouch™ Internet Connectivity Introduction The SpeedTouch™ supports two connection protocol models: • • The connection protocol model depends on the selected connection profile during the installation process and should correspond with the ISP’s requirements. E-SIT-CTC-20030702-0003 v4.0 A PPP (PPPoE or PPPoA) connection “3.1 Internet Sessions via a PPP Connection”... -
Page 30: Internet Sessions Via A Ppp Connection
3 SpeedTouch™ Internet Connectivity 3.1 Internet Sessions via a PPP Connection Introduction The SpeedTouch™ supports both most popular connection methods: • • The connection method depends on the selected local setting during the installation process and should correspond with the ISP’s requirements. PPP over ATM (PPPoA) PPP over Ethernet (PPPoE) E-SIT-CTC-20030702-0003 v4.0... -
Page 31: Ppp Sessions For Ms Windows
3.1.1 PPP Sessions for MS Windows Starting a PPP session Proceed as follows: You can open your web browser and surf the Internet. E-SIT-CTC-20030702-0003 v4.0 Double-click the SpeedTouch™ Dial-up icon on your desktop: You can also access the SpeedTouch™ Dial-up application via Note Start >... - Page 32 3 SpeedTouch™ Internet Connectivity Network connection While you are connected, you can find the network connection icon showing two PCs icon on the status area connected to each other in the system tray’s status area: The network connection icon itself symbolizes activity on the connection: •...
- Page 33 Configuring multiple In case you have more than one account, and/or multiple SpeedTouch™ devices entries connected to your PC, you can create multiple Dial-Up Networking (DUN) entries for the SpeedTouch™, with specific credentials, properties and home web page. To add additional DUN entries proceed as follows: As a result the new DUN entry is listed in the Connection list in the SpeedTouch™...
-
Page 34: Pppoa Sessions For Mac Os 8.6/9.X
3 SpeedTouch™ Internet Connectivity 3.1.2 PPPoA Sessions for Mac OS 8.6/9.x Note For PPPoE session connectivity, see Connection” on page Starting a PPPoA Proceed as follows: session As soon as the connection is established you can open your web browser and surf the Internet. - Page 35 3 SpeedTouch™ Internet Connectivity Terminating a PPPoA To release a remote access connection, click the Remote Access icon in the control strip, session and select Disconnect: As a result the connection is released. No Internet connectivity exists anymore. E-SIT-CTC-20030702-0003 v4.0...
-
Page 36: Ppp Sessions For Mac Os X
3 SpeedTouch™ Internet Connectivity 3.1.3 PPP Sessions for Mac OS X Starting a PPP session Proceed as follows: As soon as the connection is established you can open your web browser and surf the Internet. Click the Internet Connect dockling. If the Internet Connect dockling is not available, go to the Applications Note folder on the system startup disk and double-click Internet Connect. - Page 37 Terminating a PPP Proceed as follows: session The connection is released. As a result no Internet connectivity exists anymore. E-SIT-CTC-20030702-0003 v4.0 Click the Internet Connect dockling. If the Internet Connect dockling is not available, go to the Applications Note folder on the system startup disk and double-click Internet Connect. The following window appears: Make sure SpeedTouch™...
-
Page 38: Internet Sessions Via An Rfc1483 Bridged Connection
3 SpeedTouch™ Internet Connectivity 3.2 Internet Sessions via an RFC1483 Bridged Connection Connectivity The RFC1483 Bridged connection offers two connectivity scenario’s: • • Dial -in clients In case of Bridged PPPoE you can use: • • - or - • IEEE802.1D Transparent Bridging This connection provides instant access without the need of “opening”... -
Page 39: Using An Ms Windows Xp Broadband Connection
3.2.1 Using an MS Windows XP BroadBand Connection. Configuring a Proceed as follows: broadband connection E-SIT-CTC-20030702-0003 v4.0 On the Start menu, click (Settings >) Control Panel. The Control Panel window appears. Go to (Network and Internet Connections >) Network Connections. In the Network Tasks menu, click Create a new connection. - Page 40 3 SpeedTouch™ Internet Connectivity In the next window, select Connect using a broadband connection that requires a user name and password: Click Next to continue. In the next window, give a name to the connection you are creating, e.g. MyISP: In the next window, select whether the connection is available to any user or only to yourself: If you want to share this connection with other users you must select...
- Page 41 Starting a broadband Proceed as follows: Internet session E-SIT-CTC-20030702-0003 v4.0 In the next window, fill in the Internet account information. This information should be provided by your service provider: At the end of the configuration the following window appears: Click Finish to complete the configuration. The Connect MyISP window (see below) appears.
- Page 42 3 SpeedTouch™ Internet Connectivity You can open your web browser and surf the Internet. Terminating a Proceed as follows: broadband Internet session The connection is released. As a result no Internet connectivity exists anymore. As soon as the connection is established, the connection message box and dial-up window are minimized into a DUN icon in the system tray: On the Start menu, point Connect To and click the name of the connection you’ve created e.g.
-
Page 43: Using The Mac Os X Pppoe Dial-In Client
3.2.2 Using the Mac OS X PPPoE Dial-in Client Configuring a Proceed as follows: broadband connection E-SIT-CTC-20030702-0003 v4.0 On the Apple menu, click System Preferences. The System Preferences window appears. Click the Network icon. The Network window appears. Make sure Ethernet Adaptor (enx) is selected in the Show list and click the PPPoE tab: Select the Connect using PPPoE check box. - Page 44 3 SpeedTouch™ Internet Connectivity Starting a broadband Proceed as follows: Internet session As soon as the connection is established you can open your web browser and surf the Internet. Terminating a Proceed as follows: broadband Internet session The connection is released. As a result no Internet connectivity exists anymore. Click the Internet Connect dockling.
-
Page 45: Speedtouch™ Diagnostics
4 SpeedTouch™ Diagnostics 4 SpeedTouch™ Diagnostics Introduction This section describes the SpeedTouch™ Diagnostics tool. This Diagnostics tool is installed during the installation of the SpeedTouch™ drivers and allows you to view specific information on the various layers the SpeedTouch™ uses to transmit or receive information over the Asymmetric Digital Subscriber Line (ADSL) link. -
Page 46: The Speedtouch™ Status Icon
4 SpeedTouch™ Diagnostics 4.1 The SpeedTouch™ Status Icon SpeedTouch™ Status As soon as your SpeedTouch™ is installed, a SpeedTouch™ status icon is displayed: Icon • • • SpeedTouch™ status The SpeedTouch™ status icon is colored, depending on the state of the SpeedTouch™: icon colors Status icon MS Windows... -
Page 47: The Diagnostics Application
4 SpeedTouch™ Diagnostics 4.2 The Diagnostics Application Introduction The Diagnostics application allows you to overview specific information on the various layers the SpeedTouch™ uses to transmit or receive information over the Asymmetric Digital Subscriber Line (ADSL) link. E-SIT-CTC-20030702-0003 v4.0... -
Page 48: The Diagnostics Application For Ms Windows
4 SpeedTouch™ Diagnostics 4.2.1 The Diagnostics Application for MS Windows Opening the Diagnostics Double-click the SpeedTouch™ Status icon in the status area to open the Speed- window Touch™ Diagnostics window. Note Diagnostics window Opening the SpeedTouch™ Diagnostics, pops up the following window: Note Left box figures In the left box, the following figures can be displayed:... -
Page 49: Data Description
Basic data In case the SpeedTouch™ has established ADSL line synchronization, the following data are displayed: Data Bytes Sent Bytes Received Throughput bars The throughput bars allow an instant overview of the current and average performance of the connection: The following throughput indicators can be found: Indicator All throughput indicators are measured relatively to the actual available bandwidth. -
Page 50: Field Description
4 SpeedTouch™ Diagnostics Properties menu Left-click the upper-left corner of the SpeedTouch™ USB Diagnostics window or right- click the SpeedTouch™ status icon and click Properties to open the Properties window: Properties options Following Property options are available: Field Screen update Automatic start at boottime Show status on... -
Page 51: The Diagnostics Application For Mac Os 8.6/9.X
4.2.2 The Diagnostics Application for Mac OS 8.6/ Opening the Diagnostics Open the Applications folder on your system startup disk: window Open the SpeedTouch™ Diagnostics by double-clicking the Diagnostics icon. Diagnostics window Opening the SpeedTouch™ Diagnostics, pops up the following window: Note Left box figures In the left box, the following figures can be displayed:... - Page 52 4 SpeedTouch™ Diagnostics Basic date In case the SpeedTouch™ has established ADSL line synchronization, the following data are displayed: Data Bytes Sent Bytes Received Diagnostics buttons The following buttons are available: Button Description Shows the total number of sent bytes since ADSL link synchroni- zation.
-
Page 53: The Diagnostics Application For Mac Os X
4.2.3 The Diagnostics Application for Mac OS X Opening the Diagnostics Click the SpeedTouch™ status dockling to open the SpeedTouch™ Diagnostics window window. Note Diagnostics window Opening the SpeedTouch™ Diagnostics, pops up the following generic window: Note Left box figures In the left box, the following figures can be displayed: Figure E-SIT-CTC-20030702-0003 v4.0... - Page 54 4 SpeedTouch™ Diagnostics Basic data In case the SpeedTouch™ has established ADSL line synchronization, the following data are displayed: Data Bytes Sent Bytes Received Throughput bars The throughput bars allow an instant overview of the current and average performance of the connection: The following throughput indicators can be found: Data All throughput indicators are measured relatively to the actual available bandwidth.
-
Page 55: Troubleshooting
5 Troubleshooting 5 Troubleshooting Introduction This chapter provides information on how to identify and correct some common prob- lems you may encounter when using the SpeedTouch™. If the following troubleshooting tips do not resolve the problem contact the company from which you purchased the SpeedTouch™ for assistance. E-SIT-CTC-20030702-0003 v4.0... -
Page 56: General
5 Troubleshooting 5.1 General Solving problems In most cases the described solutions will solve the problem. However, if the problem keeps persistent, reinstallation of your SpeedTouch™ might solve the problem. If reinstallation has not resolved the problem, contact the company from which you purchased the SpeedTouch™... -
Page 57: Normal Operation
Normal operation In this state the USB LED is assigned to the downstream (R during a session USB connection). The ADSL LED is assigned to the upstream (T channel). Both LEDs stay green. When an ATM cell is processed in a channel, the associated LED will go off for a short time. -
Page 58: Speedtouch™ System Software Updates
5 Troubleshooting 5.2 SpeedTouch™ System Software Updates System software You can check for system software upgrades via the support pages at the SpeedTouch™ updates (all OSs) web site: System software upgrades may also be available from your Service Provider. Please contact your Service Provider for more information. -
Page 59: Removing A Speedtouch™ Driver Installation
5.3 Removing a SpeedTouch™ Driver Installation Introduction This section describes how to remove the SpeedTouch™ drivers from your system. if your computers runs: • • • E-SIT-CTC-20030702-0003 v4.0 MS Windows OS Proceed with “5.3.1 Removing a SpeedTouch™ Driver Installation on MS Windows”... -
Page 60: Removing A Speedtouch™ Driver Installation On Ms Windows
5 Troubleshooting 5.3.1 Removing a SpeedTouch™ Driver Installation on MS Windows Procedure Proceed as follows: Insert the SpeedTouch™ Setup CD-ROM in your PC's CD-ROM drive. The SpeedTouch™ CD Browser will start automatically. Choose your language and go to Install SpeedTouch™ USB/330 Software > Remove USB Software If the SpeedTouch™... -
Page 61: Removing A Speedtouch™ Driver Installation On Mac Os 8.6/9.X
5.3.2 Removing a SpeedTouch™ Driver Installation on Mac OS 8.6/9.x Procedure Proceed as follows: E-SIT-CTC-20030702-0003 v4.0 Insert the SpeedTouch™ Setup CD-ROM in your computer’s CD-ROM drive and open the OS9 folder. Open the Remove folder and double-click Installer. The Installer window appears: Click Custom Remove in the drop-down list box, select the Drivers and Software check box and click Switch Disk to select the disk where the USB drivers were installed to. -
Page 62: Removing A Speedtouch™ Driver Installation On Mac Os X
5 Troubleshooting 5.3.3 Removing a SpeedTouch™ Driver Installation on Mac OS X Procedure Proceed as follows: Go to Applications > SpeedTouch™ > USB and double-click SpeedTouchUSBUnin- staller. The Uninstaller window appears: Click Uninstall to continue. The Uninstaller prompts you to confirm your choice: Click OK to start removing the files. - Page 64 www.speedtouch.com SERIES Built for excellence...