Table of Contents
Advertisement
Quick Links
Advertisement
Table of Contents

Related Manuals for Vaisala Indigo 202


Summary of Contents for Vaisala Indigo 202
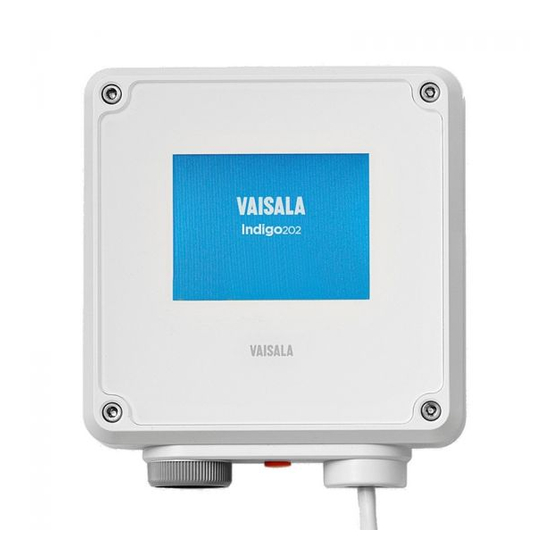
- Page 1 M211966EN-A User Guide Indigo ™ 202 Digital Transmitter Indigo 202...
- Page 2 This product contains software developed sold or disclosed to a third party without by Vaisala or third parties. Use of the prior written permission of the copyright software is governed by license terms and holder. Translated manuals and translated...
-
Page 3: Table Of Contents
Version Information....................5 Related Manuals..................... 5 Documentation Conventions................5 Trademarks......................6 Product Overview....................7 Introduction to Indigo™ Transmitters..............7 Indigo 202 Basic Features and Options.............. 8 Probe Compatibility....................8 Indigo Transmitter Parts..................9 Indigo Display....................... 10 2.5.1 Graph Display Mode..................11 Wireless Configuration Interface Overview............12 Installation...................... - Page 4 Indigo 202 User Guide M211966EN-A Configuring Relays.....................41 Relay Configuration Overview................41 Setting Relay Activation Limit Without Hysteresis......... 42 Setting Relay Activation Limit Using Hysteresis..........43 Selecting Relay Error State................44 Calibration and Adjustment................45 Calibration Overview...................45 7.1.1 Starting and Closing Calibration Mode............46 7.1.2...
- Page 5 Indigo Wiring Options..................15 Figure 10 Attaching Probes and Cables to Indigo............16 Figure 11 WLAN and RS-485 DIP Switches on Indigo 202 Circuit Board.... 18 Figure 12 Wireless Configuration Interface, Desktop Browser View......21 Figure 13 Enabling and Accessing Indigo's Wireless Configuration Interface... 22 Figure 14 Indigo Login View.....................24...
- Page 6 Indigo 202 User Guide M211966EN-A List of Tables Table 1 Document Versions....................5 Table 2 Input and Output....................17 Table 3 Indigo 202 Modbus Registers................39 Table 4 Default Modbus Serial Communication Settings........40 Table 5 Indigo Transmitter Messages Shown on Display.........59 Table 6 Input and Output....................
-
Page 7: About This Document
Chapter 1 – About This Document 1. About This Document 1.1 Version Information This document provides detailed instructions for using and maintaining Vaisala Indigo ™ 202 digital transmitter. Table 1 Document Versions Document Code Date Description M211966EN-A May 2017 First version of the document. -
Page 8: Trademarks
M211966EN-A Tip gives information for using the product more efficiently. 1.4 Trademarks Vaisala â is a registered trademark of Vaisala Oyj. Indigo ™ is a trademark of Vaisala Oyj. Chrome ™ is a trademark of Google Inc. Firefox â is a registered trademark of Mozilla Foundation. -
Page 9: Product Overview
(IEEE 802.11 b/g/n WLAN). The Indigo 202 transmitter is designed for digital output applications. The transmitter's output options include RS-485 Modbus RTU and 2 programmable relays. For more information on Indigo transmitter models, see www.vaisala.com/indigo. -
Page 10: Indigo 202 Basic Features And Options
2.2 Indigo 202 Basic Features and Options • All Vaisala Indigo-compatible probes can be connected to all Indigo transmitter models • Wireless configuration interface: connect to the scalable browser-based UI of Indigo 202 to change probe and transmitter settings, view measurements, and review probe and transmitter status •... -
Page 11: Indigo Transmitter Parts
Top cover of the transmitter: display, circuit board and connector pins Transmitter base: input and output wiring (screw terminals), mounting base CAUTION! Only use Vaisala Indigo-compatible probes with the transmitter. Attempting to connect incompatible probes or probe cables can damage the equipment. More Information ‣... -
Page 12: Indigo Display
Indigo 202 User Guide M211966EN-A 2.5 Indigo Display Indigo transmitters use a 3.5” TFT LCD color display for displaying notifications, status information, and measurement data. hPa | Pressure Figure 4 Indigo Display with One Parameter Figure 5 Indigo Display with Relays, Three Parameters and WLAN Notification... -
Page 13: Graph Display Mode
Chapter 2 – Product Overview The Indigo display can be configured to show 1-3 measurement parameters. Information about the transmitter and connected probe (for example, notifications and warnings) is shown on a message row at the bottom of the display. Relay and wireless access point activity is also shown on the display. -
Page 14: Wireless Configuration Interface Overview
Indigo 202 User Guide M211966EN-A 2.6 Wireless Configuration Interface Overview Indigo transmitters are configured using a wireless browser-based configuration interface (requires a mobile device or computer with IEE 802.11 b/g/n WLAN wireless connectivity). In addition to probe and transmitter configuration and calibration, you can also use the wireless interface to view measurement data and status information. -
Page 15: Installation
Chapter 3 – Installation 3. Installation 3.1 Mounting 1. Open the 4 screws on the transmitter cover and pull the cover off the base. CAUTION! To avoid damaging the connector pins of the transmitter, pull the transmitter cover off the base in a straight angle. Do not twist or bend. 2. -
Page 16: Indigo Transmitter Base
Serial No. SX12345678 A. Relay RS485 B. Relay Figure 8 Indigo 202 Transmitter Base Main Parts and Screw Positions Probe and probe cable connector inside the locking wheel Wireless (WLAN) configuration interface activation button Wiring from the back: cut open the seal... -
Page 17: Wiring Options
Chapter 3 – Installation 3.3 Wiring Options You can wire an input/output cable either through the opening on the back of the transmitter, or through the rubber lead-through on the bottom of the transmitter. Ø 7 ... 8 mm Figure 9 Indigo Wiring Options Wiring from the back: cut the seal open Wiring through the rubber lead-through on the bottom of the transmitter 1. -
Page 18: Attaching Probes And Cables
Indigo 202 User Guide M211966EN-A 3.4 Attaching Probes and Cables Figure 10 Attaching Probes and Cables to Indigo Insert probes into the probe connector with the orientation mark facing out. Probes are locked in place with the locking wheel. Never turn from the probe body. -
Page 19: Input And Output Specification
Probe connector M12/5 connector for probe or probe cable connection (Vaisala Indigo-compatible probes) Cable feed throughs 2 options: rubber lead-through on the bottom of the transmitter, and opening with a seal at the back of the... -
Page 20: Wlan And Rs-485 Termination Off/On Dip Switches
OFF ON RS485 TERMINATION OFF ON Figure 11 WLAN and RS-485 DIP Switches on Indigo 202 Circuit Board WLAN functionality OFF or ON RS-485 termination OFF or ON To switch WLAN or RS-485 termination OFF or ON with DIP switches: 1. Power off the transmitter. - Page 21 Chapter 3 – Installation 2. Open the transmitter cover. CAUTION! To avoid damaging the connector pins of the transmitter, pull the transmitter cover off the base in a straight angle. Do not twist or bend. 3. Use a small screwdriver or a similar tool to change the position of the WLAN (1) or RS-485 termination ON/OFF (2) DIP switches.
- Page 22 Indigo 202 User Guide M211966EN-A...
-
Page 23: Wireless Configuration Interface
Chapter 4 – Wireless Configuration Interface 4. Wireless Configuration Interface 4.1 Wireless Interface Menus Figure 12 Wireless Configuration Interface, Desktop Browser View Measurements: displays the measurement data of the connected probe Status: contains information about the status of Indigo and the connected probe (for example, notifications and alarms) Calibration: calibrate and adjust probes using references. -
Page 24: Connecting To Wireless Configuration Interface
Indigo 202 User Guide M211966EN-A 4.2 Connecting to Wireless Configuration Interface Indigo 200 Select WLAN to connect to: 1. WLAN XYZ 2. Indigo_IDxx 3. WLAN ABC Carbon dioxide concentration WLAN on Figure 13 Enabling and Accessing Indigo's Wireless Configuration Interface... -
Page 25: Connecting With A Mobile Device
Chapter 4 – Wireless Configuration Interface 4. When you have established a connection, open your browser. Depending on your browser and system, you are either directed to the wireless configuration interface's login screen, or you may need to: a. open a new browser tab or window, or close and restart your browser, if the browser was already open when you connected to Indigo's access point. -
Page 26: Logging In To Wireless Configuration Interface
Indigo 202 User Guide M211966EN-A 4.3 Logging in to Wireless Configuration Interface Figure 14 Indigo Login View When you open Indigo's wireless configuration interface in your browser, you are prompted to log in. There are 2 available user levels: • User: view-only access available for all users. Does not require a password. -
Page 27: Changing User Level
Chapter 4 – Wireless Configuration Interface 4.3.1 Changing User Level A link that allows logging in with a different user level is included in the upper right corner of all menu views. The text of the link shows the current user level. Figure 15 User Level (User/Admin) in Upper Right Corner of Menu View Current user level (User/Admin): select the text or icon to log in with a different user level... -
Page 28: Resetting Administrator Password
Indigo 202 User Guide M211966EN-A 3. In the User Access section, enter the new password (max. 25 characters) in the Administrator Password field. 4. The new password is saved when you tap or click outside the text field, and is in use at the next login. -
Page 29: Measurements View
Chapter 4 – Wireless Configuration Interface 4.4 Measurements View Figure 16 Measurements View (Desktop Browser) The Measurements view shows the measurement data from the connected probe in numeric and graph format. When you log in to Indigo, the wireless configuration interface opens in this view. -
Page 30: Status View
Indigo 202 User Guide M211966EN-A 4.5 Status View Figure 17 Status View (CO Probe Example, Desktop Browser) The Status view shows the transmitter status, general information about the Indigo transmitter, and the status of the relays A and B. 4.5.1 Status View: General The General section of the Status menu shows general information about the transmitter and the connected probe. -
Page 31: Status View: Relays
Chapter 4 – Wireless Configuration Interface • Indigo Status: shows the current status of the transmitter. Errors and notifications are displayed here. • Indigo Serial Number: the transmitter's serial number. • WLAN Access Point Name: the network name (SSID) of the transmitter. Can be configured in the Settings menu. -
Page 32: Calibration Menu
Indigo 202 User Guide M211966EN-A 4.6 Calibration Menu Figure 18 Calibration Menu (CO Probe Example, Desktop Browser) In the Calibration menu, you can calibrate and adjust the measurement of the probe connected to the transmitter with the help of references such as calibration gases that have a known concentration. -
Page 33: Wlan Settings
Chapter 4 – Wireless Configuration Interface 4.7.1 WLAN Settings • Mode: Select the timeout period for disconnecting the wireless configuration interface, or remove the timeout from use. • SSID: The network name that is used to identify the transmitter when connecting to it (default: Indigo_ID[xx]). -
Page 34: Display Settings
Indigo 202 User Guide M211966EN-A 4.7.3 Display Settings General display settings: • Brightness: set the brightness of the display (20%, 50%, 100% or off). • Mode: Select whether the display shows the measurement information in graph or numeric format. Graph view settings: •... -
Page 35: Factory Reset
More Information ‣ Graph Display Mode (page 11) 4.7.4 Factory Reset Select Reset to restore the configuration of the transmitter to factory default settings. 4.7.5 License Information Select the View software licenses link to view information on Indigo 202 software licenses. -
Page 36: Modbus Serial Communication Settings
Indigo 202 User Guide M211966EN-A 4.8 Modbus Serial Communication Settings The Settings > Outputs menu of the wireless configuration interface contains the configuration options for Modbus serial communication. Protocol Modbus protocol options. The Modbus RTU protocol is in use by default. -
Page 37: Relay Settings
Chapter 4 – Wireless Configuration Interface 4.9 Relay Settings The Settings > Relay menu contains the configuration options for controlling relays A and B. Both relays have the same configuration options (relay A example shown here). Output Mode Select whether the relay is activated when the measurement exceeds the set trigger, or when the measurement falls below the set trigger. -
Page 38: Probe Settings
The PIN code is in place by default. The available options depend on the features of the connected probe. The examples here show the probe settings for Vaisala CARBOCAP â Carbon Dioxide Probe GMP251. General (All Probes) The Calibration PIN Code must be in place to enable probe calibration and adjustment in the Calibration menu. - Page 39 Chapter 4 – Wireless Configuration Interface Measurement (GMP251 Example) Filtering factor Defines how much past measurements affect the output (measurement averaging over time). For details, see probe documentation. Temperature Select whether the probe sensor's measurement or a manually compensation mode entered setpoint is used to set the temperature compensation.
- Page 40 Indigo 202 User Guide M211966EN-A Compensation Power-up Defaults (GMP251 Example) The power-up default values are stored to the probe memory and remain in use also after you disconnect or reset the probe. Note that the environmental compensations you set in the Settings > Probe menu and the compensations you set in the Calibration menu are interconnected: the configuration set in either menu is applied to both.
-
Page 41: Modbus
Indigo 202 supports the Modbus RTU serial communication protocol (2-wire RS-485 interface). There are 2 groups of Modbus register addresses in use in Indigo 202: probe registers and Indigo registers. The probe registers are received from the connected probe, and are organized according to the probe's register map. -
Page 42: Default Communication Settings
Indigo 202 User Guide M211966EN-A 5.1.1 Default Communication Settings Modbus communication settings can be configured in the Settings > Outputs menu. Table 4 Default Modbus Serial Communication Settings Description Default Value Serial bit rate 19200 Parity None Number of data bits Number of stop bits... -
Page 43: Configuring Relays
Chapter 6 – Configuring Relays 6. Configuring Relays 6.1 Relay Configuration Overview Indigo transmitters have 2 configurable relays (relay A and relay B). Both relays have configuration options for selecting the parameter that is used to control the relay, activation triggers, hysteresis, and error state behavior. Figure 19 Relay Configuration Options (CO Probe Example) Output Mode: Select whether the relay activates above or below a set value (or set the... -
Page 44: Setting Relay Activation Limit Without Hysteresis
Indigo 202 User Guide M211966EN-A Relay State Information When one or both relays are enabled, the relay state (active/not active) is shown on the optional display. You can also check the status of the relays in the Status view of the wireless configuration interface. -
Page 45: Setting Relay Activation Limit Using Hysteresis
Chapter 6 – Configuring Relays To define a single setpoint for relay activation: 1. Open the Settings > Relays menu in the wireless configuration interface. 2. In the Relays menu, select the relay activation mode from the Output Mode dropdown menu: a. -
Page 46: Selecting Relay Error State
Indigo 202 User Guide M211966EN-A 3. Select the measurement parameter that is used to control the relay with the Parameter dropdown. 4. Set the unit of the measurement parameter with the Unit dropdown. 5. Enter the relay activation limit either to the Low Trigger Level or the High Trigger Level field: a. -
Page 47: Calibration And Adjustment
Chapter 7 – Calibration and Adjustment 7. Calibration and Adjustment 7.1 Calibration Overview The Calibration menu of the wireless configuration interface contains options for calibrating and adjusting the measurement of the probe you have connected to the transmitter. You can also view the current adjustment and restore the probe's factory adjustments. Figure 21 Calibration Menu Main View Calibration tab Configuration tab... -
Page 48: Starting And Closing Calibration Mode
The range of available options for certain parameters (for example, environmental compensations and the number of adjustment points) varies depending on the features of the connected probe. The menu examples presented here show the calibration options for Vaisala CARBOCAP â Carbon Dioxide Probe GMP252 (ppmCO measurement). -
Page 49: Restoring Factory Adjustment
Chapter 7 – Calibration and Adjustment 7.1.2 Restoring Factory Adjustment Always restore factory adjustment before entering a new adjustment. This prevents any possible earlier adjustments having an effect on the new adjustment you make. To restore factory adjustment: 1. Connect to the wireless configuration interface and open the Calibration menu. 2. -
Page 50: Environmental Compensation
Indigo 202 User Guide M211966EN-A 7.2 Environmental Compensation When making adjustments, you can enter information about the environment in which you perform the adjustment. This allows compensating for environmental factors that have an effect on the measurement (for example, temperature, pressure, or background gases). The selection of environmental compensations available in the Indigo calibration settings depends on the features and configuration of the connected probe. -
Page 51: Figure 24 Compensation Setpoint And Power-Up Default Selection
Chapter 7 – Calibration and Adjustment Compensation Setpoints and Power-Up Defaults Figure 24 Compensation Setpoint and Power-Up Default Selection, CO Probe Example Environmental compensations can have interdependencies: for example, accurate RH measurement requires that also the temperature and pressure configuration match the measurement environment. -
Page 52: Measurements Tab
7.4 Diagnostics Tab The Diagnostics tab of the Calibration menu contains status and diagnostics codes. When carrying out diagnostics (for example, contacting Vaisala support), you can identify issues by referring to this information. In addition to the diagnostics information, this view also shows the environmental compensation values that are currently in use. -
Page 53: Configuration Tab
Chapter 7 – Calibration and Adjustment Figure 26 Diagnostics Tab, CO Probe Example 7.5 Configuration Tab The Configuration tab of the Calibration menu contains probe-specific configuration options and the environmental compensation options. Note that the probe configuration options available in this view are not always necessary for use with Indigo. -
Page 54: Gmp252 Example: 2-Point Co Adjustment
Indigo 202 User Guide M211966EN-A The information shown in this tab is probe-specific: the example here shows the configuration view for a CO probe. Figure 27 Configuration Tab, CO Probe Example More Information ‣ Environmental Compensation (page 48) 7.6 GMP252 Example: 2-point CO... - Page 55 Chapter 7 – Calibration and Adjustment To make a 2-point adjustment (GMP252 ppmCO example): 1. Connect to the wireless configuration interface and open the Calibration menu. 2. Start the calibration mode with the Start calibration button. If you cannot enter configurations after selecting Start calibration, check that the calibration PIN code is in place in the Settings >...
- Page 56 Indigo 202 User Guide M211966EN-A 8. After you enter the reference value, the value of the Measured value, point 1 field updates automatically. 9. Place the probe in the second reference environment (adjustment point 2) and wait until the measurement has stabilized.
-
Page 57: Maintenance And Troubleshooting
Chapter 8 – Maintenance and Troubleshooting 8. Maintenance and Troubleshooting 8.1 Cleaning You can clean the Indigo transmitter body by wiping it with a moist cloth. Standard cleaning agents can be used. Refer to the probe-specific cleaning instructions when cleaning the probe connected to Indigo. -
Page 58: Connecting To Indigo Wlan With Iphone
Indigo 202 User Guide M211966EN-A Problem Possible Cause Remedy The Indigo access point does not Indigo access point is not enabled Switch off the Indigo WLAN show up in your device's list of or an error is has occurred. connection, enable the connection available WLAN connections. -
Page 59: Connection Option 1: Use Without Internet
Chapter 8 – Maintenance and Troubleshooting Depending on the current settings in your iPhone, you can connect to Indigo by either disabling the Auto-Login feature or with the Use Without Internet option. 8.3.1 Connection Option 1: Use Without Internet Activate Indigo's wireless (WLAN) configuration interface with the button on the bottom of the transmitter and select Indigo from your phone's list of available WLAN connections. -
Page 60: Connection Option 2: Disable Iphone Auto-Login
Indigo's default IP address 192.168.1.1 in the browser's address bar. 8.4 Display Messages The following table lists the display messages that Indigo 202 uses to inform you about the transmitter's state. In addition to the Indigo transmitter messages, the connected probes have probe-specific messages that are also shown on the display. -
Page 61: Table 5 Indigo Transmitter Messages Shown On Display
Chapter 8 – Maintenance and Troubleshooting Table 5 Indigo Transmitter Messages Shown on Display Error Message Description Recommended Action Errors Low supply voltage The supply voltage is below the The error clears when the supply minimum (range: 15 ... 30 VDC or voltage returns to the specified 20 ... - Page 62 Indigo 202 User Guide M211966EN-A...
-
Page 63: Technical Data
Probe connector M12/5 connector for probe or probe cable connection (Vaisala Indigo-compatible probes) Cable feed throughs 2 options: rubber lead-through on the bottom of the transmitter, and opening with a seal at the back of the... -
Page 64: Table 8 Standards And Compliance
Indigo 202 User Guide M211966EN-A Table 8 Standards and Compliance Property Specification Safety standard IEC/UL/EN 61010-1 Networking standards (wireless configuration IEEE 802.11 b/g/n compliant interface WLAN access point) Electromagnetic compatibility Complies with EMC standard EN61326-1 Generic Environment Contains FCC ID QOQ-WGM110 IC 5123A-WGM110 当該機器には電波法に基づく、技術基準適合証明等... -
Page 65: Spare Parts And Accessories
7 ... 8 mm (0.25 ... 0.31 inch) cable gland strain relief) 9.2 Spare Parts and Accessories Information on spare parts, accessories, and calibration products is available online at www.vaisala.com and store.vaisala.com. Table 12 Spare Parts and Accessories Description Order Code Probe connection cable, 1 m... -
Page 66: Dimensions (In Mm)
Indigo 202 User Guide M211966EN-A 9.3 Dimensions (in mm) 135 mm 43 mm Secondary mounting option with 4 screws: designed for Würth 4.0×1.8 mm Plastofast (self-tapping screws for plastics). Hole depth 12 mm. 50 mm 25 mm 114 mm 2.5 mm... -
Page 67: Appendix A: Modbus Reference
“Vaisala” ProductCode Indigo 202 MajorMinorVersion Software version (for example “1.2.3”) VendorUrl “http://www.vaisala.com/” ProductName Indigo 202 Digital Transmitter SerialNumber Serial number of the device (for example “K0710040”) Calibration date Date of the factory calibration Calibration text Information text of the factory calibration A.2 Indigo Status Registers... -
Page 68: Notification And Error Bits
Indigo 202 User Guide M211966EN-A Table 15 Modbus Status Registers (Read-Only) Address Register Description Data Format Notes (Hexadecimal) E000 Status 16-bit 0 = Status OK 1 = Info 2 = Warning 3 = Error E001 Notification and error 16-bit Provides additional details on the... - Page 69 Appendix A – Modbus Reference Bit in E001 Meaning Notes 16 (0010 No measurement probe Probe not connected or Indigo cannot detect the probe. 32 (0020 Probe warning Connect to Indigo's wireless configuration interface and review the error information in the Status menu.
- Page 70 Indigo 202 User Guide M211966EN-A...
-
Page 71: Eu Declaration Of Conformity
ES: Por la presente, Vaisala Oyj declara que el tipo de equipo radioeléctrico Indigo 202 es conforme con la Directiva 2014/53/UE. El texto completo de la declaración UE de conformidad está disponible en la dirección Internet siguiente: www.vaisala.com/indigo... -
Page 72: Warranty
2014/53/UE. It-test kollu tad-dikjarazzjoni ta' konformità tal-UE huwa disponibbli f'dan l-indirizz tal-Internet li ġej: www.vaisala.com/indigo NL: Hierbij verklaar ik, Vaisala Oyj , dat het type radioapparatuur Indigo 202 conform is met Richtlijn 2014/53/EU. De volledige tekst van de EU-conformiteitsverklaring kan worden geraadpleegd op het volgende internetadres: www.vaisala.com/indigo... -
Page 73: Technical Support
Technical Support Contact Vaisala technical support at helpdesk@vaisala.com. Provide at least the following supporting information: • Product name, model, and serial number • Name and location of the installation site • Name and contact information of a technical person who can provide further information on the problem For more information, see www.vaisala.com/support. - Page 74 Indigo 202 User Guide M211966EN-A...
- Page 76 www.vaisala.com...