
Related Manuals for Ricoh D6510


Summary of Contents for Ricoh D6510
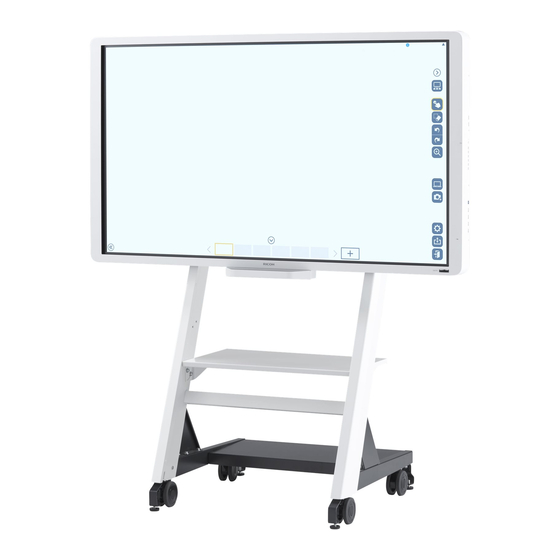
- Page 1 Operating Instructions For safe and correct use, be sure to read the Safety Information in Read This First before using the machine.
-
Page 3: Table Of Contents
TABLE OF CONTENTS Disclaimer................................3 1. Using the Remote Control Names and Functions of the Remote Control Buttons..................5 Installing the batteries into the remote control....................7 Removing the batteries from the remote control....................9 Remote Control Usage Tips..........................10 2. Connection Connecting Audio/Video Signals........................11 Connecting the VGA Input.......................... - Page 4 Advanced..............................34 Information..............................35 All Reset................................ 35 5. Product Information Specifications..............................37 List of Video Input Signals Supported by the Machine................. 41 List of PAP Input Signal Combination Supported by the Machine............... 43 List of the Functions and Commands Controlled by the RS-232C Terminal..........44 Set and Get Commands Table........................
-
Page 5: Disclaimer
Disclaimer To the maximum extent permitted by applicable laws, in no event will the manufacturer be liable for any damages whatsoever arising out of failures of this machine, losses of the registered data, or the use of this product and operation manuals provided with it. Make sure that you always copy or have backups of the data registered in this machine. -
Page 7: Using The Remote Control
1. Using the Remote Control This chapter explains how to use the remote control. Names and Functions of the Remote Control Buttons • Do not put the remote control in the direct heat, humidity, and avoid fire. • Do not drop the remote control, as doing so may cause the remote control to malfunction. •... - Page 8 1. Using the Remote Control 3. [EXIT] Returns to the previous menu or closes the On-Screen Display menu when the On-Screen Display menu is on. 4. [ ]/[Volume ]/[ ]/[Volume ] • Scrolls through settings and options in the On-Screen Display menu. •...
-
Page 9: Installing The Batteries Into The Remote Control
Installing the batteries into the remote control Installing the batteries into the remote control • When batteries fail to function, replace them immediately. • There may be local restrictions on the disposal or recycling of batteries. Consult your local regulations or waste disposal provider. Open the remote control battery cover. - Page 10 1. Using the Remote Control Refit the battery cover.
-
Page 11: Removing The Batteries From The Remote Control
Removing the batteries from the remote control Removing the batteries from the remote control Open the remote control battery cover. Remove the batteries. Refit the battery cover. -
Page 12: Remote Control Usage Tips
1. Using the Remote Control Remote Control Usage Tips • Point and aim the top front of the remote control directly at the display’s remote control sensor window when you press the buttons. The maximum distance for the remote control to operate properly is 7 meters (approx. -
Page 13: Connection
2. Connection This chapter explains how to connect cables. Connecting Audio/Video Signals Pay attention to the following notes when you connect cables: • Please turn off all devices. • Familiarize yourself with the audio/video ports on the machine and the devices you want to use. Be aware that incorrect connections may adversely affect picture quality or result in the picture not being displayed. -
Page 14: Connecting The Digital Inputs
2. Connection To view images from this input, press the VGA button on the remote control. To select an appropriate audio source, see page 27 "Sound Menu" for details. DTW203 *1 D-Sub (15-pin) cable *2 Audio cable • The audio cable is not supplied and should be purchased separately. Connecting the Digital Inputs Connect the HDMI output jack of a computer or A/V device (such as a VCR or DVD player) to the HDMI Input jack on the machine using an HDMI cable. -
Page 15: Connecting External Speakers
Connecting Audio/Video Signals To view video image from this input, press the HDMI, DP, or DVI button on the remote control. To select an appropriate audio source, see page 27 "Sound Menu" for details. DTW204 *1 DVI cable *2 HDMI cable *3 DisplayPort cable *4 Audio cable •... -
Page 16: Connecting Multiple Displays
2. Connection DTW207 • When connecting external speakers, use speakers that support 8 output. • You can use the remote control or the control panel on the machine to adjust the volume. • When using external speakers, set Speaker in the Sound menu to External. Connecting Multiple Displays You can connect multiple displays serially (daisy chain) to a computer for management. -
Page 17: Connecting With A Usb Cable
Connecting Audio/Video Signals *1 Additional display *2 The first display *3 DisplayPort cable *4 RS-232C cable *5 DisplayPort cable • The RS-232C cable and DisplayPort cable are not supplied and should be purchased separately. • This RS-232C daisy chain application requires an RS-232C port equipped computer. •... - Page 18 2. Connection • This machine has four types of USB ports to connect external devices. For details about the name and description of each USB port, see “Input/Output Terminals”, Read This First. • For details about how to connect to the USB port located on the control panel, see “Connection”, Read This First.
-
Page 19: Using The Touch Screen
3. Using the Touch Screen When the USB Type-B For Touch jack of the machine is connected to the USB port of a computer using the supplied USB cable, you can operate the Windows PC or Mac, just as you would with a mouse, using touch operations with your finger. - Page 20 3. Using the Touch Screen • Do not spray a detergent on the screen surface or the body directly. It may result in a short circuit to the touch screen. • Keep the touch screen out of direct sunlight or spotlights.
-
Page 21: The On-Screen Display Menu
4. The On-Screen Display Menu This chapter explains how to use the On-Screen Display menu and describes the menu items on it. The On-Screen Display Menu Overview Menu name Options/functions See page Picture • Picture Mode page 25 "Picture Menu" •... - Page 22 4. The On-Screen Display Menu Menu name Options/functions See page Setting • Language page 33 "Setting Menu" • Power Save • Control Setting • Touch Control Setting • Set Monitor ID • Advanced • Information • All Reset • Some options are only available when a certain input signal source is selected.
-
Page 23: Operations In The On-Screen Display Menu
Operations in the On-Screen Display Menu Operations in the On-Screen Display Menu Using the Control Panel Buttons Press [Menu] to open the On-Screen Display menu. Press [ ] or [ ] to select an item. Press [Enter/Input] to confirm selections. -
Page 24: Using The Remote Control
4. The On-Screen Display Menu Press [ ] or [ ] to select a feature and press [ ] or [ ] to adjust settings. Press [Enter/ Input] to save changes. Press [Menu] to return to the previous item. Press [Menu] several times to return to the On-Screen Display menu, and press [Menu] again to close the On-Screen Display menu. - Page 25 Operations in the On-Screen Display Menu Press [ ] or [ ] to select an item. DTW211 Press [Enter] to confirm selections. DTW212 Press [ ] or [ ] to select a feature and press [ ] or [ ] to adjust settings. Press [Enter] to save changes.
- Page 26 4. The On-Screen Display Menu Press [Menu] to close the On-Screen Display menu. DTW214...
-
Page 27: Picture Menu
Picture Menu Picture Menu Picture Mode Sets the display mode. • Standard This is the standard setting. • Vivid Displays the image so it is brighter and more vivid. • Cinema Setting for viewing videos and movies. • Custom Sets a combination of Picture Modes. •... - Page 28 4. The On-Screen Display Menu Phase Adjusts the image phase. Sharpness Adjusts the image sharpness. Color Temp. Adjusts the color temperature. • Cool Displays images in a bluish tone. • Neutral Displays images in a natural tone. • Warm Displays images in a reddish tone. •...
-
Page 29: Sound Menu
Sound Menu Sound Menu Sound Mode Adjusts the sound output from the speakers. • Dynamic: Enhances treble and bass. • Standard: Flat settings. • Custom: Recalls the customized settings. Treble Adjusts the audio treble. Bass Adjusts the audio bass. Balance Adjusts the audio balance. - Page 30 4. The On-Screen Display Menu DTW209 The Computer In is only available if the controller designed compliant with OPS (Open Pluggable Specification) standard is connected to this display. Reset Resets all settings in the Sound menu.
-
Page 31: Screen Menu
Screen Menu Screen Menu PAP Setting (Picture and Picture) Turns on or off the PIP (Picture in Picture) and PBP (Picture by Picture) functions. If the Touch Feature function is set to On, PIP will be disabled. PAP Sub source In PIP mode, selects the image source for the sub picture. -
Page 32: Aspect
4. The On-Screen Display Menu Picture Position Only in PIP mode, changes the position of the sub picture. Upper Left Upper Right Lower Left Lower Right See page 43 "List of PAP Input Signal Combination Supported by the Machine" for more information on supported combinations. -
Page 33: Adjust Screen
Screen Menu For video signal inputs Normal Normal Full Full For PC signal input Full Real Adjust Screen Auto Adjustment Automatically optimizes image display for the VGA input. Phase Adjusts the phase of the VGA input image. Clock Frequency Adjusts the clock frequency of the VGA input image. H. -
Page 34: Touch Feature
4. The On-Screen Display Menu V. Position Adjusts the vertical position of the VGA input image. Touch Feature When turned On, Aspect, PBP, and Overscan will be disabled to optimize touch performance. When the controller designed compliant with OPS (Open Pluggable Specification) standard is connected to this display, Touch Feature is fixed to On. -
Page 35: Setting Menu
Setting Menu Setting Menu Language Sets your preferred language for the On-Screen Display menu. Power Save Sets the machine to enter the power saving mode when there is no signal detected. • On All source can enter the power saving mode and wake up the display. •... -
Page 36: Touch Control Setting
4. The On-Screen Display Menu Computer In Sets the OPS (Open Pluggable Specification) controller to control the machine. The Computer In is only available if the controller designed compliant with OPS (Open Pluggable Specification) standard is connected to this display. For details about signals controlled by the RS-232C port, see page 44 "List of the Functions and Commands Controlled by the RS-232C Terminal". -
Page 37: Information
Setting Menu Auto Adjustment Sets whether to optimize image display for each VGA input. Overscan Changes the display area of the image. When this function is enabled, 96% of the original size of the image will be displayed, and the rest of the areas surrounding the image will be cut off. •... - Page 38 4. The On-Screen Display Menu...
-
Page 39: Product Information
5. Product Information This chapter explains the machine specifications and input and output signals the machine supports. Specifications Item Specifications LCD panel Backlight RICOH Interactive Panel size 65" Whiteboard D6510 Pixel pitch (mm) 0.744 × 0.744 Native resolution (pixels) 1920 × 1080... - Page 40 5. Product Information Item Specifications Touch Technology Shadow Sense Resolution 1920 × 1080 Maximum number of touches Touch Output USB 2.0 Supported Operating Systems Multi-point touch: Windows 7 (Home Premium/Ultimate/ Professional) Windows 8, Windows 8 Pro, Windows 8 Enterprise Windows 8.1, Windows 8.1 Pro, Windows 8.1 Enterprise Windows Enbedded Standard 7, Windows Embedded Standard 8...
- Page 41 12 W × 2 Internal speaker 12 W (8 ) × 2 Power Supply 100 - 240V AC, 50/60 Hz Consumption (While RICOH Interactive Whiteboard D6510: 350 operating) RICOH Interactive Whiteboard D5520: 255 Consumption (Standby) Less than 0.5 W Environment Operating Temperature 0 - 32°C (32 - 89.6°F)
- Page 42 Blue light reduction function Picture in Picture (PIP) Picture by Picture (PBP) RICOH Interactive Whiteboard D6510: 10-bit color processing RICOH Interactive Whiteboard D5520: 8-bit color processing Operation Time *1 10 touch points are supported at most. However, depending on where you touch, operations can be unstable.
-
Page 43: List Of Video Input Signals Supported By The Machine
List of Video Input Signals Supported by the Machine List of Video Input Signals Supported by the Machine The symbols in the cells have the following meanings: • : supported • –: not supported Input source Resolution DisplayPort HDMI 640 × 480 @ 60Hz (VGA) 640 ×... - Page 44 5. Product Information 720 × 480i (60Hz) – – – – 720 × 576i (50Hz) – – – – 720 × 480p (60Hz) – 720 × 576p (50Hz) – 1280 × 720p (25Hz) – – – – 1280 × 720p (30Hz) –...
-
Page 45: List Of Pap Input Signal Combination Supported By The Machine
List of PAP Input Signal Combination Supported by the Machine List of PAP Input Signal Combination Supported by the Machine The symbols in the cells have the following meanings: • : supported • –: not supported Main/Left picture signal source Computer HDMI DisplayPort... -
Page 46: List Of The Functions And Commands Controlled By The Rs-232C Terminal
5. Product Information List of the Functions and Commands Controlled by the RS-232C Terminal When you connect the machine and a computer with the communication cable RS-232C (crossover cable), you can control the machine from the computer via the RS-232C terminal using a terminal emulation program. -
Page 47: Set And Get Commands Table
List of the Functions and Commands Controlled by the RS-232C Terminal Set and Get Commands Table Set and Get Commands Table In the table below, hyphens "-" indicate items that are not supported. Set Command Get Command Value Range Function Length Remark Command... - Page 48 5. Product Information Set Command Get Command Value Range Function Length Remark Command Command (ASCII Bytes) Command Command Code Code Type Type (Hex) (Hex) PAP Swap Swap main and sub sources. Whatever value can be specified. PAP Size 00000: Small When PAP = PIP 10000: Large PIP Position...
-
Page 49: Output Signals
Output Signals Output Signals The DisplayPort Output jack of the machine outputs the signals from the DisplayPort Input jack as they are. You can connect devices, and view the video or image displayed on the machine on the connected device. •... - Page 50 5. Product Information...
-
Page 51: Troubleshooting
6. Troubleshooting This chapter explains possible problems and solutions when the functions of this machine cannot be properly used. Troubleshooting Problem Solution No picture Check the following: • Is the machine turned on? Check the power indicator of the display. •... - Page 52 6. Troubleshooting Problem Solution No sound Check the following: • Have you turned on the mute function on the machine or the input source device? Turn off the mute function or increase the audio volume level and try again. • Are there any loose cable connections? Make sure that all cables are connected firmly.
- Page 53 Troubleshooting Problem Solution The control panel buttons do not work When a controller designed compliant with OPS (Open Pluggable Specification) standard is connected to the machine, the control panel buttons will not work until the controller is completely shut down. Wait until shutdown is complete.
- Page 54 6. Troubleshooting...
-
Page 55: Appendix
7. Appendix This chapter describes the trademarks. Trademarks DisplayPort is registered trademarks of Video Electronics Standards Association in the U.S. and/or other jurisdictions. VGA is a trademark of International Business Machines Corporation in the United States, other countries, or both. HDMI and High-Definition Multimedia Interface are trademarks or registered trademarks of HDMI Licensing LLC. - Page 56 MEMO...
- Page 57 MEMO...
- Page 58 MEMO Y305-7509...
- Page 60 EN GB EN US EN AU Y305-7509 © 2017 Ricoh Co., Ltd.