Accu-Chek ADVANTAGE User Manual
Hide thumbs
Also See for ADVANTAGE:
- Owner's booklet (52 pages) ,
- User manual (90 pages) ,
- Owner's booklet (52 pages)
Table of Contents
Advertisement
ACCU-CHEK, ADVANTAGE, COMFORT CURVE, CHEK, SOFTCLIX, and CHEMSTRIP are
trademarks of a Member of the Roche Group.
©2002 Roche Diagnostics. All rights reserved. 093344800-0802
Roche Diagnostics Corporation
9115 Hague Road
Indianapolis, IN 46256
www.accu-chek.com
- C
A
CCU
User's Manual
Las instrucciones en español
están al revés de este manual.
BLOOD GLUCOSE MONITORING SYSTEM
HEK
®
®
Advertisement
Table of Contents

Related Manuals for Accu-Chek ADVANTAGE


Summary of Contents for Accu-Chek ADVANTAGE
- Page 1 ® ACCU-CHEK, ADVANTAGE, COMFORT CURVE, CHEK, SOFTCLIX, and CHEMSTRIP are trademarks of a Member of the Roche Group. ® ©2002 Roche Diagnostics. All rights reserved. 093344800-0802 User’s Manual Las instrucciones en español están al revés de este manual. Roche Diagnostics Corporation...
-
Page 2: Table Of Contents
Inserting a Test Strip...........40 Using the Accu-Chek ® Softclix ® Lancet Device ....44 How to Run a Blood Sugar Test with an Accu-Chek ® Comfort Curve ® Test Strip ...........51 Disposing of Used Lancets ..........57 Understanding Your Blood Sugar Test Results....59 Memory.................69... -
Page 3: Welcome
® Meter Accu-Chek ® Advantage ® Test Strip......81 measures your blood sugar level and displays your How to Run a Blood Sugar Test with an Accu-Chek ® results. Advantage ® Test Strip ..........90 Frequently Asked Questions........95 Before you begin testing, please read this manual Troubleshooting Guide ..........97... -
Page 4: Where To Find Help
24 hours a day, 365 days a year. We offer assistance in English, Spanish, and many other languages! Call 1-800-858-8072. For valuable information about diabetes management and the complete Accu-Chek ® product line, visit www.accu-chek.com. Glucose Control Solutions... -
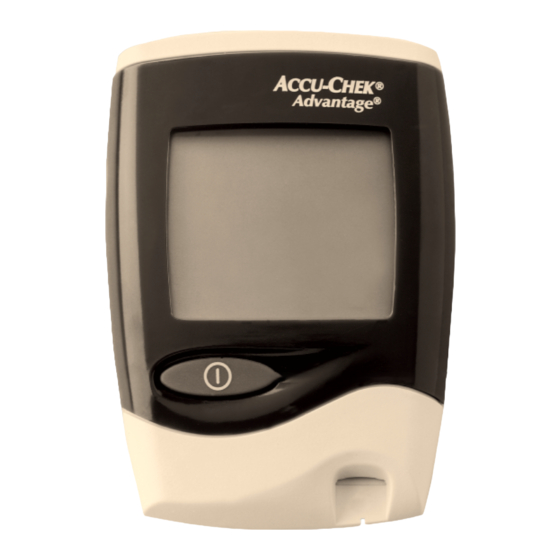
Page 5: Getting To Know Your Meter And Supplies
Getting to Know Your Meter and Supplies MEM Button—Press it to review values stored in the meter’s memory. Display Screen—Your blood sugar test result and other information will appear here. On/Off Button—This button has the symbol printed on it. Press it to turn the meter ON or OFF. - Page 6 A new code key comes code key. with every package of test strips. Battery Cover—This cover slides off so ® ® Accu-Chek Comfort Curve Test you can install or Strip—This is used when testing your change batteries. blood sugar or glucose control solution.
-
Page 7: Setting Up Your Meter
Setting Up Your Meter Additional Items Installing or Replacing the Batteries ® Accu-Chek Comfort Your meter comes with two AAA ® Curve Glucose Control Introduction alkaline batteries. Solution—This solution is used to check the performance of the meter and the test strip. - Page 8 Installing the Follow these steps to install the Step Action batteries batteries for your meter. Inside each battery slot is a Step Action picture of a battery: Slide the battery cover off the back of the meter. This shows you in which direction to install the battery.
-
Page 9: Turning The Beeper On Or Off
Turning the beeper on or off does not Introduction strip down over the batteries affect the test results. while sliding the battery cover back in place. The Accu-Chek ® Advantage ® Meter is set to beep when: • A test strip is inserted •... - Page 10 Turning the Follow these steps to turn the beeper beeper on or off Step Action on or off. Press the On/Off button to Step Action switch the beeper on or off. Press the On/Off button to turn on the meter. Press the On/Off and MEM buttons at the same time until...
-
Page 11: Setting The Time And Date
Setting the Time and Date Step Action The time and date should be set Introduction Press the On/Off and MEM prior to testing if you plan to down- buttons at the same time until load the results into software or if Set appears, then release both you or your healthcare professional buttons. - Page 12 Step Action Step Action Setting the time and date con’t Now press the MEM button. Press and release the On/Off button until the correct minutes are displayed. Now press the MEM button. The hour digit and AM will flash. Press and release the On/Off button until the correct hour is The month digit will flash.
-
Page 13: Coding Your Meter
“match” the strips. Now press the MEM button. This is called coding or calibration. The Accu-Chek ® Advantage ® Meter is coded using the code key found in the box of each new vial of test strips. - Page 14 Step Action You will need to insert a new code Find the new code key that key: came in the box of test strips. Hold the end of the code key • Whenever you open a new box of that has the ridges. With the strips.
-
Page 15: Glucose Control Testing
If it does not, solutions instead of blood. Checking your system with repeat steps 1-3. glucose control solutions ensures that you are running a test correctly and that your Accu-Chek ® Advantage ® Meter is working properly and is giving you reliable results. -
Page 16: Items You Need
Items You Need • Accu-Chek ® Advantage ® Meter You will find the acceptable glucose control • Accu-Chek ® Comfort Curve ® Test Strips range printed on the vial of the test strips. • Accu-Chek ® Comfort Curve ® Glucose Control Solutions •... - Page 17 Step Action Glucose Step Action Control Remove the Chek ™ Strip when ™ When the Chek Strip is Testing con’t you see the OK screen. inserted, the meter will turn on automatically. When the Chek ™ Strip is removed, you will see L1, a flashing test strip symbol, and on the screen.
- Page 18 Glucose Step Action Step Action Control Insert a test strip (yellow window Hold the control bottle Testing con’t facing up) into the test strip slot. horizontally and gently squeeze the bottle to form a small drop The test strip symbol will stop on the tip of the bottle.
- Page 19 Glucose Step Action Step Action Control When the control solution is If the control result is within the Testing con’t applied to the strip, a box symbol acceptable range, the result and will move around the display the OK screen will alternate. screen until the measurement is completed.
- Page 20 Glucose Step Action Step Action Control Testing con’t 11 Remove the test strip from the 12 When you are finished testing, meter and discard it. press the On/Off button to turn the meter off. When the test strip is removed, you will see the L2, a flashing test strip symbol, and on the...
-
Page 21: What To Do If Your Glucose Control Result Is Outside The Acceptable Range
What to Do if Your Glucose Control Result Is Outside the Acceptable Range Items You Need • Check the expiration date of the test strips. If the strips have expired, dispose of them promptly. • Accu-Chek ® Advantage ® Meter •... -
Page 22: Inserting A Test Strip
Inserting a Test Strip Step Action Insert a test strip into the Accu-Chek ® Introduction Make sure the yellow window on Advantage ® Meter prior to testing. If the test strip is facing up. Insert this is your first time to test, you may... - Page 23 A 3-digit code number appears. This number must match the code number on the vial of test strips. To continue, follow the instructions for using the Accu-Chek ® Softclix ® Lancet Device to obtain a drop of Example code number.
-
Page 24: Using The Accu-Chek ® Softclix ® Lancet Device
Comfort Dial ™ Dial, off the lancet device. lancet holder cap with Comfort Dial semi-circular cutout depth selection protective cap clear release button Firmly insert a new Accu-Chek ® lancet plunger Softclix ® Lancet into the lancet ejector positioning notch holder until it snaps into place. - Page 25 Getting a drop of Step Action Step Action blood con’t To adjust the depth setting, turn Twist the round protective cap the cap. You will see numbers on the lancet several times and and dots in the semicircular pull gently to remove it. cutout area.
- Page 26 Getting a drop of Step Action Step Action blood con’t Wash your hands in warm Press the plunger on the end of soapy water and dry thoroughly. the lancet device all the way down until you hear a click. You will also see a yellow dot Let your arm hang down at your appear in the center of the clear side briefly to increase blood...
-
Page 27: How To Run A Blood Sugar Test With An Accu-Chek
How to Run a Blood Sugar Test with an Accu-Chek ® Getting a drop of Step Action Comfort Curve ® Test Strip blood con’t ® 10 Press the tip of the Accu-Chek Introduction Softclix ® Lancet Device firmly The following instructions are for the against your fingertip. - Page 28 How to Run a Follow these steps to apply a drop of Blood Sugar Test your finger on the curved edge of the test strip. blood to an Accu-Chek ® Comfort with an Accu- Do not try to place the blood drop directly on top Chek ®...
- Page 29 How to Run a Step Action Step Action Blood Sugar Test with an Accu- If you see any yellow color in Once the blood sugar result is Chek ® Comfort the window after you have displayed, it will be automatically Curve ®...
-
Page 30: Disposing Of Used Lancets
If you are finished testing, press the On/Off button to turn the Disposing of Follow these steps to dispose of your meter off. used lancets used lancets. Step Action Pull the cap off the Accu-Chek ® Softclix ® Lancet Device. -
Page 31: Understanding Your Blood Sugar Test Results
Step Action used lancets What’s Normal? con’t Point the exposed end of the The normal fasting adult blood sugar range for a person Accu-Chek ® Softclix ® Lancet without diabetes is 70-109 mg/dL . One or two hours after meals, normal blood sugar levels should be less... - Page 32 If your blood sugar test result still does not reflect IF... the way you feel, contact your doctor. your blood sugar result seems unusually high or low, Follow the advice of your doctor before you AND... change your therapy. does not reflect the way you feel, check the following: •...
- Page 33 IF... IF... your blood sugar result is above 240 mg/dL, you get a low blood sugar result or LO is displayed, AND... this has occurred for several days, THEN... AND... contact your doctor and check your urine ketone levels with Roche Diagnostics’ Chemstrip ®...
- Page 34 IF... IF... HI is displayed, HI is displayed, AND... AND... you also experience symptoms of high blood sugar: this does not confirm the way you feel, fatigue, increased appetite or thirst, frequent urination, blurred vision, headache, or achiness, THEN... check that test strip has not expired or been THEN...
- Page 35 IF... IF... mg/dL and error are displayed, mg/dL and error are displayed, AND... AND... you also experience symptoms of high blood sugar: symptoms are absent, fatigue, increased appetite or thirst, frequent urination, blurred vision, headache, or achiness, THEN... run a glucose control check with your glucose control THEN...
-
Page 36: Memory
Memory Automatic Results Storage The Accu-Chek ® Advantage ® Meter automatically stores 100 results. You can review them in order from the most recent to the oldest. If you have set the time/date feature, the times and dates of the results are also displayed. -
Page 37: How To Review Results Stored In Memory
How to Review Results Stored in Memory Step Action Reviewing Follow these steps to review results When the test strip symbol Stored stored in memory. flashes, press and hold the MEM Results button. Step Action Press the On/Off button to turn the meter on. - Page 38 Step Action Step Action Release the MEM button. The Press the On/Off button to result, date, and time are turn the meter off at any time. displayed. Example result Press the MEM button and the next memory number will be displayed.
-
Page 39: How To Transfer Stored Data
Use only an Accu-Chek ® Advantage cable to connect to the data port of the Accu-Chek Advantage Meter. Do not run a glucose test when the Accu-Chek Advantage Meter is connected to accessory equipment. -
Page 40: Cleaning The Meter
Cleaning the Accu-Chek ® Softclix ® Lancet Device Clean your meter as needed using one of the following: To clean the Accu-Chek ® Softclix ® Lancet Device, use a • 70% isopropyl alcohol soft cloth dampened with mild dish washing liquid. -
Page 41: Accu-Chek ® Advantage ® Test Strips
Accu-Chek ® Advantage ® Test Strips The following instructions are for Accu-Chek ® Advantage ® Test Strips only. If your test strips have a curved edge, you need to follow the instructions for the Accu-Chek ® Comfort Curve ® Test Strips. The instructions for each type of strip are different. -
Page 42: Items You Need
Advantage ® Test Strips Glucose Control Follow these steps to run a glucose • Accu-Chek ® Advantage ® Glucose Control Testing using control test using an Accu-Chek ® an Accu-Chek ® Solutions Advantage ® Advantage ® Test Strip. • Chek ™... - Page 43 Step Action Testing using When the Chek ™ Strip is Remove the Chek ™ Strip when an Accu-Chek ® Advantage ® inserted, the meter will turn on you see the OK screen. Test Strip con’t automatically. When the Chek ™...
- Page 44 Action Glucose Control Step Action Testing using Hold the control bottle Insert a test strip (yellow window an Accu-Chek ® Advantage ® horizontally and gently squeeze facing up) into the test strip slot. Test Strip con’t the bottle to form a small drop The test strip symbol will stop on the tip of the bottle.
- Page 45 Step Action Step Action Testing using When control solution is applied If the control result is within the an Accu-Chek ® Advantage ® to the strip, a box symbol will acceptable range, the result and Test Strip con’t move around the display screen the OK screen will alternate.
- Page 46 Glucose Control Step Action Step Action Testing using 11 Remove the test strip from the an Accu-Chek ® The Level 2 test is optional. If Advantage ® meter and discard it. you have a bottle of Level 2 Test Strip con’t...
-
Page 47: How To Run A Blood Sugar Test With An Accu-Chek Advantage Test Strip
How to Run a Blood Sugar Test with an Accu-Chek ® Step Action Advantage ® Test Strip Look at the yellow window on the test strip. If you have enough Running a Blood Follow these steps to run a blood... - Page 48 Running a Blood Step Action Step Action Sugar Test with an Accu-Chek ® If you see any yellow color in Once the blood sugar result is Advantage ® Test the window after you have displayed, it will be automatically Strip con’t applied the drop of blood, a recorded in the meter’s memory.
-
Page 49: Frequently Asked Questions
Customer Care at 1-800-858-8072. Q. I’m getting results that I know are not correct. What am I doing wrong? If you are finished testing, press A. Call Accu-Chek Customer Care at 1-800-858-8072. the On/Off button to turn the meter off. -
Page 50: Troubleshooting Guide
The following are display and error messages that may appear on the meter. If you are unable to resolve a concern, please call Accu-Chek Customer Care at 1-800-858-8072, 24 hours a day, 365 days a year. Do not make treatment decisions... - Page 51 IF... IF... LO is displayed. HI is displayed. REASON REASON The blood sugar result is above the measuring range The blood sugar result is below the measuring range of your test strips. of your test strips. ACTION ACTION Understanding Your Blood Sugar Test Results Understanding Your Blood Sugar Test Results (pages 59-67).
- Page 52 ACTION ACTION All functions and display elements should appear. Immediately Understanding Your Blood Sugar If a segment is missing from a figure 8 8 , false Test Results (pages 59-67). readings could result. Call Accu-Chek Customer Care at 1-800-858-8072.
- Page 53 ACTION ACTION Turn the meter off and reinsert the code key. If this Turn the meter off and correctly insert the code key. error display still appears, contact Accu-Chek Coding Your Meter (page 23). Customer Care at 1-800-858-8072.
- Page 54 IF... IF... the following screen is displayed. the following screen is displayed. Example code number Example result REASON REASON The meter is turned on and the memory is full with The temperature is outside the operating range of 100 values. MEM flashes. the test strips (57°-104°F or 14°-40°C).
- Page 55 IF... IF... the following screen is displayed. the following screen is displayed. REASON REASON The battery power is low. The system will allow only The battery is depleted. The system will not allow a a few additional tests to be performed. test to be performed.
- Page 56 IF... IF... the following screen is displayed. the following screen is displayed. REASON REASON The test strip may be damaged or the test was not The meter has failed its internal system check. performed correctly. ACTION ACTION If this display appears before blood is placed on the Remove the Chek ™...
- Page 57 If this previously stored in memory although your meter symbol remains after 30 seconds, call Accu-Chek will store any future test results. Call Accu-Chek Customer Care at 1-800-858-8072. Customer Care at 1-800-858-8072.
-
Page 58: Other Information
Less than 95% Turn the meter off, then on again. If this error display Atmospheric Pressure > 53.3 kPa still appears, testing cannot take place. Call Accu-Chek Customer Care at 1-800-858-8072. Measuring Range Refer to your test strip package insert... -
Page 59: Product Safety Information
Product Safety Information Weight 2 oz. (60 gm) without Explanation of symbols batteries Power Supply Two 1.5-volt alkaline (AAA) batteries (type LR03) = Caution - important safety information. These batteries are available in most retail = Attention - important information. outlets. -
Page 60: Additional Supplies
Comfort Curve ® Test Strips materials or workmanship, Roche Diagnostics will Cat. Nos. 2030365, 2030373, 2030381, 2030420, 3000133, 3000141, 3000150 repair the meter or replace it with a new Accu-Chek Advantage Meter or equivalent product free of Accu-Chek ® Advantage ®... - Page 61 Warranty and Service Instructions purchase or operation of the meter or its parts. No All requests for return of Accu-Chek ® Advantage ® warranty of merchantability or fitness for a particular...
-
Page 62: References
Except where prohibited by statute, all warranties covering and Complete ™ Systems when used with Accu-Chek ® the Accu-Chek Advantage System are voided by use of the Comfort Curve ® Test Strips); and 5,352,351. A license to Accu-Chek Advantage System with any test strips or code... -
Page 63: Index
Index Accu-Chek Advantage Test Strips ... .79 Accu-Chek Comfort Curve Test Strips ..9, 51 Accu-Chek Softclix Lancet Device ..10, 44, 77 Batteries . - Page 64 Limitations ......113 LO Display ......61, 62, 98 MEM Button .