Table of Contents
Advertisement
Quick Links
Download this manual
See also:
User Manual
Advertisement
Table of Contents
Troubleshooting

Related Manuals for Vaisala DMT152


Summary of Contents for Vaisala DMT152
- Page 1 USER'S GUIDE Vaisala DRYCAP Dewpoint Transmitter ® DMT152 M210865EN-H...
- Page 2 This manual does not create any legally binding obligations for Vaisala towards customers or end users. All legally binding obligations and agreements are included exclusively in the applicable supply contract or the General Conditions of Sale and General Conditions of Service of Vaisala.
-
Page 3: Table Of Contents
Regulatory Compliances ............8 Trademarks ................8 Warranty ..................8 CHAPTER 2 PRODUCT OVERVIEW .................. 9 Introduction to Dewpoint Transmitter DMT152 ..... 9 Basic Features and Options ............ 9 Transmitter Structure ............. 10 CHAPTER 3 FUNCTIONAL DESCRIPTION ..............12 Advanced DRYCAP ®... - Page 4 User's Guide _______________________________________________________________________ DSC74C Two-Pressure Sampling Cell with Coil .... 27 NW40 Mounting Flange ............30 CHAPTER 5 SERIAL LINE OPERATION ................. 31 Serial Communication ............31 Connecting to the Serial Interface ........31 Installing the Driver for the USB Cable ......31 Terminal Application Settings ..........
- Page 5 CHAPTER 8 TECHNICAL DATA ..................62 Measured Variables ..............62 Operating Environment ............63 Outputs ..................63 General ..................63 Output Cable Specifications ..........64 Spare Parts and Accessories ..........65 Dimensions in mm (inches) ..........66 VAISALA _________________________________________________________________________ 3...
- Page 6 Table 1 Manual Revisions ............... 6 Table 2 Related Manuals ................. 6 Table 3 Quantities Measured by the DMT152 ......... 9 Table 4 Standard Wiring Pinouts and Wire Colors ........ 18 Table 5 Output Noise Minimization Wiring Option Pinouts and Wire Colors ............20 Table 6 DMT152 Default Serial Interface Setting ........
-
Page 7: Chapter 1 General Information
- Chapter 2, Product Overview, introduces the features and advantages of Dewpoint Transmitter DMT152. - Chapter 3, Functional Description, describes the advanced functionality of Dewpoint Transmitter DMT152, including the auto- calibration, sensor purge, and sensor warming functions. - Chapter 4, Installation, provides you with information that helps you install the Dewpoint Transmitter DMT152. -
Page 8: Version Information
Table 2 Related Manuals Manual Code Manual Name M210866EN DMT152 Quick Reference Guide Documentation Conventions Throughout the manual, important safety considerations are highlighted as follows: WARNING Warning alerts you to a serious hazard. If you do not read and follow instructions very carefully at this point, there is a risk of injury or even death. -
Page 9: Safety
Chapter 1 _________________________________________________________ General Information Safety The Dewpoint Transmitter DMT152 delivered to you has been tested for safety and approved as shipped from the factory. Note the following precautions: CAUTION Do not modify the unit. Improper modification can damage the product or lead to malfunction. -
Page 10: Regulatory Compliances
User's Guide _______________________________________________________________________ Regulatory Compliances ® Vaisala DRYCAP Dewpoint Transmitter DMT152 is in conformity with the following EU directives, including the latest amendments, and with national legislation implementing these directives: - EMC-Directive - RoHS-Directive The conformity is shown by compliance with the following standards: - EN 61326-1: Electrical equipment for measurement, control and laboratory use - EMC requirements –... -
Page 11: Chapter 2 Product Overview
-80 ºC to -10 ºC (-112 … +14 °F). The maximum output range of the transmitter is -100 … +20 °C (-148 … +68 °F). The DMT152 is designed for a wide range of OEM applications. The transmitter is easy to install, and the mechanics have been designed for harsh environments requiring protection against dust, dirt, and splashed water. -
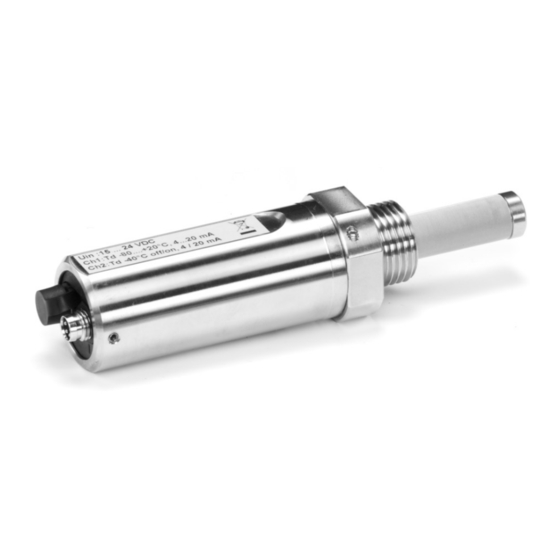
Page 12: Transmitter Structure
- Field check suitability with DM70 hand-held meter - Optional sampling cells with different installation options available as DMT152 installation accessories - LED cable option that enables a visual indication of transmitter status: LED lit when measurement is frozen (for example, purge active), blinking for malfunction alarm * When the dewpoint is below 0 °C, the transmitter outputs frostpoint... - Page 13 Connection thread: ISO G1/2", NPT 1/2", UNF 3/4"-16 2A, or UNF 5/8"-18 When installing a DMT152 transmitter with ISO or UNF thread, use a sealing ring to achieve a tight installation. Three copper sealing rings are provided with the transmitter, and more can be ordered from Vaisala.
-
Page 14: Functional Description
Auto-Calibration The auto-calibration feature of the DMT152 transmitter is an automatic procedure which greatly reduces the possible drift in the dry end of the dewpoint measurement. The auto-calibration is performed:... -
Page 15: Sensor Purge
This, together with the auto- calibration, results in a very small drift. The measurement output of the transmitter is frozen to the last measured value for the duration of the sensor purge. VAISALA ________________________________________________________________________ 13... -
Page 16: Chapter 4 Installation
Vaisala sampling cell options; see section Sampling Accessories on page 24. The DMT152 is light in weight, which means that it can be installed in a sample pipeline in the sampling cells without the need of any additional mechanical support. -
Page 17: Installing The Transmitter
Chapter 4 ________________________________________________________________ Installation Max 50 bar 0710-101 Figure 2 DMT152 Installed Directly to Pipeline Installing the Transmitter After selecting a suitable measurement location, follow the procedure below to install the transmitter: Remove the yellow transport protection cap from the transmitter. -
Page 18: Figure 4 Installing The Transmitter
Only tighten the probe from the 30mm nut. Do NOT apply force to other points in the probe body. Connect the wires of the connection cable. When using cables provided with DMT152 see the wiring section on page 18. See the power supply requirements on page 22. 0710-130... - Page 19 Chapter 4 ________________________________________________________________ Installation Turn on the power supply. The DMT152 performs self diagnostics at startup, and the output is frozen for several minutes. The transmitter will output an approximated reading after one minute, but accurate measurement will only be available after the startup procedure is complete.
-
Page 20: Wiring
User's Guide _______________________________________________________________________ Wiring Table 4 Standard Wiring Pinouts and Wire Colors Pin Connector I Connector II Wire color VDC supply+ VDC supply+ Brown Signal Ch 1+ RS-485 - / B White Blue Signal Ch 2+ / LED RS-485 + / A Black 0707-035 Figure 6... -
Page 21: Output Noise Minimization Wiring Option
- Wire only the analog outputs (V/mA) to Port I - Connect the power supply only to Port II NOTE Avoid connecting the Port I and Port II grounds (pin #3) together. 1701-067 Figure 8 Output Noise Minimization Wiring Option VAISALA ________________________________________________________________________ 19... -
Page 22: Connection Cables
RS-485 + / A Black Connection Cables The following connection cable options are available for DMT152: - Unshielded cable with M8 female straight snap-on connector - Shielded cables with M8 female straight threaded connector - Unshielded cable with LED indicator for analog channel 2, 90º... -
Page 23: Figure 10 Cable With Threaded Connector
Chapter 4 ________________________________________________________________ Installation 0910-135 Figure 10 Cable with Threaded Connector 0809-003 Figure 11 LED Cable 0809-002 Figure 12 USB Serial Interface Cable VAISALA ________________________________________________________________________ 21... -
Page 24: Power Supply Requirements
220 mA pulsed current. NOTE The DMT152 can be powered by the MI70 indicator or the Vaisala USB cable. However, the power supplied by these devices may not be enough for all functions of the transmitter (for example, the current output). -
Page 25: Sampling From Process
You can use the Vaisala Humidity Calculator to simulate the effect of pressure change to dewpoint. The Humidity Calculator can be found at www.vaisala.com/humiditycalculator. -
Page 26: Sampling Accessories
® To fit 6 mm tubing to the connectors, an adapter such as Swagelok Reducer SS-6M0-R-4 (not supplied by Vaisala) can be used. DMT242SC2 is the suitable choice in, for example, plastics drying systems, where the measurement is made by tapping off the dryer system and bringing a small air stream to the sensor. -
Page 27: Dsc74 Sampling Cell With Quick Connector And Leak Screw
PTFE thread seal tape. Tighten with an open-end wrench. 0507-105 Figure 14 DSC74 Sampling Cell with Accessories Thread adapter type G3/8" - G1/2" Thread adapter type G3/8" - G1/4" Quick connector Leak screw Sampling cell body (DMT242SC) VAISALA ________________________________________________________________________ 25... -
Page 28: Dsc74B Two Pressure Sampling Cell
Harmful gases can be recovered by connecting a collection system at the outlet (not available from Vaisala). In the basic operation of the DSC74B, the gas flows to the sensor from the front and the outlet is on the side. -
Page 29: Dsc74C Two-Pressure Sampling Cell With Coil
- Sampling cell, thread G3/8" - Connection part with a needle valve and an integrated leak screw - Reducing Nipple (thread adapter), G3/8" - G1/2" - Reducing Adapter (thread adapter), G3/8" - G1/4" - Diffusion coil (for measurements in atmospheric pressure) VAISALA ________________________________________________________________________ 27... -
Page 30: Figure 17 Default Assembly Of Dsc74C
User's Guide _______________________________________________________________________ 0510-034 Figure 17 Default Assembly of DSC74C Gas goes in. The coil can also be used here. Gas comes out Coil Valve 28 ___________________________________________________________________ M210865EN-H... -
Page 31: Figure 18 Alternative Assembly Of Dsc74C (For Tight Spaces)
Alternative Assembly of DSC74C (for Tight Spaces) Gas comes out Coil Thread, max. size 7 mm Gas goes in Valve The thread size cannot exceed 7 mm. Use the provided adapter to avoid damage to the probe. VAISALA ________________________________________________________________________ 29... -
Page 32: Nw40 Mounting Flange
An NW40 mounting flange (Vaisala order code 225220SP) is available for installations through thin chamber walls or into vacuum processes. The flange is compatible with ISO G1/2" threaded transmitters. NOTE Vaisala does not provide the flange counterpart, only the attachment for DMT152. 0908-085 Figure 19... -
Page 33: Serial Line Operation
Serial Communication Connecting to the Serial Interface The DMT152 can be connected to a PC using the RS-485 line on Port II. You can use, for example, the USB serial interface cable (Vaisala order code 219690). The cable also provides enough operating power for transmitter configuration purposes from the USB port. -
Page 34: Terminal Application Settings
Terminal Application Settings The default settings of the DMT152 serial interface are presented in Table 6. If the settings of your DMT152 have been changed and you do not know what they are, see section Unknown Serial Settings on page 59. -
Page 35: Figure 21 Putty Terminal Application
To access the configuration screen while a session is running, click the right mouse button over the session window, and select Change Settings... from the pop-up menu. 0807-004 Figure 21 PuTTY Terminal Application VAISALA ________________________________________________________________________ 33... -
Page 36: List Of Serial Commands
INTV [0 … 255 Set the continuous output interval (for RUN mode and S/MIN/H] R command) Set voltage for LED alarm (not needed with Vaisala LED cable) Set the molar mass of the process gas (used in ppm calculation) OPEN [0 … 99]... -
Page 37: Device Information And Status
If the transmitter is in poll mode, but a connection has not been opened using the OPEN command, issue the ?? command. For a description of the serial interface modes, see section Set Serial Interface Mode on page ??<cr> VAISALA ________________________________________________________________________ 35... -
Page 38: Show Transmitter Status
1110 Settling period after purge, output frozen 0000 Normal measurement Example: stat 0000 NOTE It is normal for measurement output to freeze temporarily if the measurement environment is changing rapidly. Show Firmware Version VERS<cr> Example: vers DMT152 / 1.10 36 ___________________________________________________________________ M210865EN-H... -
Page 39: Configuring Analog Outputs
The LED will not light up for the limit alarm. Additionally, DMT152 has a malfunction alarm that is always enabled in normal operation mode. The malfunction alarm can also be enabled for a channel in ON/OFF output mode. See section Malfunction Alarm on page 40. -
Page 40: Limit Alarm
5 = 0 ... 10 V 6 = LED alarm 7 = I alarm (ON/OFF output using current) 8 = U alarm (ON/OFF output using voltage) Enable mode 6 for channel 2 if you are using the Vaisala LED cable. Example: amode 2 1 Ch1 output : 4 ... -
Page 41: Purge Status Alarm
During auto-calibration, the output is not frozen, that is, the output of the purge status alarm is on Level Lo. STATUS<cr> The following example shows the purge status alarm enabled for channel 1: status Channel 1: Status VAISALA ________________________________________________________________________ 39... -
Page 42: Malfunction Alarm
User's Guide _______________________________________________________________________ Level Lo 0.00 Level Hi 5.00 Channel 2: Status Level Lo 0.00 Level Hi 0.00 Level Lo and Level Hi are shared between the STATUS and ALARM commands. For example, if you change the levels using the alarm command, they will also change when viewing the status command. -
Page 43: Configuring Serial Line Operation
With the SDELAY command you can set delay (response time) of the serial line or view the currently set delay value. Increasing the value by one increases the delay by 4 milliseconds. For example, value of 5 equals ~20 ms answer delay. VAISALA ________________________________________________________________________ 41... -
Page 44: Set Transmitter Address
User's Guide _______________________________________________________________________ SDELAY [x]<cr> where x = Serial line delay (0 … 255) Example: sdelay 1 Serial delay Set Transmitter Address To operate in the POLL mode, the transmitter must have an address. If multiple transmitters share the same serial line, each transmitter must have a different address. -
Page 45: Select Unit
4.2 TDF #r #n form 3.1 “H2O= “ ppm “ “ U3 #r #n Select Unit The DMT152 Transmitter outputs dewpoint temperature T in either Celsius or Fahrenheit degrees depending on the unit selection. The unit selection also affects the unit (bar or psi ) for the pressure compensation. -
Page 46: Set Serial Interface Mode
User's Guide _______________________________________________________________________ where Selects the unit type to output: m = metric units (for example, celcius) n = nonmetric units (for example, fahrenheit) Set Serial Interface Mode SMODE [xxx]<cr> where STOP, RUN, or POLL In STOP mode: outputting only when command is issued, any command can be used. -
Page 47: Configuring Measurement Parameters
Set Pressure Value for ppm Calculation ® The DRYCAP 180U sensor in the DMT152 is not pressure-dependent. When measuring dewpoint, pressure compensation is not needed. However, in the calculation of ppm volume concentration, the pressure of the system must be known. If you did not specify pressure compensation when ordering the product, use the commands below to enable the pressure compensation and set the pressure value. -
Page 48: Table 10 Pressure Conversion Coefficients
Conversions from mmHg and inHg are defined at 0 °C and from O and inH O at 4 °C. NOTE You can also set the pressure compensation value when you connect the DMT152 to the MI70 indicator. When using the MI70, the pressure unit is bar 46 ___________________________________________________________________ M210865EN-H... -
Page 49: Set Molar Mass For Ppmw Calculation
MOL [n]<cr> where = Molar mass (in g/mol) of the gas in the measurement environment Examples: mol 146.06 146.0600 146.0600 NOTE You can also set the molar mass when you connect the DMT152 to the MI70 indicator. VAISALA ________________________________________________________________________ 47... -
Page 50: Serial Line Output Commands
User's Guide _______________________________________________________________________ Serial Line Output Commands Start Measurement Output Use the R command to start the continuous outputting of measurement values as an ASCII text string to the serial line. The format of the measurement message is set with the FORM command. R<cr>... -
Page 51: Output A Reading Once
Troubleshooting and Maintenance Commands Display Currently Active Errors Use the ERRS command to display the currently active transmitter error codes. Possible errors and their causes are listed in Table 11 on page 60. ERRS<cr> Example: errs Voltage too low error VAISALA ________________________________________________________________________ 49... -
Page 52: Test Analog Outputs
Channel 1 output value (V or mA) Channel 2 output value (V or mA) The output shows the test values of the analog channels as well as diagnostic information that may be useful to Vaisala Service if there is a problem with the analog outputs. Example: atest 1 15 1.00... -
Page 53: Calibrate Analog Output
0 … 5 V (-80 °C … -30 °C). After giving the AOVER ON command, the range is 0 … 5.5 V (-80 °C … -25 °C). Note that the -30 °C T point is still at 5 V. Example: aover on : ON VAISALA ________________________________________________________________________ 51... -
Page 54: Other Commands
Use the OPEN command to connect to a transmitter that is in POLL mode. OPEN [aa]<cr> where address (0 ... 99) Example: open 1 DMT152 1 line opened for operator commands Closing the Connection to a Transmitter in POLL Mode The CLOSE command closes the connection to a transmitter. CLOSE<cr> Example:... -
Page 55: Reset Transmitter
With the LED command, you can set the supply voltage that is provided to the LED when the LED alarm mode is used. If you are using the Vaisala LED cable, leave this setting at the default voltage (2.80 V). LED<cr>... -
Page 56: Chapter 6 Maintenance
Changing the Filter If the filter is contaminated, it should be replaced. New filters can be ordered from Vaisala, with the order code 220957. Be careful when changing the filter, since it is easy to break the sensor when the filter is removed. -
Page 57: Calibration And Adjustment
You can perform a simple field checking operation by comparing the readings of the DMT152 and the DM70 hand-held dewpoint meter with a calibrated reference probe. For more information, see section Field Check Using DM70 on page 56. -
Page 58: Field Check Using Dm70
User's Guide _______________________________________________________________________ Field Check Using DM70 To check of the accuracy of the DMT152 in the field, you need the following equipment: - A fully charged MI70 indicator (the measurement display that is included in the DM70 package) - A calibrated reference probe that is suitable for the intended measurement environment and dewpoint range. - Page 59 NOTE Some notes on using the MI70 indicator with the DMT152: - If you disconnect the DMT152 while the MI70 indicator is on, the quantities measured will remain on the screen, but no measurement will be shown.
-
Page 60: Chapter 7 Troubleshooting
This chapter describes common problems, their probable causes and remedies, and provides contact information for technical support. Typical Problems If you have a problem with the DMT152, first read the following sections concerning the behavior and error indications of the transmitter: - Configuring Analog Outputs on page 37... -
Page 61: Unknown Serial Settings
For instructions on using the command, see page 41. Error State If the voltage supplied to the DMT152 is too low for reliable operation, or fluctuates heavily, or there is some serious problem that prevents measurement, the DMT152 will enter an error state. The error state is... -
Page 62: Error Codes
User's Guide _______________________________________________________________________ Error Codes The transmitter has error codes that can be displayed on the serial line using the ERRS command. See section Display Currently Active Errors on page 49. Table 11 Error Codes Error Code Cause Ambient temperature error Ambient temperature out of operating range (probably too hot). -
Page 63: Technical Support
Chapter 7 ____________________________________________________________ Troubleshooting Technical Support For technical questions, contact the Vaisala technical support by e-mail at helpdesk@vaisala.com. Provide at least the following supporting information: - Name and model of the product in question. - Serial number of the product. -
Page 64: Chapter 8 Technical Data
User's Guide _______________________________________________________________________ CHAPTER 8 TECHNICAL DATA This chapter provides the technical data of Dewpoint Transmitter DMT152. Measured Variables Dewpoint temperature Measurement range -80 … -10 °C (-112 … +14 °F) T Accuracy -80 … -40 °C (-112 … -40 °F) ±... -
Page 65: Operating Environment
50 bar (725 psia) the supply voltage must be 21 ... 28 VDC. Operating voltage fluctuation max. 0.3 V Supply current normal measurement 20 mA + load current during self-diagnostics max. 220 mA pulsed Load for voltage output min. 10 kOhm current output max. 500 Ohm VAISALA ________________________________________________________________________ 63... -
Page 66: Output Cable Specifications
User's Guide _______________________________________________________________________ Housing material AISI316L and PPS Stainless steel mesh filter AISI303, filter grade 18 µm Mechanical connections option 1 ISO G1/2" option 2 NPT 1/2" option 3 UNF 3/4"-16 option 4 UNF 5/8"-18 IP rating IP66 Storage temperature range -40 …... -
Page 67: Spare Parts And Accessories
Sampling cells (available only for ISO G1/2”) Sampling cell DMT242SC Sampling cell with 1/4" male Swagelok connectors DMT242SC2 Sampling cell with quick connector and leak screw DSC74 Two-pressure sampling cell DSC74B Separate cooling/venting coil for sampling cells DMCOIL VAISALA ________________________________________________________________________ 65... -
Page 68: Dimensions In Mm (Inches)
User's Guide _______________________________________________________________________ Dimensions in mm (inches) 1306-156 Figure 25 DMT152 Dimensions 66 ___________________________________________________________________ M210865EN-H... - Page 69 *M210865EN*...