Table of Contents
Advertisement
Quick Links
Advertisement
Table of Contents

Related Manuals for Accu-Chek WX3-122


Summary of Contents for Accu-Chek WX3-122
- Page 1 User’s Manual Blood Glucose Meter...
-
Page 3: Table Of Contents
Contents Introduction ..........................3 Chapter 1: Your New System ....................5 Chapter 2: Blood Glucose Tests .....................11 Chapter 3: Control Tests ......................19 Chapter 4: Review Your Data....................25 Chapter 5: Wireless Communication and Meter Pairing ............27 Chapter 6: Connecting to a PC ....................31 Chapter 7: Meter Maintenance and Troubleshooting .............33 Chapter 8: Technical Information ..................41 Chapter 9: Guarantee ......................47... -
Page 5: Introduction
The Accu-Chek Instant test strips with the Accu-Chek Instant meter are intended for in vitro diagnostic self-testing by people with diabetes. - Page 6 Introduction...
-
Page 7: Chapter 1: Your New System
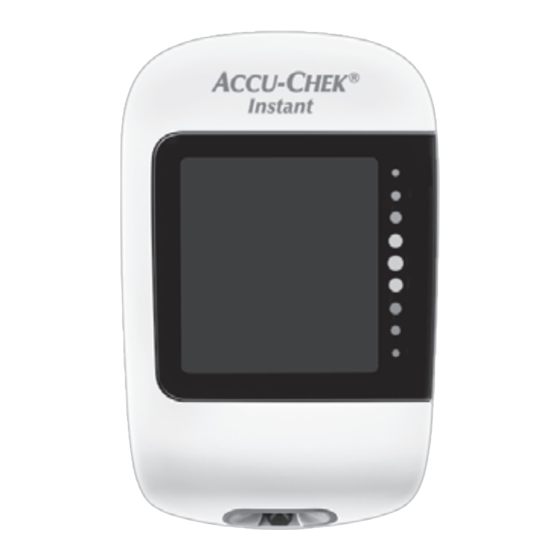
Your New System The Accu-Chek Instant Meter Right Side View Front View Left Side View 1. Meter Button 3. Target Range Indicator Press to turn the meter on and off, Indicates whether your blood glucose result move to the next screen, or make a falls above, within, or below a pre-set range of selection. - Page 8 Your New System Underside View Back View 5. Battery Door 6. Test Strip Slot Open to replace batteries. Insert test strip here.
- Page 9 Your New System (for example) Test Strip 7. Test Strip Container* 11. Batteries 8. Metallic End 12. USB Cable* Insert this end into the meter. Connects the meter to a PC. 9. Yellow Edge * Some items may not be included in the kit. Touch blood drop or control solution here.
-
Page 10: Time And Date
Your New System Using the Meter Button Your new meter has only one button, but it performs many actions. Press the meter button once to turn the meter on and see your most recent blood glucose result. Continue pressing to view your 7-, 30-, and 90-day blood glucose averages. - Page 11 Your New System Symbols Symbol Description Last test result symbol. This indicates that you are viewing your last blood glucose result. 7-day average symbol. This indicates that you are viewing the 7-day average of your blood glucose results. 30-day average symbol. This indicates that you are viewing the 30-day average of your blood glucose results.
- Page 12 Your New System...
-
Page 13: Chapter 2: Blood Glucose Tests
Blood Glucose Tests w WARNING Blood glucose results can be displayed in either mg/dL or mmol/L. The back label of the meter shows the unit of measurement. If the meter shows the wrong unit, contact Roche. If you do not know which unit of measurement is correct for you, contact your healthcare professional. -
Page 14: Performing A Blood Glucose Test With Blood From Your Fingertip
Blood Glucose Tests Using the Accu-Chek Instant System • Use only Accu-Chek Instant test strips. • Use the test strip immediately after removing it from the test strip container. • Do not apply blood or control solution to the test strip before inserting it into the meter. - Page 15 Blood Glucose Tests Wash your hands with warm Check the use by date on the Remove a test strip from the soapy water and dry thoroughly. test strip container. test strip container. Prepare the lancing device. Do not use test strips past the Close the cap tightly.
- Page 16 Blood Glucose Tests Gently squeeze your finger to Touch the yellow edge of the test strip to the blood drop. Remove assist the blood flow. This helps your finger from the test strip when the flashing hourglass symbol you get a blood drop. appears.
- Page 17 Blood Glucose Tests Blue Test result is above the target range. Green Test result is within the target range. Test result is below the target range. Your test result appears with an arrow. This arrow shows if your test result falls above, within, or below the target range.* The target range is represented by the green region of the target range indicator.
- Page 18 Blood Glucose Tests Performing a Blood Glucose Test with Blood from Your Palm, Forearm, or Upper Arm (Alternative Site Testing) w WARNING Do not use alternative site testing to calibrate a continuous glucose monitoring system or to make insulin dosing calculations. You have the option of obtaining a blood sample from other sites on your body besides the fingertip.
-
Page 19: Unusual Blood Glucose Results
Blood Glucose Tests Unusual Blood Glucose Results If your blood glucose result does not match how you feel, check this list to help solve the problem. Troubleshooting Checks Action Were the test strips expired? Discard the test strips if they are past the use by date. -
Page 20: Symptoms Of Low Or High Blood Glucose
Blood Glucose Tests Symptoms of Low or High Blood Glucose Being aware of the symptoms of low or high blood glucose can help you understand your test results and decide what to do if they seem unusual. Low blood glucose (hypoglycaemia): Symptoms of hypoglycaemia may include, but are not limited to, anxiety, shakiness, sweating, headache, increased hunger, dizziness, pale skin colour, sudden change in mood or irritability, fatigue, difficulty concentrating, clumsiness, palpitations, and/or confusion. -
Page 21: Chapter 3: Control Tests
• you want to check if you are performing the test correctly. About the Control Solutions • Use only Accu-Chek Instant control solutions. • Close the control solution bottle tightly after use. • Write the date you open the control solution bottle on the bottle label. The control solution must be discarded 3 months from the date the control solution bottle was opened (discard date) or on the use by... -
Page 22: Performing A Control Test
Control Tests Performing a Control Test You need the meter, a test strip, and control solution Level 1 or Level 2. Check the use by date on Remove a test strip from the the test strip container. Do test strip container. not use test strips past the Close the cap tightly. - Page 23 Control Tests Select the control solution to Remove the bottle cap. Wipe the tip test. You will enter the level of the bottle with a tissue. Squeeze later in the test. the bottle until a tiny drop forms at the tip. A flashing hourglass Touch the drop to the yellow symbol appears when...
- Page 24 Control Tests The control result appears. Press the meter button. If you tested with Level 1 control If you tested with Level 2 control solution, the L-1 screen appears. solution, the L-2 screen appears. Press and hold the meter button Press and hold the meter button to confirm that you tested with to confirm that you tested with...
- Page 25 Control Tests Err appears if the control OK appears if the control Wipe the tip of the bottle result is out of range. result is within range. with a tissue. Cap the bottle tightly. Remove and discard the used test strip. NOTE The meter turns off 90 seconds after a successful test or 15 seconds after the test strip is removed, provided no other action is taken.
- Page 26 Control Tests Understanding Out-of-Range Control Results w WARNING The control solution ranges are printed on the test strip container label. If the control result is out of range, check this list to help solve the problem. Troubleshooting Checks Action Were the test strips or control solutions expired? Discard the test strips or control solution if either is past the use by date.
-
Page 27: Chapter 4: Review Your Data
Review Your Data Overview • The meter automatically stores at least 720 blood glucose results in memory, but only the last blood glucose result and your 7-, 30-, and 90-day averages can be viewed on the meter. To view stored blood glucose results, transfer them to a compatible software application. - Page 28 Review Your Data Reviewing Your Test Result Averages The meter uses all of your blood glucose results from the past 7, 30, or 90 days to calculate a single number. This number is called the average, and helps you to understand your blood glucose results over a given period of time.
-
Page 29: Chapter 5: Wireless Communication And Meter Pairing
Wireless Communication and Meter Pairing Overview The process of creating a connection between the meter and the mobile device is called pairing. You will need an application on your mobile device that can accept the meter’s data. You can use this application to wirelessly and automatically synchronise your diabetes information between the meter and the mobile device. - Page 30 Wireless Communication and Meter Pairing On Your Meter OK appears if pairing is successful. Err appears if pairing is unsuccessful. Transferring Data Wirelessly If the meter is paired with a mobile device and Bluetooth is on, your test results will be sent to the paired device automatically.
- Page 31 Wireless Communication and Meter Pairing Turning Bluetooth Off Turn Bluetooth off to disable wireless communication (flight mode). Turning Bluetooth off will not unpair your meter. With the meter off, press the meter button to turn the meter on. The last test result screen appears. Press and hold the meter button until the Bluetooth symbol disappears.
- Page 32 Wireless Communication and Meter Pairing Turning Bluetooth On If you have turned Bluetooth off, follow the steps below to turn it back on. This will enable wireless communication with your mobile device. With the meter off, press the meter button to turn the meter on. The last test result screen appears.
-
Page 33: Chapter 6: Connecting To A Pc
Connecting to a PC Connecting the Meter to a PC Using a USB Cable Follow the steps below to access diabetes management software on a PC. You can use this software to view stored results, set the meter time and date, and change the target range. Start the diabetes management software and initiate a data... - Page 34 Connecting to a PC...
-
Page 35: Chapter 7: Meter Maintenance And Troubleshooting
Meter Maintenance and Troubleshooting Meter Maintenance The meter automatically tests its own systems every time you turn it on and lets you know if something is wrong. See the Error Messages section of this chapter. If you drop the meter or think the results are not accurate, contact Roche. Changing the Batteries SN XXXXXXXXXXX Open the battery door on the... -
Page 36: Checking The Meter Display
Meter Maintenance and Troubleshooting Checking the Meter Display With the meter off, press the meter button to turn the meter on. Press the meter button twice to display the 30-day average screen. Press and hold the meter button until all display segments appear. -
Page 37: Cleaning The Meter
Meter Maintenance and Troubleshooting Cleaning the Meter Keep the meter free of dust. If you need to clean or disinfect it, follow these guidelines carefully to help you get the best performance possible. w WARNING • Do not allow liquid to enter any openings in the meter. •... -
Page 38: Error Messages
Meter Maintenance and Troubleshooting Error Messages w WARNING • Never make therapy decisions based on an error message. • If you have any concerns or see any other error message, contact Roche. Error Messages NOTE • The error code and Err will alternate on the display for all coded error messages (E-1 through E 14). The meter will not turn on or The meter is connected to a PC The meter was unable to pair... - Page 39 Meter Maintenance and Troubleshooting (The error code and Err will (The error code and Err will alternate on the display.) alternate on the display.) A meter or test strip error has occurred. The test strip may be damaged, Repeat the blood glucose test. If a second E-3 code appears, not properly inserted, or was perform a control test with the control solution and a new previously used.
- Page 40 Meter Maintenance and Troubleshooting (The error code and Err will alternate on the display.) (The error code and Err will alternate on the display.) Not enough blood or control solution was drawn Blood or control solution was applied to the test into the test strip for measurement or was strip before the flashing drop symbol appeared applied after the test had started.
- Page 41 Meter Maintenance and Troubleshooting (The error code and Err will alternate on the display.) (The error code and Err will alternate on the display.) The batteries are almost out of power. The meter’s internal clock may need to be reset. Change the batteries now.
- Page 42 Meter Maintenance and Troubleshooting (The error code and Err will alternate on the display.) (The error code and Err will alternate on the display.) Fluid or foreign material may be present in the An electronic error has occurred. test strip slot. Contact Roche.
-
Page 43: Chapter 8: Technical Information
Technical Information Product Limitations See the literature packaged with the test strips and control solutions for the latest information on product specifications and limitations. Specifications Blood volume Refer to the test strip package insert. Sample type Measuring time Measuring range Test strip storage conditions System operating conditions Meter storage conditions... - Page 44 Performance Analysis – Refer to the test strip package insert. Test Principle – Refer to the test strip package insert. Declaration of Conformity – Roche hereby declares that the Accu-Chek Instant blood glucose meter conforms with the basic requirements and other relevant regulations of the European Directives 1999/5/EC and 2014/53/EU once solely applicable.
-
Page 45: Product Safety Information
Technical Information Product Safety Information w WARNING • Strong electromagnetic fields may interfere with the proper operation of the meter. Do not use the meter close to sources of strong electromagnetic radiation. • To avoid electrostatic discharge, do not use the meter in a very dry environment, especially one in which synthetic materials are present. -
Page 46: Explanation Of Symbols
Technical Information Explanation of Symbols These symbols may appear on the packaging, on the type plate, and in the instructions for the Accu-Chek Instant meter. Consult instructions for use Biological Risks – used meters carry a risk of infection. Caution, refer to safety-related notes in the instructions for use accompanying this product. -
Page 47: Additional Supplies
Technical Information Additional Supplies Test Strips: Accu-Chek Instant test strips Control Solutions: Accu-Chek Instant control solutions Information for Healthcare Professionals w WARNING Healthcare Professionals: Follow the infection control procedures appropriate for your facility. Refer to the test strip package insert for additional healthcare professional information. - Page 48 Technical Information...
-
Page 49: Chapter 9: Guarantee
Guarantee Guarantee The statutory provisions on rights in consumer goods sales in the country of purchase shall apply. -
Page 50: Index
Index alternative site testing 16, 45 supplies 7, 45 averages 9, 26 symbols IVD 44 meter display 9 batteries, changing 33 battery type 33, 41 blood glucose results, unusual 17 target range 8, 15 blood glucose test, performing 12 target range indicator 5, 15 button, functions 5, 8 technical information 41 test strips 12... - Page 51 Customer Assist Care Hotline: (02) 718 7575 / (02) 718 7588 (+63) 917 897 8000 www.accu-chek.com Saudi Arabia / United Arab Emirates Master Distributor in the Middle East: Accu-Chek Enquiry Line: +971 (0) 4 8169 000 www.accu-chekarabia.com/arabic LAST UPDATE: 2016-07...
- Page 52 68305 Mannheim, Germany www.accu-chek.com ACCU-CHEK, ACCU-CHEK CONNECT, and ACCU-CHEK INSTANT are trademarks of Roche. CONTINUA, the CONTINUA logos and CONTINUA CERTIFIED are trademarks, service marks, or certification marks of the Continua Health Alliance. CONTINUA is a registered trademark in some, but not all, countries in which this product is distributed.