Table of Contents
Advertisement
Available languages
Available languages
0310780CWM
ITM. / ART. 1031509
Model / Modèle / Modelo: LG Champion
Part / Pièce / Parte: 61500
Important: Read carefully, save these
instructions!
Important : Lire attentivement et conserver
ces instructions!
Importante : ¡Lea atentamente y conserve
estas instrucciones!
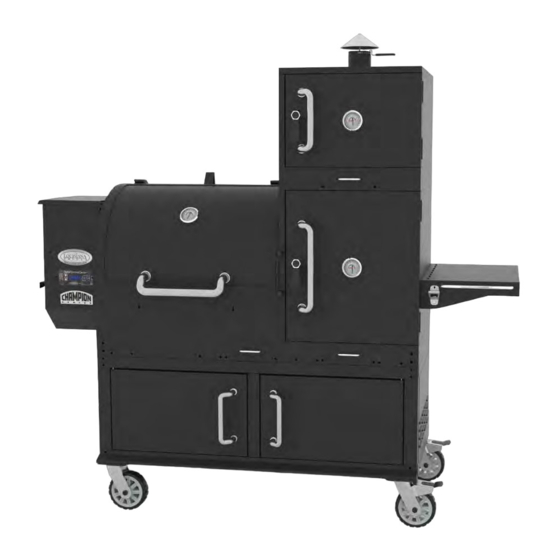
Wood Pellet Grill
and Smoker
instructions and use
Barbecue-fumoir
aux granules de bois
Instructions et utilisation
Asador y ahumador
de pellets de madera
Instrucciones y uso
WARNING: Please read the entire manual before in-
stallation and use of this electric, pellet fuel-burning
appliance. Failure to follow these instructions could re-
sult in property damage, bodily injury or even death.
Contact local building or fire officials about restrictions
and installation inspection requirements in your area.
AVERTISSEMENT : Veuillez lire l'intégralité du manuel avant
l'installation et l'utilisation de cet appareil électronique aux
granules. Le non-respect de ces instructions peut entraîner
des dommages aux biens, des blessures ou même la mort.
Communiquez avec les autorités locales en matière d'incend-
ie et de bâtiment concernant les restrictions et les exigences
d'installation dans votre région.
ADVERTENCI: Lea el manual completo antes de instalar y
utilizar este aparato eléctrico para quemar pellets de com-
bustible. Incumplir estas instrucciones podría causar daños
materiales, lesiones corporales, e incluso la muerte. Consulte
a sus funcionarios locales de construcción y control de incen-
dios para informarse sobre las restricciones y los requisitos de
inspección de instalaciones en su región.
MANUAL MUST BE READ BEFORE OPERATING! | VOUS DEVEZ LIRE CE GUIDE AVANT D'UTILISER LE BARBECUE!
¡DEBE LEER EL MANUAL ANTES DE LA OPERACIÓN!
Advertisement
Chapters
Table of Contents

Related Manuals for Louisiana Grills LG Champion 61500


Summary of Contents for Louisiana Grills LG Champion 61500
- Page 1 0310780CWM ITM. / ART. 1031509 Model / Modèle / Modelo: LG Champion Part / Pièce / Parte: 61500 Important: Read carefully, save these instructions! Important : Lire attentivement et conserver ces instructions! Importante : ¡Lea atentamente y conserve estas instrucciones! Wood Pellet Grill and Smoker instructions and use...
-
Page 2: Dangers And Warnings
• DO NOT use lava rock, wood chunks, wood shavings or charcoal in your Louisiana Grills wood pellet grill. • DO NOT use accessories not specified for use with this appliance. - Page 3 DANGERS AND WARNINGS WARNING: DO NOT over-fire your LG Champion wood pellet grill. Improper Use Can Cause Uncontrolled Fire. FUEL - WOOD PELLETS • YOU MUST only use all natural wood pellets, designed for burning in pellet grills. Any other type of fuel burn in this appliance will void the warranty and safety listing.
- Page 4 Dear “Champion” wood pellet grill owner: Thank you for choosing to purchase a “Louisiana Grills Champion” wood pellet smoking’ grill. Cooking with your Louisiana Wood Pellet Grill is about to bring you full circle from the days of the caveman when cooking outdoors with wood was a necessity, to cooking indoors in your modern kitchen and now back to the great outdoors and that savory wood flavor.
-
Page 5: Table Of Contents
TABLE OF CONTENTS Dangers and Warnings ........... 2 Operation Getting Started ..................22 Assembly Instructions Initial Set-Up Procedure ..............22 Specs ......................6 Lighting - Automatic/Manual ............24 Parts Explosion ..................7 Shutting Off Your Smoker ..............24 Safety Testing ..................8 Maintenance .............. -
Page 6: Specs
YOUR NEW LG CHAMPION WOOD PELLET GRILL Large 12.3 kg (27 lb.) Hopper Damper controlled chimney. capacity. Easy flip up top, with Duel rear exhaust control. rounded edges. Time proven metal Cold Smoker / auger feed system. Warming Cabinet 2 oven racks. Porcelain coated cast iron cooking grids Solid side shelf with... -
Page 7: Parts Explosion
UNPACKING YOUR LG CHAMPION PELLET GRILL When you open your smoker/grill, please ensure you have and can identify all the following parts: Part Items found in the box Spring Washers - Wheels Wheels 12.7cm (5 in.) dia-locking swivel Washers - Wheels Wheels 12.7cm (5 in.) - non swivel Phillips screws Main Lid Stopper... -
Page 8: Assembly Instructions
SAFETY TESTING In accordance with the procedures and specifications listed in UL SUBJECT 2728-2009 “PELLET FUEL COOKING APPLIANCES” AND CANADIAN ULC/ORD C2728 and CSA C22.2 #3 “FOR ELECTRICAL FEATURES OF FUEL BURNING EQUIPMENT. ” The Champion pellet cooking appliance has been independently tested and listed by INTERTEK (an accredited testing laboratory) to ETL, UL, ULC and CSA standards. -
Page 9: Champion Hopper Assembly
Installation: The bottom portion of the main cabinet, has threaded plates installed to allow for two (2) locking and two (2) non-locking heavy duty wheels to be installed. • To ease installation, place a soft protective covering on the floor, then carefully tip the main cabinet with the non-hopper end, onto the floor covering. - Page 10 • Using two (2) Phillips screws (D), washers (G) and spring washers (F) secure the handle to hopper access panel, just above the fan intake, through the two (2) large holes provided. • Begin by hand starting the threads, then use your Phillips screwdriver to secure. Step 2 - Preparing for the Hopper: Place six (6) Multi-head screws (E), washers (G) and spring washers (F) into the main barrel cavity to aid in installing the hopper.
-
Page 11: Igniter
Now with the hopper partially secured, hand start the remaining five (5) multi-heads screws, spring washers and washers. When complete secure firmly into place, using the proper tool. NOTE: Taking extra care not to strip the screw heads will aid in the future. INSTALLING THE IGNITER ASSEMBLY Parts Required: 2 x Phillips Metal Screws (H) -
Page 12: Handle, Adjustable Chimney
• Take the Arched Flame Broiler bottom, and hold it so that the end with the cut out and slots is in your left hand. The plate then clips easily over the adjustable mounting bracket (B). • Take the Arched Flame Broiler Slider Top, (D) and place it on top of the bottom (C). -
Page 13: Heat Panel, Deflector
Installation: Place the upper cabinet on a table or solid working space, to make installation easier. • Screw the chimney cap through the adjustable damper and into the chimney base. • Ensure to leave at least one 25 mm, (1”), distance between the top cap and the chimney base. -
Page 14: Upper Cabinet, Side Shelf
Installation: Door Handles • Remove the two (2) screws from each handle. • Insert the Phillips screw through the back of each of the 4 cabinet doors, slide the bezel onto the screw, and then line up the handle. Secure in place. Twist Lock Handles •... -
Page 15: Grease Trays, Dampers, Grids
• Insert the screws through the two (2) holes provided in front of the side shelf top, #23. • Use a Phillips screwdriver to tighten to a snug, secure fit. Step 3 Bottle Opener • Remove the two (2) screws pre-installed in the shelf. •... -
Page 16: Rack Supports, Oven Rack
INSTALL THE MAIN COOKING SURFACES Parts required: 2 x Porcelain Coated Cast Iron Main Cooking Grids 2 x Porcelain Coated Steel Upper Racks 1 x Porcelain Coated Steel Upper Rack Installation: • Slip main grids into place • Set upper cooking grids into appropriate grid holders. INSTALL THE RACK SUPPORTS Parts required: 2 x Porcelain coated rack support - short... -
Page 17: Power Supply
• Remove the main cooking grids. • Insert the main steamer body into the hole provided in the right hand-side of the main flame broiler. • Fill the cavity with water or liquid of your choice. • Cover with the vented steamer lid. TIP: When not in use, it is best to remove the steam box from the flame broiler and unit. - Page 18 • A “CLOSED” arched flame broiler protects the food from direct contact with the flame; gives a large hot metal area to help evaporate the juices back into the cooking resulting in added flavor, channels excess grease directly to a grease pail; and distributes the heat evenly throughout the cooking area.
-
Page 19: Digital Control Center-G2
PRIME TOUCH PAD This touch pad performs the same function as it has with any Louisiana Grills board. Asked for from the competition cookers. When the touch pad is pressed and held, the FUEL FEED system will turn and feed more pellets to the burn grate. -
Page 20: Programmable Meat Probe
PROGRAMMABLE INTERNAL FOOD PROBE The digital control center programmable food probe is the newest addition to the Louisiana Grills family and is a “must have” tool for the beginner or professional “Pit-master. ” By simply plugging the internal food probe into the board, then placing the... -
Page 21: Operation
then automatically drop the “grill” cooking temperature to 82oC / 180oF. It will alert you by an audio “BEEP”, six times. The grill temperature set point will automatically drop to 82oC / 180oF. TIP: To aid in cleaning, spray the meat probe with a non-stick spray or wipe with cooking oil before using. TIP: All our digital controls and probes do have a manufacturer +/- tolerance. -
Page 22: Initial Set-Up Procedure
With today’s lifestyle of striving to eat healthy and nutritious foods, one factor to consider is the importance of reducing fat intake. One of the best ways to cut down on fat in your diet is to use a low fat method of cooking, such as grilling. Because a pellet grill uses natural wood pellets, the savory wood flavor is cooked into the meats, thus reducing the need for high sugar content sauces. - Page 23 The following is a list of the important tips that will contribute to the cooking perfection that you expect when using your LG Champion pellet grill/smoker. Note: The temperature readout on the control board may NOT exactly match the dome thermometer. High Temperatures 204o - 315oC / 400o to 600oF The HIGH range will give an oven temperature of over 204o - 315oC / 400 to 600oF, depending on the weather.
-
Page 24: Getting Started
GETTING STARTED START-UP PROCEDURE - AUTOMATIC Always inspect, and clean if necessary, the burn pot, burn grate, igniter, flame broiler, cooking surfaces, hopper and wood pellet fuel before using your grill. Step 1: Plug the power cord into a 110Volt grounded electrical outlet. DO NOT break the ground end off the cord or use a non- grounded outlet or extension cord. -
Page 25: Maintenance
When finished cooking on your Champion, set your desired temperature to 232oC to 260oC / 450oF to 500oF. Let your grill run for 5 to 15 minutes, depending on what you just cooked, to go through its normal cleaning method. If you were preparing meats that were extra greasy, such as anything in BACON, it is a good practice to allow the grill to burn off for an extra 10 to 20 minutes. - Page 26 COOKING GRIDS When new, wash thoroughly with warm soapy water, place back in the smoker and PREHEAT the grill for 20 to 30 minutes. After the completion of grilling, open the lid and with a long handle grill cleaning brush give the grids a thorough cleaning. If you do not have a cleaning brush use long handle tongs and a balled up piece of aluminum foil wrap.
- Page 27 BURN POT The burn pot is the pot that the burn grate sits in. It has a solid, sealed bottom along with a slot, to permanently screw the pot to the barrel bottom as well as two screws to secure it to the barrel end. The burn pot is also sealed to the barrel end, inside and outside, as well as along the bottom.
-
Page 28: Grilling Tips And Techniques
Sear meats and cook with lid down for perfectly grilled food every time. • All Louisiana Grills are designed to allow even fan forced heat circulation, so foods cook evenly on all sides. Leave at least 2.54 cm (1”) of clearance between the food and the hood for proper heat flow. - Page 29 temperature of 50oC / 120oF. • Use long-handled tongs for turning all meats and spatulas for turning burgers and fish. Do not use a fork for turning, as it will pierce the meat allowing the flavorful juices to escape. • Misting or mopping are great ways to keep meat from drying out when going SLOW and LOW.
-
Page 30: Trouble Shooting
TROUBLE SHOOTING Proper cleaning, maintenance and the use of clean, dry, quality fuel will prevent common grill operational problems. However, when your Louisiana Grill is simply operating poorly, or not at all, the following trouble shooting tips may be helpful. The following is not an exhaustive list. - Page 31 “Actual temp” Internal grill probe needs Use a soft cloth or mild abrasive sponge, along with hot water and soap to wipe clean the cleaning. probe. does not move Probe wire became wet. Use a hair dryer to dry the probe wires. Grill probe compromised.
- Page 32 BOARD 5 AMP. 120V Fuse - North America Fast-Blow Cartridge 0.47 cm x 1.9 cm (3/16” in. x 3/4 in.) Grill Probe Spade Connectors 8 Pin Wire Harness Connection Temperature Switch Celsius/Fahrenheit Auger Motor (Yellow) Fan (Blue) AC Common Igniter (Red) White AC Hot (Black) The Digital Control Center system is an intricate and valuable piece of technology.
- Page 33 WIRE SCHEMATIC INDEX DIGITAL CONTROL CENTER W : WHITE K : BLACK Y : YELLOW N : BROWN B : BLUE S : SILVER R : RED G : GREEN °F °C GROUNDED POWER CORD GRILL PROBE VW-1, 105°C/221°F, 18-3 STANDARD CSA CONNECTOR BOX (8 PIN) GROUND IGNITOR ASSEMBLY / HD CARTRIDGE HEATER...
-
Page 34: Parts List
PARTS LIST LG CHAMPION SERIES HOPPER ASSEMBLY REPLACEMENT ITEMS Item Description Hopper Handle Hopper Access Panel Auger Motor Auger Mounting Bracket Screw 1.58 cm (5/8 in.) Metal Lock Collar Set Screw 0.39 cm x 1.27 cm (5/32 in. x 1/2 in.) Screw Metal End Cap Nylon Bushing... -
Page 35: Limited Warranty
LIMITED WARRANTY The LG Champion wood pellet grill line, manufactured by Dansons Inc., carries a five (5) year limited warranty from the date of sale to the original owner only, against defects and workmanship on all steel parts, (excluding the burn grate), and three (3) years on electrical components. - Page 36 of the wood pellet grill. This means that no warranties, either expressed or implied, are extended to persons who purchase the product from anyone other than Dansons or an authorized Dansons Dealer. AUSTRALIA Our goods come with guarantees that cannot be excluded under the Australian Consumer Law. You are entitled to a replacement or refund for a major failure and for compensation for any other reasonably foreseeable loss or damage.
-
Page 38: Dangers Et Avertissements
• NE PAS utiliser de pierre de lave, de morceaux ou de copeaux de bois, ni de charbon dans le barbecue aux granules Louisiana Grills. • NE PAS utiliser d’accessoires n’ayant pas été conçus pour cet appareil. - Page 39 DANGERS ET AVERTISSEMENTS AVERTISSEMENT : NE PAS toucher le barbecue lorsque le fumoir est CHAUD. Cela pourrait entraîner de graves blessures. AVERTISSEMENT : NE PAS surchauffer le barbecue. Une mauvaise utilisation peut provoquer un incendie. COMBUSTIBLE – GRANULES DE BOIS •...
- Page 40 Merci d’avoir choisi le barbecue et fumoir aux granules Louisiana Grills Champion. Votre barbecue aux granules Louisiana Grills vous transportera à l’extérieur où vous pourrez profiter du savoureux goût boisé, comme le faisaient nos ancêtres préhistoriques, tout en profitant des avantages d’une cuisine moderne.
- Page 41 TABLE DES MATIÈRES Dangers et avertissements ..........38 Utilisation Pour commencer ................. 60 Instructions d’assemblage Procédure de préparation ..............60 Caractéristiques techniques .............. 42 Allumage : automatique/manuel .............60 Vue éclatée des pièces .................43 Arrêt du fumoir ..................60 Évaluation de la sécurité ..............44 Entretien ................61 Roues, roulettes et butée du couvercle ..........
-
Page 42: Caractéristiques Techniques
LE BARBECUE AUX GRANULES DE BOIS LG CHAMPION Grande trémie d’une capacité Cheminée à clapet. de 12,3 kg (27 lb). Couvercle aux Orifice d’échappement bords arrondis facile à ouvrir. double à l’arrière. Système d’alimentation éprouvé avec vis sans fin Fumoir à froid / en métal. -
Page 43: Vue Éclatée Des Pièces
DÉBALLAGE DU BARBECUE LG CHAMPION À l’ouverture de la boîte, vérifier que toutes les pièces suivantes sont présentes : Pièce Qté Éléments se trouvant dans la boîte - Panneau thermique arrière Roulette verrouillable de 12,7 cm (5 po) de - Déflecteur de chaleur arrière diamètre Vis –... -
Page 44: Instructions D'assemblage
ÉVALUATION DE LA SÉCURITÉ Conformément aux procédures et spécifications de la norme UL 2728-2009 sur les appareils de cuisson aux granules de bois et les normes canadiennes ULC/ORD C2728 et CSA C22.2 no 3 concernant les caractéristiques électriques de l’équipement de combustion, le barbecue aux granules de bois Champion a été... -
Page 45: Trémie Champion
Installation : Le bas de l’unité principale est doté de plaques filetées servant à l’installation de deux (2) roulettes verrouillables et de deux (2) roues. • Pour faciliter l’installation, coucher délicatement l’unité sur une surface douce du côté opposé à la trémie. •... - Page 46 • À l’aide de deux (2) vis Phillips (D), deux (2) rondelles (G) et deux (2) rondelles élastiques (F), fixer la poignée au panneau d’accès de la trémie dans les deux (2) grands trous prévus à cet effet, tout juste au-dessus de la prise d’air du ventilateur. •...
-
Page 47: Allumeur
Répéter ensuite la dernière étape avec les cinq (5) ensembles de vis et de rondelles restants. Serrer fermement les vis à l’aide de l’outil approprié. N.B. : Faire preuve de vigilance pour ne pas strier les têtes de vis en vue de futures manipulations. INSTALLATION DE L’ALLUMEUR Pièces requises : 2 x Vis en métal Phillips (H) -
Page 48: Poignée Et Cheminée Réglable
• Tenir la partie inférieure du grilloir de sorte que l’extrémité dotée d’une découpe et de fentes se trouve du côté gauche. Installer le grilloir sur l’attache (B); il s’accroche facilement. • Placer la glissière (D) par-dessus la partie inférieure du grilloir (C). La glissière se déplace pour couvrir ou exposer les fentes du grilloir;... -
Page 49: Panneau Thermique Et Déflecteur
Installation : Pour faciliter l’installation, placer l’unité supérieure sur une table ou une surface de travail solide. • Visser le chapiteau de cheminée dans la base, à travers le clapet réglable. • Veiller à laisser un espace d’au moins 25 mm (1 po) entre le chapiteau et la base de la cheminée. -
Page 50: Tablette Latérale Supérieure
Installation : Poignées de porte • Retirer les deux (2) vis se trouvant sur chaque poignée. • Insérer les vis par l’arrière de chacune des quatre portes, glisser une rondelle sur chacune des vis, puis aligner les poignées. Fixer en place. Poignées à... -
Page 51: Plateaux À Graisse, Clapets Et Grilles
• Insérer les vis dans les deux (2) trous prévus à cet effet sur le devant du dessus de la tablette (no 23). • À l’aide d’un tournevis à pointe cruciforme, serrer complètement les vis. Étape 3 – Décapsuleur • Retirer les deux (2) vis préinstallées sur la tablette. -
Page 52: Grilles Du Réchaud Et De Support
INSTALLATION DES SURFACES DE CUISSON PRINCIPALES Pièces requises : 2 x Grille de cuisson principale en fonte recouverte de porcelaine 2 x Grille supérieure en acier recouverte de porcelaine 1 x Grille supérieure en acier recouverte de porcelaine Installation : •... -
Page 53: Alimentation Électrique
• Retirer les grilles de cuisson principales. • Insérer le boîtier du cuiseur à vapeur dans le trou prévu à cet effet du côté droit du grilloir. • Remplir le cuiseur à vapeur d’eau ou d’un liquide au choix. • Couvrir avec le couvercle à... - Page 54 • En position OUVERT, le grilloir arqué permet de cuire les aliments directement sur des flammes d’une chaleur intense. Il réduit aussi le mouvement de convection de l’air dans l’appareil. • La saveur naturelle de fumée produite par les granules en combustion, le grilloir arqué et la convection forcée par ventilateur offre un goût succulent et une cuisson uniforme uniques au barbecue aux granules.
- Page 55 Il sert également à fermer le panneau de commande ou à activer le mode d’arrêt. BOUTON « PRIME » Ce bouton est le même sur tous les panneaux de commande Louisiana Grills. Il a été demandé par les cuisiniers de compétition. Lorsqu’il est maintenu enfoncé, le système d’ALIMENTATION enverra des granules supplémentaires à...
-
Page 56: Thermomètre À Viande Programmable
Le thermomètre à viande programmable à partir du panneau de commande numérique est le plus récent ajout à la famille des barbecues Louisiana Grills; c’est un outil indispensable, tant pour le débutant que pour le pro du barbecue. Il suffit de brancher le thermomètre sur le panneau, d’insérer la sonde dans la pièce à... -
Page 57: Utilisation
Grâce au panneau de commande, le barbecue cuira vos aliments jusqu’à la température sélectionnée, puis diminuera automatiquement sa chaleur à 82 °C/180 °F. Un signal sonore se fera entendre six fois lorsque cette température sera atteinte. CONSEIL : Pour faciliter le nettoyage, vaporiser le thermomètre avec un antiadhésif ou l’enduire d’huile à cuisson avant de l’utiliser. - Page 58 La tendance aujourd’hui est à l’alimentation saine et nutritive, ce qui invite notamment à réduire la consommation de gras. L’une des meilleures façons d’y arriver, c’est d’utiliser une méthode de cuisson qui demande peu de matières grasses telle que le barbecue.
- Page 59 attention de ne pas se brûler. Si cette méthode ne fonctionne pas, régler le bouton d’alimentation à la position d’ARRÊT et garder le couvercle fermé jusqu’à ce que le feu soit complètement éteint. La liste ci-après présente de précieux conseils pour une cuisson parfaite digne d’un barbecue/fumoir aux granules LG Champion.
-
Page 60: Pour Commencer
POUR COMMENCER PROCÉDURE D’ALLUMAGE AUTOMATIQUE Toujours inspecter, et nettoyer au besoin, le creuset de combustion, la grille de combustion, l’allumeur, le grilloir, les surfaces de cuisson, la trémie et les granules de bois avant d’utiliser le barbecue. Étape 1 : Brancher le cordon d’alimentation sur une prise électrique mise à la terre de 110 V. NE PAS briser la broche de mise à la terre du cordon ni utiliser de prise non reliée à... -
Page 61: Entretien
n’oubliez surtout pas de laisser le barbecue et les grilles de cuisson s’autonettoyer. Pour ce faire, faites chauffer le barbecue à une température ÉLEVÉE ou de PRÉCHAUFFAGE (supérieure à 232 °C [450 °F]) pendant 5 à 10 minutes après chaque utilisation. Une fois la cuisson terminée, réglez le Champion à... - Page 62 GRILLES DE CUISSON Avant la première utilisation, lavez en profondeur les grilles de cuisson avec de l’eau chaude savonneuse, puis placez-les dans le fumoir et PRÉCHAUFFEZ-le pendant 20 à 30 minutes. Après la cuisson d’aliments, ouvrez le couvercle et nettoyez bien les grilles à...
- Page 63 CREUSET DE COMBUSTION Le creuset de combustion est le récipient dans lequel repose la grille de combustion. Sur son fond solide et étanche se trouve une fente par laquelle il est vissé de façon permanente au fond du baril. Il est également fixé aux extrémités du baril par deux vis. Le creuset de combustion est également joint de façon étanche aux extrémités du baril, à...
-
Page 64: Techniques Et Conseils De Cuisson Au Barbecue
• Tous les barbecues Louisiana Grills ont été conçus pour offrir une circulation égale de la chaleur forcée par le ventilateur afin que les aliments cuisent uniformément sur tous les côtés. Laissez au moins 2,54 cm (1 po) entre les aliments et la hotte pour une bonne circulation de la chaleur. - Page 65 • Pour obtenir une meilleure pénétration de la fumée dans la viande, préférez une cuisson LENTE à BASSE température, car les fibres de la viande se referment à une température interne de 50 °C (120 °F). • Utilisez des pinces à long manche pour retourner la viande et une spatule pour les boulettes de steak haché et le poisson. N’utilisez pas de fourchette pour retourner la viande, car elle percera la viande, et les jus savoureux s’échapperont.
-
Page 66: Dépannage
Un bon nettoyage et un bon entretien, ainsi que l’utilisation de combustible propre, sec et de bonne qualité, aideront à prévenir la plupart des problèmes de fonctionnement du barbecue. Toutefois, quand votre barbecue aux granules de bois Louisiana Grills ne fonctionne pas bien ou pas du tout, les conseils de dépannage suivants peuvent être utiles. - Page 67 La température Le thermomètre interne du À l’aide d’un linge doux ou d’une éponge légèrement abrasive et d’eau chaude savonneuse, laver le actuelle reste barbecue doit être nettoyé. thermomètre. toujours la même. Le fil du thermomètre est À l’aide d’un séchoir à cheveux, sécher les fils du thermomètre. mouillé...
- Page 68 CARTE FUSIBLE DE 5 A, 120 V – AMÉRIQUE DU NORD Fusible à cartouche rapide de 0,47 x 1,9 cm (3/16 x 3/4 po) Thermomètre du barbecue Cosses rectangulaires Connecteur de faisceau électrique à 8 fils Interrupteur de température Celsius/Fahrenheit Moteur de la vis sans fin (jaune) Ventilateur (bleu) Neutre CA...
- Page 69 SCHÉMA DES FILS INDEX PANNEAU DE COMMANDE NUMÉRIQUE W : BLANC K : NOIR Y : JAUNE N : BRUN B : BLEU S : ARGENT R : ROUGE G : VERT °F °C CORDON D’ALIMENTATION THERMOMÈTRE FV-1, 105°C/221°F, 18-3 STANDARD CSA DU BARBECUE BOÎTE DE CONNECTEUR (8 BROCHES) MISE À...
-
Page 70: Liste Des Pièces
LISTE DES PIÈCES TRÉMIE LG CHAMPION ARTICLES DE REMPLACEMENT Pièce Description Poignée de trémie Panneau d’accès de trémie Ventilateur Moteur de vis sans fin Support d’installation de vis sans fin Collier d’arrêt en métal de 1,58 cm (5/8 po) Vis de pression de 0,39 x 1,27 cm (5/32 x 1/2 po) Capuchon en métal Douille en nylon Tige pleine de vis sans fin... -
Page 71: Garantie Limitée
GARANTIE LIMITÉE Les barbecues aux granules de bois LG Champion, fabriqués par Dansons Inc., sont couverts – à partir de la date d’achat par le propriétaire initial seulement – par une garantie limitée de cinq (5) ans contre tout défaut de matériaux et de fabrication sur les pièces en acier (à... - Page 72 Comme certains états et certaines provinces interdissent l’exclusion ou la limitation des responsabilités quant aux dommages accidentels ou consécutifs, ou la limitation des garanties implicites, les exclusions et limitations énoncées dans cette garantie limitée pourraient ne pas s’appliquer à vous. Cette garantie limitée vous donne des droits spécifiques, et vous pourriez aussi avoir d’autres droits selon l’état ou la province où...
-
Page 74: Peligros Y Advertencias
• NO use piedras de lava, trozos de madera, virutas de madera o carbón de leña con su asador de pellets de madera Louisiana Grills. •... - Page 75 PELIGROS Y ADVERTENCIAS ADVERTENCIA: NO caliente en exceso su asador de pellets de madera LG Champion. Un uso inadecuado puede causar un fuego incontrolable. COMBUSTIBLE – PELLETS DE MADERA • DEBE usar solamente pellets de madera completamente naturales, diseñados para el uso con asadores de pellets. El uso de cualquier otro tipo de combustible con este producto anulará...
- Page 76 Deseamos aprovechar esta oportunidad para darle algunos consejos importantes respecto a su asador con pellets de madera. • La instalación inicial de su asador Louisiana Grills constituye la etapa más importante para garantizar su eficacia y buen funcionamiento durante muchos años.
- Page 77 ÍNDICE Peligros y advertencias ..........74 Operación Introducción ..................93 Instrucciones de montaje Procedimiento de instalación inicial ..........96 Especificaciones ................... 78 Encendido – automático/manual ............. 96 Despiece de las piezas .................79 Apagado del ahumador ..............96 Prueba de seguridad ................80 Mantenimiento ..............
-
Page 78: Especificaciones
SU NUEVO ASADOR DE PELLETS DE MADERA LG CHAMPION Tolva con una gran capacidad Chimenea controlada por regulador de aire. de 12,3 kg (27 pu). Tapa fácil de Controlador de escape trasero doble. levantar, con bordes redondeados. Comprobado sistema Ahumador en de alimentación por frío / cámara de tornillo sin fin de metal. -
Page 79: Despiece De Las Piezas
DESEMPACADO DE SU LG CHAMPION Al abrir su ahumador/asador, verifique que hay todas las siguientes piezas: Pieza Cant. Artículos encontrados en la caja - Panneau thermique arrière Ruedas giratorias con bloqueo de 12,7 cm (5 pu) Pernos – Ruedas Ruedas no giratorias de 12,7 cm (5 pu) Arandelas de resorte –... -
Page 80: Instrucciones De Montaje
PRUEBA DE SEGURIDAD De conformidad con los procedimientos y especificaciones enumerados en UL 2728-2009 «PELLET FUEL COOKING APPLIANCES» (ARTEFACTOS DE COCINA DE COMBUSTIBLE DE PELLETS) Y LOS ESTÁNDARES CANADIENSES ULC/ORD C2728 Y CSA C22.2 #3 «FOR ELECTRICAL FEATURES OF FUEL BURNING EQUIPMENT» (PARA CARACTERÍSTICAS ELÉCTRICAS DE EQUIPOS DE COMBUSTIÓN), el artefacto de cocción con pellets Champion ha sido probado y homologado independientemente por INTERTEK (un laboratorio de pruebas certificado) bajo los estándares ETL, UL, ULC y CSA. -
Page 81: Tolva Champion
Instalación: La parte inferior de la cámara principal tiene placas roscadas para permitir la instalación de dos (2) ruedas con bloqueo y dos (2) ruedas sin bloqueo de alta resistencia. • Para facilitar la instalación, ponga en el piso una cubierta de protección suave e incline con cuidado la cámara principal colocando el extremo sin tolva sobre la cubierta. - Page 82 • Usando dos (2) tornillos Phillips (D), dos (2) arandelas (G) y dos (2) arandelas de resorte (F), fije el mango al panel de acceso de la tolva, ubicado justo arriba de la entrada de ventilación, a través de los dos (2) agujeros más grandes. •...
-
Page 83: Encendedor
Ahora, con la tolva parcialmente fijada, enrosque manualmente los cinco (5) conjuntos de tornillos y arandelas restantes. Al terminar, apriételos firmemente usando la herramienta adecuada. NOTA: El tener mucho cuidado de no dañar las cabezas de los tornillos le facilitará las cosas en el futuro. INSTALACIÓN DEL ENCENDEDOR Piezas necesarias: 2 x Tornillos de metal Phillips (H) -
Page 84: Handle, Adjustable Chimney
• Tome la base del asador a la llama arqueado y sosténgala de manera que el lado seccionado y con ranuras se encuentre en su mano izquierda. La placa puede ahora ser fácilmente encajada sobre el soporte de montaje ajustable (B). •... -
Page 85: Panel De Calentamiento, Deflector
Instalación: Coloque la cámara superior sobre una mesa o espacio de trabajo sólido para facilitar la instalación. • Enrosque la caperuza de chimenea a través del regulador de aire ajustable y en la base de la chimenea. • Deje una distancia mínima de 25 mm (1 pu) entre la tapa superior y la base de la chimenea. -
Page 86: Cámara Superior, Estante Lateral
Instalación: Manijas de puerta • Retire los dos (2) tornillos de cada manija. • Inserte el tornillo Phillips por detrás de cada una de las cuatro (4) puertas de la cámara, deslice el marco sobre el tornillo y alinee la manija fijándola en su lugar. Manijas de cierre por torsión •... -
Page 87: Bandeja Para Grasa, Reguladores De Aire, Parrillas
• Inserte los tornillos a través de los dos (2) agujeros que se encuentran en la parte delantera de la parte superior del estante lateral (#23). • Use un destornillador Phillips para apretar firmemente los tornillos. Paso 3 – Destapador •... -
Page 88: Repisas De Soporte, Rejilla De Horno
INSTALACIÓN DE LAS SUPERFICIES DE COCCIÓN PRINCIPALES Piezas necesarias: 2 x Parrillas de cocción de hierro fundido recubiertas de porcelana 2 x Repisas superiores de acero recubiertas de porcelana 1 x Repisa superior de acero recubierta de porcelana Instalación: • Deslice las parrillas principales en su lugar. -
Page 89: Fuente De Alimentación
• Retire las parrillas de cocción principales. • Inserte la parte principal de la vaporera dentro del agujero ubicado al lado derecho del asador a la llama. • Llene la cavidad con agua o el líquido de su elección. • Cubra con la tapa ventilada de la vaporera. - Page 90 • Un asador a la llama arqueado CERRADO impide que los alimentos entren en contacto directo con la llama; proporciona una gran área de metal caliente que facilita la evaporación y el retorno de los jugos a los alimentos siendo cocinados para un mayor sabor, conduce el exceso de grasa directamente a una bandeja para grasa, y distribuye uniformemente el calor por toda la zona de cocción.
-
Page 91: Centro De Control Digital G2
PANEL TÁCTIL DE ALTA CALIDAD Este panel táctil tiene las mismas funciones que cualquier otro panel de las parillas Louisiana Grills. Solicitado por los participantes de las competiciones de cocina, cuando se presiona y mantiene el panel, el sistema de alimentación de combustible gira y añade pellets adicionales a la rejilla de combustión. -
Page 92: Sonda Para Carne Programable
La sonda para alimentos interna programable del centro digital de control es la más reciente adición a la familia de asadores Louisiana Grills y es una herramienta indispensable para los parrilleros debutantes o profesionales. Basta con conectar la sonda para alimentos interna en el panel, insertar la sonda de acero inoxidable en su creación culinaria y determinar la temperatura deseada de la sonda para carne. -
Page 93: Introducción
El centro de control digital cocina automáticamente su comida hasta alcanzar la temperatura deseada de la sonda para alimentos. Posteriormente, el controlador baja automáticamente la temperatura de cocción del asador a 82 oC / 180 oF y le alerta emitiendo seis veces un tono «BIIP». - Page 94 El estilo de vida predominante en la actualidad prefiere los alimentos saludables y nutritivos, resaltando la importancia de reducir el consumo de grasas. Una de las mejores maneras de reducir las grasas en su dieta es de emplear técnicas de cocina con bajo contenido de grasas, como los asadores.
- Page 95 tapa y rocíe ligeramente bicarbonato de sodio sobre el fuego. Tenga cuidado de no quemarse. Si esto no funciona, gira el botón de alimentación hasta la posición de APAGADO para que los pellets dejen de alimentar el fuego y cierre la tapa hasta que el fuego se apague por completo.
-
Page 96: Procedimiento De Instalación Inicial
PARA EMPEZAR PROCEDIMIENTO DE ENCENDIDO ‒ AUTOMÁTICO Siempre examine, y limpie si es necesario, el cesto de combustión, la rejilla de combustión, el encendedor, el asador a la llama, las superficies de cocción, la tolva y el combustible de pellets de madera antes de usar su asador. Paso 1: Enchufe el cable de alimentación en un tomacorriente puesto a tierra de 110 voltios. -
Page 97: Mantenimiento
normal. Si preparó alimentos con mucha grasa, como con TOCINO, es una buena idea el dejar funcionar el asador entre 10 y 20 minutos adicionales. La grasa podría causar un fuego, pero NO ENTRE EN PÁNICO NI DESENCHUFE la unidad. Sólo mantenga la tapa cerrada y deje que el asador se apague solo de manera natural, de manera muy similar a un horno autolimpiante. - Page 98 PARRILLAS DE COCCIÓN Lave a fondo las parrillas de cocción nuevas usando agua jabonosa caliente. Vuelva a colocarlas en el asador y PRECALIENTE el asador durante 20 a 30 minutos. Después de haber cocinado alimentos, abra la tapa y use un cepillo para limpiar parrillas con mango largo para limpiar minuciosamente las parrillas.
- Page 99 La función principal del cesto de combustión es de albergar el encendedor y de canalizar el aire forzado por el ventilador hacia la rejilla de combustión. Por consiguiente, requiere muy poco mantenimiento. De vez en cuando, usted puede aspirar o cepillar las cenizas o residuos quemados que hayan caído debajo de la rejilla de combustión.
-
Page 100: Consejos Y Técnicas Para Asar En La Parrilla
CONSEJOS Y TÉCNICAS PARA UNA BUENA PARRILLADA Estos son algunos consejos y técnicas muy útiles compartidos por muchos propietarios de asadores Louisiana Grills, por nuestro personal y nuestras familias, y obtenidos gracias a muchas prácticas. Todo es cuestión de TIEMPO y TEMPERATURA. - Page 101 temperatura interna de 50 oC / 120 oF. • Use tenazas con mango largo para voltear las carnes y espátulas para voltear las hamburguesas y el pescado. No use un tenedor para voltear las carnes pues puede pinchar la carne y hacer que los jugos de sabor se desprendan de ella. •...
-
Page 102: Resolución De Problemas
La limpieza y el mantenimiento adecuados, así como el uso de combustible limpio, seco y de buena calidad, sirven para prevenir los problemas de funcionamiento comunes de los asadores. Sin embargo, si su asador Louisiana Grills funciona mal o no funciona del todo, los siguientes consejos de diagnóstico pueden resultar muy útiles. - Page 103 Mensaje de error La sonda para carne no está No se está usando la sonda para carne. «noPR» conectada. Compruebe que la sonda está insertada por completo en el panel. Compruebe que el cable no esté perforado, torcido o roto. El indicador La sonda de asador interna Lave la sonda usando un paño delicado o una esponja abrasiva suave, junto con agua caliente y...
- Page 104 PANEL FUSIBLE DE 5 A 120 V – NORTE AMÉRICA Cartucho de acción rápida 0,47 cm x 1,9 cm (3/16 pu x 3/4 pu) Sonda de asador Conectadores de horquilla Conexión de mazo de cables de 8 clavijas Interruptor de temperatura Celsius/Fahrenheit Motor de tornillo sin fin (Amarillo) Ventilador (Azul)
- Page 105 ESQUEMÁTICA DE CABLES ÍNDICE CENTRO DE CONTROL DIGITAL W : BLANCO K : NEGRO Y : AMARILLO N : MARRÓN B : AZUL S : PLATA R : ROJO G : VERDE °F °C CABLE DE ALIMENTACIÓN SONDA DE VW-1, 105°C/221°F, 18-3 ESTÁNDAR CSA ASADOR CONECTOR (8 PINES) TOMA DE...
-
Page 106: Lista De Piezas
LISTA DE PIEZAS TOLVA DE LA GAMA LG CHAMPION REPUESTOS Artículo Descripción Mango de tolva Panel de acceso de la tolva Ventilador Motor de tornillo sin fin Soporte de montaje de tornillo sin fin Tornillo Collar de seguridad de metal de 1,58 cm (5/8”) Juego de tornillos de 0,39 cm x 1,27 cm (5/32”... -
Page 107: Garantía Limitada
GARANTÍA LIMITADA GARANTÍA LIMITADA La gama de asadores de pellets de madera LG Champion, fabricados por Dansons Inc., viene con una garantía limitada de cinco (5) años a partir de la fecha de compra por el propietario original solamente, contra defectos en el material y la fabricación sobre todas las partes de acero, (a excepción de la rejilla de combustión), y de tres (3) años sobre los componentes eléctricos. - Page 108 Algunos estados no permiten exclusiones ni limitaciones de los daños incidentales o consecuenciales, ni limitaciones de las garantías implícitas, por lo cual las limitaciones o exclusiones enunciadas aquí pueden no aplicarse a su caso particular. Esta garantía limitada le confiere derechos legales específicos y es posible que usted tenga otros derechos, los cuales varían de un estado a otro.
- Page 111 Distributed by: Costco Wholesale Corporation P.O. Box 34535 Seattle, WA 98124-1535 1-800-774-2678 www.costco.com Imported by / Importé par : Costco Wholesale Canada Ltd. * 415 W. Hunt Club Road Ottawa, Ontario K2E 1C5, Canada 1-800-463-3783 www.costco.ca * faisant affaire au Québec sous le nom Les Entrepôts Costco Imported by: Costco Wholesale UK Ltd / Costco Online UK Ltd...
- Page 112 Pour toute autre questions, commentaires ou demandes de renseignements, veuillez communiquer avec Dansons Inc. directement. Le service à la clientèle Louisiana Grills est ouvert du lundi au vendredi, de 8 h à 17 h (heure des Rocheuses). Communiquez avec service à la clientèle Louisiana Grills (Anglais/français).