Table of Contents
Advertisement
Advertisement
Table of Contents

Related Manuals for MAGINON IM_WK3HD


Summary of Contents for MAGINON IM_WK3HD
- Page 1 User Manual WILDLIFE CAMERA WITH 3-ZONE MOTION SENSOR...
- Page 2 QR codes take you where you want to go quickly and easily Whether you require product information, spare parts or accessories, details on warranties or aftersales services, or if you want to watch a product demonstration video, our QR codes will take you there in no time at all.
-
Page 3: Overview
Overview... -
Page 5: Scope Of Delivery/Device Parts
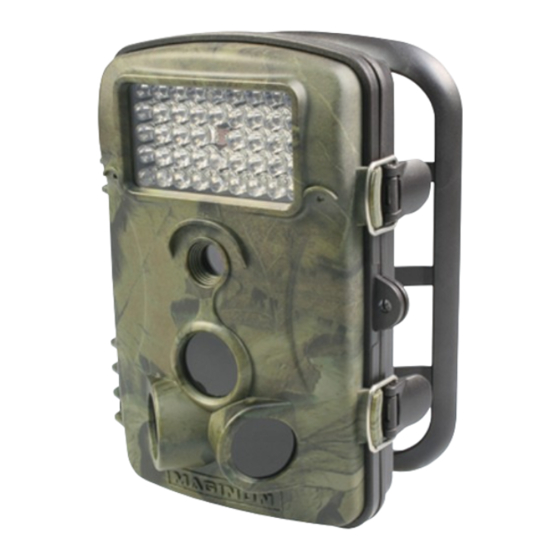
Scope of supply / Camera parts Maginon WK 3 HD Lens 4 GB SDHC memory card Red LED 8x batteries type AA Microphone Mounting belt Blue LED Wall mount Operating buttons (please refer to page 26) USB cable Monitor AV cable... -
Page 6: Table Of Contents
Content of box .................16 Preparing the Wildlife Camera ..........16 Introduction ..............17 About your Wildlife Camera ..........17 Features of MAGINON WK 3 HD Wildlife Camera ....17 Areas of application .............. 18 Preparation ...............19 Opening and closing the camera ........19 Inserting the batteries ............20 Inserting the memory card .......... - Page 7 Contens Aligning the camera .............39 File format................41 Connecting to a Computer ..........42 System requirements ............43 Connection to TV .............. 44 Technical specification ............. 45 Potential legal infringements ......... 46 Declaration of conformity..........48 Storing ................48 Cleaning ................49 Disposal ................
-
Page 8: Preface
Preface Preface Dear customer, Congratulations on purchasing a high quality MAGINON product. You have chosen a modern Wildlife Camera with excellent technical equipment and respective accessory, which is particularly easy to operate. The device comes with a 3 year warranty. In case of a defect in the Wildlife Camera , you require the enclosed warranty card and proof of purchase. -
Page 9: General
General General Read and keep instructions This Operating Instruction belong to this Wildlife Camera. It contains important information about the start up and handling. For ease of understanding, the “Wildlife Camera” can just referred to as Camera in these Operating Instructions. Study these Operating Instructions and, in particular the Safety Information in detail prior to using the Wildlife Camera. - Page 10 General WARNING! These signal words indicate a medium level hazard which could cause death or serious injury if not avoided. CAUTION! These signal words indicate a medium level hazard which could cause death or serious injury if not avoided. NOTE! This signal word warns against potential material damage or provides useful additional information regards assembly or operation.
-
Page 11: Safety
Safety Safety Correct use The Wildlife Camera is solely designed to be used as a Wildlife Camera. It is only suitable for private and not for commercial use. Only use Wildlife Camera as described in the operating instructions. Any other use is deemed to be incorrect and can cause material damage and loss of data. - Page 12 Safety − Never immerse USB cable or plug in water or other fluids. − Keep Wildlife Camera, and accessories away from open flames and hot surfaces. − Install any cable in such a way that it does not become a trip hazard.
- Page 13 Safety − Follow the battery manufacturer’s safety, usage, and disposal instructions. − When not using or cleaning the Wildlife Camera or in case of a fault, always switch off the Wildlife Camera and remove the batteries. − Never touch leaking batteries without respective protection.In case of contact with skin, wash the area with plenty of soap and water.
- Page 14 Safety Note! Danger of material damage! Incorrect use of the Wildlife Camera can cause the Wildlife Camera to be damaged. − Do not leave Wildlife Camera unattended during operation. − Never place Wildlife Camera on or near hot surfaces (e.g. stove tops, etc.).
-
Page 15: Start
Start Start Content of box WARNING! Caution! Keep plastic foil and bags away from babies and small children as danger of suffocation. Note! Danger of damage! If the packaging is carelessly opened with a sharp knife or other pointed objects, the product can be easily damaged. −... -
Page 16: Introduction
Introduction Introduction About your Wildlife Camera The MAGINON WK 3 HD is a wildlife and surveillance camera with a 3 zone infrared sensor. The sensor can detect sudden changes to the ambient temperature within an evaluation area. The signals of the highly sensitive infrared sensor (PIR, passive infrared sensor) switch on the camera, activating picture or video mode. -
Page 17: Areas Of Application
Introduction − Using the serial number function, locations can be en- coded on photos. Where several cameras are used, this function allows easier identification of locations when viewing photos. − Date, time, temperature and moon phase can be displayed on the images. −... -
Page 18: Preparation
Preparation Preparation Opening and closing the camera Operating buttons, connections and batteries are located inside the wildlife and surveillance camera. To open the camera undo the two lateral locking brackets as shown in Fig. 1. To lock the camera again, engage metal hoops of locking brackets into mount and press down plastic tab of bracket (Fig.2). -
Page 19: Inserting The Batteries
Preparation Inserting the batteries Open the camera as described in prior section to insert the batteries. The battery compartment is housed in the right, rear part of the camera. Now open the protective cover of the battery compartment by pulling the clamping closure at the top slightly inwards before lifting off the cover. - Page 20 Preparation When using 4 batteries, these can either all be inserted in the top or in the bottom part of the compartment. Other combinations are not possible. Close the battery compartment again with the protective cover. − Instead of type LR6 (AA) batteries, rechargeable batteries with the same specification (with 2000 mAh or higher) may be used.
-
Page 21: Inserting The Memory Card
Preparation Inserting the memory card A memory card must have been inserted in order to save photos and videos. Insert a SD-/SDHC memory card in the memory card compartment before switching on the camera. − Switch off the camera and open as described in prior section. -
Page 22: External Power Supply
Preparation − To avoid damage to the memory card, turn the camera off before inserting or removing the memory card. If you insert or remove the microSD/ SDHC memory card while the camera is turned on, it will switch off automatically. -
Page 23: Assembly With Strap
Preparation Assembly with strap In the Settings menu of the photo mode, the settings for taking photos can be made. Use the securing strap supplied to attach the wildlife camera to a tree or another object. The illustrations below demonstrate how to fasten the securing strap. -
Page 24: Using The Wall Mount
Preparation Using the wall mount Using the supplied wall mount, the camera can be securely attached to walls or ceilings. Prior to installing the wall mount ensure that all existing bolts are securelytightened. (A) Drilled holes (B) Tripod bolt (C) Counter screw (D) Hinge screws CAUTION! Prior to drilling check that no supply pipes are concealed in... - Page 25 Preparation Prior to installing the Wildlife Camera on the wall mounting a memory card or batteries should be inserted or the power supply should be connected. The camera should also be switched to Standby mode. − In order to move the camera into the final position, release the two hinge screws (D) slightly, align the camera and fix the position by tightening the two hinge screws (D).
-
Page 26: Using The Camera
Using the camera Using the camera Prior to setting up the camera for surveillance, it must be set up for the respective purpose. For this purpose, the so- called test mode is available. In addition to changing settings, photos and videos can be taken and existing photos can be viewed in this mode. -
Page 27: Operating Buttons
Using the camera Operating buttons Set the mode switch to TEST and the camera and monitor are switched on. Using the operating buttons different functions can now be activated and settings can be changed. For this purpose, the following operating buttons are provided on the display panel: Functions of operating buttons in recording mode Below, the operating buttons are described in the recording... - Page 28 Using the camera Functions of operating buttons in replay mode Below, the operating buttons are described in the replay mode with non activated menu. − MENU: Select the Replay menu using the MENU button. − REPLAY: Press the button to return to Recording mode. −...
-
Page 29: Settings
Using the camera Settings Prior to using the MAGINON WK 3 HD, change the settings as required. Slide the mode switch of the wildlife camera to the TEST position to start the test mode. In the Photo or Video mode press the MENU button to call up the menu. - Page 30 Using the camera quality but results in larger files requiring more space on the memory card. 12M and 8M resolutions are generated by interpolation which can also affect quality. − Video size: 1080P (1920 x 1080, 15 fps), 720P (1080 x 720, 30 fps), WVGA (848 x 480, 30 fps), VGA (640 x 480, 30 fps) Select the required video resolution.
- Page 31 Using the camera − Timer: Off/On Set timer to “On” if camera should only be active within a certain time. Once “On” has been confirmed with the OK button, the start and end time can be set. If the start time is, for instance set to 18:35 hrs and the end time to 8:25 hrs, the camera will be operational from 6:35 pm of the current day until 8:25 am of the following day.
-
Page 32: Side Sensor Zones
Using the camera a motion or not. This is useful for observing cold blooded animals e.g. snakes or plants opening up, etc. As soon as the “On” setting has been confirmed by pressing the OK button, you can enter the interval time after which photos and videos are to be taken. - Page 33 Using the camera CAUTION! Ensure that files still required have been backed up prior to formatting! − Setting the time: Set date and time. Press OK button to set date and time. Using the and buttons to skip between values and change selected valu- es by pressing the ...
- Page 34 Using the camera the OK button. During the update the respective status is shown on the display. − FW Version: Shows the Firmware version installed on the camera. In Replay mode the option Delete is available in the menu. − Delete: Select the “Delete” option to remove individual or all photos from the memory card thus making storage room for new photos.
-
Page 35: Night Recording
MAGINON WK 3 HD uses IR LEDs with a long wavelength, to keep red light to a minimum. The provided number of IR LEDs generates a high deflection angle thus allowing night recording at a distance of 3 m to 20 m, without overexposing the object. -
Page 36: Setting Up The Live Mode
Using the camera Setting up the live mode The standard application of the MAGINON WK 3 HD is the so-called Live mode. When in this mode, photos are either triggered by movement sensors or at intervals according to the respective setting. -
Page 37: Advantages Of Pir Sensors (Passive Infrared Sensors)
Where wild animals do, however, move past the camera swiftly, it is possible that the photo only shows the rear part of the body or possibly nothing at all. The MAGINON WK 3 HD solves this problem due to the unique design of the lateral PIR sensor zone. -
Page 38: Aligning The Camera
Using the camera animal finally enters the detection range of the central sensor zone and does not move rapidly, the photo – based on the standard reaction time of one second – will probably capture the entire body of the animal. Aligning the camera The Test mode is advantageous for determining the best possible detection angle and range of the movement sensor. - Page 39 Where necessary, point the camera down for optimum alignment. MAGINON WK 3 HD corresponds to protection class IP 54. The camera is protected against dust and spray water and can thus be used in any weather condition.
-
Page 40: File Format
Using the camera File format The wildlife camera stores photos and videos on the memory card in the folder “\DCIM\100MEDIA“. Photos are given a file name with extension ”JPG“ (Example: “SUNP0001.JPG“), videos are given the extension “.AVI“ (Example: ”SUNP0002.AVI“). When in TEST and OFF mode use the enclosed USB cable to transfer files onto the computer. -
Page 41: Connecting To A Computer
Connecting to a Computer Connecting to a Computer The wildlife camera can be connected to a computer or your TV using the supplied USB and video cables to view existing photos/videos. − Connect the camera to your computer using the USB cable. −... -
Page 42: System Requirements
Connecting to a Computer Mac computers show an “Unknown” drive on the desktop. When clicking on this drive, the program ”iPhoto“ is automatically started. System requirements Windows® Hardware: Pentium® III or higher Operating system: Windows® XP/Vista/7/8 Main memory: 512 MB RAM Hard disk space: 1 GB Screen resolution:... -
Page 43: Connection To Tv
Connection to TV Connection to TV − Switch on the wildlife camera in Test mode. − Connect the video cable to the camera. − Plug the other end of the video cable into the TV. • Connect the yellow connector to the video input and the white connector to one of the audio inputs of the TV. -
Page 44: Technical Specification
Technical specification Technical specification Model: WK 3 HD Image sensor 5.0 mega pixels, 1/2.5“ CMOS sensor Photo resolution 12M: 4000 x 3000 (interpolated); 8M: 3264 x 2448 (interpolated); 5M: 2592 x 1944 Screen 6.1 cm (2.4") colour TFT-LCD; 480 x 234 pixels Recording medium Supports SD/SDHC-memory cards up to 32 GB (optional) -
Page 45: Potential Legal Infringements
Potential legal infringements We reserve the right to make technical and op- tical changes to the product as part of product improvements. Potential legal infringements Observe the following information for using the Wildlife Camera: Copyright Generally every person owns his/her own image. According to the copyright law, images may only be published without the consent of the respective person if the person appears only as a person embellishment to a landscape image, or... - Page 46 Potential legal infringements NOTICE! Attention! Please note that you must use the reset function (page 66) before handing over the camera for repair or to third parties in order to delete all personal data from the camera’s memory. Personal determinability Personal determinability exists, where it can be determined that a certain person was at a certain place at a certain time.
-
Page 47: Declaration Of Conformity
Declaration of conformity area. Passers-by must also be informed that by entering the monitored area they give their permission to pictures/ videos being taken so that if they do not wish to give their consent they can avoid the picture/video being taken by not accessing the area. -
Page 48: Cleaning
Cleaning Cleaning WARNING! Burn hazard! Wildlife Camera becomes hot during operation! − Let Wildlife Camera cool down completely! NOTICE! Danger of short circuit! Any water that has entered the housing can cause a short. − Never immerse Wildlife Camera in water. −... -
Page 49: Disposal
Disposal Disposal Dispose of packaging For disposal, separate packaging into different types. Cardboard and board must be disposed of as paper and foil must be recycled. Dispose of used camera (Applicable in European Union and other European countries using systems for separate collection of recyclables). Do not dispose of used cameras in household waste! If the Wildlife Camera can no longer be used each... -
Page 50: Warranty Details
Wildlife Camera WK 3 HD with 3-zone motion sensor Warranty Details The product is guaranteed to be free from defects in workmanship and parts for a period of 36 months from the date of purchase. Defects that occur within this warranty period, under normal use and care, will be repaired, replaced or refunded at our discretion. -
Page 51: Repair And Refurbished Goods Or Parts Notice
Wildlife Camera WK 3 HD with 3-zone motion sensor Repair and Refurbished Goods or Parts Notice Unfortunately, from time to time, faulty products are manufactured which need to be returned to the Supplier for repair. Please be aware that if your product is capable of retaining user-generated data (such as files stored on a computer hard drive, telephone numbers stored on a mobile telephone, songs stored on a portable media player, games saved on a games console or files stored on a USB memory stick) during the process of repair, some or all of your stored data may... -
Page 52: Warranty Certificate
QSL - MAGINON Service Rear Unit 11 Slough Business Park, 2 Slough Avenue, (off Rachael Close) Silverwater, NSW 2128 Australia MAGINON After Sales Support: 1800 623 432 (Operating Hours: Mon-Fri 08:00AM to 06:00PM EST) Email: info@supra-electronics.com AFTER SALES SUPPORT 1800 623 432... - Page 53 Rear Unit 11 Slough Business Park, 2 Slough Avenue, (off Rachael Close), Silverwater, NSW 2128, Australia MAGINON After Sales Support: 1800 623 432 (Operating Hours: Mon-Fri 08:00AM to 06:00PM EST) When making a return, please ensure the product is properly packaged so as to ensure that no damage occurs to the product during transit.
- Page 54 Made in China DISTRIBUTED BY: ALDI STORES 1 SARGENTS ROAD MINCHINBURY NSW 2770 www.aldi.com.au AFTER SALES SUPPORT 1 800 623 432 info@supra-electronics.com YEARS WARRANTY Product code: 92948 03/2016 Model: WK 3 HD...