Table of Contents
Advertisement
Advertisement
Table of Contents

Summary of Contents for MAGINON DPF-8
-
Page 3: Introduction
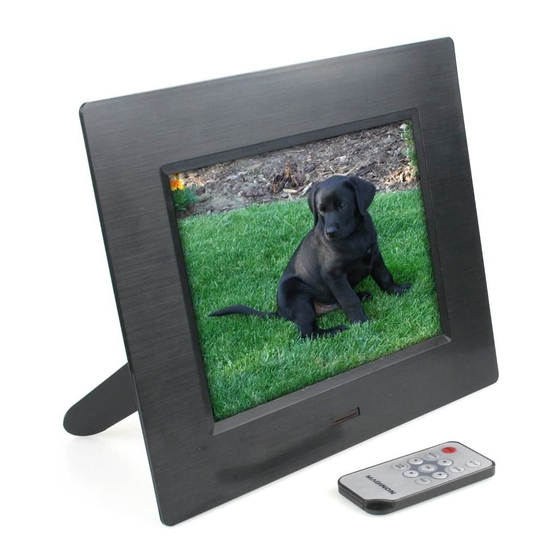
Make sure to include the instruction manual if the product is passed on to third parties. Note: • Only use the picture frame for the intended purposes If it is used for other purposes, and there is a damage to the unit the warranty will be void. Moreover, only if used properly can damage to people and the environment be avoided. Key Features • Supports JPEG File Formats • Reads the most popular memory cards SD/SDHC, MMC • Fast USB 2.0 connection • Calendar and clock function • Slide show and preview function • Automatic playback of pictures after inserting a storage medium • Selectable slide show interval and transitions • Swivel stand • German menu Package Contents In the package contains the following components: 1. MAGINON® DPF-8 SuperSlim 2. Remote control 3. AC adapter with cable 4. Operating instructions 5. Warranty and service documents... -
Page 4: Table Of Contents
Table of contents Introduction Key features Package contents Table of contents Safety instructions 1. Quick Guide 1.1. Mains connection 1.2. Installing the stand 1.3. Wall mounting 1.4. Inserting the memory card or USB flash drive 1.5. Switching on the Digital Picture Frame 1.6. - Page 5 2.7. Settings 2.7.1. Language 2.7.2. Picture sequence 2.7.3. Slide show mode 2.7.4. Slide show interval 2.7.5. Photo effect 2.7.6. Picture transitions 2.7.7. Picture size 2.7.8. Monitor set-up 2.7.9. Time 2.7.10. Time format setting 2.7.11. Formatting the memory 2.7.12. Reset 2.7.13. Exit 3.
-
Page 6: Safety Instructions
Safety instructions DANGER for children • Children do not recognize the dangers associated with the improper handling of electrical appliances. Therefore, keep children away from the product. • Keep children away from the packaging materials. There is also a danger of suffocation! DANGER from electricity • Do not immerse the digital picture frame, the power cable and the mains adapter into water, since there will then be a danger of electrical shock. • Do not touch the product with wet hands and not operate it outdoors or in rooms with high humidity. • Do not place any liquid filled object such as vases on or in the immediate environment. The liquid filled object can be knocked over and the liquid impair the electrical safety. • Only connect the unit to a properly installed outlet whose mains voltage matches the specifications of the AC adapter. • Unplug the AC adapter from the wall outlet ..if you do not use the unit for a long time, ... during a lightning storm, ... before cleaning the unit and ... if faults occur during the operation. Hereby, always pull on the AC adapter, not on the power cord. • The power button does not disconnect the device from the mains voltage. To completely disconnect the power supply, unplug the power adapter. Use a good accessible outlet so that you can, if necessary, unplug the power cord quickly. • The power cable may not be kinked or crushed. Keep the power cable away from hot surfaces and sharp edges. • Do not put the device into operation, if the device itself, the power adapter or the electric cable show visible damages. - Page 7 CAUTION - Damage to property • Set the digital picture frame in a firm, level surface. • Protect the device from moisture, dust, high temperatures and direct sunlight. Otherwise there might be malfunctions and damage to the electronics or the housing could occur. • Make sure that there is sufficient space for ventilation around the unit. • Keep sufficient distance from heat sources such as stoves, or furnaces. • Do not drop the digital picture frame and expose it to strong impact. • Do not place any open flame sources, such as lighted candles on or near the unit. • Do not place the device near strong magnetic fields, e.g. speakers. The playback could be disrupted. • Do not touch the screen unnecessarily. Do not exert pressure on the surface and do not touch it with a sharp object. • Absolutely observe the instruction for the correct insertion of memory cards. Incorrect installation can cause damage to the card or the device. • Do not remove the memory card from the device when files are being read. Data could be damaged or lost. • For the cleaning, do not use harsh chemicals or abrasive, aggressive cleaning agents Intended use The Digital Picture Frame is intended for the playback of digital photos (from storage media) in dry indoor rooms. It is designed for personal use and not suitable for commercial applica- tions.
-
Page 8: Quick Guide
1. Quick Guide 1.1. Mains connection Place your digital picture frame on a flat surface. Insert the connector plug of the AC adapter into the DC IN jack on the bottom of the picture frame and the AC adapter into an electrical outlet. Note: • Check before plugging in the AC adapter, if the specifications on the nameplate correspond to those of your local power grid. 1.2. Installing the stand The base stand is in the packaging. 1. Align the opening of the stand above the corresponding opening on the rear of the picture frame. 2. By turning the stand you can optionally setup your picture frame vertically or horizontally. Hereby, the stand is always at a 45° angle to the body of the picture frame. 3. Attach the stand with the provided screw. 1.3. Wall mounting You can attach the picture frame to the wall with screws and anchors. In the back of the housing there are cut-outs for either vertical or horizontal wall mounting. -
Page 9: Inserting The Memory Card Or Usb Flash Drive
1.4. Inserting the memory card or USB flash drive To play back images from a memory card, insert the memory card into the memory card slot (1) on the bottom. A USB flash drive, can be plugged into the side USB connector (2) of the frame. Is when the picture frame is switched on and a memory card or a USB stick is inserted into the device, it will automatically start a slide show from that storage medium. Caution!: The USB connector may not be used to connect the picture frame to a computer! Note: • This unit supports the following types of memory cards: SD/SDHC/MMC • Further information about supported memory cards and file formats can be found in the product specifications. 1.5. Switching on the Digital Picture Frame The power switch is located on the back of the frame (see 1 in Figure 1 on the next page). Press the power button on the picture frame. All supported media files will now automatically be downloaded from the inserted storage medium. After the loading playback will begin automatically. -
Page 10: Control Buttons
When the picture frame is turned on for the first time, a menu will appear for the language selection. Choose your language and confirm your selection by pressing the OK button. Note: • In case the device does not switch on, initially check if the wall outlet and mains adapter are connected properly. • To open the language selection menu again, the picture frame must be returned to the factory default settings in the "Settings" menu. Fig. 1 Fig. 2 1.6. Control buttons The control buttons of your picture frame are located above the power button on the back of the frame. With these keys, all functions of the on-screen menus can be called up and operated. Here is an overview of the keys (see Figure 1): 1. On/off switch: To turn the picture frame on and off 2. OK-button: To confirm a selection or setting, to stop and start the slide show 3. Exit-button: To exit the sub-menu or the slide show 4. Menu-button: To open the "Settings" menu or a sub-menu 5. Up-button: Navigate the menu 6. Down-button: Navigate the menu 7. Left-button: Navigate the menu 8. Right-button: Navigate the menu If the control buttons are pressed while viewing a picture or a slide show, the picture frame will display the control panel within the image for a few seconds in the upper right corner (Fig. 2). -
Page 11: Remote Control Functions
1.7. Remote control functions 1.8. Changing the battery of the remote control 1. Open the battery door by pulling pulling it out of the rear cut-out opening. 2. Replace the lithium battery "CR2025" with one of the same type. Then close the battery compartment again. Safety instructions • Batteries can be life-threatening if swallowed. inserted incorrectly. Therefore, absolutely Therefore, keep battery and remote control observed the polarity (+/-) during the out of the reach of small children. If a battery insertion. is swallowed, seek medical assistance • Remove the battery from the remote control immediately. when it is consumed or the unit is not in use • Keep the battery for the remote control away for a longer period of time. This way you are from strong heat sources such as sunbeams, able to prevent damage, which could result fire, etc. from battery leakage. • Batteries may not be charged, taken apart, • Avoid any contact of the battery fluid with thrown into fire or short circuited. There is a the skin, eyes and mucous membranes. Upon... -
Page 12: Functions
2. Functions Your new picture frame MAGINON DPF-8 SuperSlim features easy to use menus and functions that are explained in the following chapter. 2.1. Slide show When the photo frame is turned on by connecting to the power or pressing the power button, a slide show of images from the storage media that was selected before the last power off will automatically start. The show can also be started at any time by pressing the SLIDE SHOW button on the remote control. 2.2. Selection of the storage medium During the slide show press the EXIT button on the remote three times to go to the selection of the storage medium. Subsequently all installed storage media will be listed. Use the buttons / to select the desired memory device "Internal Memory", "USB" or "SD/MMC card" and confirm this by pressing the OK button. This will take you to the main menu. 2.3. Main menu During the slide show press the EXIT button on the remote two times to go to the main menu. To reach the main menu again from the file or calendar mode as well as from the settings, press the EXIT button once. The main menu will offer you the options “Photo", “File", "Calendar" and "Settings". Use the buttons / to select the desired option and confirm this by pressing the OK button. With the option "Photo" you can reach the single-picture view, in which all the images on the selected media will be displayed as thumbnails sorted by name. -
Page 13: Photo
2.4. Photo By selecting the "photo" in the main menu, a picture display will open. In this picture you can see the thumbnails of all images on the selected media. This display is independent from the folder structure which is present on the storage medium. The images are sorted in an ascending order by file name, if none of the file names contains more than 8 characters. 2.4.1. Single picture mode In the thumbnail view, use the buttons / / / to select a picture and then press the OK button to display it in full size on the screen. The picture frame will then be in the single picture mode. In the single picture mode the selected picture will be displayed continuously. You can rotate, enlarge this image, or transfer it to the internal memory. Using the buttons / you can switch to the previous or next picture. With the OK button you can switch from the single picture mode to the slide show mode and back. 2.4.1.1. Rotate picture To rotate a picture, press the ROTATE button on the remote control in the single picture mode. Then the image will be rotated 90 degrees clockwise. You can also rotate the picture by pressing the MENU or SETUP button and then selecting "rotate image” in the menu that appears. The rotation of an image is only maintained until a different picture is displayed. The rotated image can not be saved. 2.4.1.2. Enlarge picture By pressing the ZOOM button in the single picture mode, the displayed image is gradually enlarged. The enlargements hereby correspond to the values 1 25%, 150%, 200%, 300% and 400%. If during the greatest enlargement the ZOOM button is pressed again, the picture will be displayed in original size. You can also enlarge the picture by pressing the MENU or SETUP button and then selecting "enlarge image” in the menu that appears. -
Page 14: Save Picture
2.4.1.3. Save picture The picture frame has a small internal memory, where a maximum of 5 images can be stored. To copy an image to this internal memory, select the desired image in single picture mode using the / / / buttons. Open the menu by pressing the MENU or SETUP button and then select the item "save image”. Once you confirm your selection with the OK button, the image is copied to the internal memory. Hereby, the image is scaled to fit the screen. When the internal memory is full, the following message will appear on the screen: "Memory Full! Press any key to continue." Then press any key to return to the single picture mode. To delete images from the internal memory, proceed as described in Chapter 2.3.2. “Delete image” Pictures in the internal memory can not be copied back to another medium. 2.4.2. Delete picture In thumbnail view, you can delete individual images from the selected media. Use the buttons / / / to select a picture to be deleted. Then press the SETUP button and in the displayed menu switch to "Delete File" using the / buttons. Once you confirm your selection with the OK button, the image will be deleted. Please observe that deleted images can not be restored. 2.5. File Selecting "File” from the main menu will provide you with an overview of the folders and images contained on the selected media. Here you can browse the folders separately for existing images, delete individual files and folders or start a slide show within a selected folder. Use the / buttons to select a folder and press the OK button to open the folder. Within a folder, you can select individual images with the / buttons. After selecting an image press the OK button, to start a slide show, which is limited to the contents of the selected folder. -
Page 15: Calendar
2.6. Calendar From the main menu, select "Calendar", and you will receive an on-screen calendar view. In addition to displaying the current date and time a slide show will be running in parallel in a small window. This slide show will be performed according to the settings made in the "Settings" menu (see Chapter 2.7.9.). Within the calendar view, you can change the date displayed with the / / / buttons. However, this setting will not be saved; the date can only be set via the "Settings" menu. 2.7. Settings From the main menu, select "Settings", and you will reach the Settings menu of the picture frame. From this menu you have the option of making settings related to the on-screen display and the slide show. Within the menu, press the / / / buttons to access the various menu items. Use the OK button to select a sub-menu or to make a settings change. A single setting can be changed with the / button. With the EXIT button you are able to exit a menu or return to the main menu from the Settings menu. 2.7.1. Language Select the language to be used in the menus. Confirm your selection by pressing the OK button. 2.7.2. Picture sequence Here you can specify the order in which the images are displayed during slide show. The following two options are available: By Name: Provided that all the images have a file names no longer than 8 characters, the images are displayed sorted by that name in ascending order. Random: Play back is performed randomly among all images without repetitions. Only when all the images have been played once, will they appear again. -
Page 16: Slide Show Mode
2.7.3. Slide show mode Here, you are able to specify whether 1, 2, 3 or 4 images will be displayed simultaneously during a slideshow. 2.7.4. Slide show interval You can set how long a picture is displayed during a slide show on the screen before the next image appears. You are able to choose from interval times of 3, 5, 15 and 30 seconds, 1, 5, 15 and 30 minutes and up to 1 hour. Please note that, especially for the setting of short transition times, these may not be precisely adhered to in all cases. If an image has a high resolution, there may be delays of 2-3 seconds before it can be read and displayed. 2.7.5. Photo effect Here you can set in which hue the images will be playback. Available options are colour, mono- chrome (black and white) and Sepia (yellow). 2.7.6. Picture transitions Here you can choose the form in which the current image will fade out and how the next image will fade in. A total of 14 different transition modes are available as well as a setting a randomly selected image transition. 2.7.7. Picture size Images whose resolution is larger than that of the picture frame (800x600 pixels) at least one direction, and whose height-width ratio does not match that of the picture frame (4-3), can be adapted to the screen in various ways. Automatic adaption: The images are adjusted so that they coincide in the direction of the greater extension of the screen. In the other direction, black bars will be shown. Optimal size: The images are adjusted so that they coincide with both directions of the screen. Overlapping image parts will hereby be "cut off". Full screen: The images are adapted so that they are flush with the left and right and fill the screen in the up and down direction through stretching. -
Page 17: Time
2.7.9. Time In this menu you can set the date and time for the calendar view. Initially, use the buttons / to select the value to be changed. Then press the OK button, and the selected value is displayed in red. Use the buttons / to change the value and confirm this by pressing the OK button. Once you have set all the values, switch to “Save time” and confirm the settings with the OK button. Only after you have performed this option, will the settings of date and time be taken over permanently. 2.7.10. Time format setting Specify whether to display the time in the 12 or 24 hour format. 2.7.11. Formatting the memory To format the internal memory, select "Format Memory", then press the OK button. Use the buttons / to switch to “Yes” and confirm again by pressing the OK button. A possibly inserted memory card or a USB flash drive can not be formatted with this function. Caution: By formatting, all pictures from the internal memory of the photo frame will be deleted! 2.7.12. Reset Use this option to reset the picture frame to the factory settings. Date and time will remain unchanged, and the data on the storage media will not be deleted. 2.7.13. -
Page 18: Conformity
3. Conformity This device was labelled with the CE marking, in accordance with the following European Directives: Low Voltage Directive 2006/95/EC EMC Directive 2004/108/EC The EU declaration of conformity can be requested from the address listed on the warranty card. Operation of this equipment is acceptable if the following two conditions are fulfilled: (1) This device may not emit any harmful interference pick-up. (2) This device must accept the influence of interference pick-up. This includes interference pick-up which can impede the operation or cause operational malfunctions. In case of an interference of the radio and television reception through this device - this can be determined by simply switching on and off of the device - the user should try to correct the interference with the following measures: • Turn the receiver antenna into a different direction or install it somewhere else. • Increase the space between the equipment and receiver. • Contact the dealership or an experienced radio TV technician. -
Page 19: Frequently Asked Questions
4. Frequently asked questions (FAQ) Prior to shipment this product was set to the default modes. If you have questions on using the digital picture frame, initially apply the following troubleshooting measures. Q: How do I turn on the digital picture frame? A: The digital picture frame will already be operational within minutes after unpacking. Connect the AC adapter to the digital picture frame and a standard wall socket. Insert the memory card into the provided card slot (see Section 1.4.). Q: What memory media can be read by the digital picture frame? A: The compatible storage media includes Secure Digital™ (SD), Secure Digital High Capacity™ (SDHC), MultiMediaCard™ (MMC) and USB memory stick. Q: What data formats will the picture frame playback? A: The frame plays images in the JPEG format. Q: A memory card is inserted, but no pictures are appearing. A: Please check whether there is data on the memory card and that the data corresponds to the supported formats. Check if the memory card is supported by the picture frame. If the requirements are met, please turn the frame off and on again. If the above troubleshooting solutions are not successful, you should contact the Customer Service listed in the warranty documents. They can give you further assistance and support, and spare parts can be ordered if required. CAUTION! Do not open the device housing! There are no serviceable parts in it. Unauthorized interference with the device put the user in danger and lead to loss of warranty. Note: • In some digital cameras, the images are stored in other formats. For information about which image format your camera uses, refer to the manual of your camera... -
Page 20: Cleaning
6.1. Packaging The product packaging is made from recyclable materials and can be introduced to the recovered substance cycle. Dispose of these in an environmentally friendly manner. 6.2. Device After the device has completed its service life it must be disposed of in compliance with the Directive 2002/96/EC at a proper disposal point and should never be disposed of with normal household waste. Dispose of old devices at a collection point for electronic waste. There, recyclables contained in the device will be introduced to the recycling, and thus avoid a contamination of the environment. For further information contact your local waste disposal company or your municipal administration. 7. Warranty and Service If problems should occur during the operation of the device, we are available under service address to handle any questions and problems you may have. We will issue a three-year manufacturer's warranty for the device. For details, please refer to the separately enclosed warranty card. Before you send us a defective unit, please contact our hotline. Manufacturer address: Service Address: supra Schenker Australia Pty Ltd Foto-Elektronik-Vertriebs-GmbH MAGINON® Service Denisstr. 28A P.O. Box 329 67663 Kaiserslautern Villawood, NSW 2163 Germany Australia Tel.: 1800 623 432... -
Page 21: Technical Data
8. Technical specifications Model MAGINON DPF-8 SuperSlim LCD-type and resolution TFT LCD, resolution: 800 x 600 Screen aspect ratio Brightness 200 cd/m2 Contrast 300:1 Key assignment On/Off, Up, Down, Left, Right, Confirm, Menu, Exit Image Rotation 90, 180 and 270 degrees Max. picture size 8000 x 8000 pixels Compression JPEG Manually Image change intervals 3, 5, 15, 30 seconds, 1, 5, 15, 30 minutes, 1 hour Supported storage media SD, SDHC, MMC card, USB flash drive (up to 32GB) Picture preview Thumbnails Calendar and clock function Remote control Included AC adapter, type: FJ-SW0501000DE Power supply Input: AC 100-240V 50/60Hz Output: DC 5V/1A USB interface USB 2.0 Host (supports USB 1.1) Dimensions (HxWxD) 243 x 202 x 19 mm Note: •... -
Page 22: Keyword Index
9. Keyword index Base stand 6 Order 13 Brightness 14 Package contents 1 Calendar 13 Photo format 17 Changing the battery 9 Photo effect 14 Cleaning 18 Picture size 14 Colour 14 Picture transitions 14 Conformity 16 Power Supply 6 Contrast 14 Control buttons 8 Questions 17 Date setting 15 Remote control 9 Delete picture 12 Reset 15 Disposal 18 Rotate picture 11 Enlarge picture 11 Safety notices 4, 9 Saturation 14 Factory settings 15 Save picture 12 File 12 Selecting the memory card 10 Formatting the memory 15 Service 18 Settings 13 Setting the language 8, 13 Hue 14 Setting the time 15 Single picture mode 11 Image display 11 Slide show 10 Image sort order 13... - Page 24 supra KO 7042 Foto-Elektronik-Vertriebs-GmbH 90303 Denisstr. 28A 12/2012 67663 Kaiserslautern 2000 2992 Germany...