Ricoh Aficio SP 5200S Operating Instructions Manual
Hide thumbs
Also See for Aficio SP 5200S:
- Operating instructions manual (444 pages) ,
- Safety information manual (36 pages) ,
- Service manual (667 pages)
Table of Contents
Advertisement
Quick Links
Read this manual carefully before you use this machine and keep it handy for future reference. For safe and correct use, be sure to read the Safety
Information in "Manuals and Safety Information for This Machine" before using the machine.
1
Simple Search
2
Guide to the Machine
3
Getting Started
4
Installing Options
5
Adding Paper
6
Replacing the Consumables
7
Entering Text
8
On-screen Operating Instructions
9
Remarks
10
Appendix
Operating Instructions
About This Machine
Advertisement
Table of Contents

Related Manuals for Ricoh Aficio SP 5200S


Summary of Contents for Ricoh Aficio SP 5200S
-
Page 1: Operating Instructions
Operating Instructions About This Machine Simple Search Guide to the Machine Getting Started Installing Options Adding Paper Replacing the Consumables Entering Text On-screen Operating Instructions Remarks Appendix Read this manual carefully before you use this machine and keep it handy for future reference. For safe and correct use, be sure to read the Safety Information in "Manuals and Safety Information for This Machine"... -
Page 3: Table Of Contents
TABLE OF CONTENTS Manuals for This Machine..........................7 Manuals List..............................10 What You Can Do with This Machine......................12 Using This Machine as a Copier........................12 Using This Machine as a Printer........................13 Utilizing Stored Documents.........................13 Paperless Fax Transmission and Reception....................14 Fax Transmission and Reception Over the Internet...................15 Using the Facsimile and the Scanner in a Network Environment.............16 Administrating the Machine/Protecting Documents (Security Functions)..........17 Monitoring and Setting the Machine Via Computer.................18... - Page 4 I Want to Convert Documents to Electronic Formats Easily!..............42 I Want to Register Destinations!........................43 I Want to Operate the Machine More Effectively!...................43 Searching by Keyword............................45 Paper................................45 Register/Change/Delete..........................45 Color Scanning............................46 Check................................46 Install................................47 Envelope...............................47 2. Guide to the Machine Guide to Components............................49 Exterior Components...........................49 Interior Components............................52 Control Panel..............................54...
- Page 5 Changing Modes............................83 Multi-Accessing............................84 Installing the SD Card Provided with the Machine...................86 Connecting the Machine..........................89 Connecting to the Ethernet Interface (mainly Europe and Asia).........89 Connecting to the Ethernet Interface (mainly North America)..........90 Connecting to the USB (Type B) Interface....................91 Connecting a Device to the Machine's USB Host Interface..............92 Connecting the Machine to a Telephone Line and Telephone..............93 Inserting and Removing a Removable Memory Device................95 Inserting an SD Card...........................95...
- Page 6 Loading Orientation-Fixed Paper or Two-Sided Paper.................123 Changing the Paper Size..........................125 Changing the Paper Size in Trays 1 - 4....................125 Changing to a Size That Is Not Automatically Detected...............130 Changing Paper Thickness Settings......................134 Recommended Paper Sizes and Types......................136 Envelopes...............................141 Thick Paper..............................143 Unusable Paper.............................144 Paper Storage..............................146 6.
- Page 7 Cleaning the Friction Pad and Paper Feed Roller...................171 Cleaning the Registration Roller.......................173 Cleaning the Exposure Glass........................175 Cleaning the Auto Document Feeder.......................176 Cleaning the Power Cord Plug.........................177 Backing Up Hard Disk Data.........................179 Changing the Timing for Prompting Users to Prepare Replacement Supplies..........180 Counter................................182 Enquiry................................183 Disposal................................185...
- Page 8 Trademarks..............................207 INDEX ................................209...
-
Page 9: Manuals For This Machine
Manuals for This Machine Read this manual carefully before you use this machine. Refer to the manuals that are relevant to what you want to do with the machine. • Media differ according to manual. • The printed and electronic versions of a manual have the same contents. ®... - Page 10 Facsimile Reference Explains Facsimile functions and operations. Printer Reference Explains Printer functions and operations. Scanner Reference Explains Scanner functions and operations. Network and System Settings Reference Explains how to connect the machine to a network and how to configure and operate the machine in a network environment.
- Page 11 • App2Me Start Guide • The following software products are referred to using general names: Product name General name DeskTopBinder Lite and DeskTopBinder DeskTopBinder Professional ScanRouter EX Professional and ScanRouter the ScanRouter delivery software EX Enterprise SmartDeviceMonitor for Client SmartDeviceMonitor for Client *1 Optional...
-
Page 12: Manuals List
Manuals List (mainly Europe and Asia) Printed Manuals HTML Manuals PDF Manuals Manual Name Provided Provided Provided Manuals and Safety Information for This Machine Quick Installation Guide Initial Guide for Scanner and Fax About This Machine Troubleshooting Copy and Document Server Reference Facsimile Reference Printer Reference... - Page 13 (mainly North America) Printed Manuals HTML Manuals PDF Manuals Manual Name Provided Provided Provided Manuals and Safety Information for *2 *4 This Machine Quick Installation Guide Initial Guide for Scanner and Fax About This Machine Troubleshooting Copy and Document Server Reference Facsimile Reference Printer Reference...
-
Page 14: What You Can Do With This Machine
What You Can Do with This Machine This section introduces the features of this machine. • For details about options, see “Options”. • page 101 "Options" Using This Machine as a Copier You can make copies of originals. CFE053 • You can print stamps on copies. Stamps can include background numbers, scanned images, dates, and page numbers. -
Page 15: Using This Machine As A Printer
Using This Machine as a Printer You can print documents created in applications. CFE054 • This machine supports network and local connections. • You can send PDF files directly to the machine for printing, without having to open a PDF application. -
Page 16: Paperless Fax Transmission And Reception
CFE055 • You can retrieve stored documents scanned in scanner mode. • Using the file format converter (optional), you can download documents stored in copier, Document Server, or printer mode to your computer. • For details about machine's settings, see “Network Settings Required to Use Document Server”, Network and System Settings Reference. -
Page 17: Fax Transmission And Reception Over The Internet
CFE056 You can use Web Image Monitor to check, print, delete, retrieve, or download documents using your computer (Storing received documents). • See “Confirming/Printing/Deleting Received and Stored Documents”, Facsimile Reference. Transmission You can send a fax from your computer over the network (Ethernet or wireless LAN) to this machine, which then forwards the fax via its telephone connection (LAN-Fax). -
Page 18: Using The Facsimile And The Scanner In A Network Environment
CFE058 E-mail Transmission This machine converts scanned document images to e-mail format, and transmits and receives this data over the Internet. • To send a document, specify an e-mail address instead of dialing the destination telephone number (Internet Fax and e-mail transmission). •... -
Page 19: Administrating The Machine/Protecting Documents (Security Functions)
CFE059 • You can send scan files to a specified destination using e-mail (Sending scan files by e-mail). • You can send scan files directly to folders (Sending scan files by Scan to Folder). • You can use this machine as a delivery scanner for the ScanRouter delivery software (Network delivery scanner). -
Page 20: Monitoring And Setting The Machine Via Computer
CFE060 • You can protect documents from unauthorized access and stop them from being copied without permission. • You can control the use of the machine, as well as prevent machine settings from being changed without authorization. • By setting passwords, you can prevent unauthorized access via the network. •... -
Page 21: Preventing An Unauthorized Copy
• Using Web Image Monitor, you can check and specify the initial settings (System Settings, Printer Features, network settings, security settings/certificate management, and e-mail notification), control print jobs, display the print job journal, and protect the data in the machine using authentication. -
Page 22: Notice
Notice Important In no event will the company be liable for direct, indirect, special, incidental, or consequential damages as a result of handling or operating the machine. For good output quality, the manufacturer recommends that you use genuine toner from the manufacturer. -
Page 23: How To Read This Manual
How to Read This Manual Symbols This manual uses the following symbols: Indicates points to pay attention to when using the machine, and explanations of likely causes of paper misfeeds, damage to originals, or loss of data. Be sure to read these explanations. Indicates supplementary explanations of the machine's functions, and instructions on resolving user errors. -
Page 24: Notes
Machine type Copy/print speed Finisher Internal tray 2 Type 2 50 sheets/minute (A4 ) Cannot be installed Standard 52 sheets/minute (8 × 11 ) Type 3 50 sheets/minute (A4 ) Standard Cannot be installed 52 sheets/minute (8 × 11 ) Notes Contents of this manual are subject to change without prior notice. - Page 25 Option list Referred to as Wireless LAN board IEEE 802.11a/g Interface Unit Type J IEEE 802.11g Interface Unit Type K IEEE 802.11a/g Interface Unit Type J Gigabit Ethernet Gigabit Ethernet Board Type A Gigabit Ethernet Board Type C Copy Data Security Unit Type F Copy data security unit...
-
Page 26: Safety Information
Safety Information When using this machine, the following safety precautions should always be followed. Safety During Operation In this manual, the following important symbols are used: Indicates a potentially hazardous situation which, if instructions are not followed, could result in death or serious injury. - Page 27 • Do not place heavy objects on the machine. Doing so can cause the machine to topple over, possibly resulting in injury. • Make sure the room where you are using the machine is well ventilated and spacious. Good ventilation is especially important when the machine is used heavily. •...
-
Page 28: Handling The Main Machine
• Touching the prongs of the power cable's plug with anything metallic constitutes a fire and electric shock hazard. • The supplied power cord is for use with this machine only. Do not use it with other appliances. Doing so could result in fire or electric shock. •... - Page 29 • If the machine emits smoke or odours, or if it behaves unusually, you must turn off its power immediately. After turning off the power, be sure to disconnect the power cord plug from the wall outlet. Then contact your service representative and report the problem. Do not use the machine.
- Page 30 • Wait at least one hour after power off before replacing parts. Not allowing the machine to cool may result in burns. • Type 1 weighs approximately 45 kg (99.2 lb.), type 2 weighs approximately 47 kg (103.7 lb.), and type 3 weighs approximately 52 kg (114.7 lb.). When moving the machine, use the inset grips on both sides, and lift slowly.
- Page 31 • If the machine's interior is not cleaned regularly, dust will accumulate. Fire and breakdown can result from heavy accumulation of dust inside this machine. Contact your sales or service representative for details about and charges for cleaning the machine's interior. •...
- Page 32 • If toner or used toner gets into your eyes, flush immediately with large amounts of water. Consult a doctor if necessary. • If toner or used toner is swallowed, dilute by drinking a large amount of water. Consult a doctor if necessary.
-
Page 33: Safety Labels Of This Machine
Safety Labels of This Machine This section explains the machine's safety information labels. Positions of WARNING and CAUTION labels on Types 1 and 2 This machine has labels for WARNING and CAUTION at the positions shown below. For safety, please follow the instructions and handle the machine as indicated. CFE084 CFE005 Type 1 weighs approximately 45 kg (99.2 lb.) and type 2 weighs approximately 47 kg (103.7 lb.). - Page 34 CFE019 CFE006 Do not incinerate spilled toner or used toner. Toner dust is flammable and might ignite when exposed to an open flame. Disposal should take place at an authorized dealer or an appropriate collection site. Keep toner (used or unused) and toner containers out of reach of children. CFE003...
- Page 35 Do not put your hands inside the machine. The inside of this machine becomes very hot. Do not touch parts with this label (indicating a hot surface). CFE072 CFE001 The inside of this machine becomes very hot. Do not touch parts with this label (indicating a hot surface). CFE002 The inside of this machine becomes very hot.
-
Page 36: Positions Of Warning And Caution Labels On Type 3
Positions of WARNING and CAUTION labels on Type 3 This machine has labels for WARNING and CAUTION at the positions shown below. For safety, please follow the instructions and handle the machine as indicated. CFE073 CFE004 Type 3 weighs approximately 52 kg (114.7 lb.). When moving the machine, use the inset grips on both sides. - Page 37 CFE018 CFE006 Do not incinerate spilled toner or used toner. Toner dust is flammable and might ignite when exposed to an open flame. Disposal should take place at an authorized dealer or an appropriate collection site. Keep toner (used or unused) and toner containers out of reach of children. CCS037...
- Page 38 Keep your hands clear of the finisher when removing the staple cartridge. You might trap your fingers if you do not. CFE003 Do not put your hands inside the machine. The inside of this machine becomes very hot. Do not touch parts with this label (indicating a hot surface).
-
Page 39: Power Switch Symbols
CFE002 The inside of this machine becomes very hot. Do not touch parts with this label (indicating a hot surface). Power Switch Symbols The meanings of the symbols for the switches on this machine are as follows: • : POWER ON •... -
Page 40: Laws And Regulations
Laws and Regulations Legal Prohibition Do not copy or print any item for which reproduction is prohibited by law. Copying or printing the following items is generally prohibited by local law: bank notes, revenue stamps, bonds, stock certificates, bank drafts, checks, passports, driver's licenses. The preceding list is meant as a guide only and is not inclusive. -
Page 41: Model-Specific Information
Model-Specific Information This section explains how you can identify the region your machine belongs to. There is a label on the rear of the machine, located in the position shown below. The label contains details that identify the region your machine belongs to. Read the label. CFE052 The following information is region-specific. -
Page 43: Simple Search
1. Simple Search You can search for a procedure either by keyword or by what you want to do. Searching by What You Want to Do You can search for a procedure by what you want to do. I Want to Save my Paper Document! This section explains the functions and procedures that you can use to reduce your printing and running costs easily. -
Page 44: I Want To Convert Documents To Electronic Formats Easily
1. Simple Search Sending files from the computer without printing them (LAN-Fax) See Facsimile Reference for details. I Want to Convert Documents to Electronic Formats Easily! This section explains the functions and procedures you can use to convert documents to electronic formats easily. -
Page 45: I Want To Register Destinations
Searching by What You Want to Do I Want to Register Destinations! You can find explanations of the functions and procedures that you can use to register destinations easily. BRL060S Using the control panel to register destinations in the Address Book See Facsimile Reference for details. - Page 46 1. Simple Search BQX139S Registering and using frequently-used settings (Program) See Copy and Document Server Reference for details. See Facsimile Reference for details. See Scanner Reference for details. Registering frequently-used settings as initial settings (Program as Defaults (Copier/Fax/ Scanner)) See Copy and Document Server Reference for details. See Facsimile Reference for details.
-
Page 47: Searching By Keyword
Searching by Keyword Searching by Keyword You can search for a procedure by keyword. Paper I want to load paper. page 121 "Loading Paper" I want to change the paper size. page 125 "Changing the Paper Size" I want to know what the paper specifications are. page 136 "Recommended Paper Sizes and Types"... -
Page 48: Color Scanning
1. Simple Search Color Scanning I want to scan a color original (Normal Color Scan) See Scanner Reference for details. I want to minimize the amount of storage required when scanning color originals (High Compression PDF) See Scanner Reference for details. Check I want to display the fax transmission status. -
Page 49: Install
Searching by Keyword Install I want to install the printer driver so I can use the SmartDeviceMonitor for Client port. See Printer Reference for details. I want to install the printer driver so I can use the Standard TCP/IP port. See Printer Reference for details. - Page 50 1. Simple Search...
-
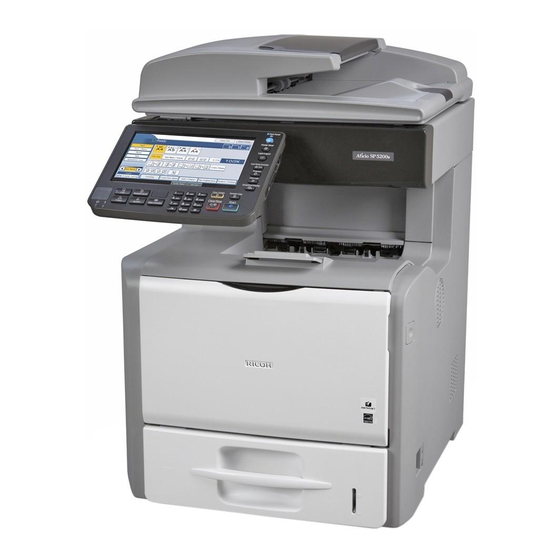
Page 51: Guide To The Machine
2. Guide to the Machine This chapter describes the names and functions of this machine's components. Guide to Components This section describes the names and functions of the components. Exterior Components This section describes the names and functions of the exterior components. •... - Page 52 2. Guide to the Machine 4. Internal tray 1 (types 1 and 2 only)/ Finisher shift tray (type 3 only) (The illustration shows the finisher shift tray.) Copied/printed paper and fax messages are delivered here. Pull out the extender when printing on A4 or 8 ×...
- Page 53 Guide to Components Rear and left view 11 11 CFE022 1. Ventilation holes Prevent the machine from overheating. 2. Rear cover Open this cover to remove misfed paper. 3. Rear cover lever Pull up on this lever to open the rear cover. 4.
-
Page 54: Interior Components
2. Guide to the Machine • page 54 "Control Panel" • page 74 "Turning On/Off the Power" Interior Components This section describes the names and functions of the interior components. Front and right view CFE023 1. Print cartridge Contains toner and the photo conductor unit. When "Replacement of Print Cartridge is now necessary."... - Page 55 Guide to Components Rear and left view CFE024 1. Fusing unit Fuses print images onto paper. When "Replacement Required: Maintenance Kit" appears, replace this unit. 2. Envelope lever Raise this lever when loading envelopes in trays 1 4 or the bypass tray. 3.
-
Page 56: Control Panel
2. Guide to the Machine Control Panel This section introduces the names and functions of the components on the control panel. • Do not turn off the main power switch while the operation switch indicator is lit or blinking. Doing so may damage the hard disk. - Page 57 Control Panel 4. [Energy Saver] key Press to switch to and from Energy Saver mode. See “Saving Energy”. 5. [Login/Logout] key Press to log in or log out. 6. [User Tools/Counter] key • User Tools Press to change the default settings to meet your requirements. See “Accessing User Tools”, Network and System Settings Reference.
- Page 58 2. Guide to the Machine Press to delete a number entered. • Stop Press to stop a job in progress, such as copying, scanning, faxing, or printing. 14. [ ] key (Enter key) Press to confirm values entered or items specified. 15.
-
Page 59: Adjusting The Angle Of The Control Panel (Types 2 And 3 Only)
Control Panel • page 182 "Counter" • page 183 "Enquiry" Adjusting the Angle of the Control Panel (Types 2 and 3 Only) This section describes how to adjust the angle of the control panel for easier use (types 2 and 3 only). Position the control panel at the vertical angle that you require. -
Page 60: Display Panel
2. Guide to the Machine Display Panel The display panel shows machine status, error messages, and function menus. • Don't apply strong impact or force to the screen. Or it may be damaged. Maximum force allowable is approx. 30N (approx. 3 kgf). (N = Newton, kgf = Kilogram force. 1 kgf = 9.8N.) The function items displayed serve as selector keys. -
Page 61: Changing The Display Language
Display Panel Press the [Simplified Display] key. CCS002 This illustration shows the copier function's simplified display. CFE067 1. [Key Colour] Press to increase screen contrast by changing the color of the keys. This is available only for the simplified display. •... - Page 62 2. Guide to the Machine Press the [User Tools/Counter] key. CCS003 Press the language key. Press the exit key. The menu appears in the language that you specified. • If you want to return the display language to “English”, repeat the step above.
-
Page 63: When The Authentication Screen Is Displayed
When the Authentication Screen is Displayed When the Authentication Screen is Displayed This section explains the authentication screen. • Ask the user administrator for the Login User Name, Login Password, and User Code. For details about user authentication, contact your administrator. •... -
Page 64: User Code Authentication (Using A Printer Driver)
2. Guide to the Machine • Press the [Energy Saver] key after jobs are completed. User Code Authentication (Using a Printer Driver) This section explains the procedure for logging in to the machine using a printer driver while User Code Authentication is active. -
Page 65: Logout (Using The Control Panel)
When the Authentication Screen is Displayed Enter a Login Password, and then press [OK]. When the user is authenticated, the screen for the function you are using appears. • If authentication fails, the "Authentication has failed." message appears. Check that the Login User Name and Login Password are correct. -
Page 66: Login (Using Web Image Monitor)
2. Guide to the Machine If Basic Authentication, Windows Authentication, LDAP Authentication, or Integration Server Authentication is active, make encryption settings in the printer properties of the printer driver, and then specify a Login User Name and Login Password. For details, see the printer driver Help. •... -
Page 67: Getting Started
3. Getting Started This chapter explains how to set up the machine for operation. Installing the Machine Where to Put Your Machine This section describes precautions for installation and movement. Choose your machine's location carefully. Environmental conditions greatly affect its performance. •... -
Page 68: Optimum Environmental Conditions
3. Getting Started • Do not obstruct the machine's vents. Doing so risks fire caused by overheated internal components. • Machine sound levels exceeding LWAd > 63 dB (A) are not suitable for desk work environments, so place the machine in another room. •... -
Page 69: Environments To Avoid
Installing the Machine Environments to avoid This section describes environments to avoid when locating the machine. • Locations exposed to direct sunlight or other sources of strong light (more than 1,500 lux). • Locations directly exposed to cool air from an air conditioner or heated air from a heater. (Sudden temperature changes can cause condensation to form inside the machine.) •... - Page 70 3. Getting Started • Do not use any power sources other than those that match the specifications shown in this manual. Doing so could result in fire or electric shock. • Do not use any frequencies other than those that match the specifications shown. Doing so could result in fire or electric shock.
-
Page 71: Unpacking
Installing the Machine • Be sure to disconnect the plug from the wall outlet and clean the prongs and the area around the prongs at least once a year. Allowing dust to build up on the plug constitutes a fire hazard. •... - Page 72 3. Getting Started • Do not incinerate toner (new or used) or toner containers. Doing so risks burns. Toner will ignite on contact with naked flame. • Do not place the machine on an unstable or tilted surface. If it topples over, an injury might occur.
- Page 73 Installing the Machine CFE026 Lower the machine slowly and carefully to prevent trapping your hands. Remove the adhesive tape attached on the machine's exterior. Carefully pull out tray 1 (type 3 only). CFE075 Remove the extender from tray 1 (type 3 only). CFE076...
- Page 74 3. Getting Started Carefully push tray 1 fully in (type 3 only). CFE080 Attach the extender to the finisher tray (type 3 only). CFE027 Lift the ADF. CFE077 Remove the protective material attached on the exposure glass.
- Page 75 Installing the Machine Lower the ADF. CFE081 Push the button on the right side of the machine to open the front cover. CFE078 Hold the print cartridge's front handle to lift and pull it out. CFE068 Place the print cartridge on a stable, flat surface. Remove the protective material attached on the machine's interior.
-
Page 76: Turning On/Off The Power
3. Getting Started Hold the grips of the cartridge, and then insert it into the machine until it stops. CFE071 Close the front cover. CFE074 • Print cartridges (consumables) are not covered by warranty. However, if there is problem, contact the store where they were purchased. - Page 77 Installing the Machine This switch turns off the main power to the machine and causes the main power indicator on the right side of the control panel go off. When your machine is type 2, or types 1 and 3 with the optional fax unit installed, fax files in the memory may be lost if you turn this switch off.
- Page 78 3. Getting Started • Do not turn off the main power switch immediately after turning it on. Doing so may result in damage to the hard disk or memory, leading to malfunctions. • Make sure the power cord is plugged securely into the wall outlet. •...
- Page 79 Installing the Machine CFE030 • After you switch the main power on, a screen may appear to indicate that the machine is initializing. Do not switch the power off during this process. Initialization takes about three minutes. Turning On the Power This section explains how to turn on the power.
- Page 80 3. Getting Started CCS004 • Even if you press the operation switch, the operation switch indicator does not go out, but blinks in the following cases: • During communication with external equipment. • When the hard disk is active. • When the internal cooling fan is active. Turning Off the Main Power This section explains how to turn off the main power.
-
Page 81: Saving Energy
Installing the Machine or more, and then turn it back on again. Never turn the power back on immediately after turning it off. Make sure the operation switch indicator is not lit. Turn off the main power switch. The main power indicator goes out. •... -
Page 82: Loading Paper Into Tray 1
3. Getting Started • When the "Replace Print Cartridge." message appears • When the print cartridge is being replaced • When the User Tools screen is displayed • When fixed warm-up is in progress • When data is being processed •... - Page 83 Installing the Machine While pressing down the release lever, slide the side fences outward. CFE011 While pressing down the release lever, slide the end fence until it is aligned with the size of paper you want to load. CEC011 Fan the paper before loading paper in the tray. CBK254 Square the paper and load it print side down.
- Page 84 3. Getting Started CEC006 Align the side fences gently against the paper you loaded. CFE012 Hold the tray with both hands, slide it along the rails of the machine, and then push it straight in. CFE014 Check the paper size on the display. •...
-
Page 85: Changing Modes
Installing the Machine • page 121 "Loading Paper into Trays 1 - 4" • page 125 "Changing the Paper Size in Trays 1 - 4" • page 136 "Recommended Paper Sizes and Types" Changing Modes This section explains how to change modes. Press the function key that you want to use. -
Page 86: Multi-Accessing
3. Getting Started • When accessing User Tools • During interrupt copying • During On-hook dialing for fax transmission • While scanning an original • The copy display is set as the default screen when the machine is turned on. You can change this default setting under Function Priority. - Page 87 Installing the Machine BHL002S *1 Simultaneous operations are only possible after the preceding job documents are all scanned and [New Job] appears. *2 You can scan a document after the preceding job documents are all scanned. *3 Operation is possible when extra lines are added. *4 During stapling, printing automatically starts after the current job.
-
Page 88: Installing The Sd Card Provided With The Machine
3. Getting Started another function if “Apply Auto Paper Select (Printer Only)” under [Paper Type: Bypass Tray] in User Tools is set to [Yes] and “Input Tray” is set to [Auto Tray Select] in the printer driver. • If the machine is capable of executing multiple functions simultaneously, specify which function should have priority in “Print Priority”. - Page 89 Installing the Machine Check the contents of the package. BFL308S Turn off the main power switch, and then unplug the machine's power cord from the wall outlet. Loosen and remove the screw, and then carefully remove the cover of the SD card slot. CFE031 Carefully push in the SD card (notched corner downward and leading), until it clicks into place.
- Page 90 3. Getting Started Reattach the cover over the SD card. Fasten the screw to secure the cover. CFE033 • You can confirm that VM Card & App2Me Provider was installed correctly by checking the User Tools menu. For details, see VM Card Extended Feature Settings Device Reference or VM Card Extended Feature Settings Web Reference.
-
Page 91: Connecting The Machine
Connecting the Machine Connecting the Machine This section explains how to connect the machine to the network or the telephone lines. Connecting to the Ethernet Interface (mainly Europe and Asia) This section describes how to connect an Ethernet cable to the Ethernet interface. Caution: A network interface cable with a ferrite core must be used for RF interference suppression. -
Page 92: Connecting To The Ethernet Interface (Mainly North America)
3. Getting Started Connect the other end of the Ethernet interface cable to a network connection device such as a hub. Turn on the main power switch of the machine. CFL014 1. Indicators When 100BASE-TX or 10BASE-T is operating, the green LED is lit and the orange LED flashes. If the machine is not connected to the network, both LEDs are turned off. -
Page 93: Connecting To The Usb (Type B) Interface
Connecting the Machine Connect the Ethernet interface cable to the 10BASE-T/100BASE-TX port. CFL007 Connect the other end of the Ethernet interface cable to a network connection device such as a hub. Turn on the main power switch of the machine. CFL014 1. -
Page 94: Connecting A Device To The Machine's Usb Host Interface
3. Getting Started Caution: Properly shield twisted pair cable (STP cable) must be used for connections to a host computer (and/or peripheral) in order to meet emission limits. Connect the USB2.0 (Type B) interface cable to the USB2.0 port. CFL009 Connect the other end to the USB2.0 port on the host computer. -
Page 95: Connecting The Machine To A Telephone Line And Telephone
Connecting the Machine Connect the other end of the USB interface cable to a card authentication device or media slot. • This machine does not come with a USB interface cable. Make sure you purchase the appropriate cable. Connecting the Machine to a Telephone Line and Telephone This section describes how to connect the machine to the telephone lines. - Page 96 3. Getting Started • If you are using an external telephone, specify the reception mode. For details about specifying the reception mode, “Reception Settings”, Facsimile Reference. • If your telephone has functions that are not compatible with this machine, those functions cannot be used.
-
Page 97: Inserting And Removing A Removable Memory Device
Inserting and Removing a Removable Memory Device Inserting and Removing a Removable Memory Device This section discusses how to insert/remove a removable memory device. • Do not turn off the main power switch while the machine is saving data to a removable memory device. -
Page 98: Inserting A Usb Memory
3. Getting Started Inserting a USB Memory This section describes how to insert a USB memory. • Certain types of USB memory cannot be used. Align the USB memory in the correct direction, and then push it straight into the media slot. -
Page 99: Removing A Usb Memory
Inserting and Removing a Removable Memory Device Removing a USB Memory This section describes how to remove a USB memory. Make sure the machine is not reading from or writing to the USB memory. Pull the USB memory carefully out of the slot. CCS053... -
Page 100: Downloading Utility Software
3. Getting Started Downloading Utility Software This section explains the utility software for this machine. SmartDeviceMonitor for Admin This section describes the functions available with SmartDeviceMonitor for Admin. SmartDeviceMonitor for Admin is an application that monitors network printers. It can monitor multiple network printers using IP address. -
Page 101: Smartdevicemonitor For Client
Downloading Utility Software DeskTopBinder Lite with limited functionality is available as a free download. Contact your local dealer for information on downloading the software. *1 For details to purchase ScanRouter delivery software, contact your local dealer. • For details about the functionality, see Help of DeskTopBinder. SmartDeviceMonitor for Client This section describes the functions available with SmartDeviceMonitor for Client. - Page 102 3. Getting Started...
-
Page 103: Installing Options
4. Installing Options This chapter describes how to install various options for this machine. Options This section introduces the names and functions of main optional parts. External Options This section provides explanations about external options. CFE010 1. Paper feed unit Holds up to 550 sheets of paper. -
Page 104: Internal Options
4. Installing Options Internal Options This section describes the options that can be installed in the machine. • The Bluetooth interface unit (optional) will be available from 2011. Information about this option is subject to change. For the latest information, refer to the documentation provided when you purchase the Bluetooth option. -
Page 105: Order Of Option Installation
Options • For details about how to install the SD card options, see “Installing the SD Card (Optional)”. • page 103 "Order of Option Installation" • page 108 "Installing the Board (Optional)" • page 118 "Installing the SD Card (Optional)" Order of Option Installation When installing multiple options, the following order is recommended: Attach the paper feed unit. -
Page 106: Installing The Paper Feed Unit (Optional)
4. Installing Options Installing the Paper Feed Unit (Optional) This section describes how to install the paper feed unit. • If the machine topples, or if a cover or other part gets broken, you must turn the power switch to off and disconnect the power cord plug from the wall outlet. - Page 107 Installing the Paper Feed Unit (Optional) CFE007 1. Paper feed unit • If the machine is installed directly on the floor, up to three paper feed units can be stacked. Stack the paper feed unit with casters to the bottom of the machine. CFE008 1.
- Page 108 4. Installing Options Remove the adhesive tape from the paper feed unit. Turn off the main power switch, and then unplug the machine's power cord from the wall outlet. Lift the machine by the inset grips on its sides. At least four people are needed to lift the machine. CFE079 When moving the machine, do not hold on the following parts as doing so could cause a malfunction:...
- Page 109 Installing the Paper Feed Unit (Optional) • If the print area is not centered correctly, adjust the printing position for the paper feed unit. For details, see “Adjusting Printing Position”, Troubleshooting. • For details about loading paper onto the paper tray, see “Loading Paper into Trays 1 4” or “Changing the Paper Size in Trays 1 4”.
-
Page 110: Installing The Board (Optional)
4. Installing Options Installing the Board (Optional) • Do not remove any covers or screws other than those explicitly mentioned in this manual. Inside this machine are high voltage components that are an electric shock hazard and laser components that could cause blindness. Contact your sales or service representative if any of the machine's internal components require maintenance, adjustment, or repair. - Page 111 Installing the Board (Optional) Check the contents of the package. CEC233 1. Gigabit Ethernet board 2. Protective caps (one each for the Ethernet port and the USB port) 3. Ferrite core Design of the ferrite core varies according to machine model. Turn off the main power switch, and then unplug the machine's power cord from the wall outlet.
- Page 112 4. Installing Options Loosen two screws and remove the cover of the slot in which the Gigabit Ethernet board is installed. CFE037 Fully insert the Gigabit Ethernet board. CFE038 Tighten two screws to secure the Gigabit Ethernet board. Check the Gigabit Ethernet board is connected firmly to the board slot. CFE039 •...
-
Page 113: Installing The Gigabit Ethernet Board (Mainly North America)
Installing the Board (Optional) • If the board was not installed properly, repeat the procedure from step 4. If it cannot be installed correctly even after reattempting installation, contact your sales or service representative. • For details about how to connect the Ethernet interface cable to the Gigabit Ethernet port, see “Connecting to the Gigabit Ethernet Interface”, Network and System Settings Reference. - Page 114 4. Installing Options Disconnect the cables from the Ethernet port and the USB port of the machine, and cover each port with its protective cap. CFE036 Loosen two screws and remove the cover of the slot in which the Gigabit Ethernet board is installed.
-
Page 115: Installing The Wireless Lan Interface Board
Installing the Board (Optional) CFE039 • Confirm that the Gigabit Ethernet board was correctly installed by printing the configuration page. If it is correctly installed, “Gigabit Ethernet Board” will appear for “Device Connection” on the configuration page. For details about printing the configuration page, see “Interface Settings”, Network and System Settings Reference. - Page 116 4. Installing Options 2. Hook and loop fasteners 3. Cable clamps Turn off the main power switch, and then unplug the machine's power cord from the wall outlet. Remove the seals from the hook and loop fasteners, and then attach them to the left side of the machine.
- Page 117 Installing the Board (Optional) Fully insert the wireless LAN interface board. CFE042 Tighten two screws to secure the interface board. Check the wireless LAN interface board is connected firmly to the board slot. CFE043 Attach the antennas of the wireless LAN with the hook and loop fasteners that you attached in step 3, and then place the cables in the cable clamps and close the clamps.
-
Page 118: Installing The File Format Converter
4. Installing Options • If the board was not installed properly, repeat the procedure from step 3. If it cannot be installed correctly even after reattempting installation, contact your sales or service representative. • Before using the wireless LAN interface board, you must configure settings. For details, see “Interface Settings”, Network and System Settings Reference. - Page 119 Installing the Board (Optional) Fully insert the file format converter. CFE045 Tighten two screws to secure the file format converter. Check the file format converter is connected firmly to the board slot. CFE046 • You can confirm that the file format converter was installed correctly by checking the User Tools menu.
-
Page 120: Installing The Sd Card (Optional)
4. Installing Options Installing the SD Card (Optional) This section describes how to install the optional SD card. • Do not remove any covers or screws other than those explicitly mentioned in this manual. Inside this machine are high voltage components that are an electric shock hazard and laser components that could cause blindness. - Page 121 Installing the SD Card (Optional) Loosen and remove the screw, and then carefully remove the cover of the SD card slot. CFE031 If an SD card is already inserted, push and release the SD card, pinch it, and then pull it carefully out of the slot.
- Page 122 4. Installing Options Reattach the cover over the SD card. Fasten the screw to secure the cover. CFE033 • Do not touch the card while the machine is in use. It may come loose, even if pushed only slightly. The slot cover must be reattached. •...
-
Page 123: Adding Paper
5. Adding Paper This chapter describes recommended paper sizes and types, and how to load paper into the paper tray. Loading Paper This section describes how to load paper into the paper tray. • When loading paper, take care not to trap or injure your fingers. •... - Page 124 5. Adding Paper Lift and pull tray 1 carefully, and then pull it out with both hands. CFF032 Place the tray on a flat surface. Fan the paper before loading paper in the tray. CBK254 Square the paper and load it print side down. Do not stack paper over the limit mark.
-
Page 125: Loading Orientation-Fixed Paper Or Two-Sided Paper
Loading Paper Hold the tray with both hands, slide it along the rails of the machine, and then push it straight in. CFE070 • Various sizes of paper can be loaded in trays 1 4 by adjusting the positions of side fences and end fence. -
Page 126: Original Orientation
5. Adding Paper Original Orientation Exposure glass • Copy • Scanner Paper Orientation Paper tray Trays 1 - 4 Bypass tray Copy mode One sided Two sided : Shows to load the : Shows to load the paper print side up. paper print side down. -
Page 127: Changing The Paper Size
Changing the Paper Size Changing the Paper Size This section describes how to change the paper size. • When loading paper, take care not to trap or injure your fingers. • Do not stack paper over the limit mark. • Straighten curled or warped paper before loading. •... - Page 128 5. Adding Paper Lift and pull tray 1 carefully, and then pull it out with both hands. CFF032 Place the tray on a flat surface. Remove paper if loaded. While pressing down the release lever, slide the side fences outward. CFE011 While pressing down the release lever, slide the end fence until it is aligned with the size of paper you want to load.
- Page 129 Changing the Paper Size Fan the paper before loading paper in the tray. CBK254 Square the paper and load it print side down. Do not stack paper over the limit mark. CEC006 Align the side fences gently against the paper you loaded. CFE012...
- Page 130 5. Adding Paper Hold the tray with both hands, slide it along the rails of the machine, and then push it straight in. CFE070 Check the paper size on the display. • When loading a low number of sheets, be sure not to squeeze the side fences in too tightly. If the paper bows, it might not feed in properly.
- Page 131 Changing the Paper Size • For details about various details about and recommendations concerning envelopes, see “Envelopes”. • If you load a paper size that is not selected automatically, you will need to specify the paper size with the control panel. For details, see “Changing to a Size That Is Not Automatically Detected”. •...
-
Page 132: Changing To A Size That Is Not Automatically Detected
5. Adding Paper Return the catches to their original positions. CEC009 Square the paper and load it print side down. Do not stack paper over the limit mark. CFE015 Align the end and side fences gently against the paper you loaded. Hold the tray with both hands, slide it along the rails of the machine, and then push it straight in. - Page 133 Changing the Paper Size Press the [User Tools/Counter] key. CCS003 Press [System Settings]. Press the [Tray Paper Settings] tab.
- Page 134 5. Adding Paper Select the tray for which you want to change the paper settings. Select the loaded paper size and feed direction, and then press [OK]. The set paper size and feed direction is displayed. Press the [User Tools/Counter] key. The initial display is shown.
- Page 135 Changing the Paper Size • page 136 "Recommended Paper Sizes and Types"...
-
Page 136: Changing Paper Thickness Settings
5. Adding Paper Changing Paper Thickness Settings Select [Plain Paper 1] or [Plain Paper 2] depending on the type of plain paper. If in System Settings, [Tray Paper Settings], you set “Paper Thickness” to [Plain Paper] for each tray's [Paper Type], you must then select [Maintenance], [Plain Paper Setting] and specify either [Plain Paper 1] or [Plain Paper 2], depending on the thickness of the loaded paper. - Page 137 Changing Paper Thickness Settings Press [Plain Paper Setting]. Select the plain paper type for each tray depending on the paper to be set and press [OK]. Press [Exit]. Press [Exit]. • In System Settings, [Tray Paper Settings], for each tray's [Paper Type] you can specify “Paper Thickness”.
-
Page 138: Recommended Paper Sizes And Types
5. Adding Paper Recommended Paper Sizes and Types This section describes recommended paper sizes and types. • Do not use paper designed for inkjet printers, as these may stick to the fusing unit and cause a misfeed. • If you use damp or curled paper, a staple clogging or paper jam may occur. Tray 1 Paper type and weight Paper size... - Page 139 Recommended Paper Sizes and Types Paper type and weight Paper size Paper capacity Envelopes Sizes of envelopes that you need to 10 sheets specify × 9 × 7 , C5 Env , C6 Env , DL Env Trays 2 4 Paper type and weight Paper size Paper capacity...
- Page 140 5. Adding Paper Paper type and weight Paper size Paper capacity Envelopes Sizes of envelopes that you need to 10 sheets specify × 9 × 7 , C5 Env , C6 Env , DL Env Bypass tray Paper type and weight Paper size Paper capacity 52 220 g/m...
- Page 141 Recommended Paper Sizes and Types *4 Select the paper size. For details, see “Copying onto Regular Size Paper”, Copy and Document Server Reference, or “Setting the Paper Size Using the Control Panel”, Printer Reference. *5 Enter the paper size using the number keys. For details, see “Copying onto Custom Size Paper”, Copy and Document Server Reference, or “Setting Custom Size Paper Using the Control Panel”, Printer Reference.
- Page 142 5. Adding Paper • We recommend that you use a 4000 ANSI lumen or brighter overhead projector to project OHP transparencies. • When copying or printing onto OHP transparencies or thick paper, the copy/print speed is slower than usual. • Flatten out curled sheets before loading them. •...
-
Page 143: Envelopes
Envelopes Envelopes This section gives you various details about and recommendations concerning envelopes. • Misfeeds might occur depending on the length and shape of the flaps. • Do not use window envelopes. When loading envelopes in trays 1 - 4 or the bypass tray, open the rear cover, and then raise the envelope lever. - Page 144 5. Adding Paper CFG016 When copying onto envelopes, see “Copying onto Envelopes from Trays 1 - 4” or “Copying onto Envelopes from the Bypass Tray”, Copy and Document Server Reference. When printing onto envelopes, see “Setting Envelopes Using the Control Panel”, Printer Reference. The following sizes can be used: 4 ×...
-
Page 145: Thick Paper
Thick Paper Thick Paper This section gives you various details about and recommendations concerning thick paper. When loading thick paper of 106 220 g/m (28 lb. Bond 80 lb. Cover) in trays 1 4 or the bypass tray, follow the recommendations below to prevent misfeeds and loss of image quality. •... -
Page 146: Unusable Paper
5. Adding Paper Unusable Paper This section describes paper unusable on this machine. • Do not attempt to print on stapled sheets, aluminum foil, carbon paper, or any kind of conductive paper. Doing so risks fire. • To prevent faults, do not use any of the following kinds of treated paper: •... - Page 147 Unusable Paper • Do not load sheets that have already been printed onto by another machine. (Sheets can become jammed if they have been improperly stored.)
-
Page 148: Paper Storage
5. Adding Paper Paper Storage This section describes how to store paper. • When storing paper, the following precautions should always be followed: • Do not store paper where it will be exposed to direct sunlight. • Avoid storing paper in humid areas (humidity: 70% or less). •... -
Page 149: Replacing The Consumables
6. Replacing the Consumables This chapter describes how to replace the consumables. Handling the Print Cartridge This section describes how to replace and store the print cartridge. • If metal objects, or water or other fluids fall inside this machine, you must turn off its power immediately. -
Page 150: Replacing The Print Cartridge
6. Replacing the Consumables • When removing jammed paper or replacing toner, avoid getting toner (new or used) on your skin. If toner comes into contact with your skin, wash the affected area thoroughly with soap and water. • The print cartridge might need to be replaced even if there is toner remaining in it. This is due to depletion or wear of other components. -
Page 151: Sending Faxes Or Scanned Documents When Toner Has Run Out
Handling the Print Cartridge Push the button on the right side of the machine to open the front cover. CFF004 Hold the print cartridge's front handle to lift and pull it out. CFF008 Take the new print cartridge out of the box. Hold the grips of the cartridge, and then insert it into the machine until it stops. -
Page 152: Used Print Cartridge
6. Replacing the Consumables • If number of communications executed after the toner has run out and not listed in the automatically output Journal exceeds 200, communication is not possible. Make sure the machine is in facsimile or scanner mode. Press [Exit], and then perform transmission operation. -
Page 153: Adding Staples
Adding Staples Adding Staples This section describes what to do when staples need replacing. • Stapling failures or jams may occur if you use a staple cartridge other than that recommended. Open the finisher cover on the right side of the machine. CFF035 Hold the lever, and then gently pull out the cartridge. - Page 154 6. Replacing the Consumables Push the new refill into the cartridge until it clicks. CCS023 Hold the lever, and then push in the cartridge until it clicks. CFF037 Close the finisher cover. • If you cannot remove the refill, there are staples remaining. Use all the staples, and do not add more.
-
Page 155: Replacing Machine Parts
Replacing Machine Parts Replacing Machine Parts Replace the paper feed roller, transfer roller, and fusing unit when they are worn. Refer to the maintenance guide provided with the new items for the replacement maintenance kit. • Do not remove any covers or screws other than those explicitly mentioned in this manual. Inside this machine are high voltage components that are an electric shock hazard and laser components that could cause blindness. - Page 156 6. Replacing the Consumables...
-
Page 157: Entering Text
7. Entering Text This chapter describes how to enter characters. Entering Text This section explains how to enter text. When you enter a character, it appears at the position of the cursor. If there is a character already at the cursor position, the entered character appears before that. -
Page 158: Keys (Mainly North America)
7. Entering Text CFE065 • When entering uppercase or lowercase letters continuously, use [Shift Lock] to lock the case. Keys (mainly North America) This section explains the entry screen and the keys displayed on it. You can change the entry screen using the keys below. -
Page 159: How To Enter Text
Entering Text CFE066 • When entering uppercase or lowercase letters continuously, use [Shift Lock] to lock the case. How to Enter Text This section explains text entry more specifically. Entering letters This section explains how to enter letters. Press [Shift] to switch between uppercase and lowercase. Press the letters you want to enter. - Page 160 7. Entering Text Press [Symbol Entry] to enter into the Symbol Entry mode. Press the symbols you want to enter. • Depending on the machine type, this function may not be available. Entering numbers This section explains how to enter numbers. Press numbers you want to enter.
- Page 161 Entering Text For the registration procedure under Program / Change / Delete User Text, see “System Settings”, Network and System Settings Reference. Press [User Text]. Select the User Text you want to use.
- Page 162 7. Entering Text...
-
Page 163: On-Screen Operating Instructions
8. On-screen Operating Instructions This chapter describes the on-screen operating instructions of this machine. The on-screen operating instructions are included in the supplied manual CD-ROMs. Formats of the Operating Instructions The operating instructions of this machine are provided in the following formats: •... -
Page 164: Reading The Html Manuals On The Cd-Roms
8. On-screen Operating Instructions Reading the HTML Manuals on the CD-ROMs This section describes how to read the HTML manuals on the supplied manual CD-ROMs. Insert the CD-ROM in the CD-ROM drive of your computer. Select a language and a product, and then click [OK]. Click [Read HTML manuals]. -
Page 165: Installing And Opening The Html Manuals
Installing and Opening the HTML Manuals Installing and Opening the HTML Manuals This section describes how to install and open the HTML manuals on your computer. For your convenience, we recommend you install these manuals on your computer. Insert the CD-ROM in the CD-ROM drive of your computer. Select a language and a product, and then click [OK]. - Page 166 8. On-screen Operating Instructions • To delete an installed manual, on the [Start] menu, click [All Programs], then [Product Name], and then uninstall the data. • Depending on the settings made during installation, menu folder names may differ.
-
Page 167: Reading The Pdf Manuals On The Cd-Rom
Reading the PDF Manuals on the CD-ROM Reading the PDF Manuals on the CD-ROM This section describes how to read the PDF manuals on the supplied manual CD-ROM. File path The manuals are included in the following folder on the CD-ROM: MANUAL_PDF\(language) Insert the CD-ROM in the CD-ROM drive of your computer. - Page 168 8. On-screen Operating Instructions...
-
Page 169: Remarks
9. Remarks This chapter describes how to maintain and operate the machine. Dos and Don'ts The following items should be followed during use of this machine. • Do not use flammable sprays or solvents in the vicinity of this machine. Also, avoid placing these items in the vicinity of this machine. - Page 170 9. Remarks • After scanning originals continuously, the exposure glass may become warm - this is not a malfunction. • The area around the ventilation holes might feel warm. This is caused by exhaust air and is not a malfunction. •...
-
Page 171: Moving The Machine
Moving the Machine Moving the Machine This section describes precautions when moving the machine. • Be sure to locate the machine as close as possible to a wall outlet. This will allow easy disconnection of the power cord in the event of an emergency. •... -
Page 172: Moving The Machine
9. Remarks • If paper feed units (optional) are attached, remove them from the machine and move them separately. • page 74 "Turning On/Off the Power" Moving the Machine This section describes precautions when moving the machine. Be sure to check the following points: •... -
Page 173: Cleaning The Machine
Cleaning the Machine Cleaning the Machine If parts of the machine is dirty, copy clarity may be reduced or misfeed may occur. Clean them if they are dirty. • Do not remove any covers or screws other than those explicitly mentioned in this manual. Inside this machine are high voltage components that are an electric shock hazard and laser components that could cause blindness. - Page 174 9. Remarks Remove all the cables from the machine. Lift and pull tray 1 carefully, and then pull it out with both hands. CFF032 Place the tray on a flat surface. Remove paper if loaded. Wipe the friction pads with a soft damp cloth. After that, wipe it with a dry cloth to remove the moisture.
-
Page 175: Cleaning The Registration Roller
Cleaning the Machine Hold the tray with both hands, slide it along the rails of the machine, and then push it straight in. CFE070 Insert the power plug into the wall outlet securely. Connect all the cables that were removed. Turn on the main power. - Page 176 9. Remarks Push the button on the right side of the machine to open the front cover. CFF004 Hold the print cartridge's front handle to lift and pull it out. CFF008 Wipe around the metallic registration roller by turning with a soft damp cloth. After that, wipe it with a dry cloth to remove the moisture.
-
Page 177: Cleaning The Exposure Glass
Cleaning the Machine Hold the grips of the cartridge, and then insert it into the machine until it stops. CFE071 Close the front cover. CFF007 Cleaning the Exposure Glass This section describes how to clean the exposure glass and the scanning glass. Wipe the exposure glass and the scanning glass. -
Page 178: Cleaning The Auto Document Feeder
9. Remarks Cleaning the Auto Document Feeder This section describes how to clean the ADF. Open the upper cover of the ADF. CFF020 Lift the original feed unit. CFE082 Wipe the paper pickup roller, paper feed roller, and friction pad with a soft damp cloth. After that, wipe them with a dry cloth to remove the moisture. -
Page 179: Cleaning The Power Cord Plug
Cleaning the Machine 3. Friction pad Return the original feed unit to its original position. Close the upper cover of the ADF. Lift the ADF. CFF024 Wipe the sheet and guide plate of the ADF. CFE089 1. Guide plate 2. Sheet Lower the ADF. - Page 180 9. Remarks • Be sure to disconnect the plug from the wall outlet and clean the prongs and the area around the prongs at least once a year. Allowing dust to build up on the plug constitutes a fire hazard.
-
Page 181: Backing Up Hard Disk Data
Backing Up Hard Disk Data Backing Up Hard Disk Data You can store data such as images and Address Book information on the machine's hard disk. This section describes how to back up or download this data. • If the machine's hard disk fails, data stored on it, including Address Book information might be lost. For this reason, do not save important data on the machine's hard disk without backing it up or downloading it. -
Page 182: Changing The Timing For Prompting Users To Prepare Replacement Supplies
9. Remarks Changing the Timing for Prompting Users to Prepare Replacement Supplies The machine displays a message prompting the user to prepare a replacement print cartridge or maintenance kit. This section describes how to change the timing when the machine displays the message. Press the [User Tools/Counter] key. - Page 183 Changing the Timing for Prompting Users to Prepare Replacement Supplies Specify the timing. To notify sooner, press [Notify Sooner]. To notify later, press [Notify Later]. Press [OK]. Press [Exit] twice.
-
Page 184: Counter
9. Remarks Counter You can display the total counter value used for all functions. Press the [User Tools/Counter] key. CCS003 Press [Counter]. To print a counter list, press [Print Counter List]. Press the [Start] key. A counter list prints out. Press [Exit] twice. -
Page 185: Enquiry
Enquiry Enquiry The Enquiry function allows you to check the machine's serial number under “Machine Maintenance/ Repair”. In addition, the following items appear after your sales or service representative enters them: Consumables • Telephone No. to order • Toner • Staple Machine Maintenance/Repair •... - Page 186 9. Remarks Press [Print Enquiry List]. Press the [Start] key. Enquiry information prints out. Press [Exit] twice. • Contact your sales or service representative for further information about topics covered in this manual or to enquire about topics not covered in manuals provided with the machine.
-
Page 187: Disposal
Disposal Disposal • For environmental reasons, do not dispose of the machine or expended supply waste at household waste collection points. Disposal can take place at an authorized dealer. Ask your sales or service representative for information about correct disposal of this machine. -
Page 188: Consumables
9. Remarks Consumables • Our products are engineered to meet the highest standards of quality and functionality. When purchasing expendable supplies, we recommend using only those specified by an authorized dealer. Print Cartridges Print cartridge Average printable number of pages per cartridge Black 25,000 pages *1 The printable number of pages is based on pages that are compliant with ISO/IEC 19752 and the image... -
Page 189: Staple Cartridges
Consumables Staple Cartridges Name Number of shots Staple cartridge 5,000 shots × 1 with cartridge Staple Refill cartridge Refill 5,000 shots × 2 Maintenance Kit Name Average printable number of pages Maintenance Kit SP 5200 (includes a fusing unit, transfer roller, and paper 120,000 pages feed roller) •... - Page 190 9. Remarks...
-
Page 191: 10. Appendix
10. Appendix This chapter describes the provided software and utilities CD-ROM, and specifications. Software and Utilities Included on the CD-ROM This section explains the software and utilities CD-ROM provided with this machine. The following is included in the CD-ROM: Font Manager For installing new screen fonts, or organizing and managing fonts already in the system. -
Page 192: Twain Driver
10. Appendix Printer Language PCL 5e PCL 6 PostScript 3 Windows Server 2008 Mac OS X *1 Microsoft Windows XP Professional Edition/Microsoft Windows XP Home Edition/Microsoft Windows XP Media Center Edition/Microsoft Windows XP Tablet PC Edition *2 Microsoft Windows Vista Ultimate/Microsoft Windows Vista Enterprise/Microsoft Windows Vista Business/ Microsoft Windows Vista Home Premium/Microsoft Windows Vista Home Basic *3 Microsoft Windows 7 Home Premium/Microsoft Windows 7 Professional/Microsoft Windows 7 Ultimate/ Microsoft Windows 7 Enterprise... -
Page 193: Lan-Fax Driver
Software and Utilities Included on the CD-ROM \DRIVERS\TWAIN System requirements • Hardware PC/AT-compatible machines that support the following operating system properly • Operating system Windows XP/Vista/7 Windows Server 2003/2003 R2/2008/2008 R2 *1 Operates in 32-bit compatibility mode on 64-bit operating systems •... -
Page 194: Specifications For The Main Unit
10. Appendix Specifications for the Main Unit Configuration: Desktop Original scanning: One-dimensional solid scanning system through CCD Copy process: Laser beam scanning and electro-photographic printing Development: Monocomponent Nonmagnetic Development System Fusing: Heating roll pressure system Resolution: • Scanning: Exposure glass: 600 × 600 dpi ADF: 600 ×... - Page 195 Specifications for the Main Unit • Tray 1 (custom size): Vertical: 140.0 356.0 mm (5.52 14.01 inches) Horizontal: 98.0 216.0 mm (3.86 8.50 inches) • Bypass tray: A4 , A5 , A6 , B5 JIS , B6 JIS , 8 ×...
- Page 196 10. Appendix • Types 2 and 3: 50 sheets/minute (A4 ), 52 sheets/minute (8 × 11 ) Reproduction ratio: • (mainly Europe and Asia) Preset reproduction ratios: • Enlargement: 200%, 141% • Full size: 100% • Reduction: 93%, 71%, 50% •...
- Page 197 Specifications for the Main Unit Type 1 Type 2 Type 3 Stand-by About 200 W About 200 W About 160 W About 194 W About 197 W About 159 W During printing About 843 W About 869 W About 833 W About 863 W About 892 W About 858 W...
-
Page 198: Auto Document Feeder
10. Appendix Type 1 Type 2 Type 3 Copying Less than 72.0 dB(A) Less than 73.0 dB(A) Less than 73.0 dB(A) • Sound pressure level: • Main unit only Type 1 Type 2 Type 3 Stand-by Less than 35.8 dB(A) Less than 35.8 dB(A) Less than 35.8 dB(A) Copying... -
Page 199: Document Server
Specifications for the Main Unit Original weight: • 1-sided originals: 52 128 g/m (14 34 lb. Bond) • 2-sided originals: 60 105 g/m (16 28 lb. Bond) Number of originals to be set: 50 sheets (80 g/m , 21 lb. Bond) Document Server HDD (Document Server): Approx. -
Page 200: Finisher (Type 3 Only)
10. Appendix Stack capacity (80 g/m , 21 lb. Bond): 100 sheets Finisher (Type 3 Only) Paper size: A4 , A5 , A6 , B5 JIS , B6 JIS , 8 × 14 , 8 × 13 , 8 × 11 , 8 ×... -
Page 201: Specifications For Paper Feed Unit (Optional)
Specifications for Paper Feed Unit (Optional) Specifications for Paper Feed Unit (Optional) Paper size: A4 , A5 , B5 JIS , B6 JIS , 8 × 14 , 8 × 13 , 8 × 11 , 8 × 13 , 8 × 13 , ×... -
Page 202: Specifications For Paper Feed Unit With The Casters (Optional)
10. Appendix Specifications for Paper Feed Unit with the Casters (Optional) Paper size: A4 , A5 , B5 JIS , B6 JIS , 8 × 14 , 8 × 13 , 8 × 11 , 8 × 13 , 8 × 13 , ×... -
Page 203: Specifications For Wireless Lan Board (Optional)
Specifications for Wireless LAN Board (Optional) Specifications for Wireless LAN Board (Optional) Transmission spec.: • (mainly Europe and Asia) • Based on IEEE 802.11a/b/g (wireless LAN) • Based on IEEE 802.11b/g (wireless LAN) • (mainly North America) • Based on IEEE 802.11a/b/g (wireless LAN) Protocol: TCP/IP, IPX/SPX Transmission Rate:... -
Page 204: Specifications For Gigabit Ethernet (Optional)
10. Appendix Specifications for Gigabit Ethernet (Optional) Interface connector: 10Base-T, 100Base-TX, 1000Base-T Data transmission speed: 1000 Mbps, 100 Mbps, 10 Mbps Protocol: TCP/IP, IPX/SPX Distance between devices: 100 m... -
Page 205: Specifications For Other Options
Specifications for Other Options Specifications for Other Options Copy data security unit The copy data security unit deletes images and prints the gray ground color of the paper when the documents marked unauthorized are copied. -
Page 206: Electromagnetic Interference
10. Appendix Electromagnetic Interference If this machine is located close to another electronic device, both devices may malfunction due electromagnetic interference. Televisions and radios may produce noise if located too close to this machine. If this happens, do the following: •... -
Page 207: Energy Star Program
ENERGY STAR Program ENERGY STAR Program ® ENERGY STAR Program Requirements for Imaging Equipment ® This company is a participant in the ENERGY STAR Program. This machine is compliant with the regulations specified by the ® ENERGY STAR Program. ® The ENERGY STAR Program Requirements for Imaging Equipment encourage energy conservation by promoting energy efficient computers and other office equipment. - Page 208 10. Appendix Type 1 Type 2 Type 3 Time of Switch out from Sleep Mode 20 seconds 20 seconds 20 seconds...
- Page 209 Macintosh, Mac OS, and Safari are trademarks of Apple Inc., registered in the U.S. and other countries. ® The Bluetooth word mark and logos are registered trademarks owned by Bluetooth SIG, Inc. and any use of such marks by Ricoh Company, Ltd. is under license. ® Firefox is a registered trademark of the Mozilla Foundation.
- Page 210 10. Appendix ® ® Microsoft Windows 7 Ultimate ® ® Microsoft Windows 7 Enterprise • The product names of Windows Server 2003 are as follows: ® ® Microsoft Windows Server 2003 Standard Edition ® ® Microsoft Windows Server 2003 Enterprise Edition •...
- Page 211 INDEX Clear Modes key........... Clear/Stop key............. 1 bin tray.............. Collate..............1000BASE-T............Color............... 10BASE-T/100BASE-TX port......Color originals............Combine............12, 41 Communicating indicator........Access to the machine........... Components............Adding staples............. Computer............... Address book..........18, 43, 45 Confidential File indicator........ADF..........22, 49, 176, 196 Connecting the Machine........
- Page 212 Energy saving functions........Genuine toner............ENERGY STAR Program........Gigabit Ethernet.......... 102, 202 Enlarge..............Gigabit Ethernet board......108, 111 Enquiry..............Grain..............Enter key (# key)........... Guide board............Entering letters............. Entering numbers..........Handling the print cartridge....... Entering symbols..........Hard disk............. Entering text..........155, 157 High Compression PDF.........
- Page 213 Moving the machine in a short distance.... Multi-Accessing............. Key arrangement........155, 156 Key Colour............. Names of major items........... Network..............Label paper (adhesive labels)......Network connection..........LAN-Fax..........14, 41, 191 Network delivery scanner........LAN-Fax driver............ Normal Color Scan..........LAN-Fax driver destination list......Notes..............
- Page 214 PCL................ PDF manuals..........10, 165 Safety labels of this machine........ Plug............... Sample Copy key..........Positions of WARNING and CAUTION labels on Sample Print............type 3..............Saving paper............Positions of WARNING and CAUTION labels on types 1 and 2............Scan files..............PostScript 3............
- Page 215 Symbols..............System Reset............WARNING labels.......... 31, 34 Web Image Monitor......13, 14, 18, 64 Web Services on Devices........Text.............. 155, 157 When toner has run out........Thick paper..........136, 143 Where to put your machine........Toner.......... 147, 148, 149, 150 Windows Network Printer........
- Page 216 MEMO...
- Page 217 MEMO...
- Page 218 MEMO M052-7006A...
- Page 219 © 2011-2014...
- Page 220 M052-7006A...