
Related Manuals for Ricoh D8400


Summary of Contents for Ricoh D8400
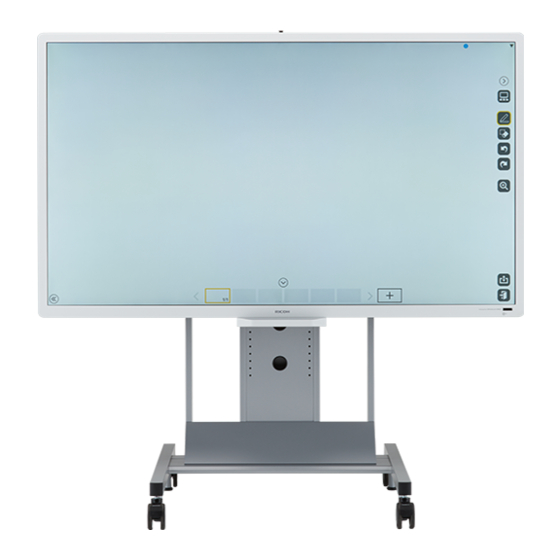
- Page 1 Operating Instructions For safe and correct use, be sure to read the Safety Information in Read This First before using the machine.
-
Page 3: Table Of Contents
Table of Contents Disclaimer ........................2 1. Using the Remote control..................3 Installing the batteries into the remote control ............4 Removing the batteries from the remote control ........... 4 Remote control usage tips ..................5 2. Connection ......................6 Connecting audio/video signals................ -
Page 4: Disclaimer
Disclaimer Disclaimer To the maximum extent permitted by applicable laws, in no event will the manufacturer be liable for any damages whatsoever arising out of failures of this machine, losses of the registered data, or the use of this product and operation manuals provided with it. Make sure that you always copy or have backups of the data registered in this machine. -
Page 5: Using The Remote Control
1. Using the Remote control 1. Using the Remote control Important • Do not put the remote control in the direct heat, humidity, and avoid fire. • Do not drop the remote control, as doing so may cause the remote control to malfunction. -
Page 6: Installing The Batteries Into The Remote Control
1. Using the Remote control Installing the batteries into the remote control • When batteries fail to function, replace them immediately. • There may be local restrictions on the disposal or recycling of batteries. Consult your local regulations or waste disposal provider. 1. -
Page 7: Remote Control Usage Tips
1. Using the Remote control Remote control usage tips • Point and aim the top front of the remote control directly at the display’s remote control sensor window when you press the buttons. • Do not let the remote control become wet or place it in humid environments (like bathrooms). •... -
Page 8: Connection
2. Connection 2. Connection Connecting audio/video signals Pay attention to the following notes when you connect cables: • Please turn off all devices. • Familiarize yourself with the audio/video ports on the machine and the devices you want to use. Be aware that incorrect connections may adversely affect picture quality or result in the picture not being displayed. -
Page 9: Connecting The Digital Inputs
2. Connection Connecting the digital inputs 1. Connect the HDMI output jack of a computer or A/V device (such as a VCR or DVD player) to the HDMI Input jack on the machine using an HDMI cable. If the device has a DisplayPort output jack, connect it to the DisplayPort Input jack on the machine using a DisplayPort cable. -
Page 10: Connecting External Speakers
2. Connection Connecting external speakers The built-in amplifier on the machine allows you to output audio signals through external speakers. Connect external speakers to the Speaker R(8Ω)12W/Speaker L(8Ω)12W jacks on the machine. External speakers Note • When connecting external speakers, use speakers that support 8Ω output. •... -
Page 11: Connecting Multiple Displays
2. Connection Connecting multiple displays You can connect multiple displays serially (daisy chain) to a computer for management. The number of displays you can connect serially depends on the resolution of the input signal you use. The first display Additional display DisplayPort cable RS-232C cable Note... -
Page 12: Using The Touch Screen
• When connecting a Mac to the machine, settings may need to be made using an exclusive application. Download the exclusive application from the Ricoh website on the Internet. http://www.ricoh.com/ • Touch operation behavior may differ depending on the application. See the application’s operating manual. - Page 13 3. Using the touch screen - Moisten a clean soft, lint-free cloth with a neutral detergent and then clean the touch screen. - Do not spray a detergent on the screen surface or the body directly. It may result in a short circuit to the touch screen.
-
Page 14: The On-Screen Display Menu
4. The On-Screen Display menu 4. The On-Screen Display menu On-Screen Display menu overview Menu name Options/functions See page • Picture Mode • Backlight • Contrast • Brightness Picture • Chroma • Phase • Sharpness • Color Temp. • Reset •... -
Page 15: Operations In The On-Screen Display Menu
4. The On-Screen Display menu Operations in the On-Screen Display menu Using the control panel buttons Using the remote control 1. Press [Menu] to open the On-Screen 1. Press [MENU] to open the On-Screen Display menu. Display menu. 2. In the On-Screen Display menu, press 2. - Page 16 4. The On-Screen Display menu 5. Press [Menu] to return to the previous 5. Press [MENU] to close the On-Screen item. Press [Menu] several times to return Display menu. to the On-Screen Display menu, and press [Menu] again to close the On- Screen Display menu.
-
Page 17: Picture Menu
4. The On-Screen Display menu Picture menu Name Description Sets the display mode. • Standard: This is the standard setting. • Vivid: Displays the image so it is brighter and more vivid. Picture Mode • Cinema: Setting for viewing videos and movies. •... -
Page 18: Sound Menu
4. The On-Screen Display menu Sound menu Name Description Treble Adjusts the audio treble. Bass Adjusts the audio bass. Balance Adjusts the audio balance. Volume Turns down/up the volume. Mute Turns on or off the mute function. Sets the audio source. Speaker •... -
Page 19: Screen Menu
4. The On-Screen Display menu Screen menu Name Description • PAP: Turns on or off the PIP (Picture in Picture) and PBP (Picture by Picture) functions. Note If the Touch Feature function is set to On, PIP will be disabled. •... - Page 20 4. The On-Screen Display menu • Picture Position: (PIP only) Changes the position of the sub picture. Upper Left Upper Right Lower Left Lower Right PAP Setting (Continued) Note • See "List of PAP input signal combination supported by the Machine" on page 26 for more information on supported combinations.
- Page 21 4. The On-Screen Display menu For PC signal input Real Full Aspect (continued) • Auto Adjustment: Automatically optimizes image display for the VGA input. • Phase: Adjusts the phase of the VGA input image. Adjust Screen • Clock Frequency: Adjusts the clock frequency of the VGA input image. •...
-
Page 22: Setting Menu
4. The On-Screen Display menu Setting menu Name Description Language Sets your preferred language for the On-Screen Display menu. Sets the machine to enter the power saving mode when there is no signal detected. • On: All source can enter the power saving mode and wake up the display. •... - Page 23 4. The On-Screen Display menu Assigns an ID number for the current machine when multiple displays are connected. Set Monitor Note For use when under the RS-232C control mode. • Auto Search: If turned On, the display automatically detects available input sources.
-
Page 24: Product Information
5. Product information 5. Product information Specifications Item Specifications Backlight Panel size 84" Pixel pitch (mm) 0.4845 x 0.4845 Native resolution (pixels) 3840 x 2160 LCD panel Brightness (cd/m ) (typical) Contrast (typical) 1400:1 Response time (ms) (typical) 5 ms (grijs naar grijs) Panel Bit 10-bit Technology... - Page 25 5. Product information Supply 100 - 240V AC, 50/60 Hz Power Consumption (While operating) 564 W Consumption (Standby) Less than 0.5 W Operating Temperature 0 - 32°C (32 - 89.6 Environment Operating Humidity 10 - 80% (without condensation) Weight Less than 110 kg Dimensions (W x H x D) Mechanical - with pen tray...
-
Page 26: List Of Video Input Signals Supported By The Machine
5. Product information List of Video Input Signals Supported by the Machine Input source Resolution DVI 1/ DisplayPort HDMI DVI 2 640 x 480 @ 60Hz (VGA) 640 x 480 @ 72Hz 640 x 480 @ 75Hz 720 x 400 @ 70Hz 800 x 600 @ 60Hz (SVGA) 800 x 600 @ 75Hz 832 x 624 @ 75Hz... - Page 27 5. Product information Input source Resolution DVI 1/ DisplayPort HDMI DVI 2 1920 x 1080p (24Hz) 1920 x 1080p (25Hz) 1920 x 1080p (30Hz) 1920 x 1080p (50Hz) 1920 x 1080p (60Hz) 1920 x 1080p (24Psf) 1920 x 1080p (25Psf) 3840 x 2160p (30Hz) 3840 x 2160p (60Hz) •...
-
Page 28: List Of Pap Input Signal Combination Supported By The Machine
5. Product information List of PAP input signal combination supported by the Machine Main/Left picture signal source Computer Display DVI 1 1 DVI 1 2 HDMI Port DVI 1 1 DVI 1 2 HDMI DisplayPort Computer • : supported Note •... -
Page 29: Output Signals
5. Product information Output signals The DisplayPort Output jack of the machine outputs the signals from the DisplayPort Input jack as they are. You can connect devices, and view the video or image displayed on the machine on the connected device. Note Depending on the connected device, the video or image may not be displayed on the device connected to the output terminal even if it is displayed on the machine’s display. -
Page 30: Troubleshooting
6. Troubleshooting 6. Troubleshooting Problem Solution Check the following: • Is the machine turned on? Check the power indicator of the display. • Is the signal source device turned on? Turn on the device and try again. • Are there any loose cable connections? Make sure that all cables are connected firmly. - Page 31 6. Troubleshooting Check the following: • Have you chosen an unsupported output resolution on the computer? Refer to "List of Video Input Signals Supported by the Machine" on page 24 to select a supported resolution and try again. • Use the Auto Adjustment function (See "Adjust Screen"...
- Page 33 Y303-7524A © 2016 Ricoh Co., Ltd.