Table of Contents

Related Manuals for Ricoh fax 1195L


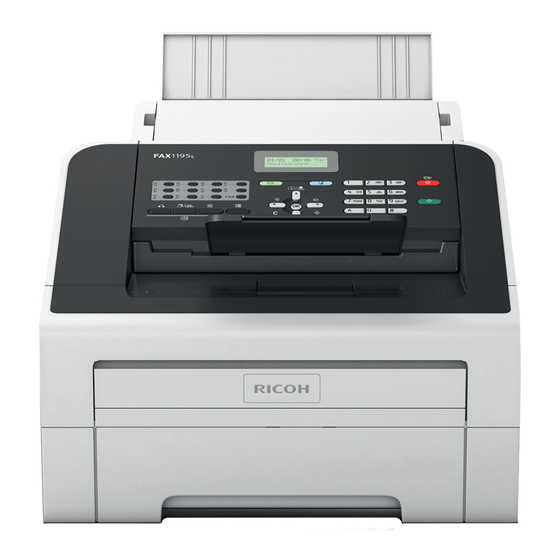
Summary of Contents for Ricoh fax 1195L
- Page 1 FAX 1195L Software User’s Guide Read this manual carefully before you use this machine and keep it handy for future reference. For safe and correct use, be sure to read “Safety Information” pamphlet and “Product Safety Guide”.
-
Page 2: Compilation And Publication Notice
We reserve the right to make changes without notice in the specifications and materials contained herein and shall not be responsible for any damages (including consequential) caused by reliance on the materials presented, including but not limited to typographical and other errors relating to the publication. ©2013 Ricoh Company, Ltd. IMPORTANT NOTE ... -
Page 3: Table Of Contents
Table of Contents Section I Machine operation keys Using the control panel Using the printer keys ..........................2 Job Cancel............................2 ® Section II Windows Printing Using the printer driver ..........................4 Printing a document...........................5 Manual duplex (two-sided) printing......................6 Guidelines for printing on both sides of the paper ................6 Manual duplex printing ........................6 Simultaneous scanning, printing and faxing ....................7 Printer driver settings..........................8... - Page 4 Scanning Scanning a document using the WIA driver.....................29 WIA compliant ...........................29 Scanning a document into the PC .....................29 Scanning a document using the WIA driver (Windows Photo Gallery and Windows Fax and Scan) ................34 Scanning a document into the PC .....................34 Scanning a document using the TWAIN driver..................36 Scanning a document into the PC .....................36 Pre-Scanning to crop a portion you want to scan................37...
- Page 5 Section I Machine operation keys Using the control panel...
-
Page 6: Using The Control Panel
Using the control panel Using the printer keys You can access the following features from your machine’s control panel. Job Cancel To cancel the current print job, press . You can clear the data that is left in the machine’s memory by pressing... -
Page 7: Section Ii Windows
Section II ® Windows Printing Scanning Remote Setup PC-FAX Send Software... -
Page 8: Printing
Printing Note ® The screens in this section are from Windows 7. Screens on your PC may vary depending on your operating system. Using the printer driver A printer driver is software that translates data from the format used by a PC into the format needed by a particular printer, using a printer command language or page description language. -
Page 9: Printing A Document
Printing Printing a document When the machine receives data from your computer, it begins printing by picking up paper from the paper tray. The paper tray can feed many types of paper and envelopes. (For information about the Paper Tray and Recommended paper, see Basic User’s Guide.) From your application, choose the Print command. -
Page 10: Manual Duplex (Two-Sided) Printing
Printing Manual duplex (two-sided) printing The supplied printer driver supports manual duplex printing. Guidelines for printing on both sides of the paper If the paper is thin, it may wrinkle. If paper is curled, turn over the stack, straighten it and then put it back in the paper tray or manual feed slot. ... -
Page 11: Simultaneous Scanning, Printing And Faxing
Printing Simultaneous scanning, printing and faxing Your machine can print from your computer while sending or receiving a fax in memory, or while scanning a document into the computer. Fax sending will not be stopped during the computer printing. However, when the machine is copying or receiving a fax on paper, it pauses the computer printing operation, and then continues printing when copying or fax receiving has finished. -
Page 12: Printer Driver Settings
Printing Printer driver settings You can change the following printer settings when you print from your computer: Paper Size Orientation Copies Media Type Resolution Print Settings Multiple Page Duplex / Booklet Paper Source ... -
Page 13: Accessing The Printer Driver Settings
Printing Accessing the printer driver settings ® (For Windows Click Start, and then Printers and Faxes. ® (For Windows Vista Click the button, Control Panel, Hardware and Sound, and then Printers. ® (For Windows Click the button, and then click Devices and Printers. ®... -
Page 14: Basic Tab
Printing Basic tab You can also change the Page Layout settings by clicking the illustration on the left side of the Basic tab. Choose Paper Size, Orientation, Copies, Media Type, Resolution and Print Settings (1). Choose Multiple Page and Duplex / Booklet (2). Choose Paper Source (3). -
Page 15: Orientation
Printing Orientation Orientation selects the position of how your document will be printed (Portrait or Landscape). Portrait (Vertical) Landscape (Horizontal) Copies The copies selection sets the number of copies that will be printed. Collate With the Collate check box selected, one complete copy of your document will be printed and then repeated for the number of copies you selected. -
Page 16: Media Type
Printing Media Type You can use the following types of media in your machine. For the best print quality, select the type of media that you wish to use. Plain Paper Thin Paper Thick Paper Thicker Paper ... -
Page 17: Print Settings
Printing Print Settings You can change the print settings as follows: Graphics This is the best mode for printing documents that contain graphics. Text This is the best mode for printing text documents. Manual You can change the settings manually by choosing Manual and clicking the Manual Settings... button. You can set brightness, contrast and other settings. -
Page 18: Manual Duplex (Two-Sided)/ Booklet
Printing Manual duplex (two-sided)/ Booklet When you want to print a booklet or do manual duplex printing, use this function. None Disable duplex printing. Duplex (Manual) When you want to do duplex printing, use this option. • Duplex (Manual) The machine prints all the even-numbered pages first. -
Page 19: Paper Source
Printing Paper Source You can choose Auto Select, Tray1 or Manual and specify separate trays for printing the first page and for printing from the second page onwards. -
Page 20: Advanced Tab
Printing Advanced tab Change the tab settings by clicking one of the following selections: Scaling (1) Reverse Print (2) Use Watermark (3) Header-Footer Print (4) Toner Save Mode (5) Administrator (6) Other Print Options (7) Scaling You can change the print image scaling. -
Page 21: Use Watermark
Printing Use Watermark You can put a logo or text into your document as a watermark. You can choose one of the preset Watermarks, or you can use a bitmap file that you have created. Check Use Watermark and then click the Settings... button. -
Page 22: Custom Settings
Printing Transparent Check Transparent to print the watermarked image in the background of your document. If this feature is not checked then the watermark will be printed on top of your document. In Outline Text Check In Outline Text if you only want to print an outline of the watermark. It is only available when you choose a text watermark. -
Page 23: Header-Footer Print
Printing Header-Footer Print When this feature is enabled, it will print the date and time on your document from your computer’s system clock and the PC login user name or the text you entered. By clicking Settings, you can customize the information. -
Page 24: Other Print Options
Printing Watermark Lock Lock the current settings of the Watermark option to prevent changes being made. Header-Footer Print Lock Lock the current settings of the Header-Footer Print option to prevent changes being made. Other Print Options You can set the following in Printer Function: ... -
Page 25: Skip Blank Page
Printing Skip Blank Page If Skip Blank Page is checked, the printer driver automatically detects blank pages and excludes them from printing. Note This option does not work when you choose the following options: • Use Watermark • Header-Footer Print •... -
Page 26: Print Profiles Tab
Printing Print Profiles tab Print Profiles are editable presets designed to give you quick access to frequently used printing configurations. Print profile list box (1) Edit a profile(2) You can edit and save a new print profile. Restore default profiles(3) Click to restore all the default print profiles. -
Page 27: Edit A Profile
Printing Edit a Profile The Save your profile changes dialog box appears by clicking Edit a profile. Choose an icon you want to use from the Icon list. Enter the desired title in Name. Choose the print profile you want to overwrite, then click OK. Note You can overwrite the preset print profiles. -
Page 28: Support
Printing Support Click Support... in the Printing Preferences dialog box. Check Setting (1) You can check the current driver settings. About (2) This will list the printer driver files and version information. -
Page 29: Tray Settings Tab
Printing Tray Settings tab Note To access the Tray Settings tab, see Accessing the printer driver settings uu page 9. You can define the paper size for each paper tray and auto detect the serial number in the Tray Settings tab as follows. - Page 30 Printing Update (4) The Update function reflects the Paper Size (2) setting in Paper Source Setting (1). Serial No. (5) By clicking Auto Detect (6), the printer driver will query the machine and display its serial number. If it fails to receive the information, the screen will display “---------------”.
-
Page 31: Status Monitor
Printing Status Monitor The Status Monitor utility is a configurable software tool for monitoring the status of one or more devices, allowing you to get immediate notification of error messages such as paper empty or paper jam. You can check the device status at anytime by double-clicking the icon in the tasktray or by choosing Status Monitor located in Start/All Programs/RFG/TYPE 1195L on your PC. -
Page 32: Monitoring The Machine's Status
Printing Monitoring the machine’s status The Status Monitor icon will change colour depending on the machine’s status. A green icon indicates the normal stand-by condition. A yellow icon indicates a warning. A red icon indicates a printing error has occurred. There are two locations where you can display the Status Monitor on your PC - in the tasktray or on the desktop. -
Page 33: Scanning
Scanning The scanning operations and drivers will be different depending on your operating system. The machine uses a TWAIN compliant driver for scanning documents from your applications. Two scanner drivers are installed. A TWAIN compliant scanner driver (See Scanning a document using the ®... - Page 34 Scanning If necessary, adjust the following settings in the Scanner Setup dialog box: Paper source (1) Picture type (2) Adjust the quality of the scanned picture (3) Page size (4) Scan (5) Choose Document Feeder from the Paper source drop-down list (1). Choose the picture type (2).
- Page 35 Scanning If you need advanced settings, click Adjust the quality of the scanned picture (3). You can choose Brightness, Contrast, Resolution (DPI) and Picture type from Advanced Properties. Click OK after you have changed the settings. Note • The scanner resolution can be set as high as 1200 dpi. •...
- Page 36 Scanning Scanner Utility The Scanner Utility is used for configuring the WIA scanner driver for resolutions greater than 1200 dpi. You must restart your PC for the new settings to take effect. Note If you scan the document at a resolution greater than 1200 dpi, the file size may be very large. Make sure that you have enough memory and hard disk space for the size of the file you are trying to scan.
- Page 37 Scanning Note ® ® (Windows Vista and Windows When the User Account Control screen appears, do the following. • For users who have administrator rights: Click Yes. • For users who do not have administrator rights: Enter the administrator password and click Yes.
-
Page 38: Scanning A Document Using The Wia Driver (Windows Photo Gallery And Windows Fax And Scan)
Scanning Scanning a document using the WIA driver (Windows Photo Gallery and Windows Fax and Scan) Scanning a document into the PC You can use the ADF (automatic document feeder) to scan a whole page. Load your document. Open your software application to scan the document. Do one of the following: ... - Page 39 Scanning If necessary, adjust the following settings in the Scan dialog box: Scanner (1) Profile (2) Source (3) Paper size (4) Color format (5) File type (6) Resolution (DPI) (7) Brightness (8) ...
-
Page 40: Scanning A Document Using The Twain Driver
Scanning Scanning a document using the TWAIN driver A TWAIN compliant scanner driver is available from the CD-ROM attached to your machine. TWAIN drivers meet the standard universal protocol for communicating between scanners and applications. This means that you can scan images directly into hundreds of software applications that support TWAIN scanning. These ®... -
Page 41: Pre-Scanning To Crop A Portion You Want To Scan
Scanning Note After you select a document size, you can adjust the scanning area further by clicking the left mouse button and dragging it. This is required when you want to crop an image when scanning. (See Pre-Scanning to crop a portion you want to scan uu page 37.) Pre-Scanning to crop a portion you want to scan You can preview your image and crop unwanted portions before scanning by using the PreScan button. -
Page 42: Settings In The Scanner Setup Dialog Box
Scanning Press and hold down the left mouse button and drag it over the portion you want to scan. 1 Scanning area Note You can enlarge the image using the icon, and then use the icon to restore the image to its original size. - Page 43 Scanning Resolution You can choose a scanning resolution from the Resolution drop-down list. Higher resolutions take more memory and transfer time, but produce a finer scanned image. The following table shows the resolutions you can choose. Resolution Black & White/ Grey (Error Diffusion)/ True Grey 100 x 100 dpi...
- Page 44 Scanning Note The Contrast setting is only available when Grey (Error Diffusion) or True Grey is chosen. When scanning photographs or other images for use in a word processor or other graphics application, try different settings for the contrast and resolution to see which setting best suits your needs. Document Size Choose one of the following sizes: ...
- Page 45 Scanning Note • You can see the actual paper size you chose on the screen. • Width: shows the width of scanning area. • Height: shows the height of scanning area. • Data Size: shows the rough data size in Bitmap format. The size will be different for other file formats such as JPEG.
-
Page 46: Remote Setup
Remote Setup Remote Setup ® The Remote Setup program lets you configure many machine settings from a Windows application. When you start this application, the settings on your machine will be downloaded automatically to your PC and displayed on your PC screen. If you change the settings, you can upload them directly to the machine. Click the Start button, All Programs, RFG, TYPE 1195L and Remote Setup. - Page 47 Remote Setup Print Lets you print the chosen items on the machine. You cannot print the data until it is uploaded to the machine. Click Apply to upload the new data to the machine and then click Print. Export ...
-
Page 48: Pc-Fax Send Software
PC-FAX Send Software PC-FAX sending The PC-FAX feature lets you use your PC to send a document from an application as a standard fax. All you have to do is set up the receiving parties as members or groups in your PC-FAX Address Book or simply enter the destination address or fax number into the user interface. -
Page 49: Setting Up User Information
PC-FAX Send Software Enter a fax number using any of the following methods: Use the dial pad to enter the number. Click the Address Book button, and then choose a member or group from the Address Book. If you make a mistake, click All Clear to delete all the entries. To include a cover page, check Add Cover Page. -
Page 50: Sending Setup
PC-FAX Send Software Click OK to save the User Information. Note ® You can set up the User Information separately for each Windows account. Sending setup From the PC-FAX Setup dialog box, click the Sending tab to display the screen below. ... -
Page 51: Setting Up A Cover Page
PC-FAX Send Software Setting up a cover page From the PC-FAX sending dialog box, click the icon to access the PC-FAX Cover Page Setup screen. The PC-FAX Cover Page Setup dialog box appears: Entering cover page information Note If you are sending a fax to more than one recipient, the recipient information will not be printed on the cover page. -
Page 52: Address Book
PC-FAX Send Software Address Book If Outlook or Outlook Express is installed on your PC, you can choose in the Select Address Book drop- down list which address book to use for PC-FAX sending. There are five types: PC-FAX Address Book, ®... -
Page 53: Address Book
PC-FAX Send Software Address Book Click the Start button, All Programs, RFG, TYPE 1195L, PC-FAX Sending, then PC-FAX Address Book. The Address Book dialog box appears: Setting up a member in the Address Book In the Address Book dialog box you can add, edit and delete members and groups. In the Address Book dialog box, click the icon to add a member. -
Page 54: Setting Up A Group For Broadcasting
PC-FAX Send Software Setting up a group for broadcasting You can create a group to send the same PC-FAX to several recipients at one time. In the Address Book dialog box, click the icon to create a Group. The Address Book Group Setup dialog box appears: Enter the name of the new group in the Group Name field. -
Page 55: Deleting A Member Or Group
PC-FAX Send Software Deleting a member or group Choose the member or group you want to delete. Click the icon. When the confirmation dialog box appears, click OK. Exporting the Address Book You can export the whole Address Book to an ASCII text file (*.csv). You can also create a vCard for an address book member that can be attached to an outgoing E-mail (a vCard is an electronic business card that contains the sender’s contact information). - Page 56 PC-FAX Send Software Click OK to save the data. Enter the name of the file, and then click Save.
-
Page 57: Importing To The Address Book
PC-FAX Send Software Importing to the Address Book You can import ASCII text files (*.csv), vCards (electronic business cards) or Remote Setup Dial Data into your Address Book. Importing an ASCII text file Do one of the following: From the Address Book, click File, Import, then Text. ... - Page 58 PC-FAX Send Software Enter the name of the file, and then click Open. Note If you chose Text file in step a, Files of type: will be Text files {*.txt; *.csv}.
- Page 59 Index Administrator ............16 Scan Resolution .............. 39 TWAIN Compliant ..........36 WIA Compliant ............29 Brightness ..............39 Scan Type Black & White ............39 Grey (Error Diffusion) ..........39 True Grey ............... 39 Contrast ..............39 Status Monitor ............27 Support ..............
- Page 60 This machine is approved for use in the country of purchase only. H560-6021...